
Snapmaker Artisan 3-in-1 Review
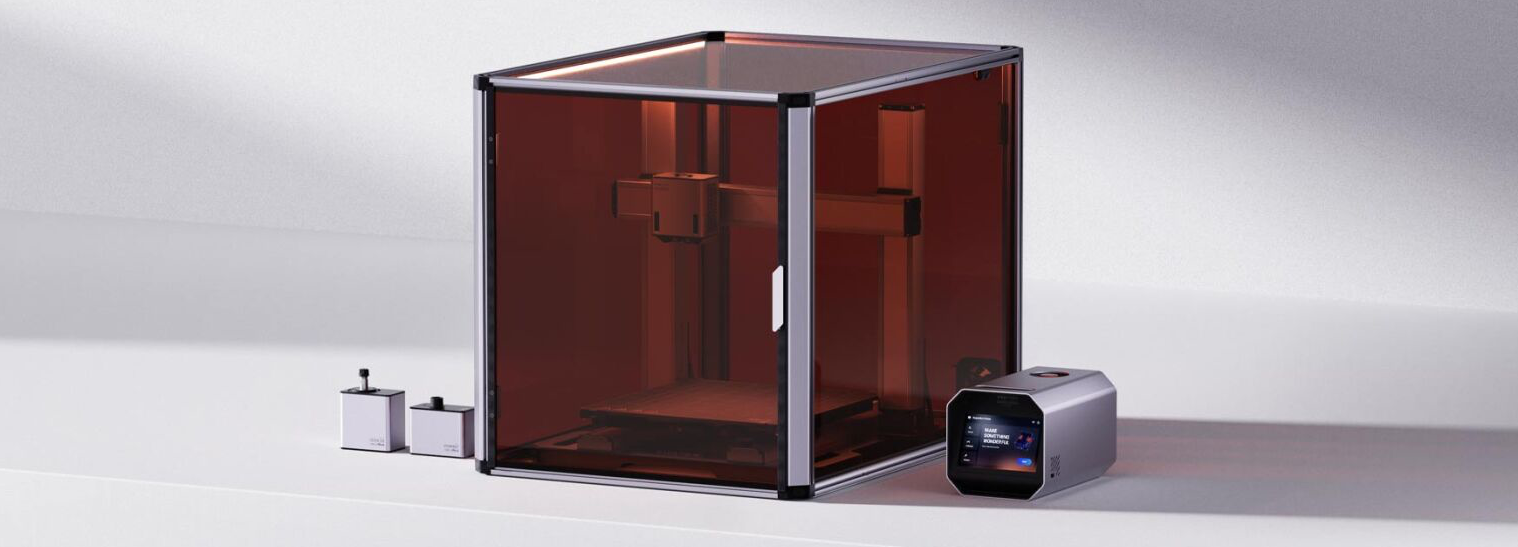
Snapmaker Artisan 3-in-1
A rock solid desktop fabricator with a dual extruding 3D printer module, beefed up CNC router, and 10w laser engraver/cutter all within the confines of a single machines footprint.
Pros:
- Very sturdy construction with quicker tool changes
- Larger build volume than previous model
- All tool head modules and platforms upgraded
- Everything including sample materials, tools and software included
Cons:
- It's a large machine so ensure you have the space
- As with the previous version of Luban, at the time of writing there are small but annoying software problems which lets down the excellent hardware
Where to buy:
- Snapmaker direct:
snapmaker.sjv.io/zxLoyr
What is it?
The Snapmaker Artisan is arguably the third major incarnation of the Snapmaker series of multi functional desktop machines. The original Snapmaker started as a Kickstarter campaign back in 2017 and was quickly backed by more than 5,000 people. Five years later they created the Snapmaker 2.0 and then now, at the beginning of 2023, they have released the Snapmaker Artisan. I've been testing one for two weeks now and am lucky enough to also have the Snapmaker 2.0 A350 to compare it to.
It's clear that Snapmaker have listened to feedback from users of previous generation machines and although the Snapmaker 2.0 was by no means a problematic machine they have made numerous updates and improvements which have resulted in an even better experience than before. Throughout this review I'll cover these improvements from the viewpoint of a new user and from someone considering a possible upgrade from an earlier machine.
Technical Overview
| Printable Materials | PLA, ABS, Wood, Flexible, Water Soluble | |
|---|---|---|
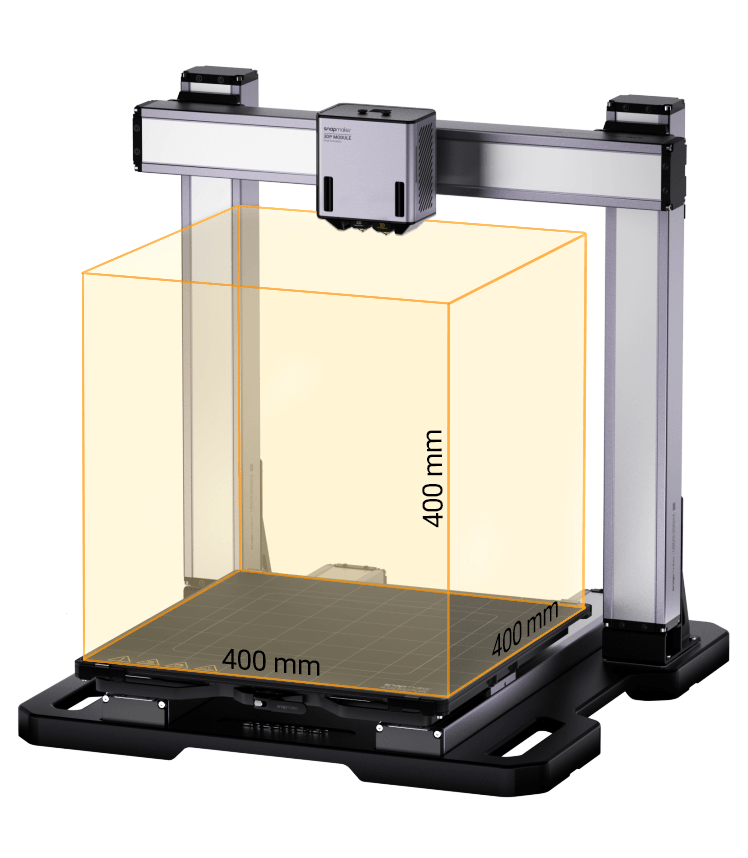
| Print volume | 400 x 400 x 400mm | |
| Layer height | 50 - 300 microns | |
| Max Nozzle Temp | 300ºC | |
| Print Platform | Zoned Heating | |
| Control | 7 Inch Touch Screen | |
| Connectivity | USB memory stick and WiFi | |
| Laser Engraving & Cutting | Fabric, Leather, Plywood, Acrylic... | |
| CNC Carving | Walnut, Carbon Fibre Sheet, PCB, Platane Wood, POM.... |
For a more detailed technical table please see the end of this review.
The build volume of the Artisan is 400 x 400 x 400mm which is certainly on the larger side. In comparison the A350 achieved 320 x 330 x 350mm. I'm looking forward to running some larger prints of this machine.
The 3D printing module now includes two extruders enabling dual coloured prints and the ability to use separate materials (such as water soluble supports).
The included 10w laser module (see my dedicated 10W laser module review) includes a camera to aid alignment of artwork and is also used to automatically detect the thickness of materials.
The other major improvement is the CNC routing module which has increased from a 50w motor to 200w allowing for more aggressive machining of tougher materials.
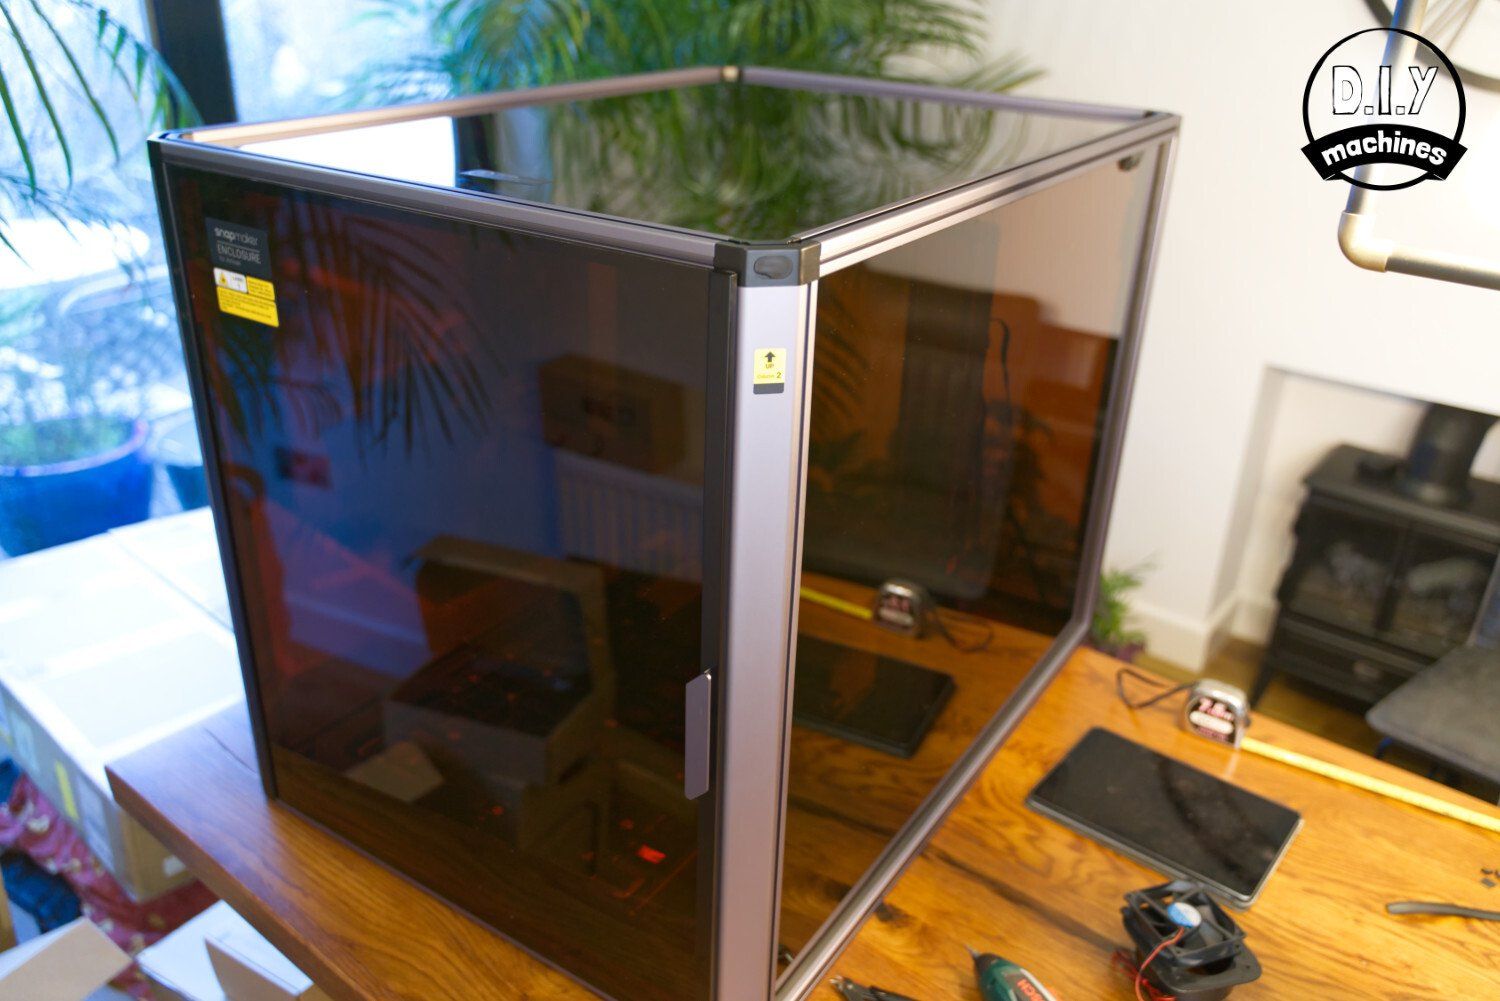
All this is controlled from a revised 7" touchscreen controller with integrated emergency stop button as standard. The safety enclosure is also now included as standard. A must for the LASER function in my opinion - well done Snapmaker for making this decision.
Shipping and Packing
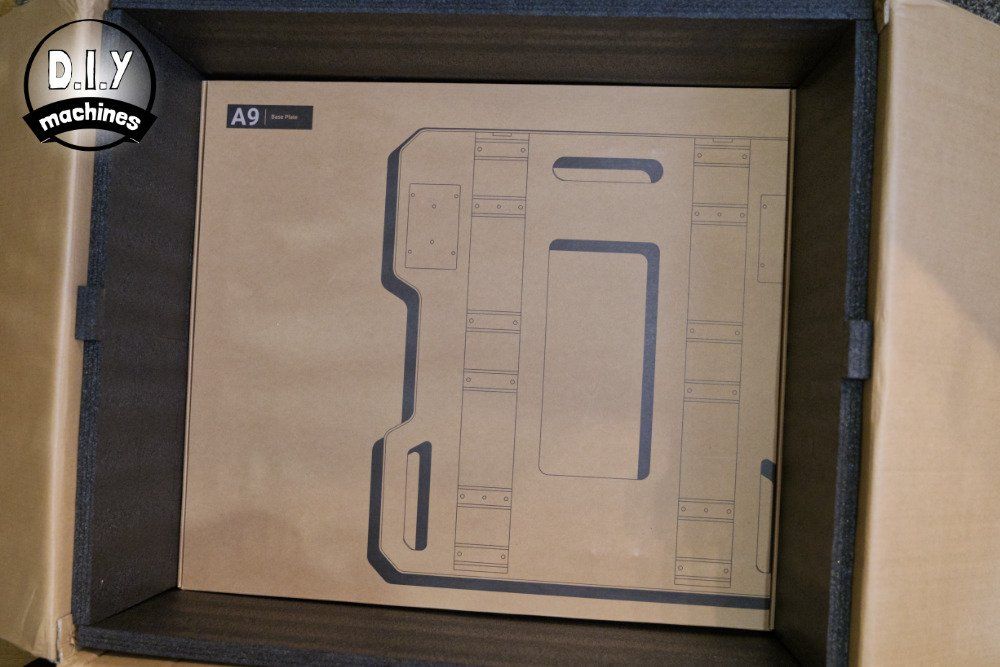
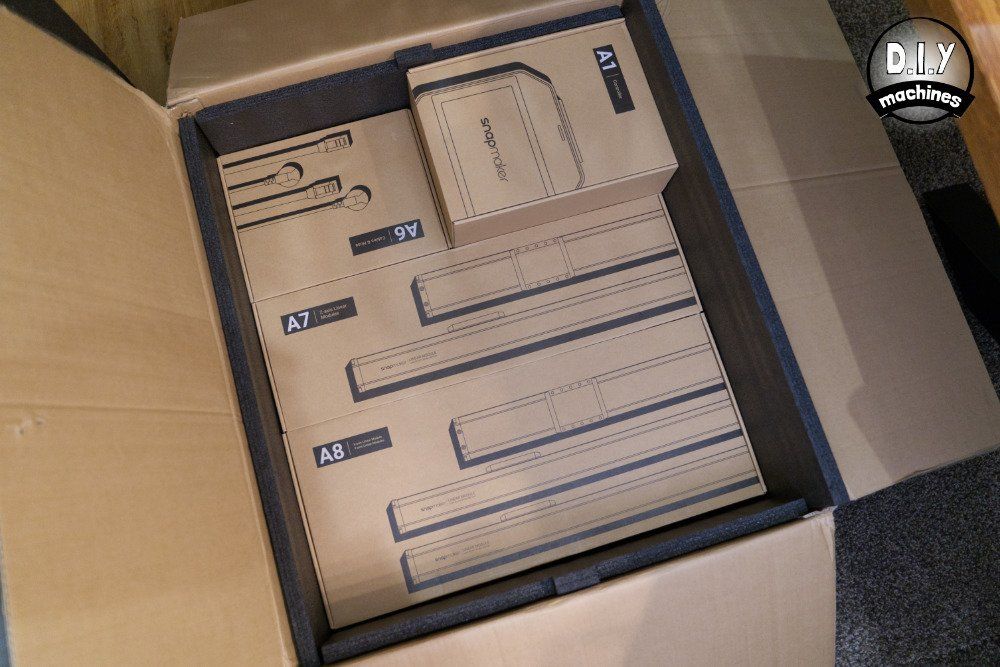
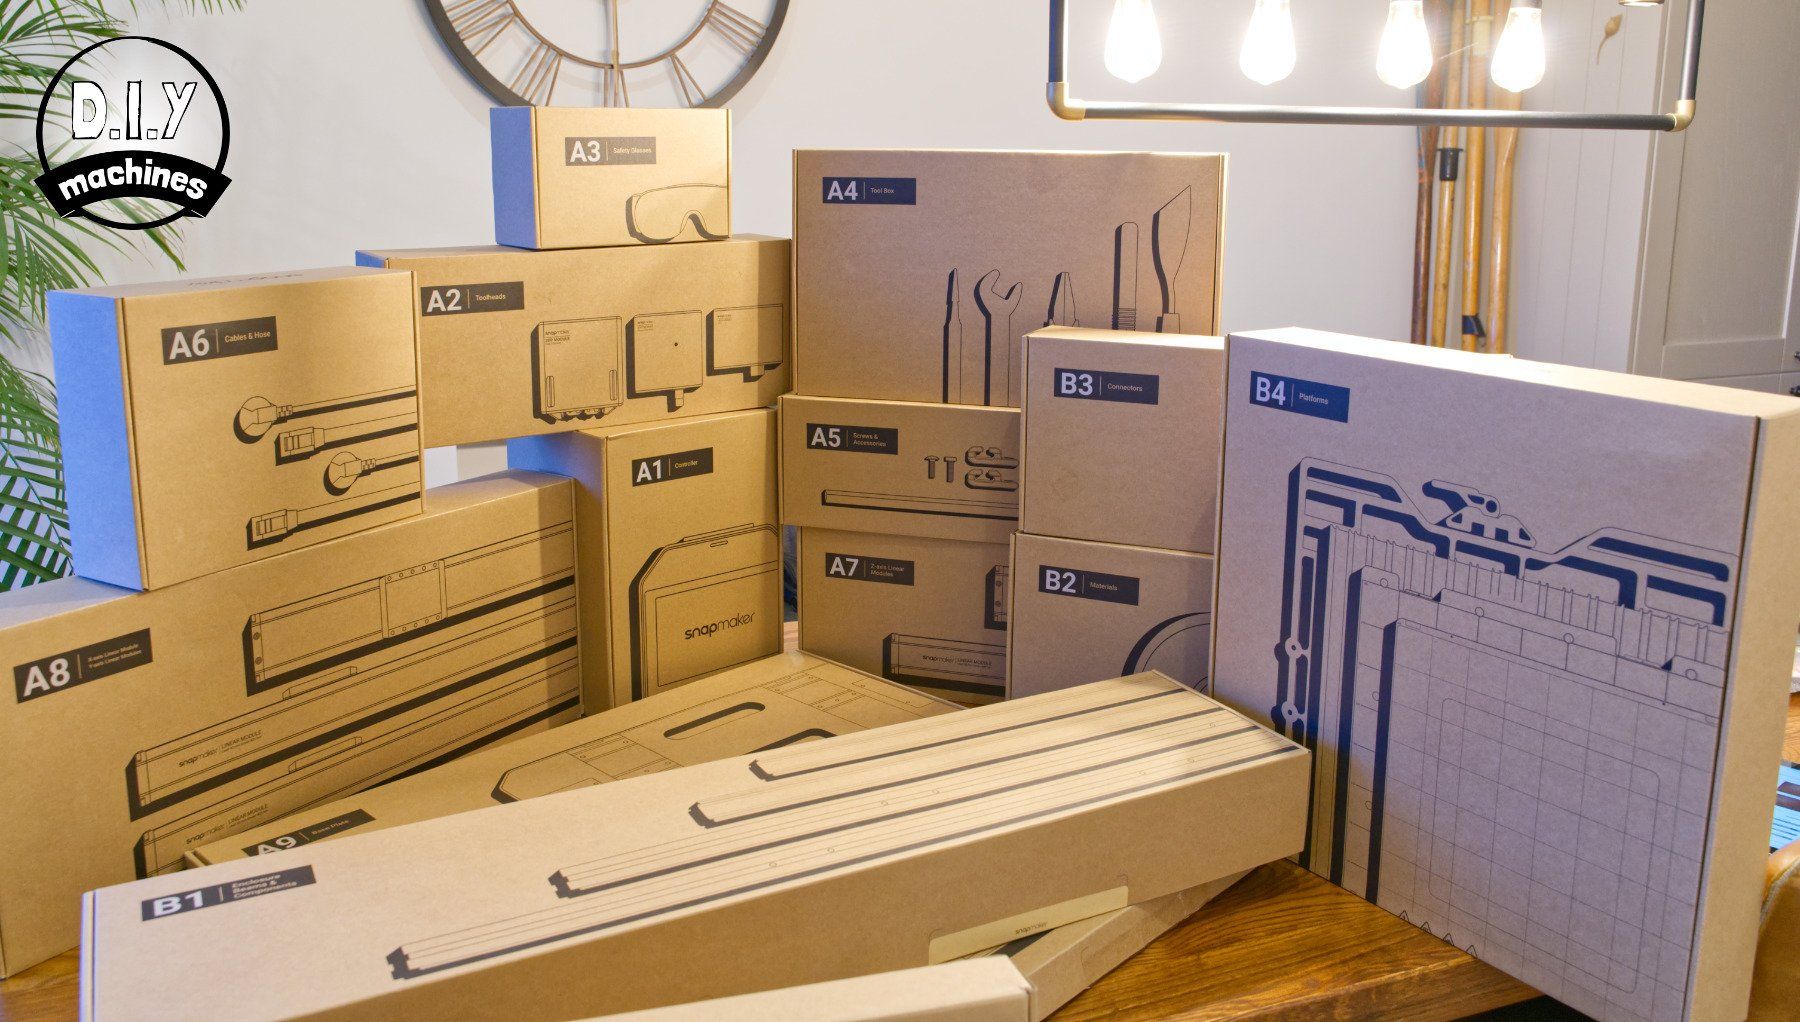
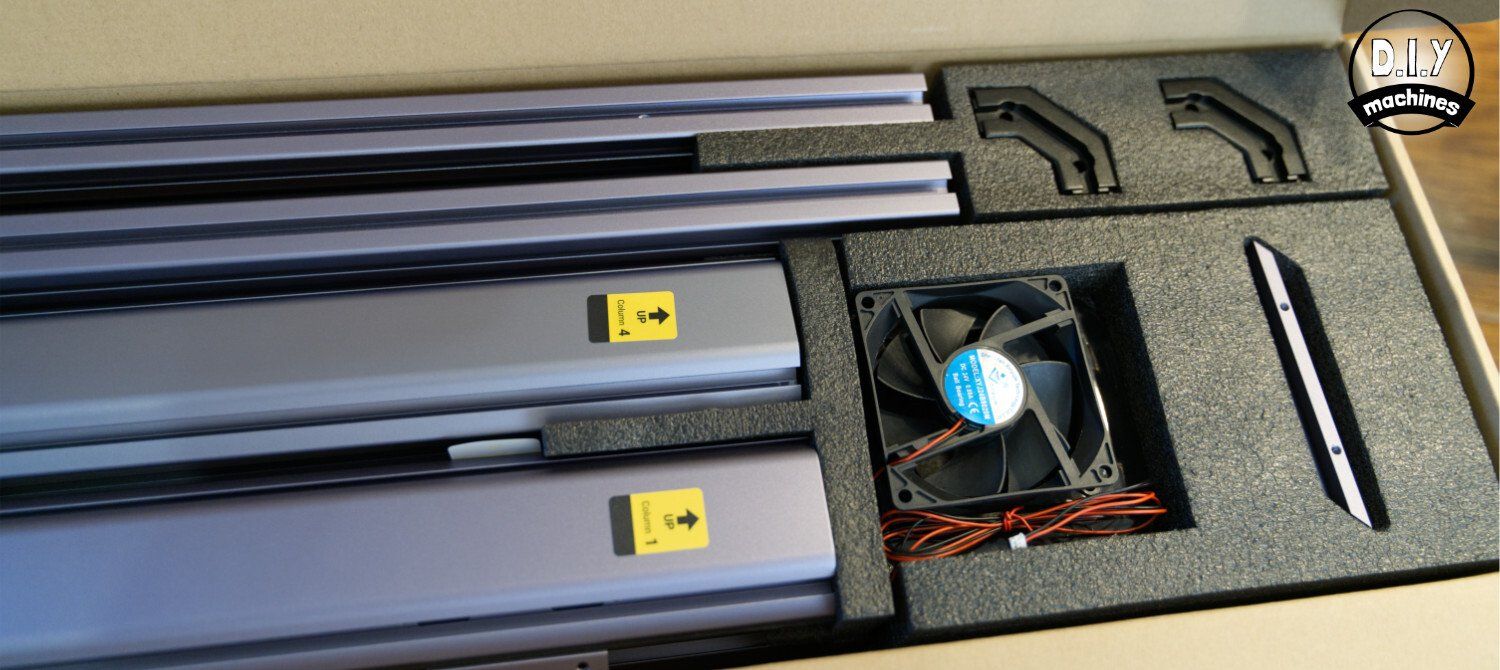
This is a large machine which means the packaging is even larger. In fact, it's split over two very large and heavy packages (one of them is nearly 50kg!). The contents of both are well padded, packed, and extraordinarily well sorted. Inside these boxes the items are further grouped and labelled so you know what you'll need and when as you'll see in the section on assembly.

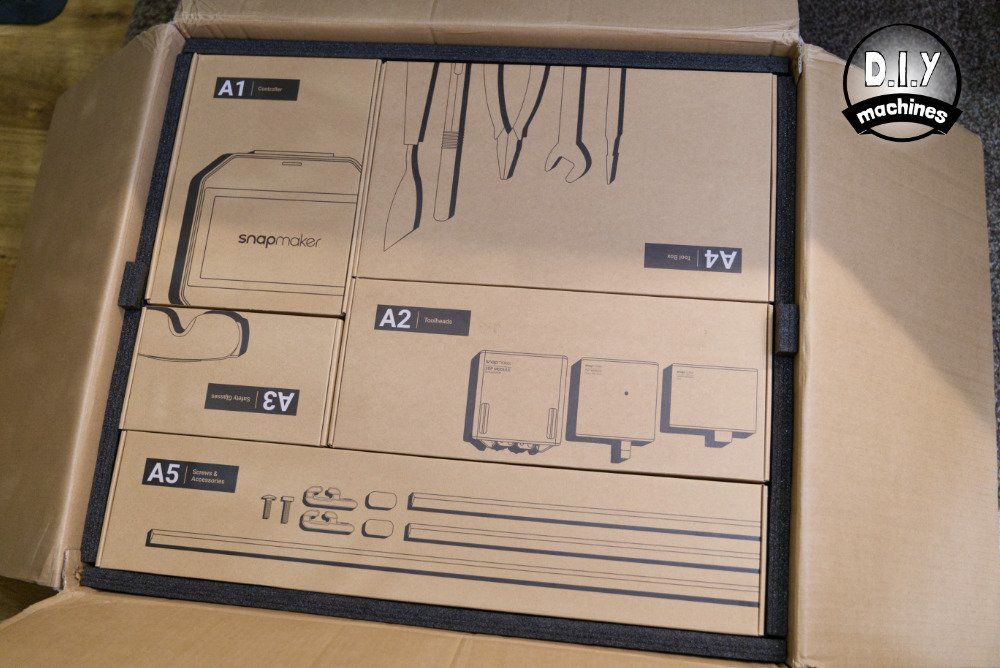
The exterior of one of my shipping boxes showed some puncture and compression damage sustained on its journey to me. However, the dense foam packing had completely protected the contents which appeared indifferent to the fact it had all journeyed from China to England via who knows how many handlers who probably resented the boxes weighty contents.
What else is included?
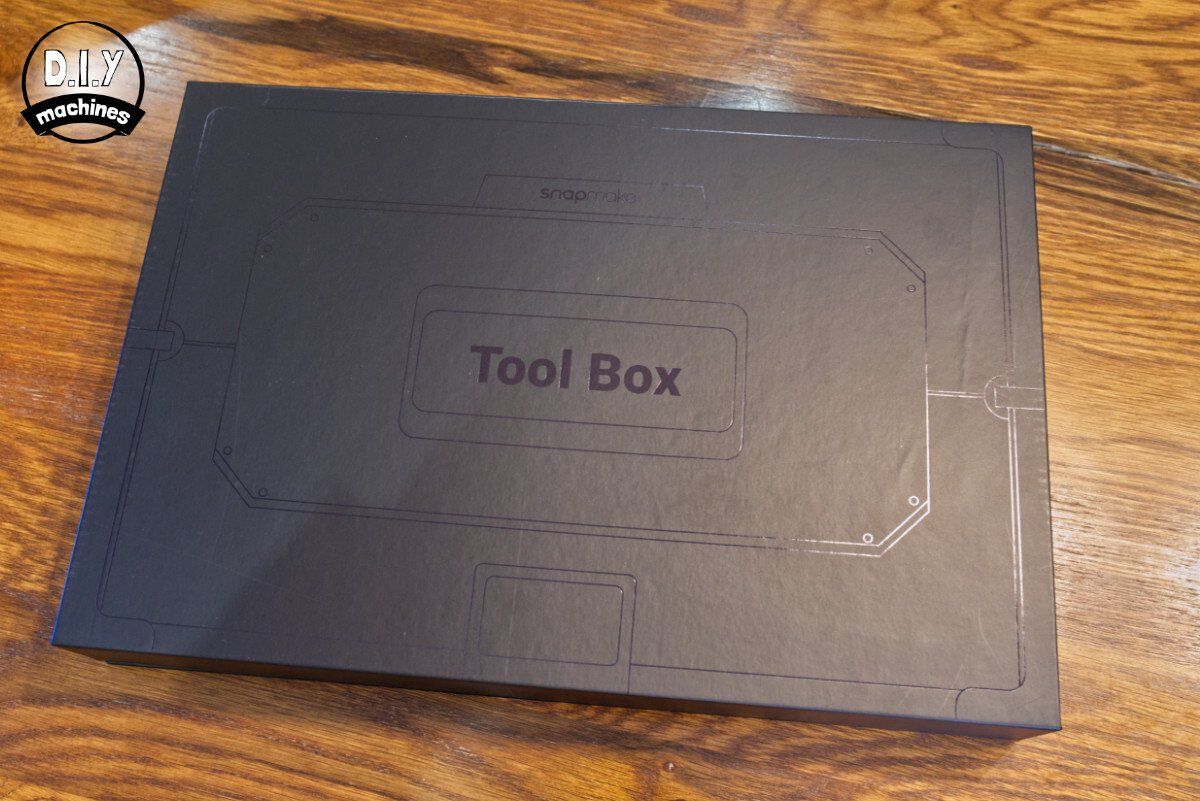
All the tools for assembling and maintaining your machine in the long run are included. With the new Artisan they have provided a very well organised toolbox which presents the tools well whilst encouraging you to keep your tools well organised for the foreseeable future. Gone is the custom designed multi tipped screwdriver of the A350 in favour for standard Allen keys. At first I was a little saddened by this but then realised that the new colour coding of the Allen keys made for much quicker assembly.

- Clear CNC Safety Glasses
- Break away Filament
- PLA Filment
- Calibration card
- Printed setup and user manual
- ER11 Collet & Nut
- Cotten swabs
- Hex Keys (x4)
- Open Wrench 17mm & 14mm
- Palette Knife
- Diagonal Pliers
- USB Flash Drive
- Spare Laser Lens Protector
- Hose clamp and Hose for venting
- Straight Grove V CNC Bit
- Flat End Mill Single-flute CNC Bit
- Flat End Mill Double-flute CNC Bit
- Tweezers
- Wire Brush
- Parts to fix materials to work platforms
- Tool box to store your, well, tools 🙂
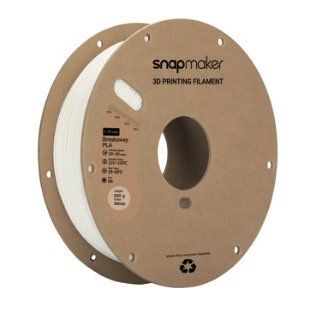


You will also find a selection of sample materials to get you going immediately with each of the Snapmaker's three unique functions. Some Basswood for the laser module, HDF (High Density Fibreboard) for the CNC routing module, and two types of filament for the 3D printing module. Each of the sample project provided in the Quick Start Guide use these materials.
One small detail which makes the unpacking and assembly process just that it easier are the paper pull tabs used to open the boxes. This level of thought sets the tone for the rest of the build process.
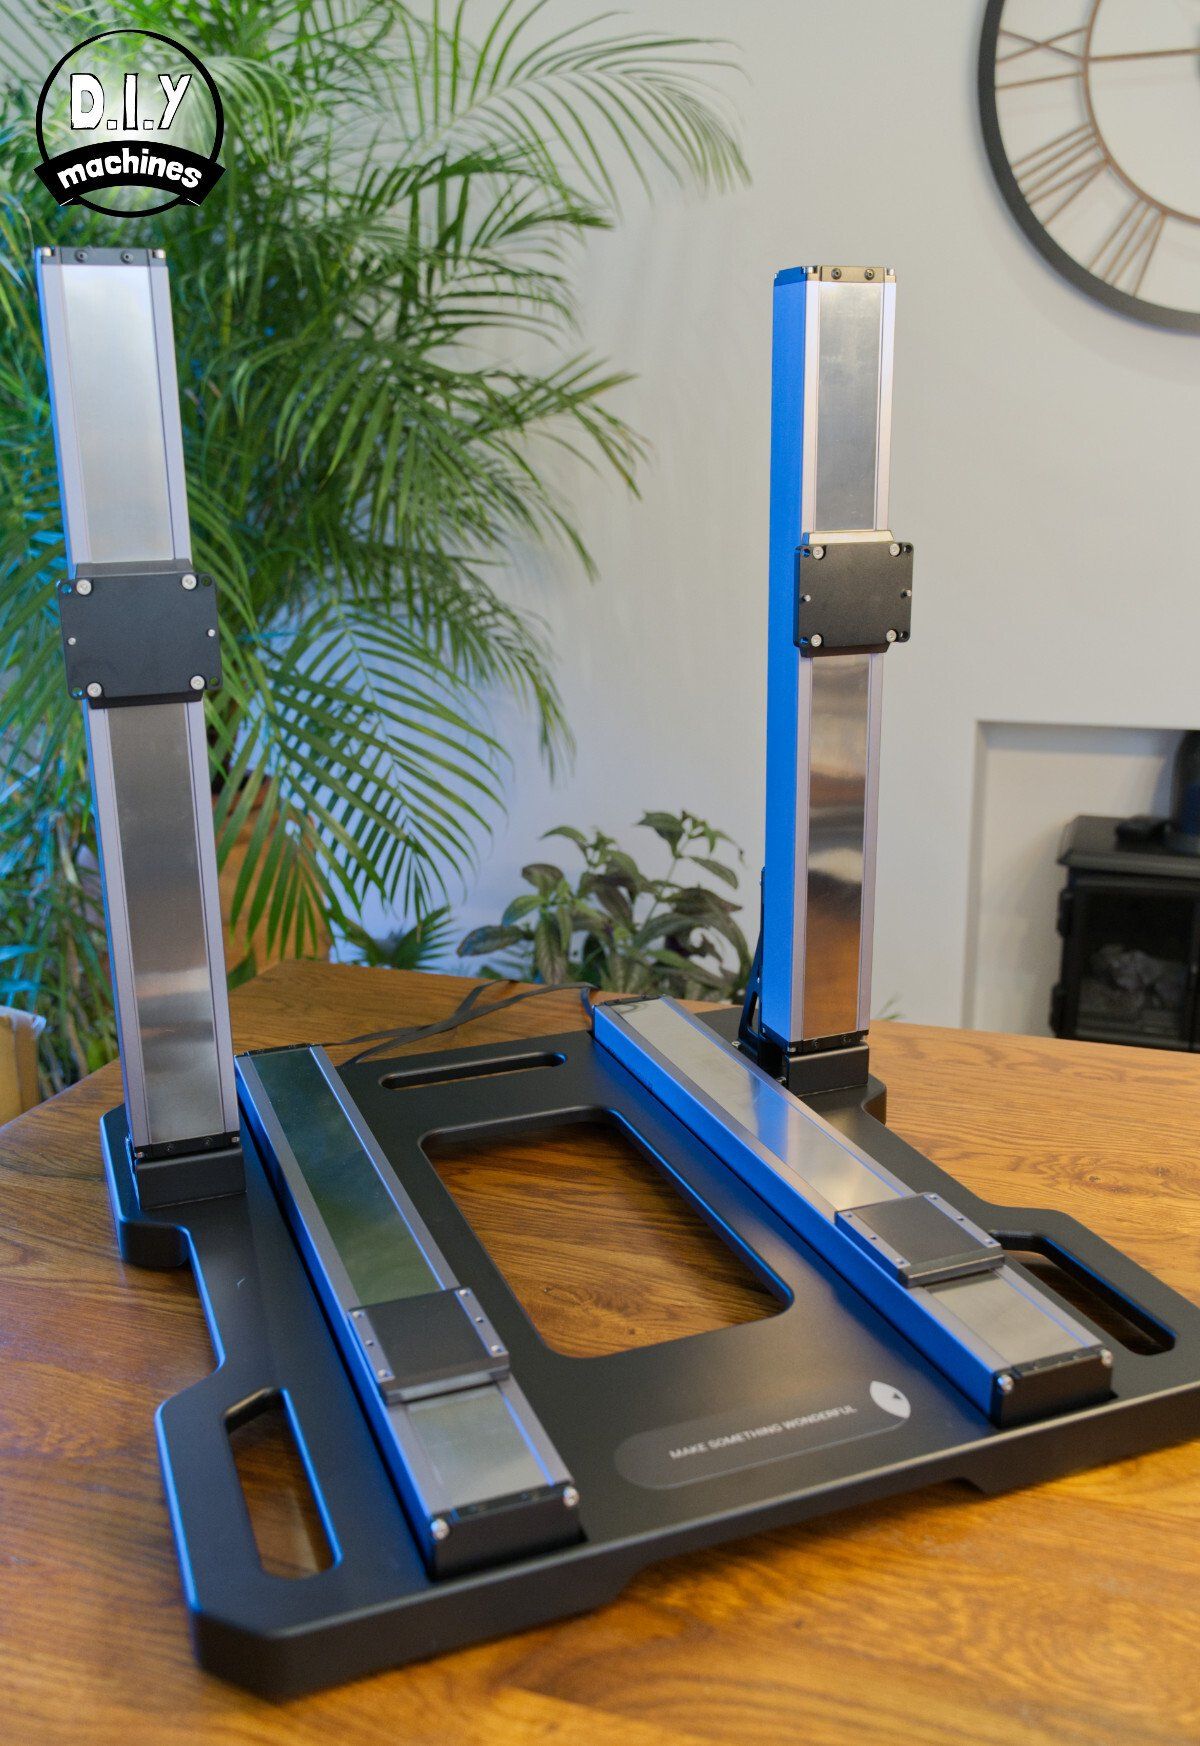
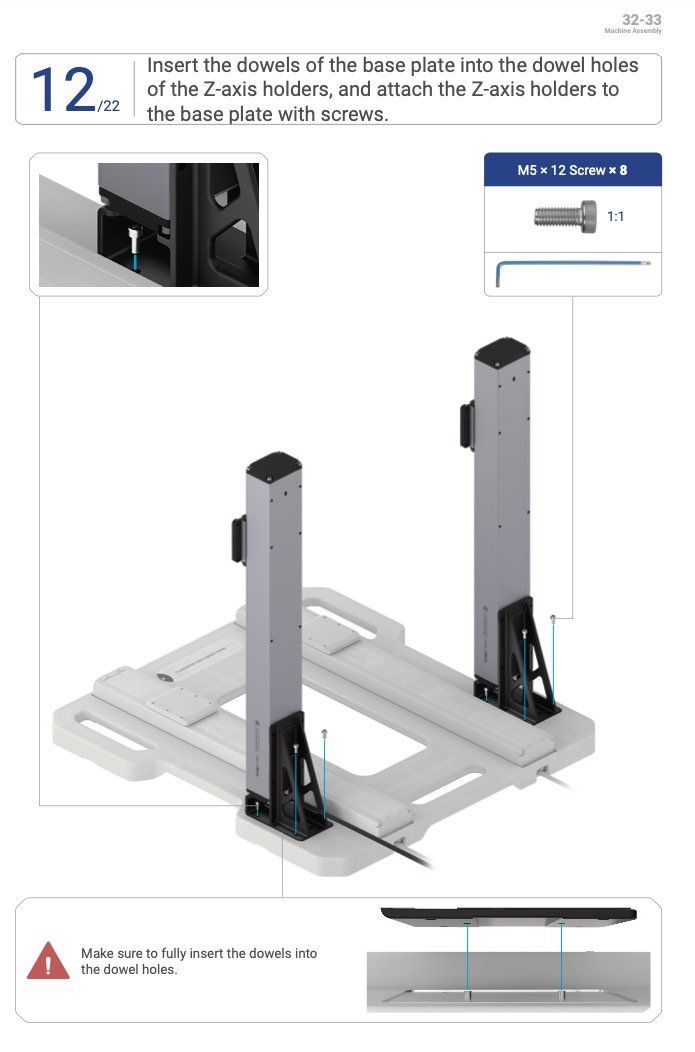
Assembly
This is a large machine and you may be hesitant about assembling it... don't be. (But definitely do assemble it as close to where it is going to reside as possible!) The instruction manual is truly excellent. The written instructions are clear and concise. I made one single error in assembly which was easily rectified when I realised later. A second inspection of the instructions revealed it was my error as well (probably got distracted by a fresh supply of tea and biscuits being handed to me!).
So how much space will you need to keep your assembled Snapmaker? The enclosure and machine itself measures 67cm's wide, 93cm's deep and 71cm's tall. I would allow for an additional 25cm of width on both sides to be able to add the spool holders for 3D printing (one is positioned on each side when using two filaments in the same print) and this also allows for the Integrated Control Centre (ICC) to sit beside the enclosure. Snapmaker points out, and I agree, that the ICC is best situated on the right hand side of the machine so that you can still reach its controls when the door of the enclosure is open.


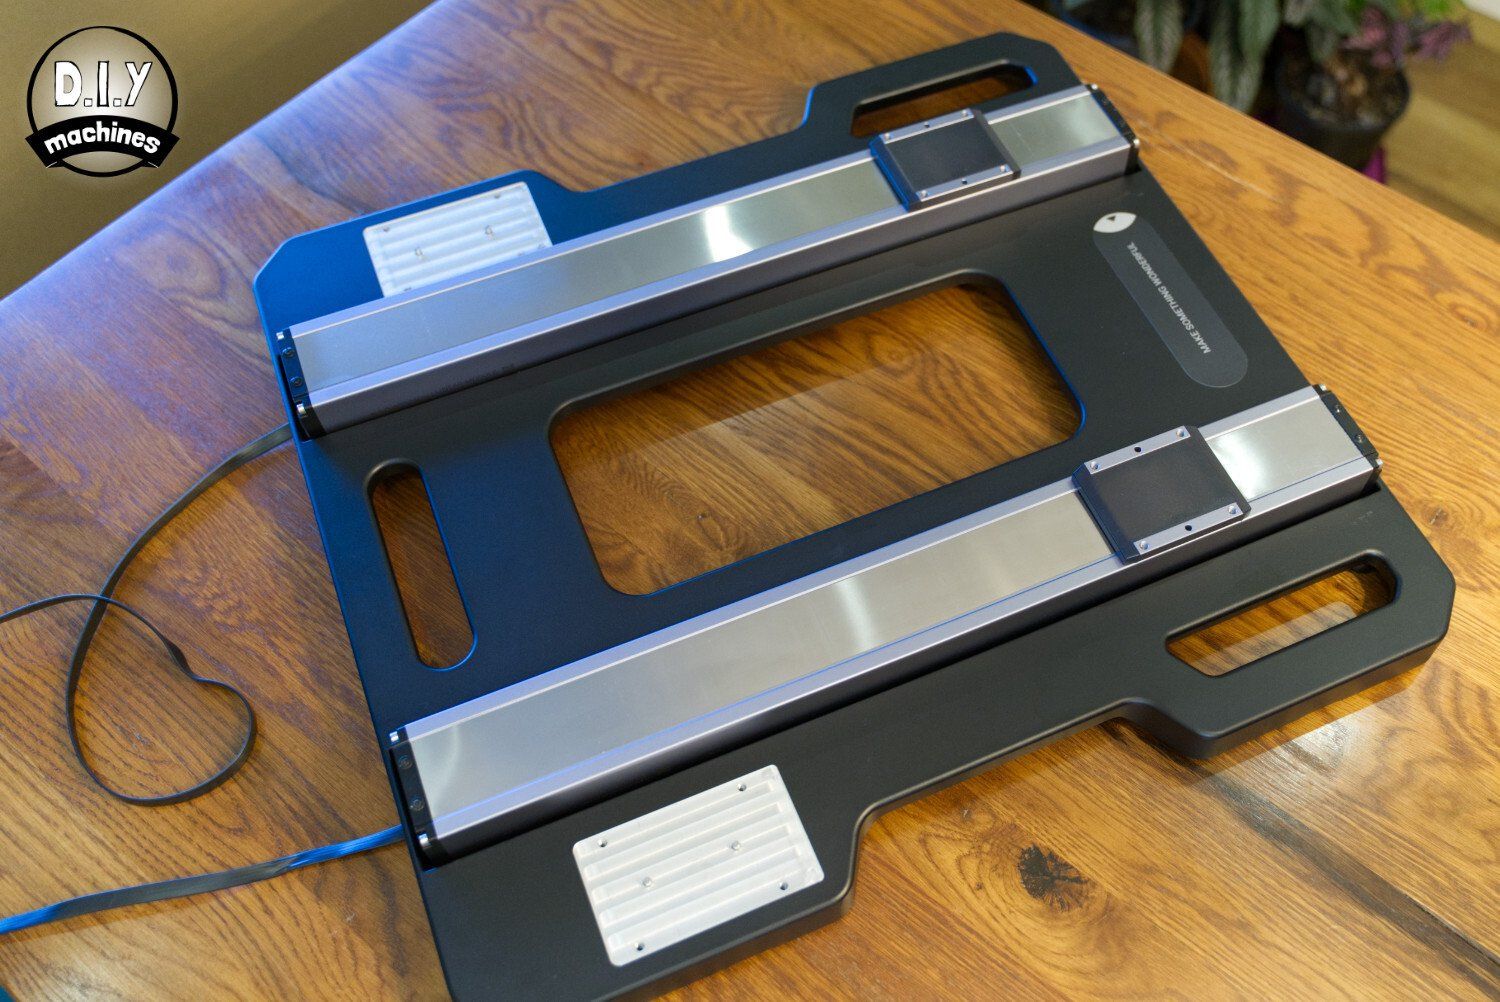

One of my main complaints in regards the the A350 model was its jumble of wires which needed wrestling to appear tidy and cared for. The wiring really felt like an afterthought or something that had been entirely forgotten. Thankfully, this has improved with the newer Snapmaker Artisan. The wiring is held in clear thought out channels. The wires that need to have a certain amount of slack in them (to allow for the movement of the machine) have bright yellow strips marking where they should be inserted into clips/clamps so you know that you don't have neither too much or too little slack where it matters.


After the machines main skeleton and enclosure have been assembled you will need to attach the correct working platform and tool head depending on the function you wish to use.
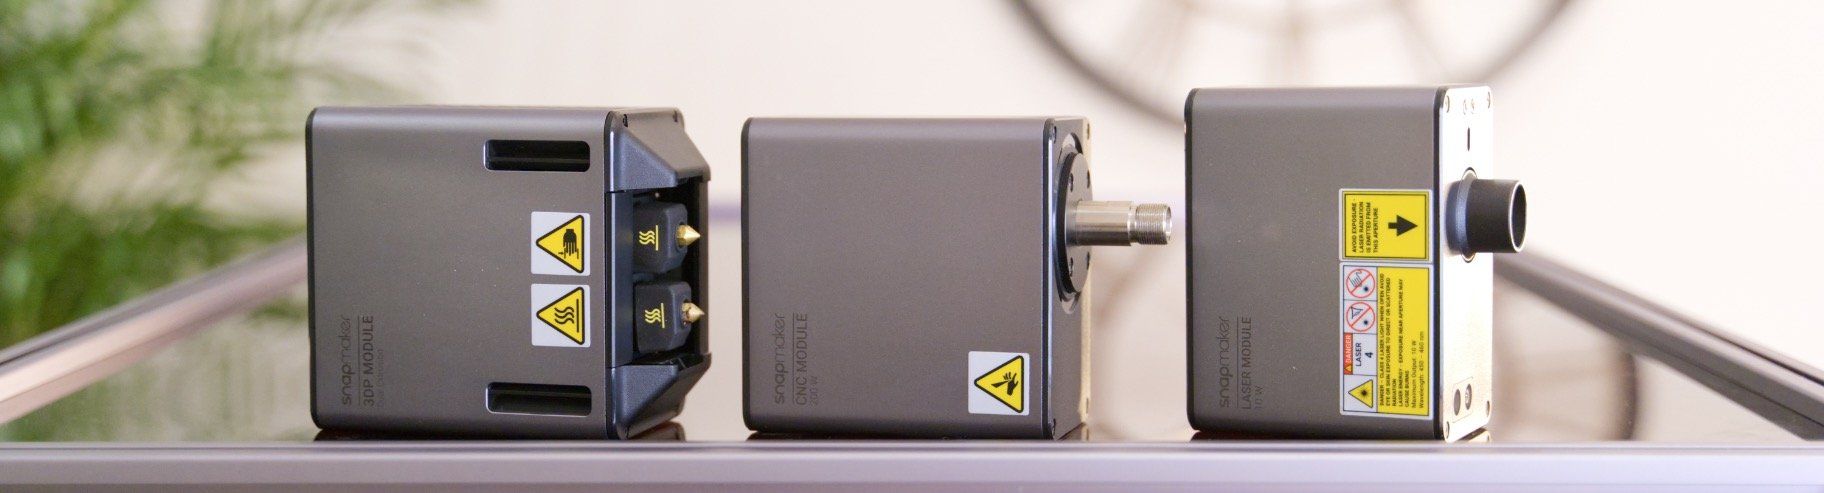
For the toolhead on previous incarnations this required releasing and re-fitting four bolts on the rear of the toolhead which could be tricky to access depending on whether or not you could open your enclosure at the side. With the new Snapmaker? Just pull open the lever on top, slide one module out and the other in before closing the same lever. A massive improvement in speed and convenience.
Same is true of the work platform - in fact the improvement is greater here. The same single lever design is utilised, but for some functions this saves having to remove twelve bolts (for the routing workbed) and then installing roughly the same amount for the function you're switching to. If this was 3D printing then you would need to use different bolts to fix it to the Snapmaker. All of this hassle is now gone. Well done again Snapmaker. If a previous generation Snapmaker user asked if it's worth the upgrade I would say if you're switching functions often then this is a major upgrade not to be missed.
Instruction manual
The instructions are just superb. SU-PERB. 🙂
Clear, concise, well spaced out, and perfectly tied up with what box and bag the parts you need for each step will be found in. It's a large user guide that takes the time and space it needs to be as helpful as it can.
And when it comes to powering on and setting up the machine and its functions you'll find that the instruction manually is perfectly complemented by the step by step instructions shown on the new 7" touchscreen on the control centre. This is made smarter by the fact the controls and 'wizards' presented on the display depend on the modules that it detects.
I've included a sample step here for you to see as an example and you can also download the entire instruction manual using the button below.
The 10W Laser module

I'm currently testing the Laser Module in combination with the Snapmaker Artisan and can so far draw your attention to the increased work size of 400mm x 400mm and the revised (and much improved) system for fixing your material to the workbed. You can find my full dedicated review of the 10w Laser module here. (Spoiler.... I loved it!)
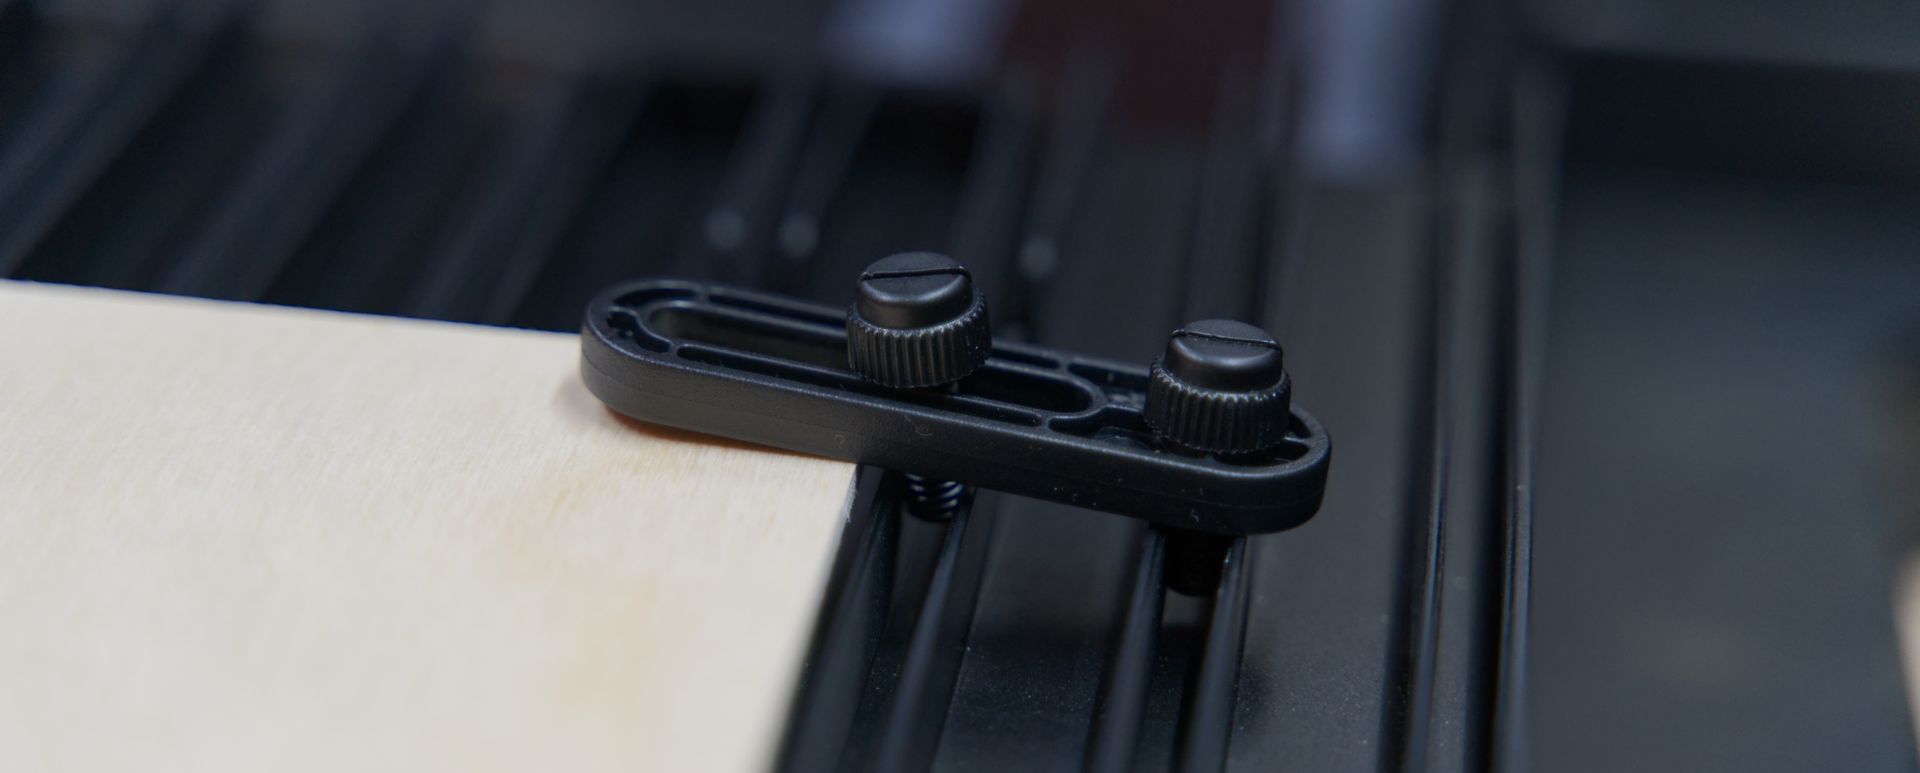
The previous model used some rubber 'T' shaped bungs which you pushed between smooth metal tracks. It worked for the most part but was often fiddly to insert (the rubber would bend the wrong way when you tried to push it into the tracks). Otherwise the friction in between the tracks was not enough to hold the work piece down if it has slight warp to its surface.
The revised design features a rigid plastic 'lever' which is fixed to the platform using two plastic screws which actually screw into ribbed tracks. The holding power of this is far greater whilst also making it easier to the slide the fixings along the length of the track as apposed to removing and replacing them entirely when changing materials.
As my tests with the Laser Module continue I will add an updates to this review.
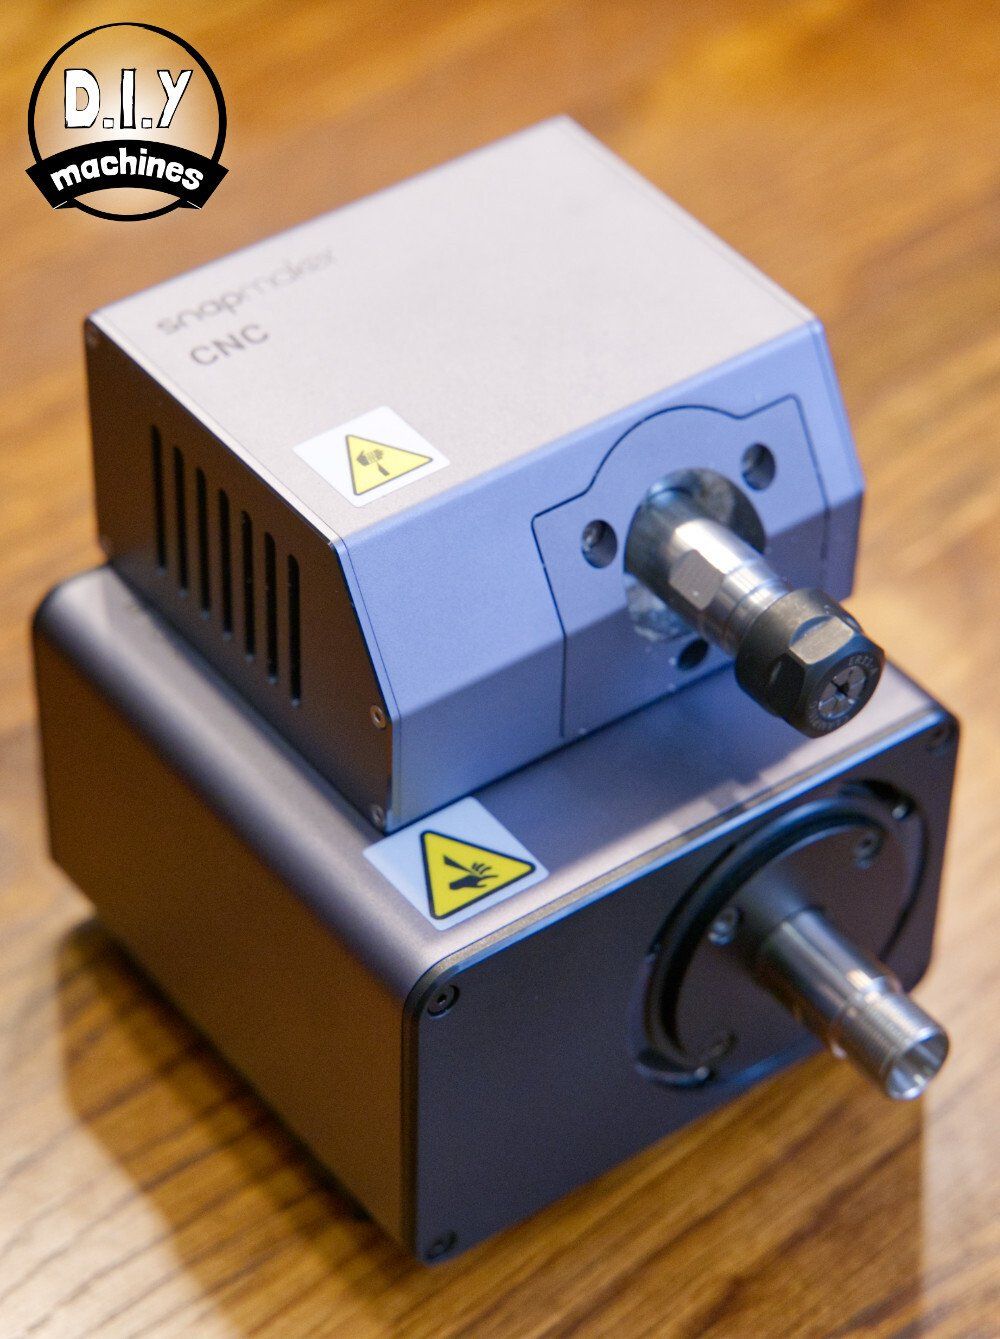
The Upgraded 200w CNC Carving & Cutting Module
CNC Overview
I'll start by admitting that the CNC function was something I did not use as often as I thought I would have on the previous Snapmaker. This is mostly due to the long work times required to complete a job and I never wanted to leave the machine running without me at least being in the same building. However, Snapmaker have focused on improving the robustness and speed of this module significantly.
The updated tool head sports the same standard ER11 collet (the part which grips the drill/router bits) as before which makes purchasing additional bits super easy and inexpensive. If you're like me then it is likely that a few bits will be broken as you get to know your machine. Being able to source them on Amazon prime from just a few pounds each is a relief. It also means you have access to huge variety of bits depending on your needs. Single/ double flutes, up-cut or down cut, flat heads etc. The list goes on and the opportunity to really explore the CNC modules ability and achieve what you want is rabbit hole you could dive deep into.
According to Snapmaker's presets this difference allows you to machine Beech wood at twice the depth for each step/pass (2mm instead of 1mm) and move through the material at 3000mm/min instead 1000mm/min. In theory this would allow you to remove the same amount of Beech material 6X faster with this updated CNC module - which now comes as standard with the Snapmaker Artisan! I don't know about you, but having a theoretical 6 hour job reduced to just 1 hour is a major improvement.
There is a large list of materials which you can cut or carve using the Snapmaker CNC module, both soft and hard. You'll be able to work with woods (such as Walnut, Birch, Oak etc), PCBs, Acrylic Sheets, POM (a plastic engineered to have great qualities for machining), carbon fibre sheets and more.
The motor power has increased 4X from 50w to 200w allowing for the aforementioned more aggressive tool paths without the spindle speed reducing so quickly as the previous model. The maximum speed achievable has also been increased from 12,000 RPM to 18,000 RPM.
Preparing to CNC Machine
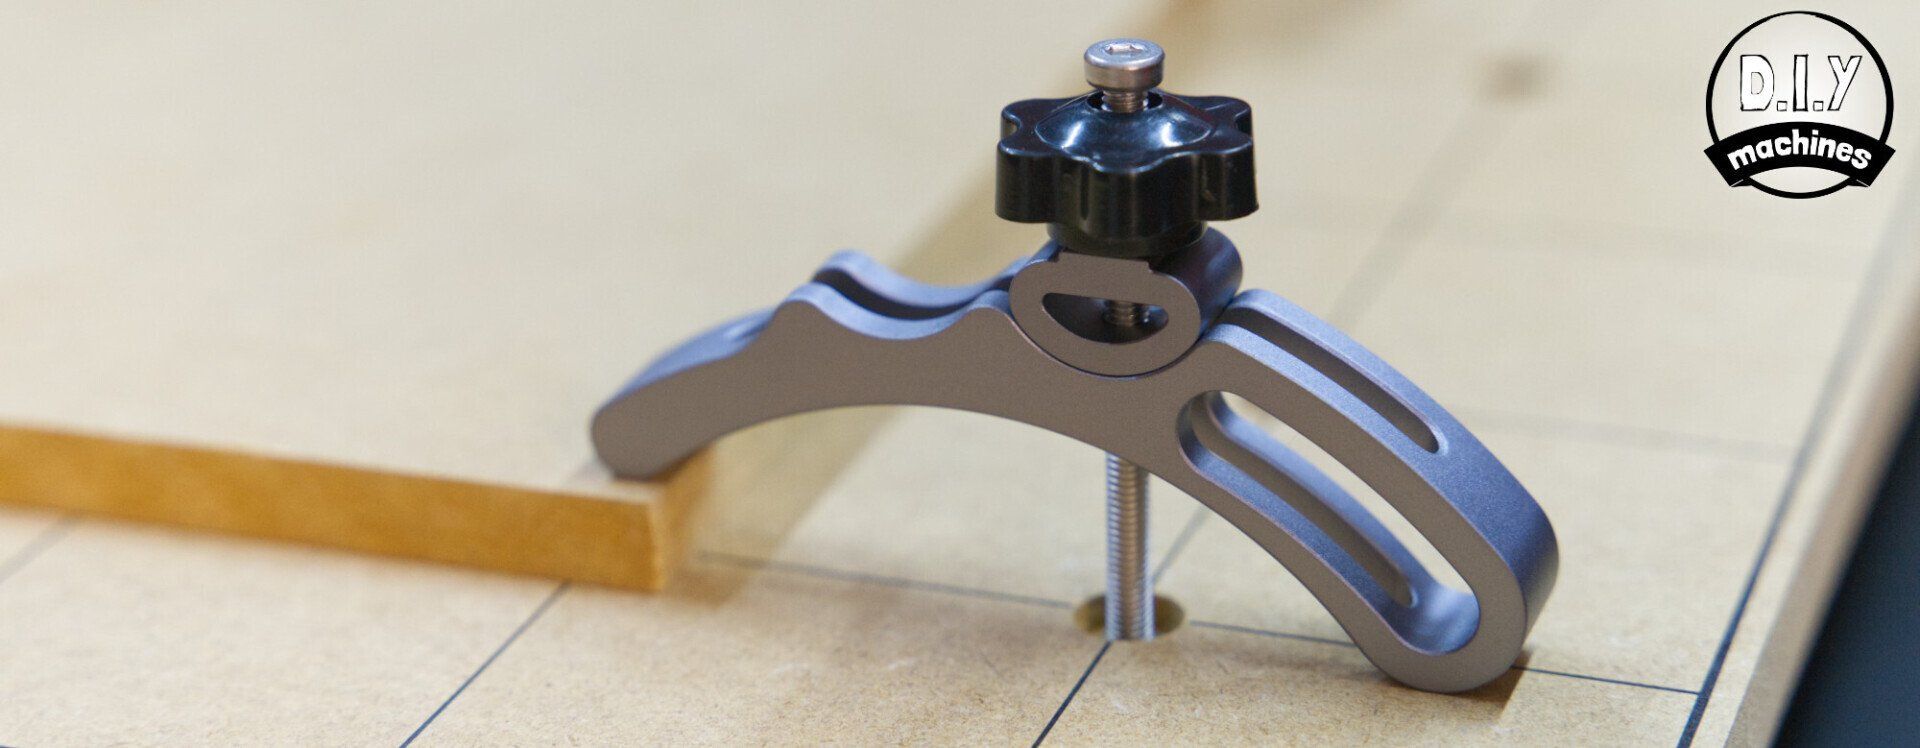
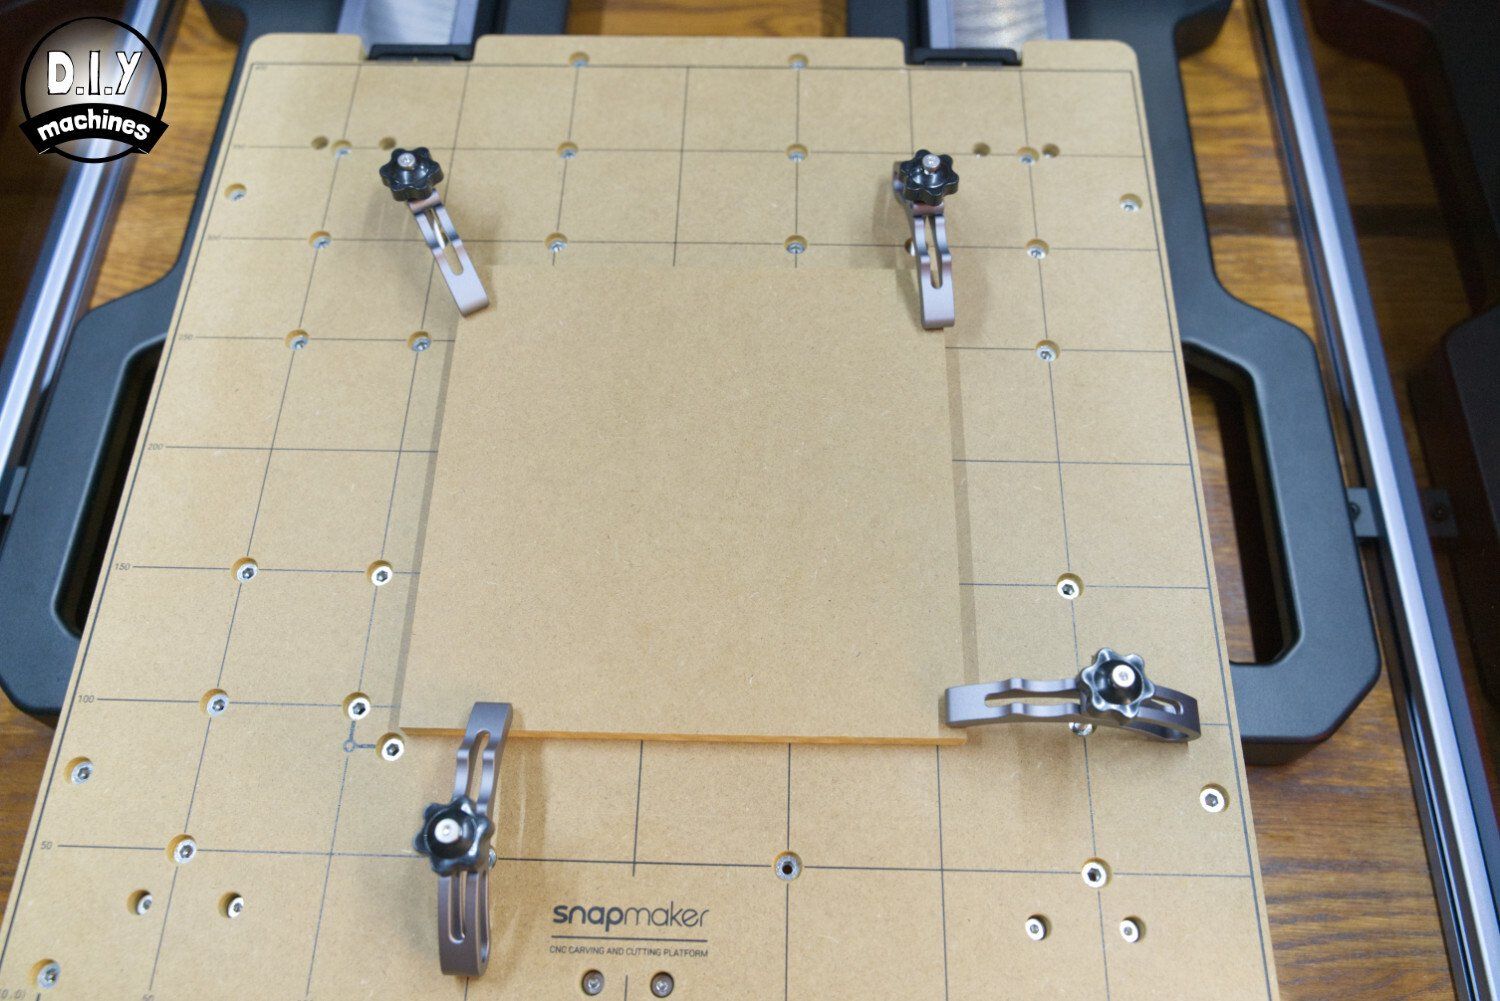
The system for clamping down material is largely untouched as it did work well on the previous model. It consists of a bolt and two pieces of aluminium - these are bolted into one of the numerous bolt holes on the CNC carving platform and used to pin down the material by tightening a thumb screw. I like that no tools are required to do this.
The wooden platform is deemed as being a sacrificial board. By this they mean that in order to cut all the way through any material you are using, the drill bit will also cut away an amount of the work platform itself. This is likely to be less than a mm at most (depending on the cutting program you created) and it won't impact its ability to function as a level work platform for a very long time. Ultimately it will need replacing - Snapmaker and its resellers around the world keep it in stock. And if you were so inclined, you could make your own. There is nothing secret or difficult about its construction.

Installing the work bit into the ER11 collect does require both of the included open ended spanners. You simply insert the work bit into the end of the collet, hand-tighten whilst ensuring the bit is nestled in vertically in the centre of the collet before tightening the collets grip firmly using the two spanner. One on the silver shaft and the second on the black collar.
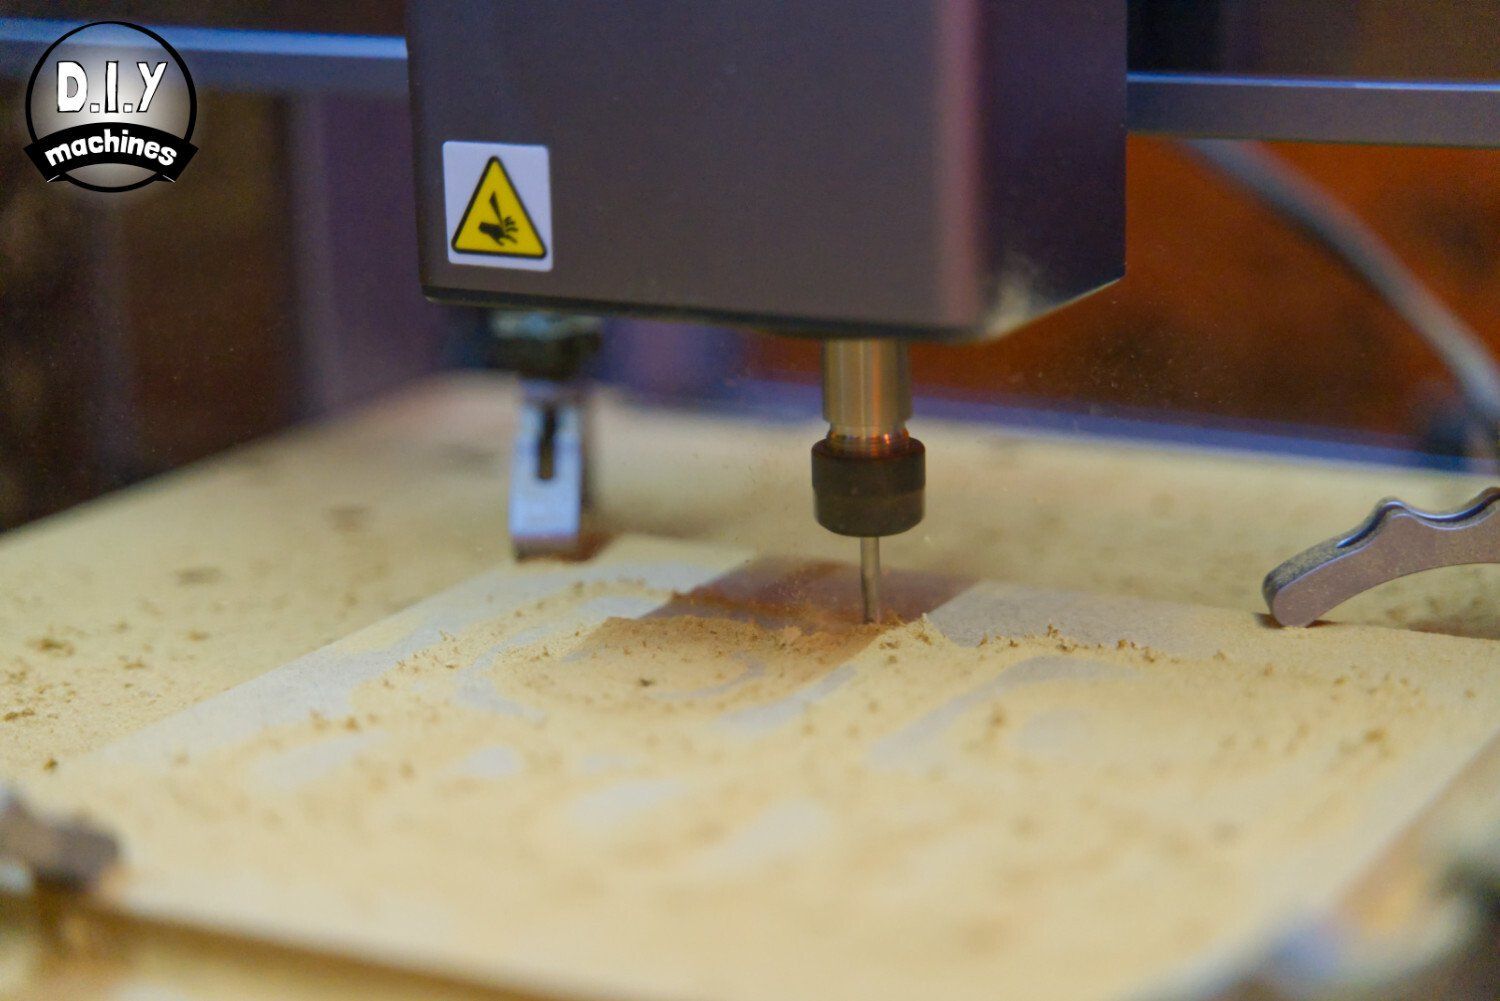
Making the sample CNC machining project
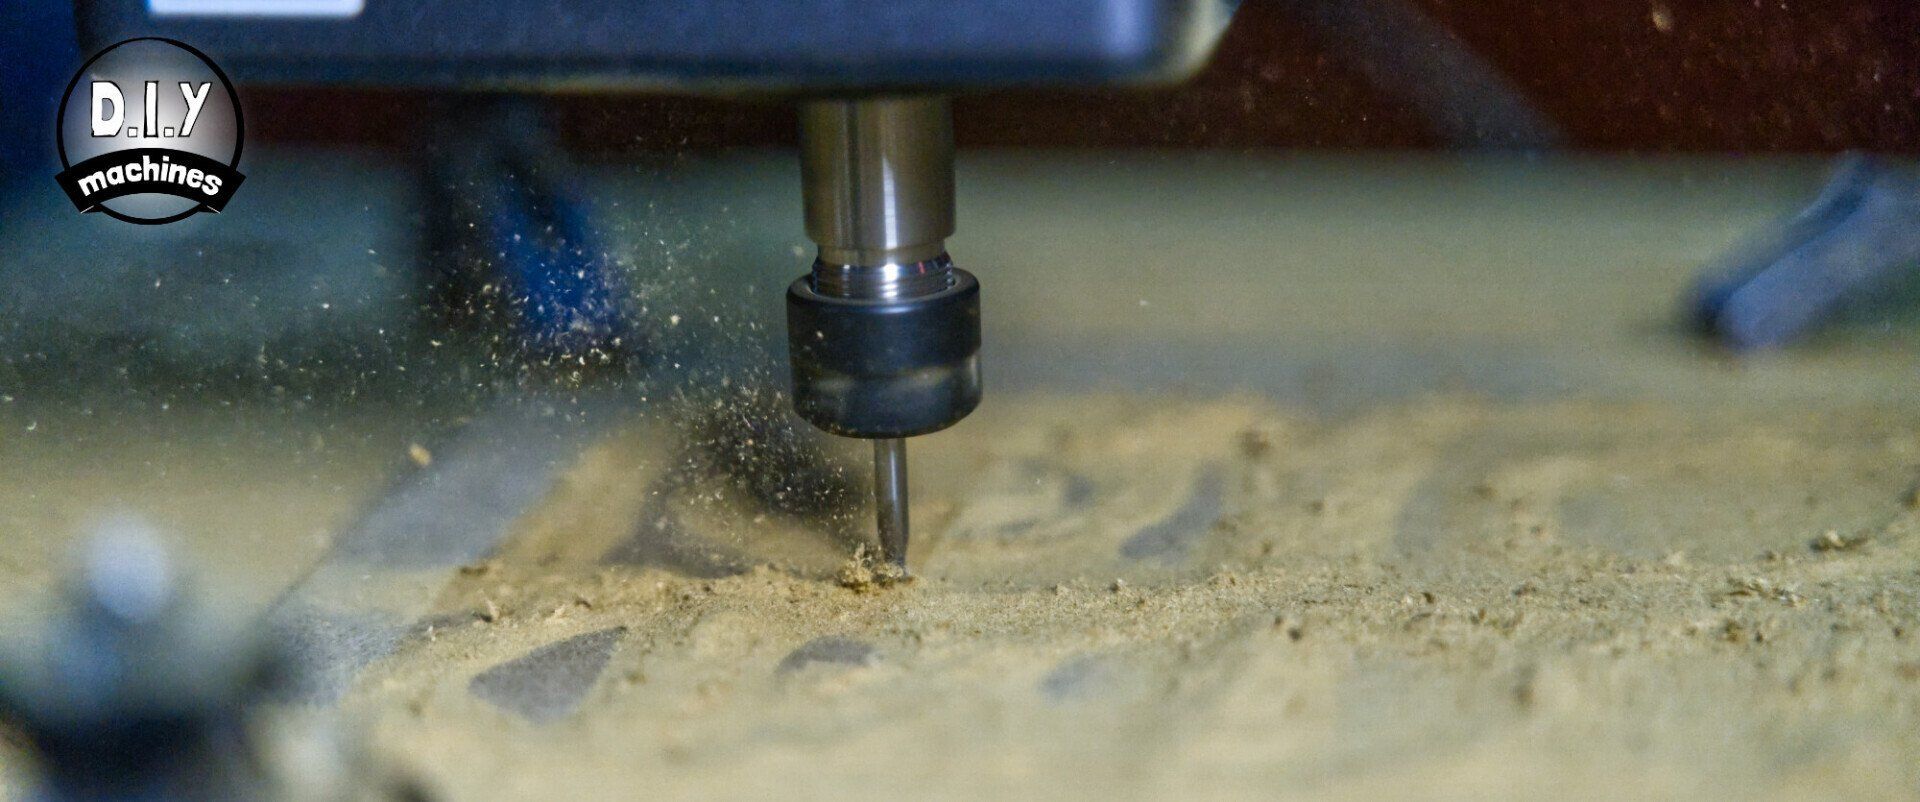
The first stage of any CNC carving or cutting wok flow is setting the work origin. This is a couple of steps which lets the Snapmaker know where the surface of your material is and the correct starting point the program should begin from. This is required as your positioning of the material on the platform is highly unlikely to be where the machine is expecting to encounter it.
To begin with you use the onscreen control to lower the CNC modules work bit closer to the material but high enough that it cannot collide with any of the clamps if the CNC module was to move around above the platform. You can then press 'Run Boundary' on the display. The machine will the move its axis to mark the greatest extent / boundary of its working area for your selected program. As long as it is clear of the clamps and any other obstruction you can lower the work bit further. This time you keep going whilst sliding a piece of paper around between the work bit and top surface of your material. When the paper encounters friction you can save this height.
That's it, the machine can then begin the CNC program. If anything goes wrong whilst preparing the machine or during the program itself then you should immediately use the emergency stop button located on top of the Integrated Controller.
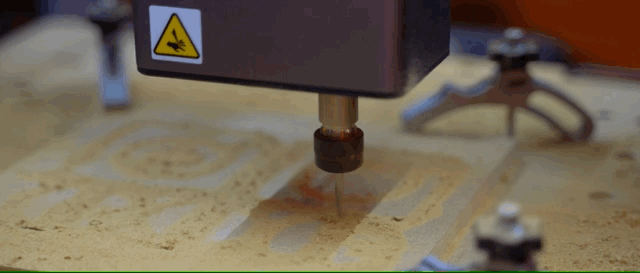
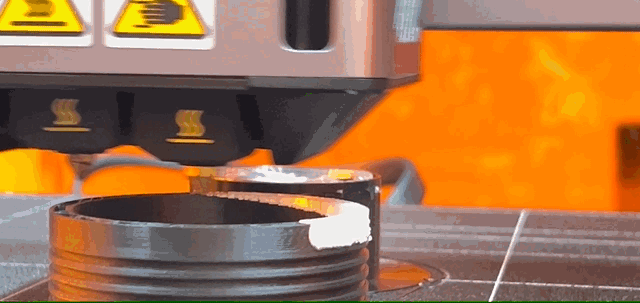
This process is loud. Significantly louder than the Laser or 3D printing modules. Thankfully the enclosure dampens a lot of the noise but when you're spinning a high speed work bit whilst dragging it through hard materials as it cuts loud noises are going to be unavoidable. Despite the updated Artisans ability to work more aggressively I have also found that everything still seems more rigid than the A350T.
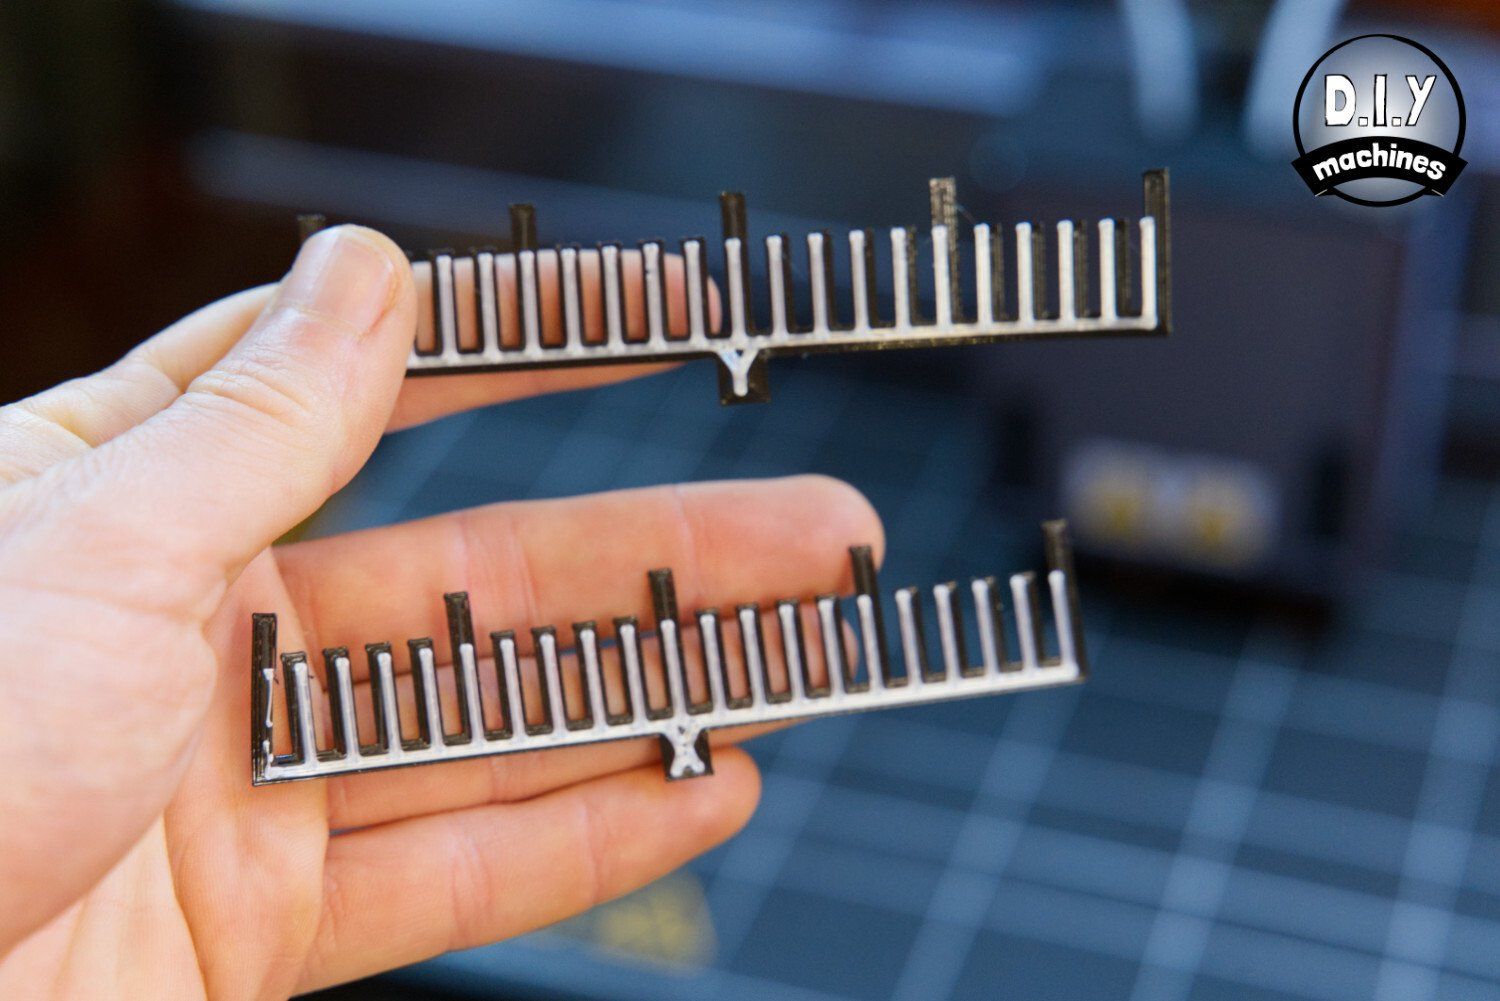
The sample project used a sheet of HDF to cut a series of interlocking shapes. These (after some puzzling) fit together to make very pleasing tolerances. Check out the images below.
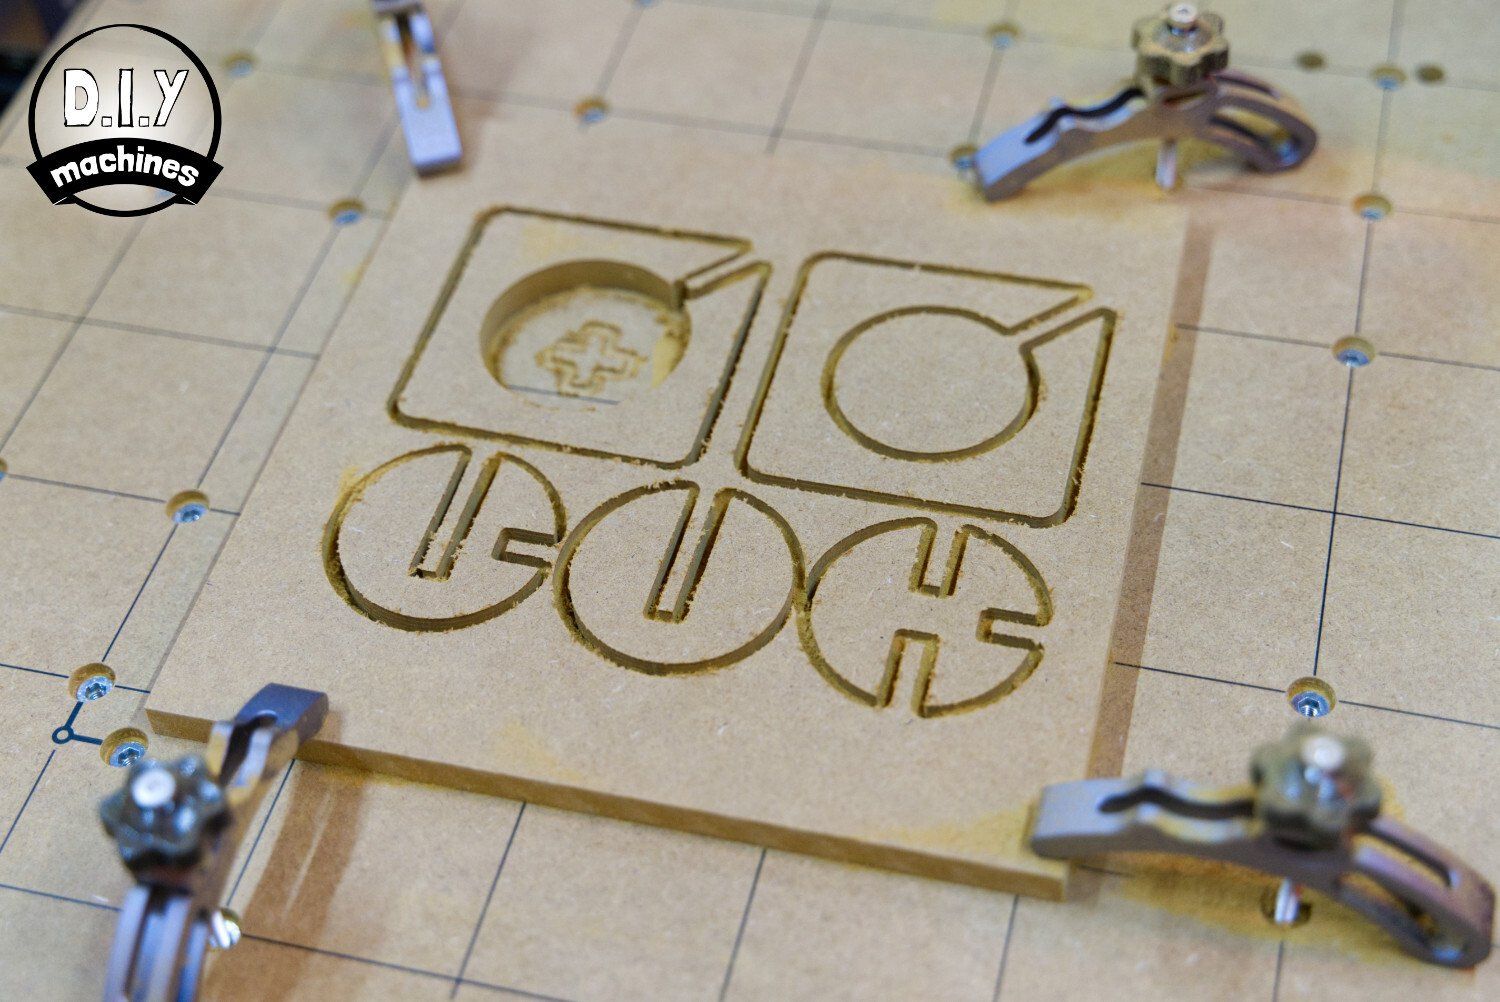

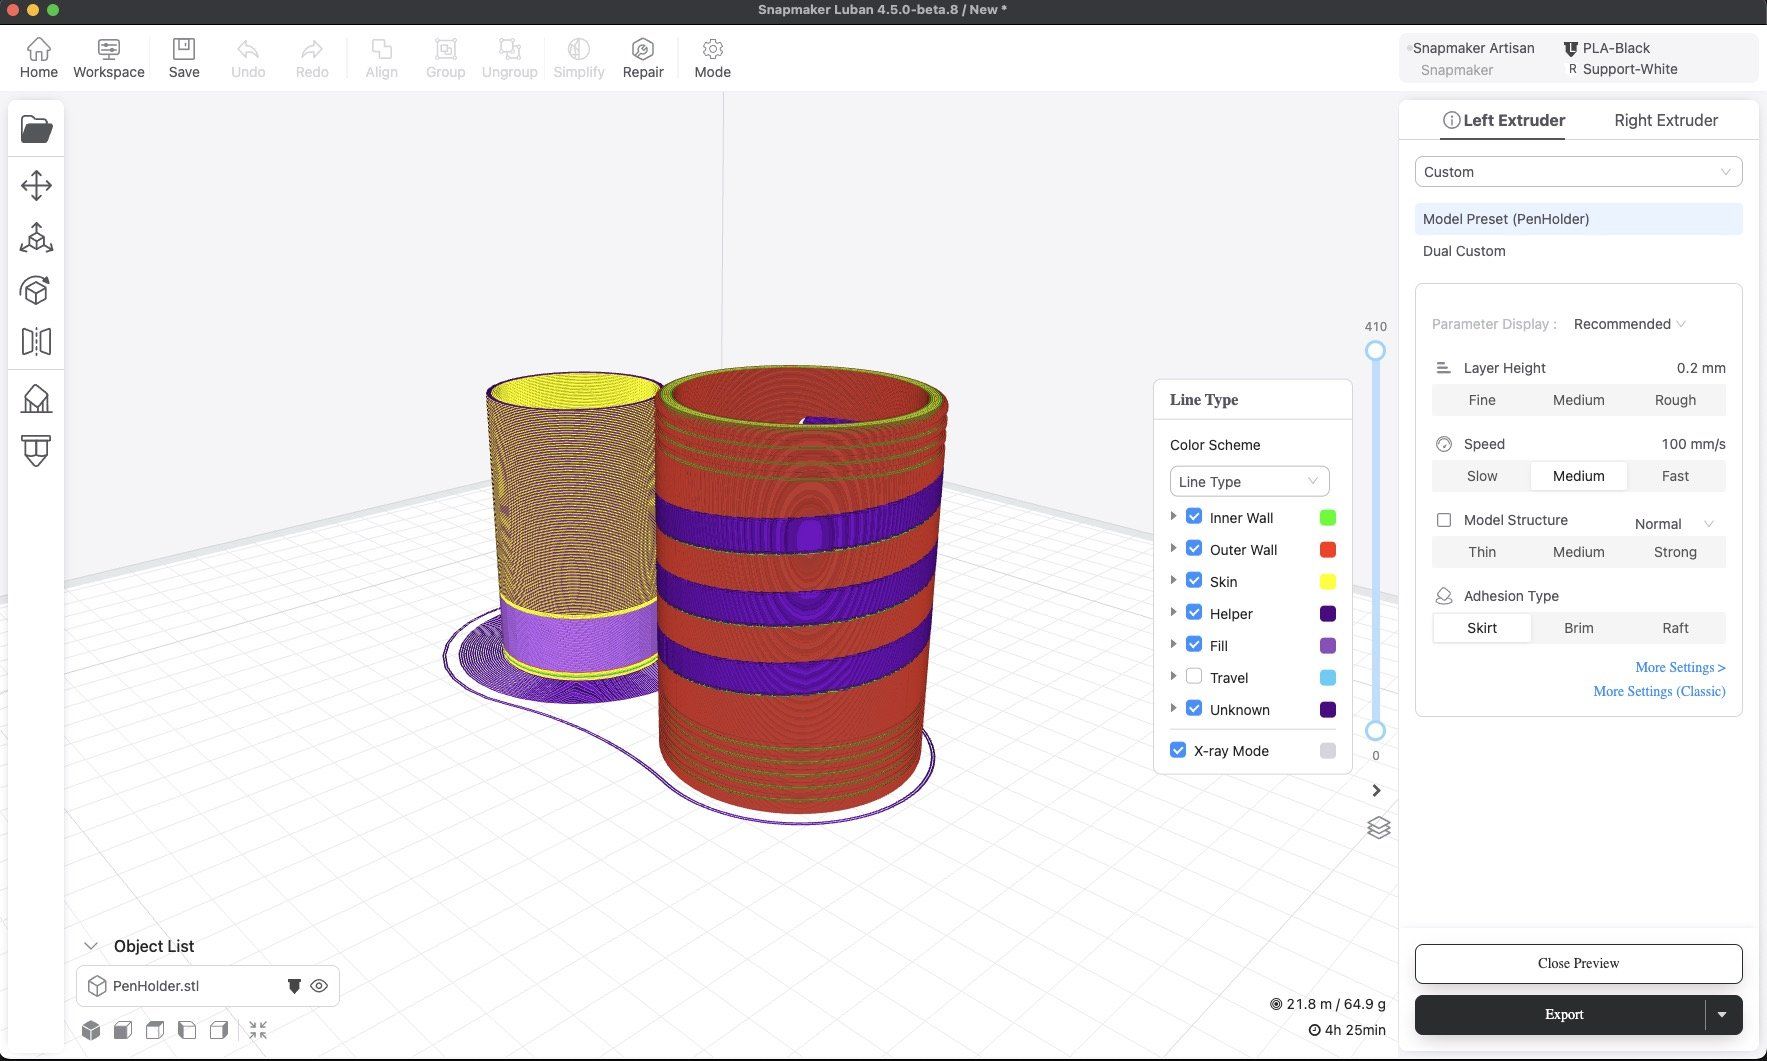
The above project was designed and exported from Snapmaker's own free Luban software which is specifically designed for their machines. I'll be going over Luban later on in the review. If you like to work with Fusion 360 I also wanted to mention that Snapmaker have created a detailed and easy to follow video guide on how to create machining files from within Fusion 360. You can see it here for yourself.
As you can see in the first image, the cross shaped circular stand for the sample model cut itself too deep and its tabs were not strong enough to keep it connected to the work piece. It came loose and started throwing itself around the drill bit at high speed. I immediately hit the big red emergency button and the machine promptly stopped the tool head. I was able to then resolve the issue (I removed the loose workpiece) and then was able to reset the safety stop and the Snapmaker was able to continue with the rest of the program. No big drama and great opportunity to test the Emergency Stop button. This is now integrated in the top of the Controller. On previous models it was an optional extra (and not a cheap one either in my opinion).
The New Dual Extrusion 3D Printing Module
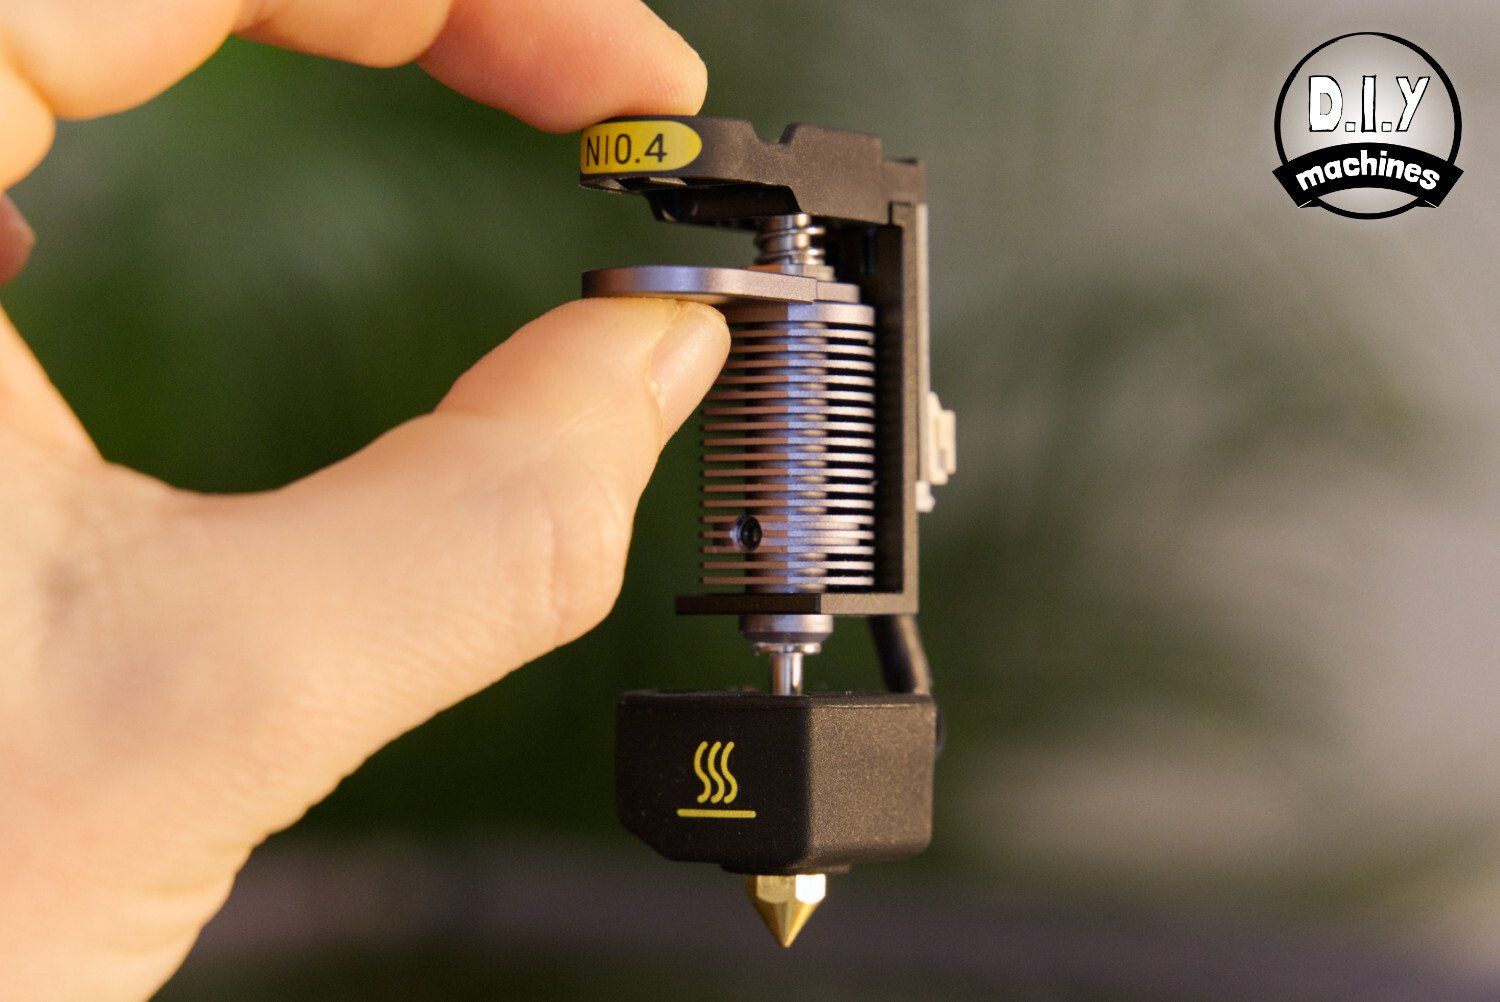
3D Printing is my speciality so I will be more critical here. My benchmark is a Prusa i3 Mk3s. A machine I use often and a popular contender in the mid priced 3D printing market. Well the very first obvious win for the Snapmaker Artisan 3-in-1 is its dual nozzled extruder setup. This allows it two print more than one filament in a single job without human intervention. and as each one uses a separate nozzle we can use different materials (such as soluble supports) that require different temperatures. The nozzles are also extremely simple to swap out (this takes a little work and some tools on my Prusa) and perhaps in a future software version of Luban you'll be able to use to different nozzle diameters?
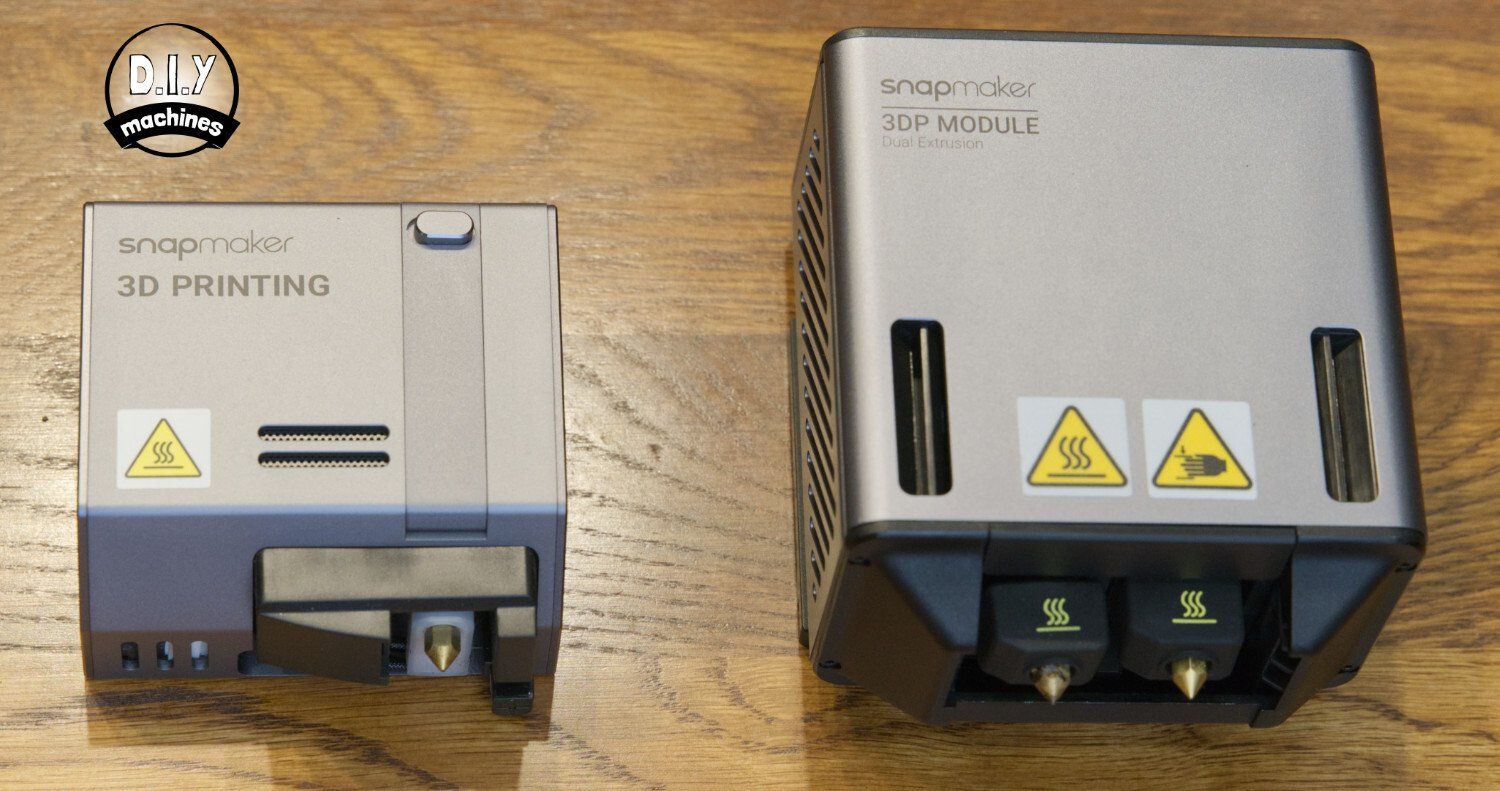
For comparison you can see that the upgraded module of the Artisan is rather different to its predecessor.
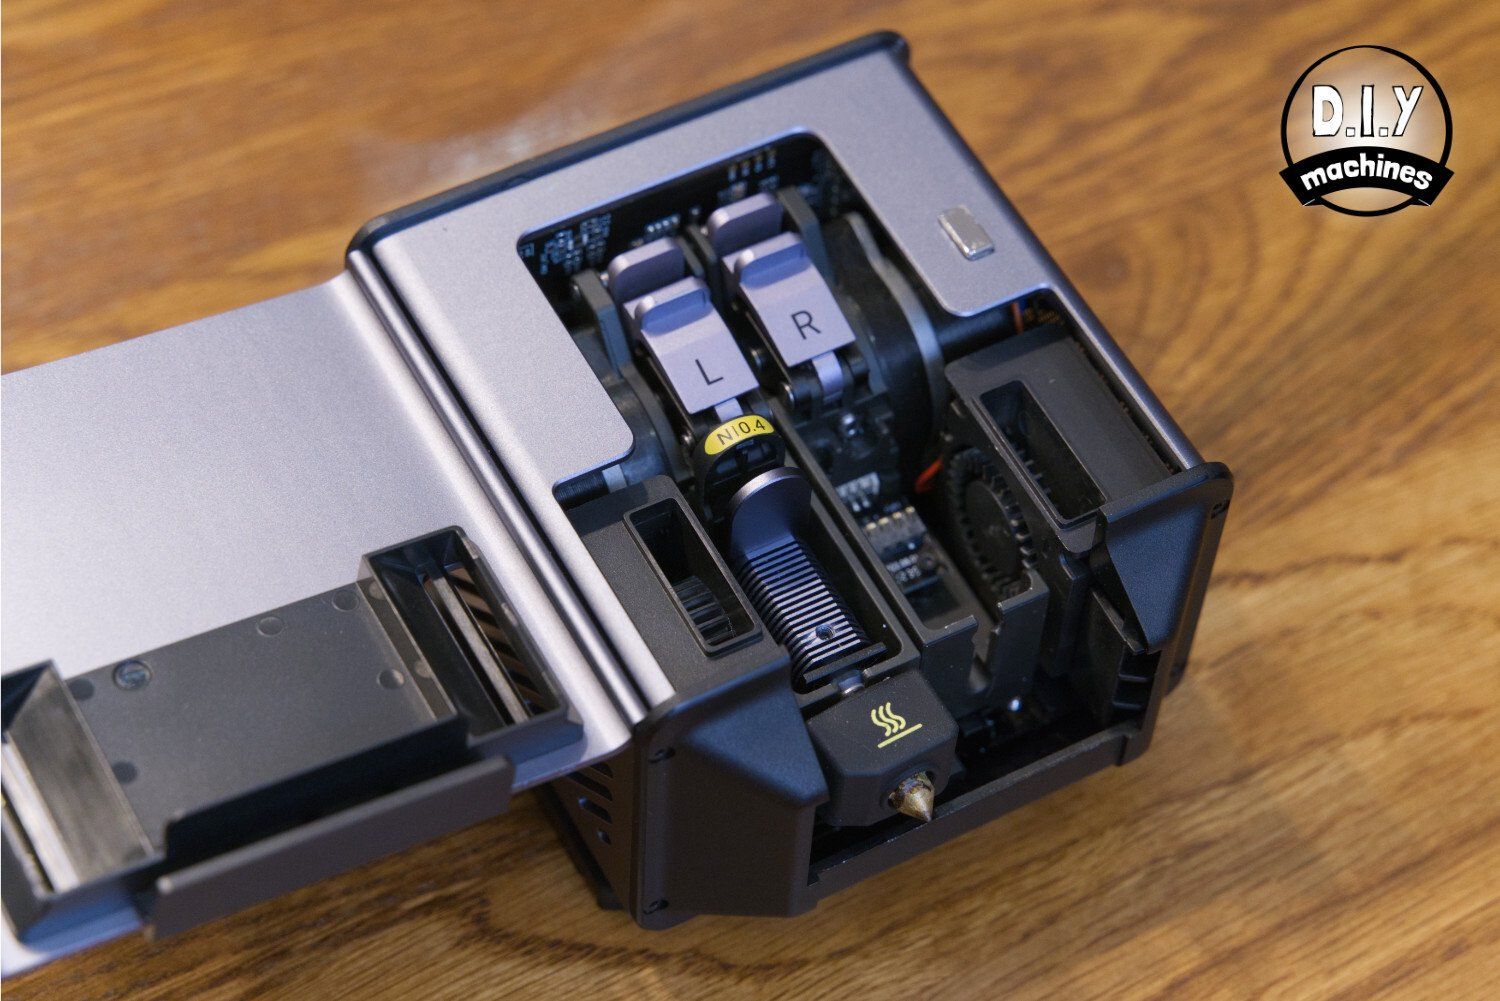
You can instantly observe the twin nozzle design along with substantially enlarged air inlets for effective cooling of the heatbreak and the print itself.
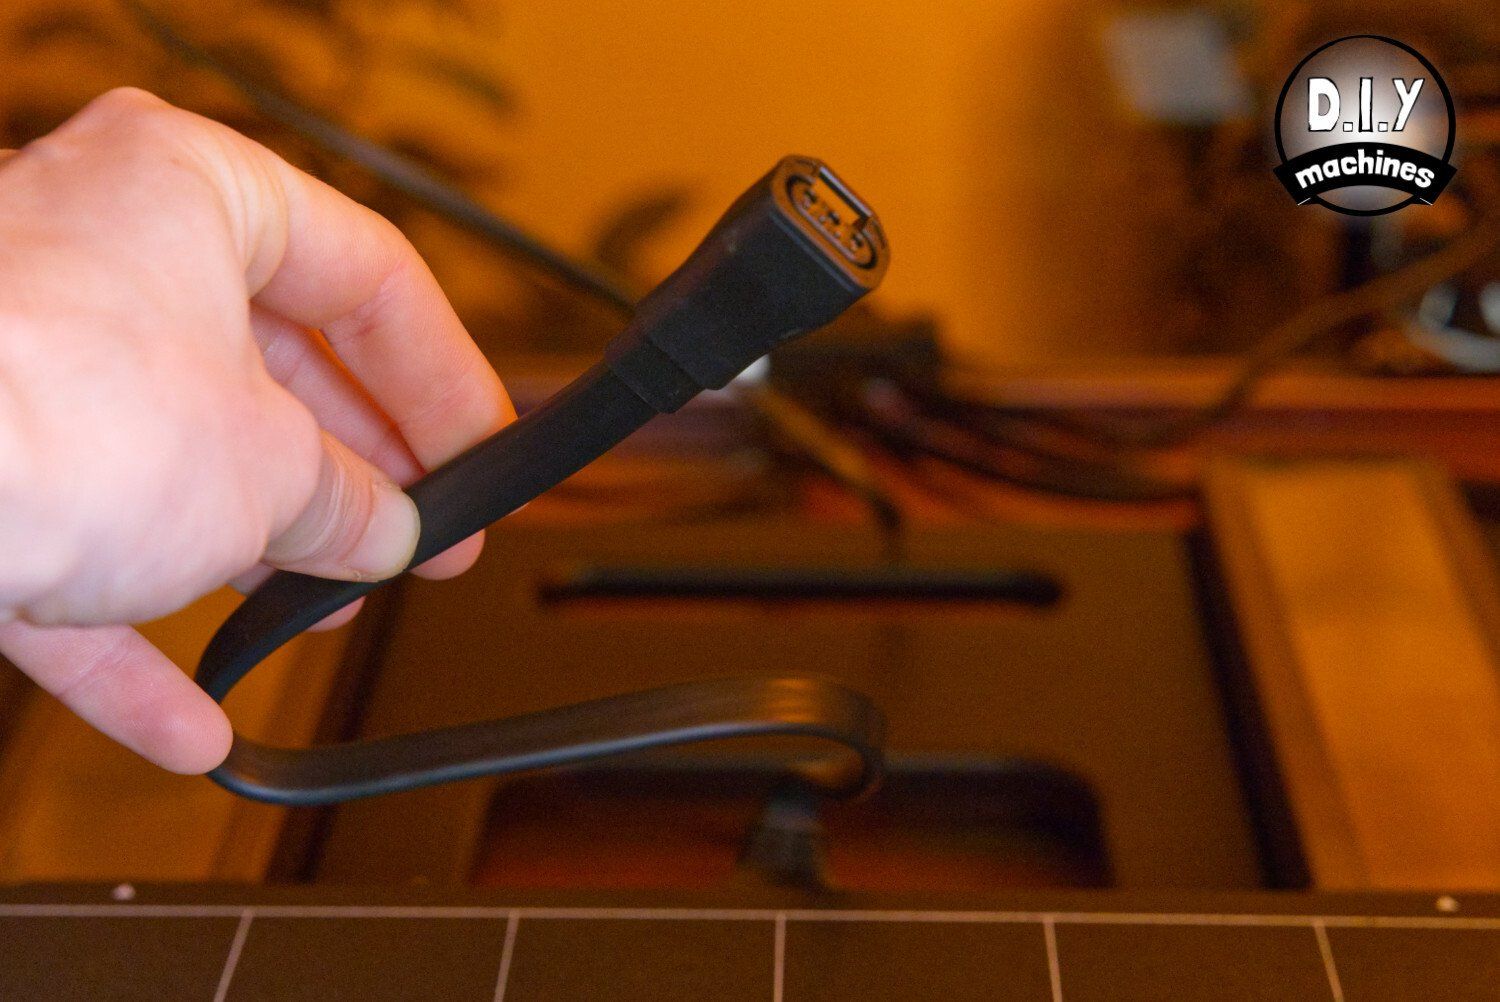
Both filament are mounted externally either side of the enclosure and fed in to the top of the module via a pair of easily reconnect-able Bowden tubes .
With the bed and toolhead installed I powered on the Snapmaker which automatically recognised I had prepared the machine to do some 3D printing. The onscreen wizard then guided me through loading each roll of the included sample filament. I struggled a little to load the filament into the left nozzle, but the right nozzle went without a hitch.
Once the filament is loaded you will to need to run through the calibration process to ensure good alignment of the two separate nozzles. This involves the machine printing two calibration models, one for the X axis and one for the Y.
Once this is done you let the machine know which of the markings had the most centred pair of printed lines. The machine will then go ahead and test these setting you just entered by printing one more model - some intersecting squares.


As with most 3D printers on the market today the Snapmaker contains the hardware and software needed for it to automatically probe the surface of the print bed at pre-determined points and calculate and then compensate for any undulations in the print surface.
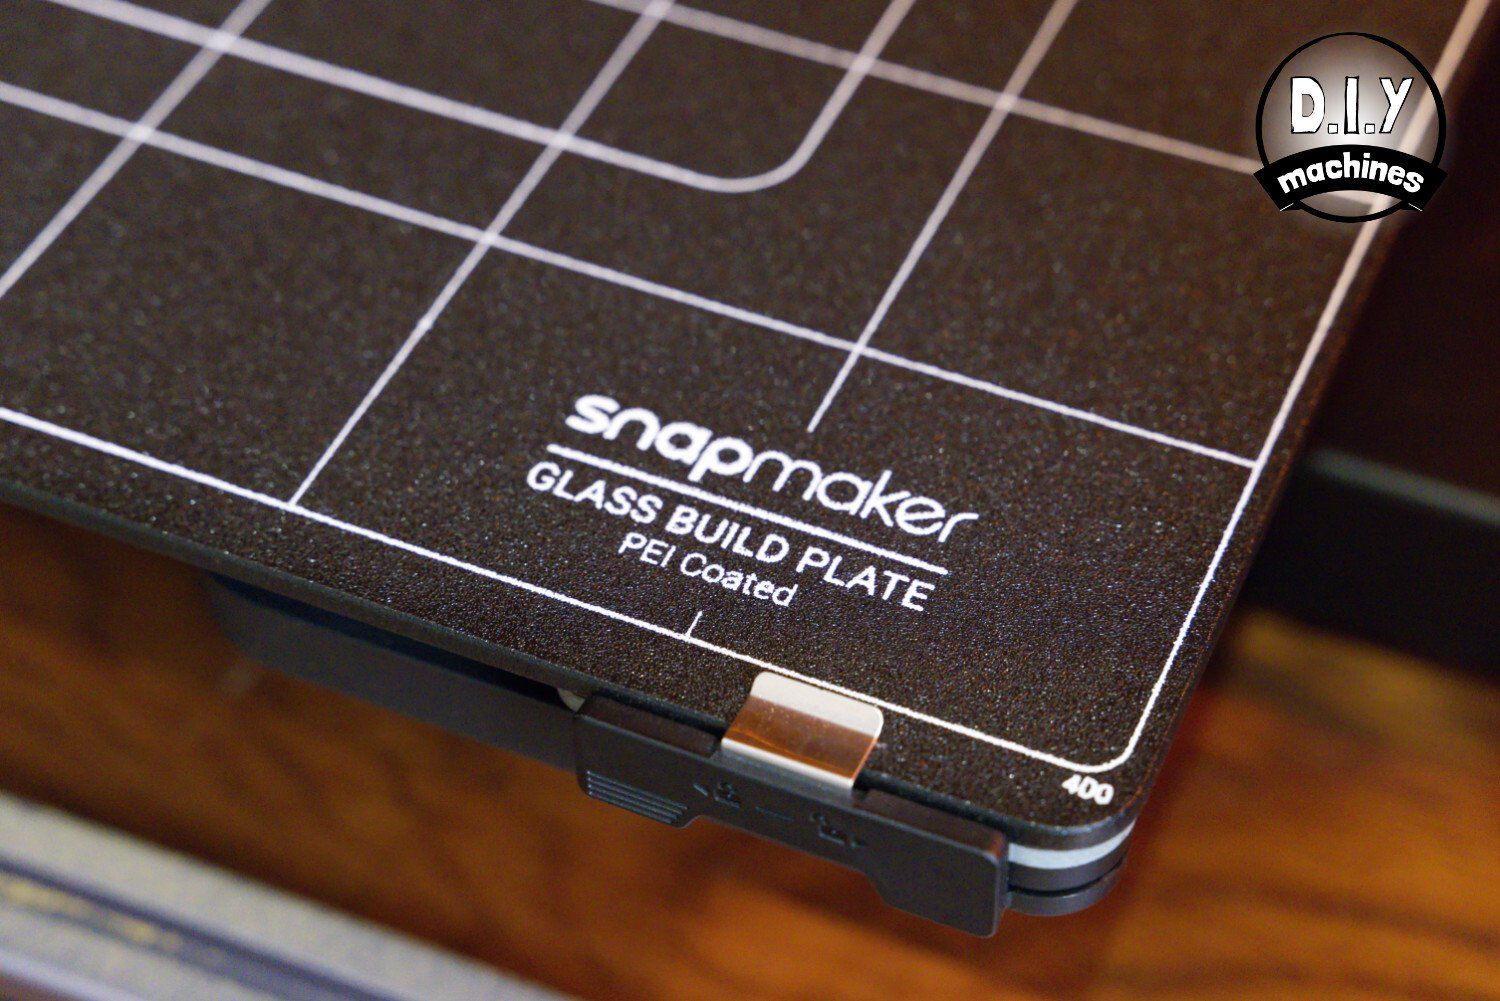
It is also worth me mentioning that the print bed has two different usable surfaces - one on each side. One of which is a textured PEI coated surface. This is ideal for most materials. It aids adhesion whilst also helping to mask the pattern of the first layer on the underside of your project. The second side of our printing surface is a glossy glass surface which is more suitable for sticky filaments such as TPU and flexible ones.
I followed the user guides instructions to print the sample model. A spring like pencil pot with overhangs so severe you cannot print it without supports - step in the break away support filament and Artisans second nozzle. 🙂
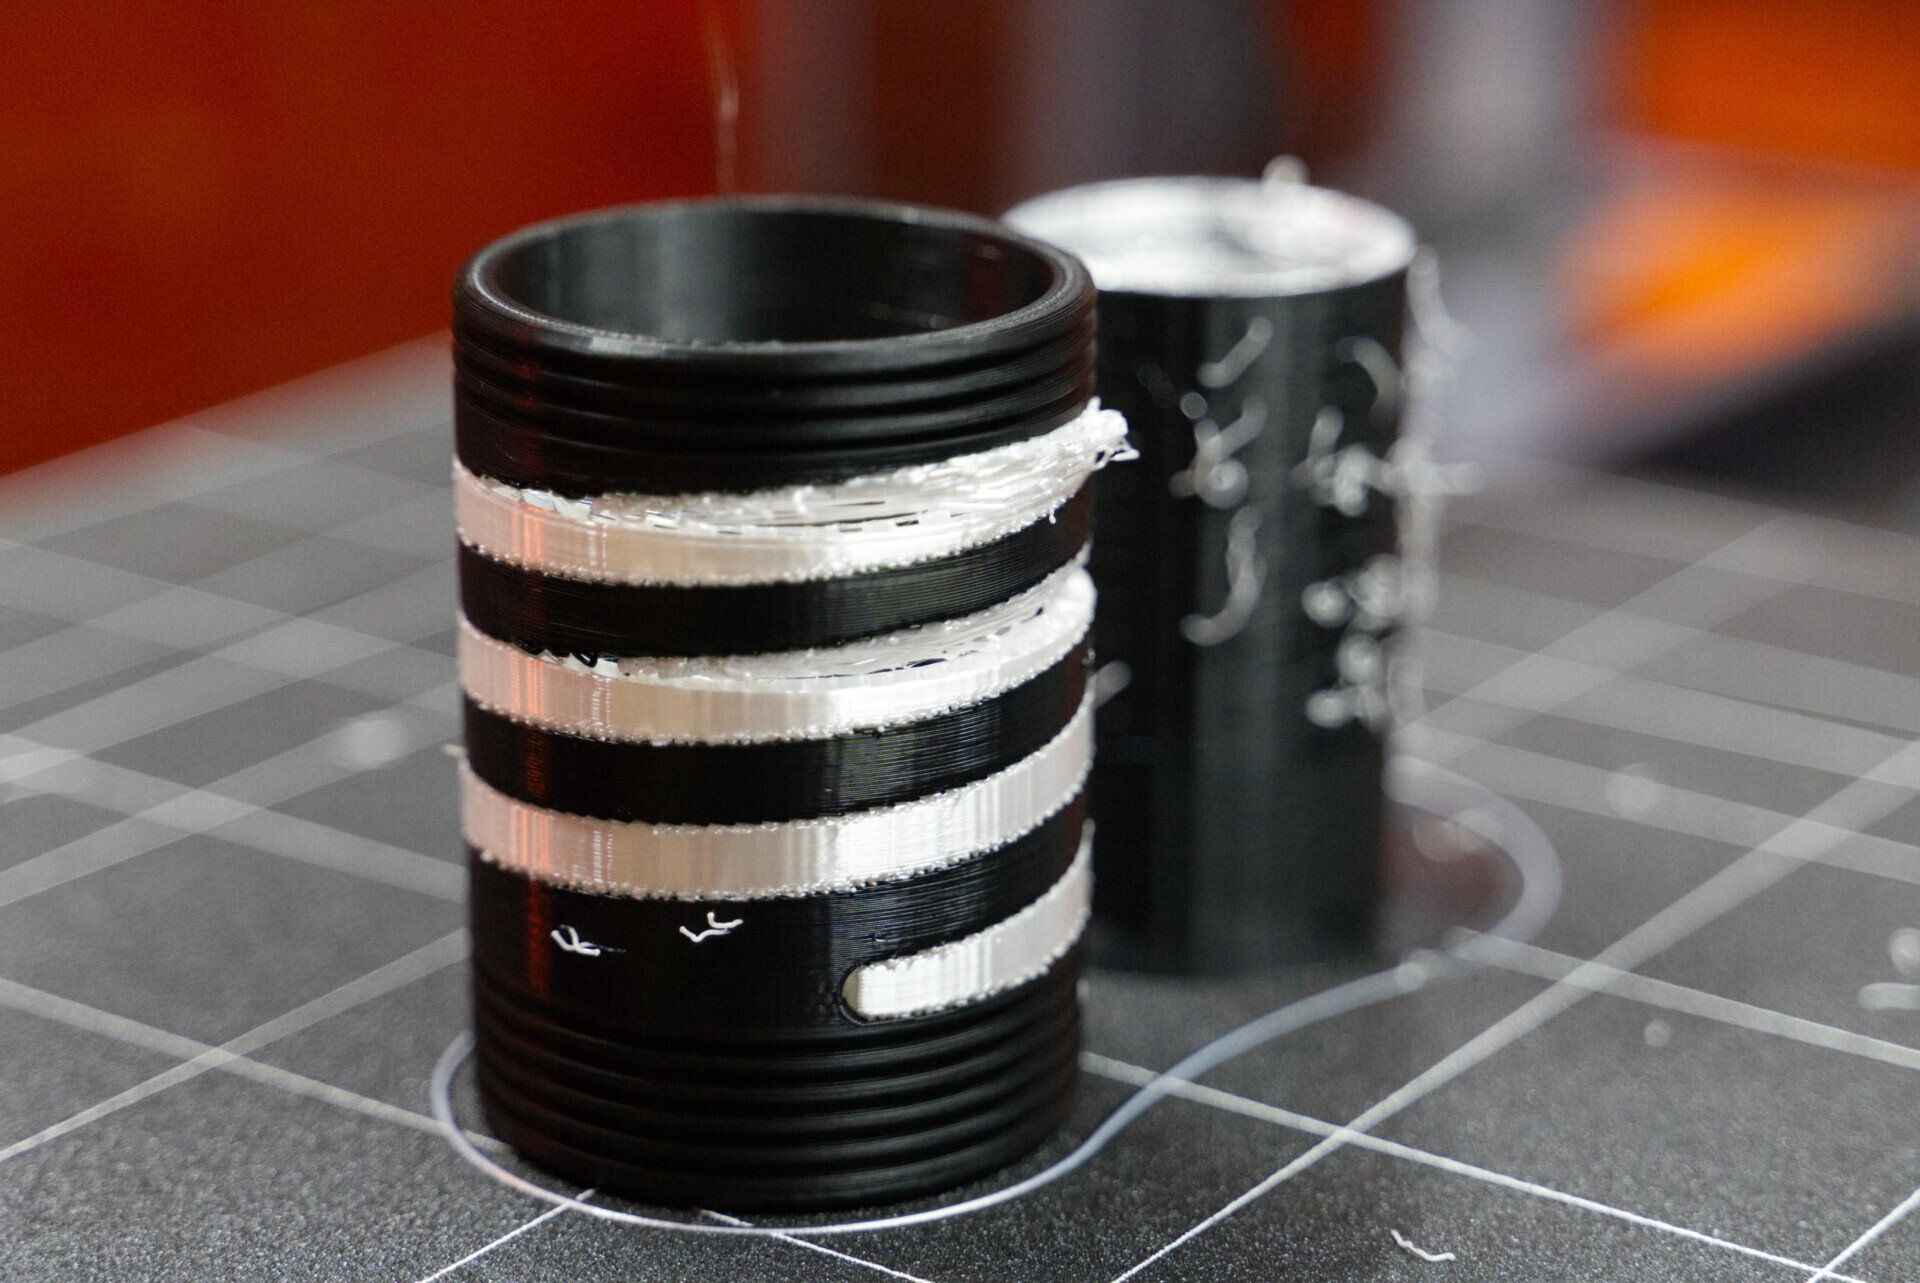
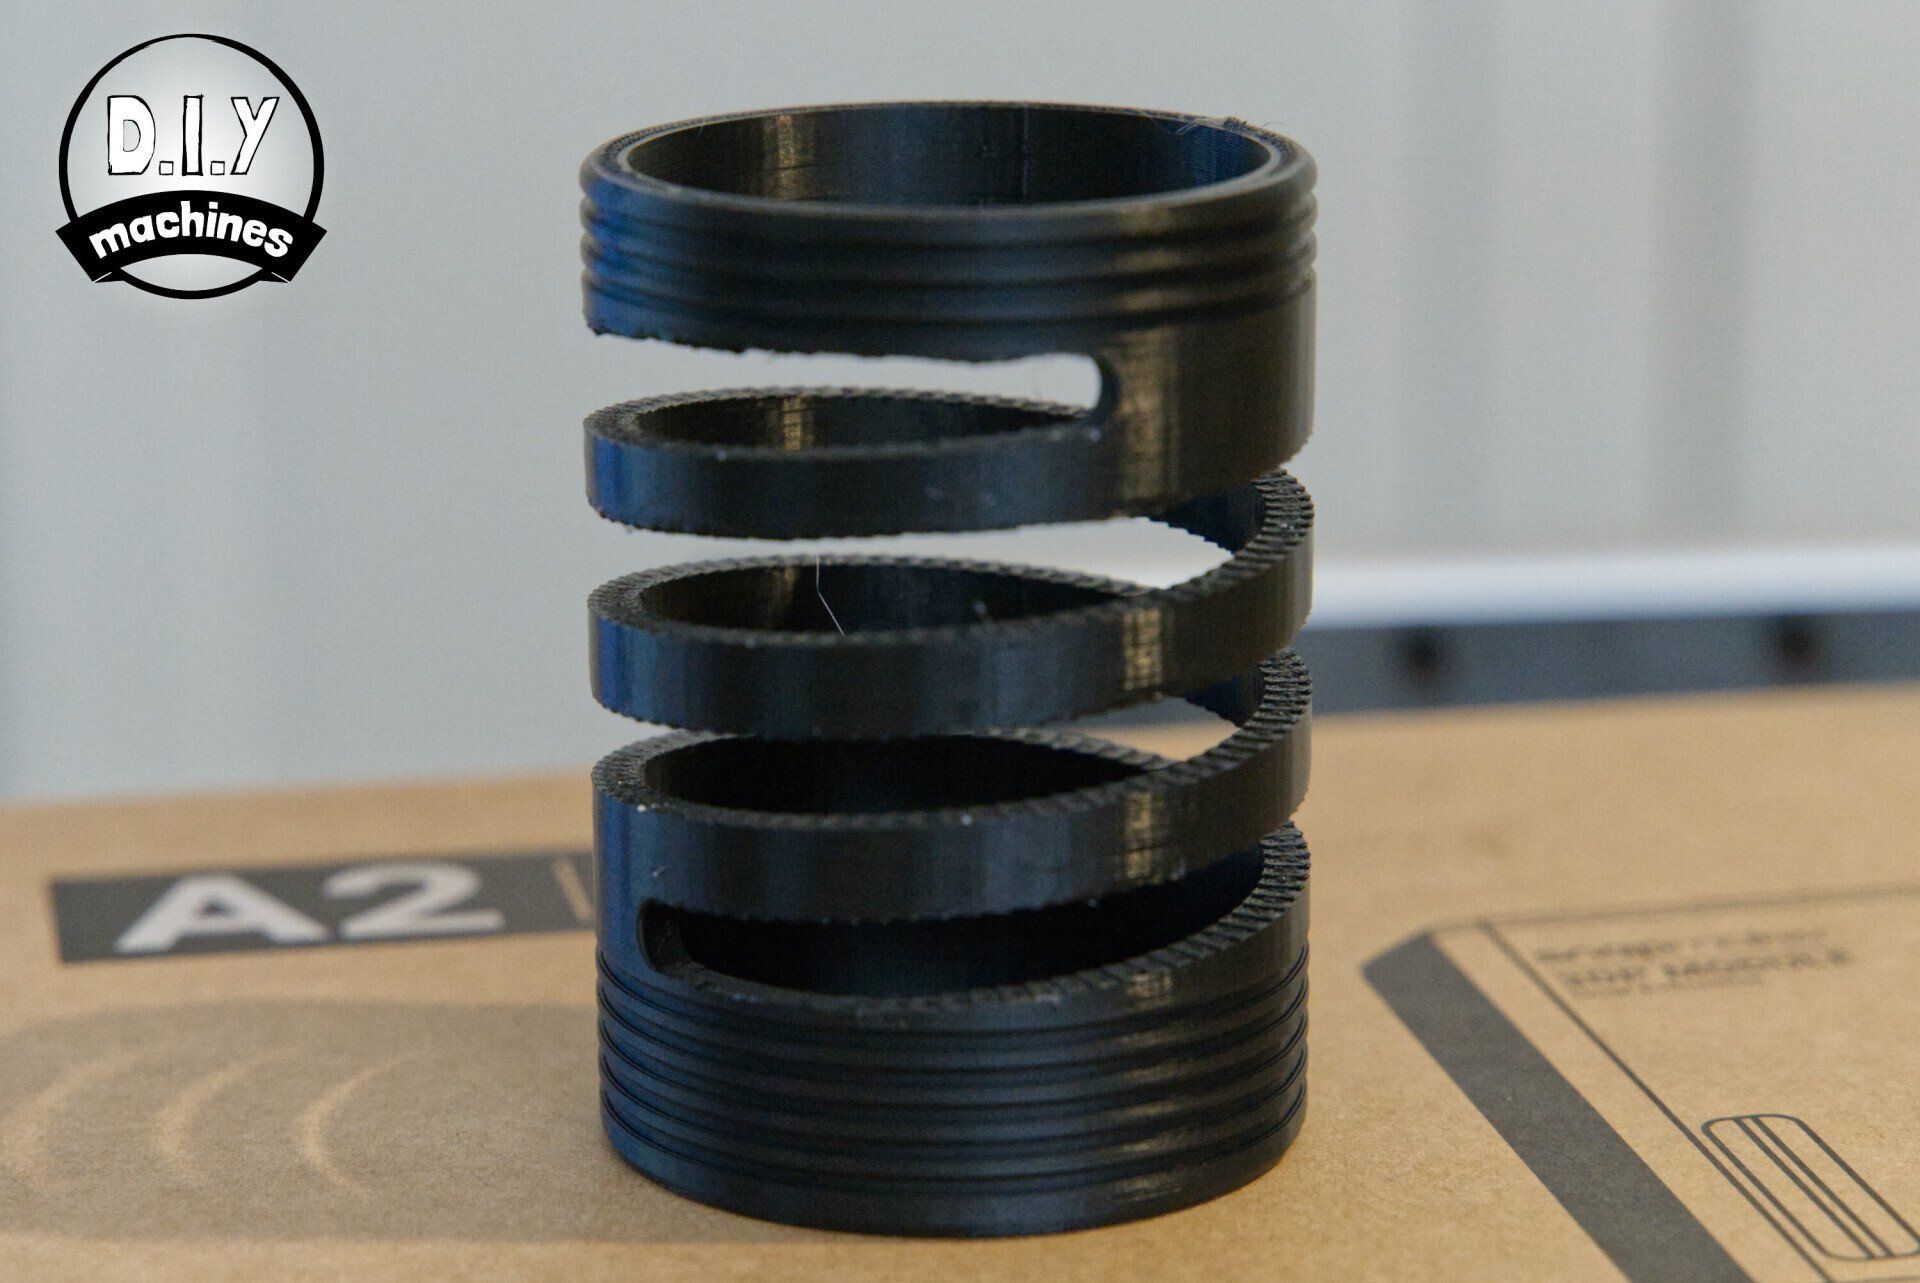
This is my first time using a dual nozzled printer. The set up was easier then expected and naturally the print time was increased due to the nozzles need to spend some time making use of the purge tower (which also consumes additional filament). Of course you can use this as a single nozzle printer and with the option to use two nozzles available at any time.
The print bed is also dual-zoned. A small central section and a larger outer perimeter zone. This means you need only heat the centre section for smaller prints. This provides the opportunity to heat it quicker, to higher temperature and save energy. The enclosure also plays a role in printing success by ensuring an ideal ambient temperature with the option to switch on the extraction at the end of the print to remove any unpleasant odours depending on the filament type you are using.
The Snapmaker Artisan is able to utilise the full 400 x 400 x 400mm scare build volume for some truly large prints. Thankfully the style of filament holders allows for the use of rolls larger than 1kg. Ideal when prints as large as this machine is capable of.
As with the CNC'ing or Lasering use modes, the switching of toolhead module and build platform is tool-less and takes mere seconds. You'll find a trailing power connector at the back of the print surface which is connected to the capped cable at the rear of the enclosure. You also need to connect the two Bowden tubes to the top of the print module. This again is a tool-less task and take 20 stress free seconds.
I would like to see some additional information on screen whilst printing. For example, at the moment the current layer height/number and time-elapsed are missing.
When heading into the settings to pre-heat the nozzles there are separate screen for the for the left and right nozzle. Whenever you switch between them the printer does a little hop between its nozzles which makes the switch back and fourth on screen slower. I personally would prefer an overview of the machines nozzle and print bed temperatures to be shown on the home screen when the 3D printing module and platform are detected. Then in the setting screens I would like to see the two nozzles combined onto one screen. I feel they have enough room to do it without abandoning their design aesthetic.
Software - Luban 4
Snapmaker maintain their own GCODE generating software, Luban, to help you prepare your artwork for 3D printing, CNC machining or Laser etching/cutting. It's available for free and runs on all the major operating systems. Mac, Windows, and Linux.

For those of you who are interested, the software itself was built on the codebase of cncjs and uses the CuraEngine as the backend 3D slicing engine. Luban itself is open source and hosted on Github.
Its development alongside the Snapmaker hardware means that features such as the camera capture for the Laser module are easy to locate and use. Though I don't have the optional Rotary Module I can see that they have also taken care of including an appropriate specialised workspace to aid in the creating of 4-axis machine code.
Snapmaker have sent to me a pre-release version of Luban 4.5 to use whilst testing the machine. This version will be adding the newer features such as dual extrusion 3D printing to it's suite of tools. It has a few bugs understandably. I will revisit this section and take judgement on the new version of Luban when it reaches the general release stage of its development cycle. To judge it know on stability would be unfair.
I will however say that I have been using the previous version of Luban for sometime. It has its own little niggles but it regularly receives updates and the problems are becoming fewer and further between. I encourage you to report them via the project Github page to help Snapmaker further improve this powerful piece of software.
Final thoughts
This has become a machine which is truly heading towards becoming a master of each trade.
Usually when a tool does multiple jobs, it does none as well as a dedicated single job tool. The Snapmaker A350T felt like that when it came to 3D printing and CNC machining. The updates made to the Artisan have addressed both of these whilst also continuing to improve the Laser function. There are also a great deal of what used to be 'optional upgrades' which now come as standard such as the enclosure, emergency stop button, 10W laser and more.
And the quick change mechanisms! Wow, they make such a difference to any friction felt when you, for example, wanted to Laser something but you were most recently CNC'ing. I used to put making off because of the switch but not any more. Creativity and fun are no easier and doesn't want that. Another side note is the fact you no longer have to power off the machine to change modules. This not only makes I quicker still, but also allows you to keep the enclosure light on whilst changing between functions.
Here is my super brief summary and opinion of each mode of use:
3D printing: It has all the features of mainstream non-budget printers. Auto-levelling, filament run out sensors, heated bed. It now improves on most with a dual zone heated bed and dual extrusion. I do worry that I'll miss the flexible print surface, the A350T had it and my other printers do as well. But to be honest to myself it has not been any issue yet. The Artisan has the largest available build volume of all my machines though so I'm looking forward to exploring that.
Laser module: I loved this module on the A350T and will love it more on the Artisan. To start, it now comes with the 10W module as standard. The improved and included enclosure vastly reduces the possibility of harm. The increased size of laser platform and the ability to switch functions quicker than before is a bonus. I also much prefer the newer system for fixing materials to the surface.
CNC Routing: I dabbled in this with my previous machine but the long work times meant I often chose to create projects by other tools and methods. This has been massively addressed on the Artisan with 4X more motor power and 50% more spindle speed available. Watch this space! 😁
What needs work: Nothing is perfect. If I could ask Snapmaker to focus their efforts on certain areas then I would ask for Luban to have some additional features. PrusaSlicer allows you to use support material only at the point where it contact the work piece - this would be ideal for vastly reducing the amount of expensive materials required such as when using soluble filaments. I would also like to be able to import artwork for the Laser where colours can be assigned processes. For example it's common to encounter files where black lines need cutting and red is for engraving.
I will be continuing to put the Snapmaker Artisan through its paces this winter and will endeavour to come back to this review and showcase some of what I have produced as examples for you. I will also update my opinions and views as I learn more and the software evolves.
So, if a friend asked if they should treat themselves to the new 2023 Snapmaker Artisan my answer is - if you every think you'll do more than just one discipline then this is without doubt the machine to get.
Technical Details:
| Control | 7 Inch Touch Screen with all new UI |
|---|---|
| Connectivity | USB memory stick and wifi |
| Enclosure | LED lit with extraction system included |
| Software | Free 3-in-1 Software: Snapmaker Luban |
| 3D Printing Module | |
| Layer height | 50 - 300 microns |
| Nozzle Diameter | Dual Extrusion 0.4mm (optional 0.8mm) |
| Materials | PLA, ABS, PETG, TPU, wood filled PLA, Water Soluble |
| Nozzle Temp | 300°C |
| Dual Zone Bed Temp | Max 100°C Centre, 80ºC outer |
| Printable Volume | 400 x 400 x 400mm |
| Print surface | Textured PEI and Glass |
| Features | Self levelling, power loss recovery, replaceable hot end, filament runout recovery |
| CNC Router Module | |
| Shank Diameter | 0.5–6.35 mm |
| Collet | Standard ER11 Collet |
| Spindle speed: | 6,000–18,000 rpm |
| Motor Power | 200W |
| Working platform | MDF Board & Clamp Sets for CNC Carving |
| Suitable materials | Wood, acrylic, PCB, carbon fiber sheet, jade |
| Working area / size | 400 × 400 × 400 mm (W x D x H) |
| Laser Engraving and Cutting | |
| Camera | Built-in camera |
| Laser Power | 10W |
| Wavelength | 450 nM |
| Safety Class | Class 4 (Class 1 with included enclosure) |
| Suitable materials | Wood, leather, plastic, fabric, paper, cardboard, non-transparent acrylic |
| Working platform | Aluminum Grid Table for Laser Engraving and Cutting |
| Working area / size | 400 × 400 × 400 mm (W x D x H) |
| Emergency Stop Button | Included as standard |


