HALOT-X1 Resin 3D Printer Review
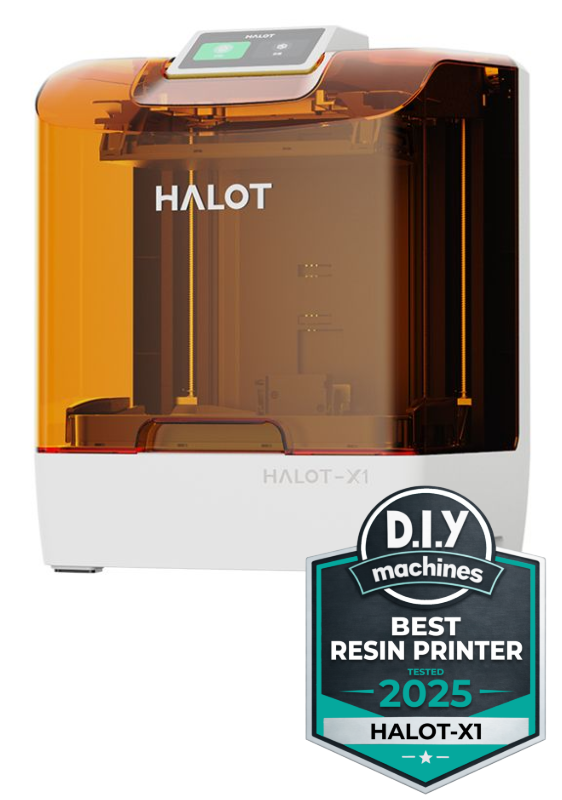
PioCreat HALOT-X1
10.1” 16K Resin Printer Review
The PioCreat Halot X1 is one of the more unusual consumer resin 3D printers I’ve tested in a while. On paper, it promises a lot: a large 10.1" 16K screen, a genuinely leveling-free build plate, a unique “twist-to-release” print removal system, and an optional AFU that can automatically refill and reclaim resin for you.
I’ve spent the last few weeks putting it through its paces in my workshop here iat DIY Machines to see whether it really delivers on those claims — and more importantly, whether those workflow conveniences actually make resin printing any easier or more enjoyable. (Which would certainly be welcome given resin printers messier workflow).
If you’re wondering whether the Halot X1 is worth buying, this in-depth review should help you decide.
Where to buy:
- Creality/PeoCreat direct: https://crealityofficialstore.sjv.io/19qvGm
Pros:
- 16k 10.1" mono LCD
- Leveling-free build plate
- Twist-to-release quick ejecting build plate (I love this!)
- Hinged front lid
- Optional AFU (auto-refill & resin reclaim, heating and RFID bottle detection)
Cons:
- AFU does not fully empty resin vat
- Grooved plate can complicate direct-on-plate printing
- Slight Z compression
Video Review of Halot-X1
For the first time I have also created a video review of a 3D Printer - which is the Halot-X1. I've embedded it below for you. This written review covers some additional features in detail and the video review focuses on it's technical ability to deliver accurate prints.
What is the PioCreat Halot X1?
The PioCreat Halot X1 is a feature-packed 16K leveling-free resin 3D printer designed to offer higher detail and a simpler printing experience than most MSLA machines on the hobbyist market. What sets the Halot X1 apart from typical resin printers is its inverted printing system: the build plate remains fixed while the vat and UV light system move, resulting in a stable and fully factory-calibrated platform that never needs manual leveling. That's one less thing to worry about.
The printer also includes a unique quick-release build plate that twists to eject prints without scraping, dramatically reducing the risk of damage both to the printer, your prints, or yourself (I'll explain this later!). For users who want even more automation, the optional AFU 'Auto Feed Unit' can top up resin during long prints, reclaim unused resin, and load resin-specific exposure presets via RFID. This is not a perfect system, but does manage to ease several pain points of resin printing. (More on that further in the review below).

These innovations make the Halot X1 one of the most user-friendly high-resolution resin 3D printers available in 2025, and certainly which I have tested. This is ideal especially for beginners and miniature makers seeking detail without complexity. Top all this with less need to interact with resin, I'm finding I'm using this machine more than any other previous resin printers I have owned.
Technical Overview
| Printing Technology | Mono LCD Resin |
|---|---|
| Print volume | 211.68 x 118.37 x 200mm |
| Layer height | 0.01 - 0.2mm |
| Motion System | Fixed platform, moving light source |
| UV Wavelength | 405nm |
| X/Y Resolution | 14x19μm (15120x6230px) |
| Control | 3.98" Inch Touch Screen |
| Connectivity | USB memory stick & WiFi |
| Print Speed | 170mm/h |
| Self Leveling System | Yes |
| Print release system | Yes - Twist to release |
For a more detailed technical table please see the end of this review.
The PioCreat Halot X1 is built around a 10.1-inch 16K monochrome LCD, delivering an XY resolution of roughly 14 microns. As already mentioned, it uses an inverted kinematic system, meaning the build plate remains fixed while the vat, LCD, and light engine move together on a robust dual-linear Z assembly. This design eliminates manual leveling entirely.
Print removal is handled by a unique twist-to-release build plate that uses internal mechanical ribs to eject models without needing a scraper. The printer also supports an optional AFU Auto Feed Unit, which can automatically top up resin, reclaim leftover resin, lightly heat resin during pumping, and read RFID-tagged bottles for automatic exposure presets.
A 92-zone intelligent UV matrix provides targeted, uniform exposure across the build area, and the machine includes built-in air purification, Wi-Fi connectivity, and compatibility with Halot Box, Creality Cloud, Chitubox, and Lychee slicers.
Shipping and Packing
Everything arrived in perfect condition, and for the first time the external box itself was in good condition. For comparison every Elegoo printer I have had before this has arrived with scraps and punctures to the external packing (but the machines have always been fine inside because of similar good level of internal packing).


The instruction are placed near the top of the contents along with the correct power lead for your country.
At the base of the machine are two handles, if you're able to get your hands down the side and reach these then you will have a good and safe grip on your machine as you remove it.
I put both my hands on the orange shell and lifted that, only to find later that I had lifted by it's hinged lid which itself is only attached to the reassuringly heavy machine but two small hinges. Luckily I did not damage anything but I would not encourager you to risk the same. 😅
The machine feels substantial, coming in at a round 12.7kg after the packaging has been removed.

What’s provided in the box?
Aside from a small amount of resin for printing and alcohol for post-print cleaning—both of which are typically excluded due to shipping complexities—all essential items for your initial prints are included. PeoCreat and other brands avoid bundling these liquids with electronic equipment to streamline shipping. Here’s what came with my Halot X1 :
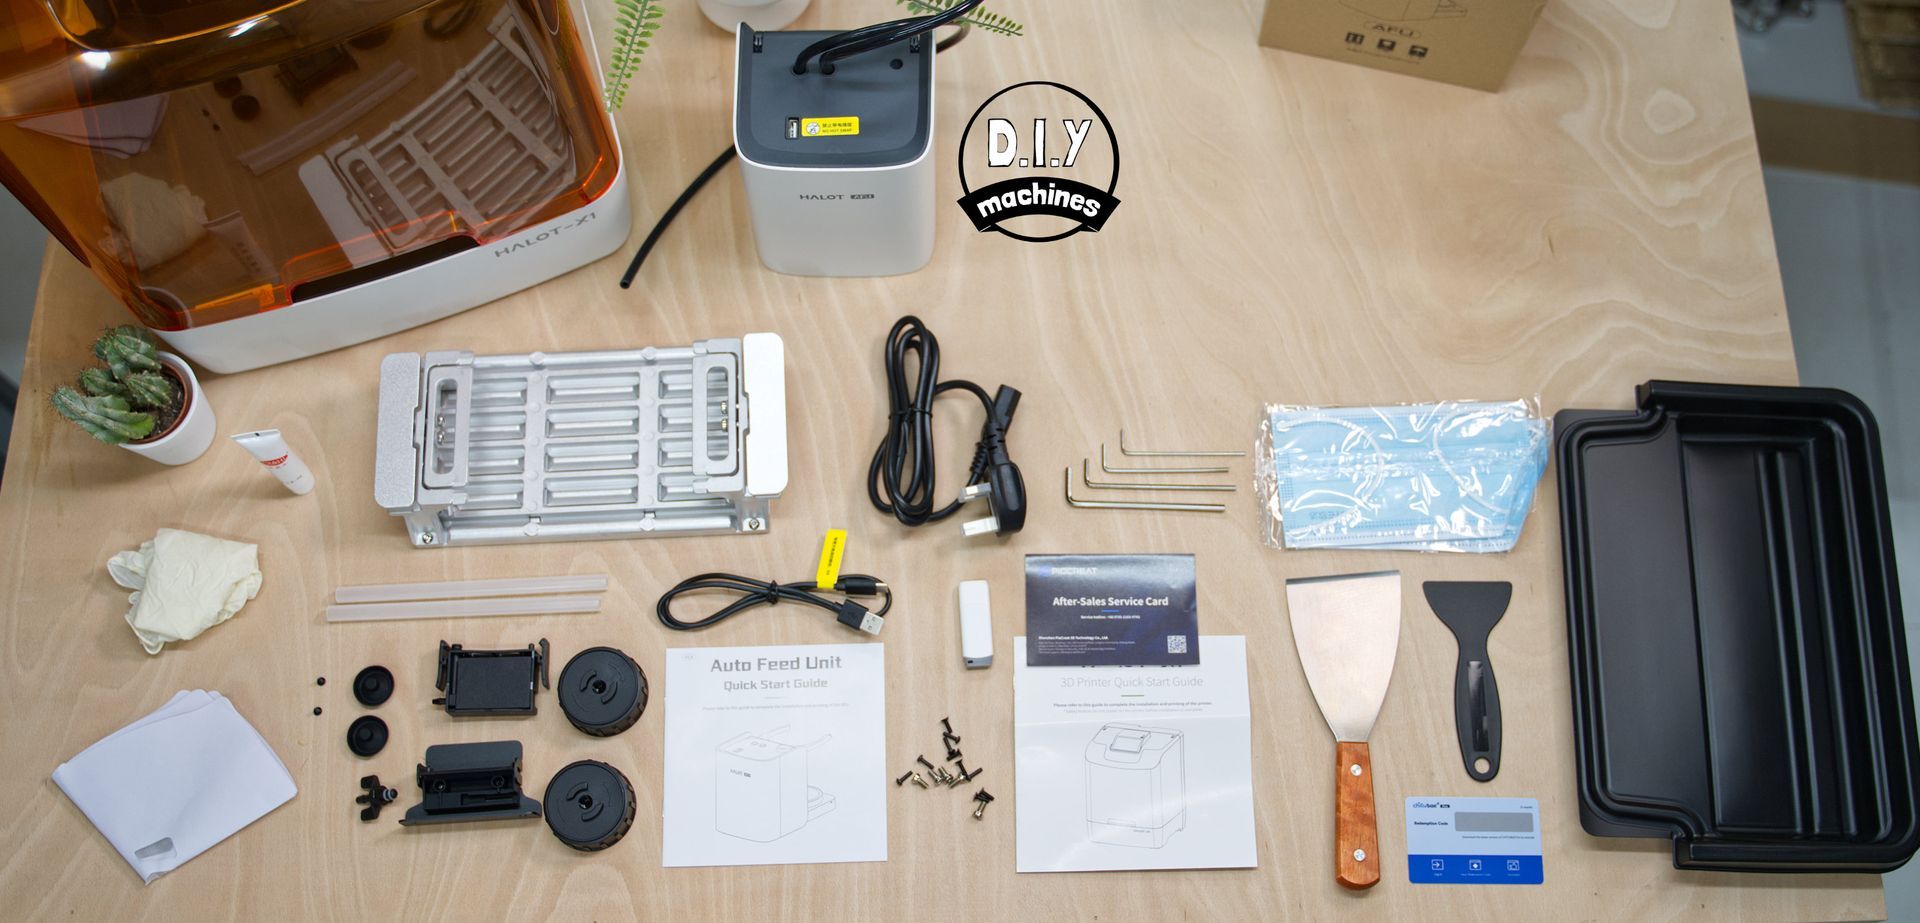
- Protective face masks
- USB Disk (preloaded with demo print, )
- Printed setup and user manual
- Gloves x4
- After sales service card
- Power supply
- Resin Drip Tray (for protecting your printer)
- Hex Keys x4
- Plastic Scraper
- ChituBox Pro Demo Key
- Lubricant
- Some resin filter funnels
- Spare screws and bolts
For the AFU
- USB Connection cable
- Detection Module and Holder
- Adapter caps x2
- Suction Tubes x2
- Silicone Mat x2
- Flat head screwdriver
I would also recommend treating yourself to some protective eye wear if you don't already have some. I don't know about you, but I'm already on my last pair of eyes so want to take good care of them. You may also want a higher quality respirator for when you're post processing your model depending on your sensitivity to the fumes - or use extraction/open a window.
Assembly
Setting up the machine for your fist print is very easy. This involves removing all the packaging material and various species of yellow tape keeping the parts firmly in place during shipment. The build platform (where your prints are created) is then slid into the guide rails at the top. Then plug in the power and switch on.
Instruction manual
The instructions are simple for the printer itself(because the set-up itself is). The AFU is a little trickier, but by no means difficult. They have clean illustrations and cover everything you need to set the machine up.
I do feel it would have been nice if they also stepped you though slicing your first model of your own and given a few tips of advice to get you going. But to be honest, there is plenty of advice on Youtube and the general web for this.
Features in more detail

This machine has a very smart, clean and professional design. The touchscreen on top is preferable for me and I suspect any taller people in general. I find it is a more ergonomic height and also does not risk being contaminated by dripping resin.
The USB port is also placed on top and I immediately tried three different USB data drives none of them have caught the lid when it hinges open which is naturally good news.
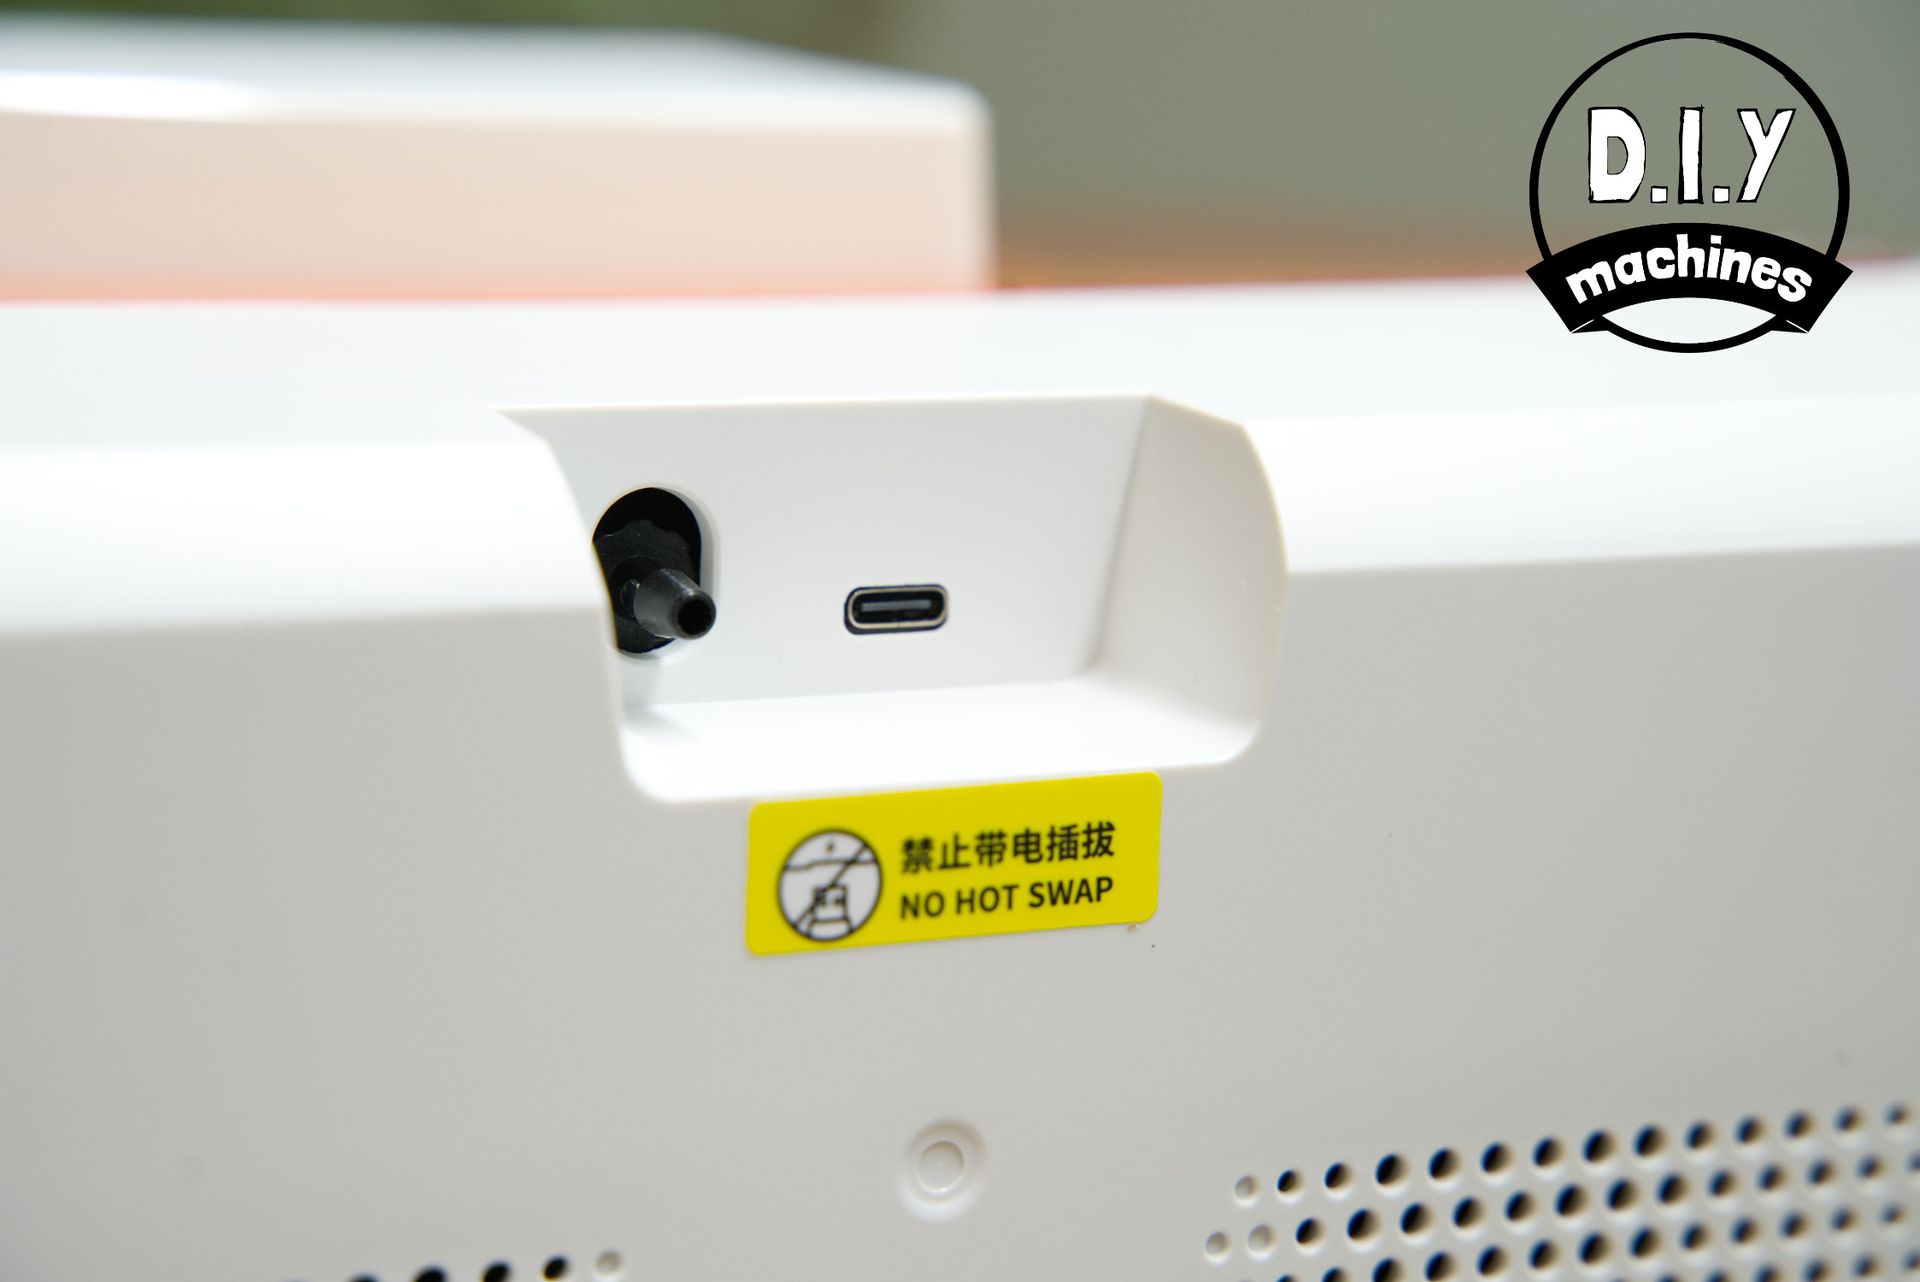
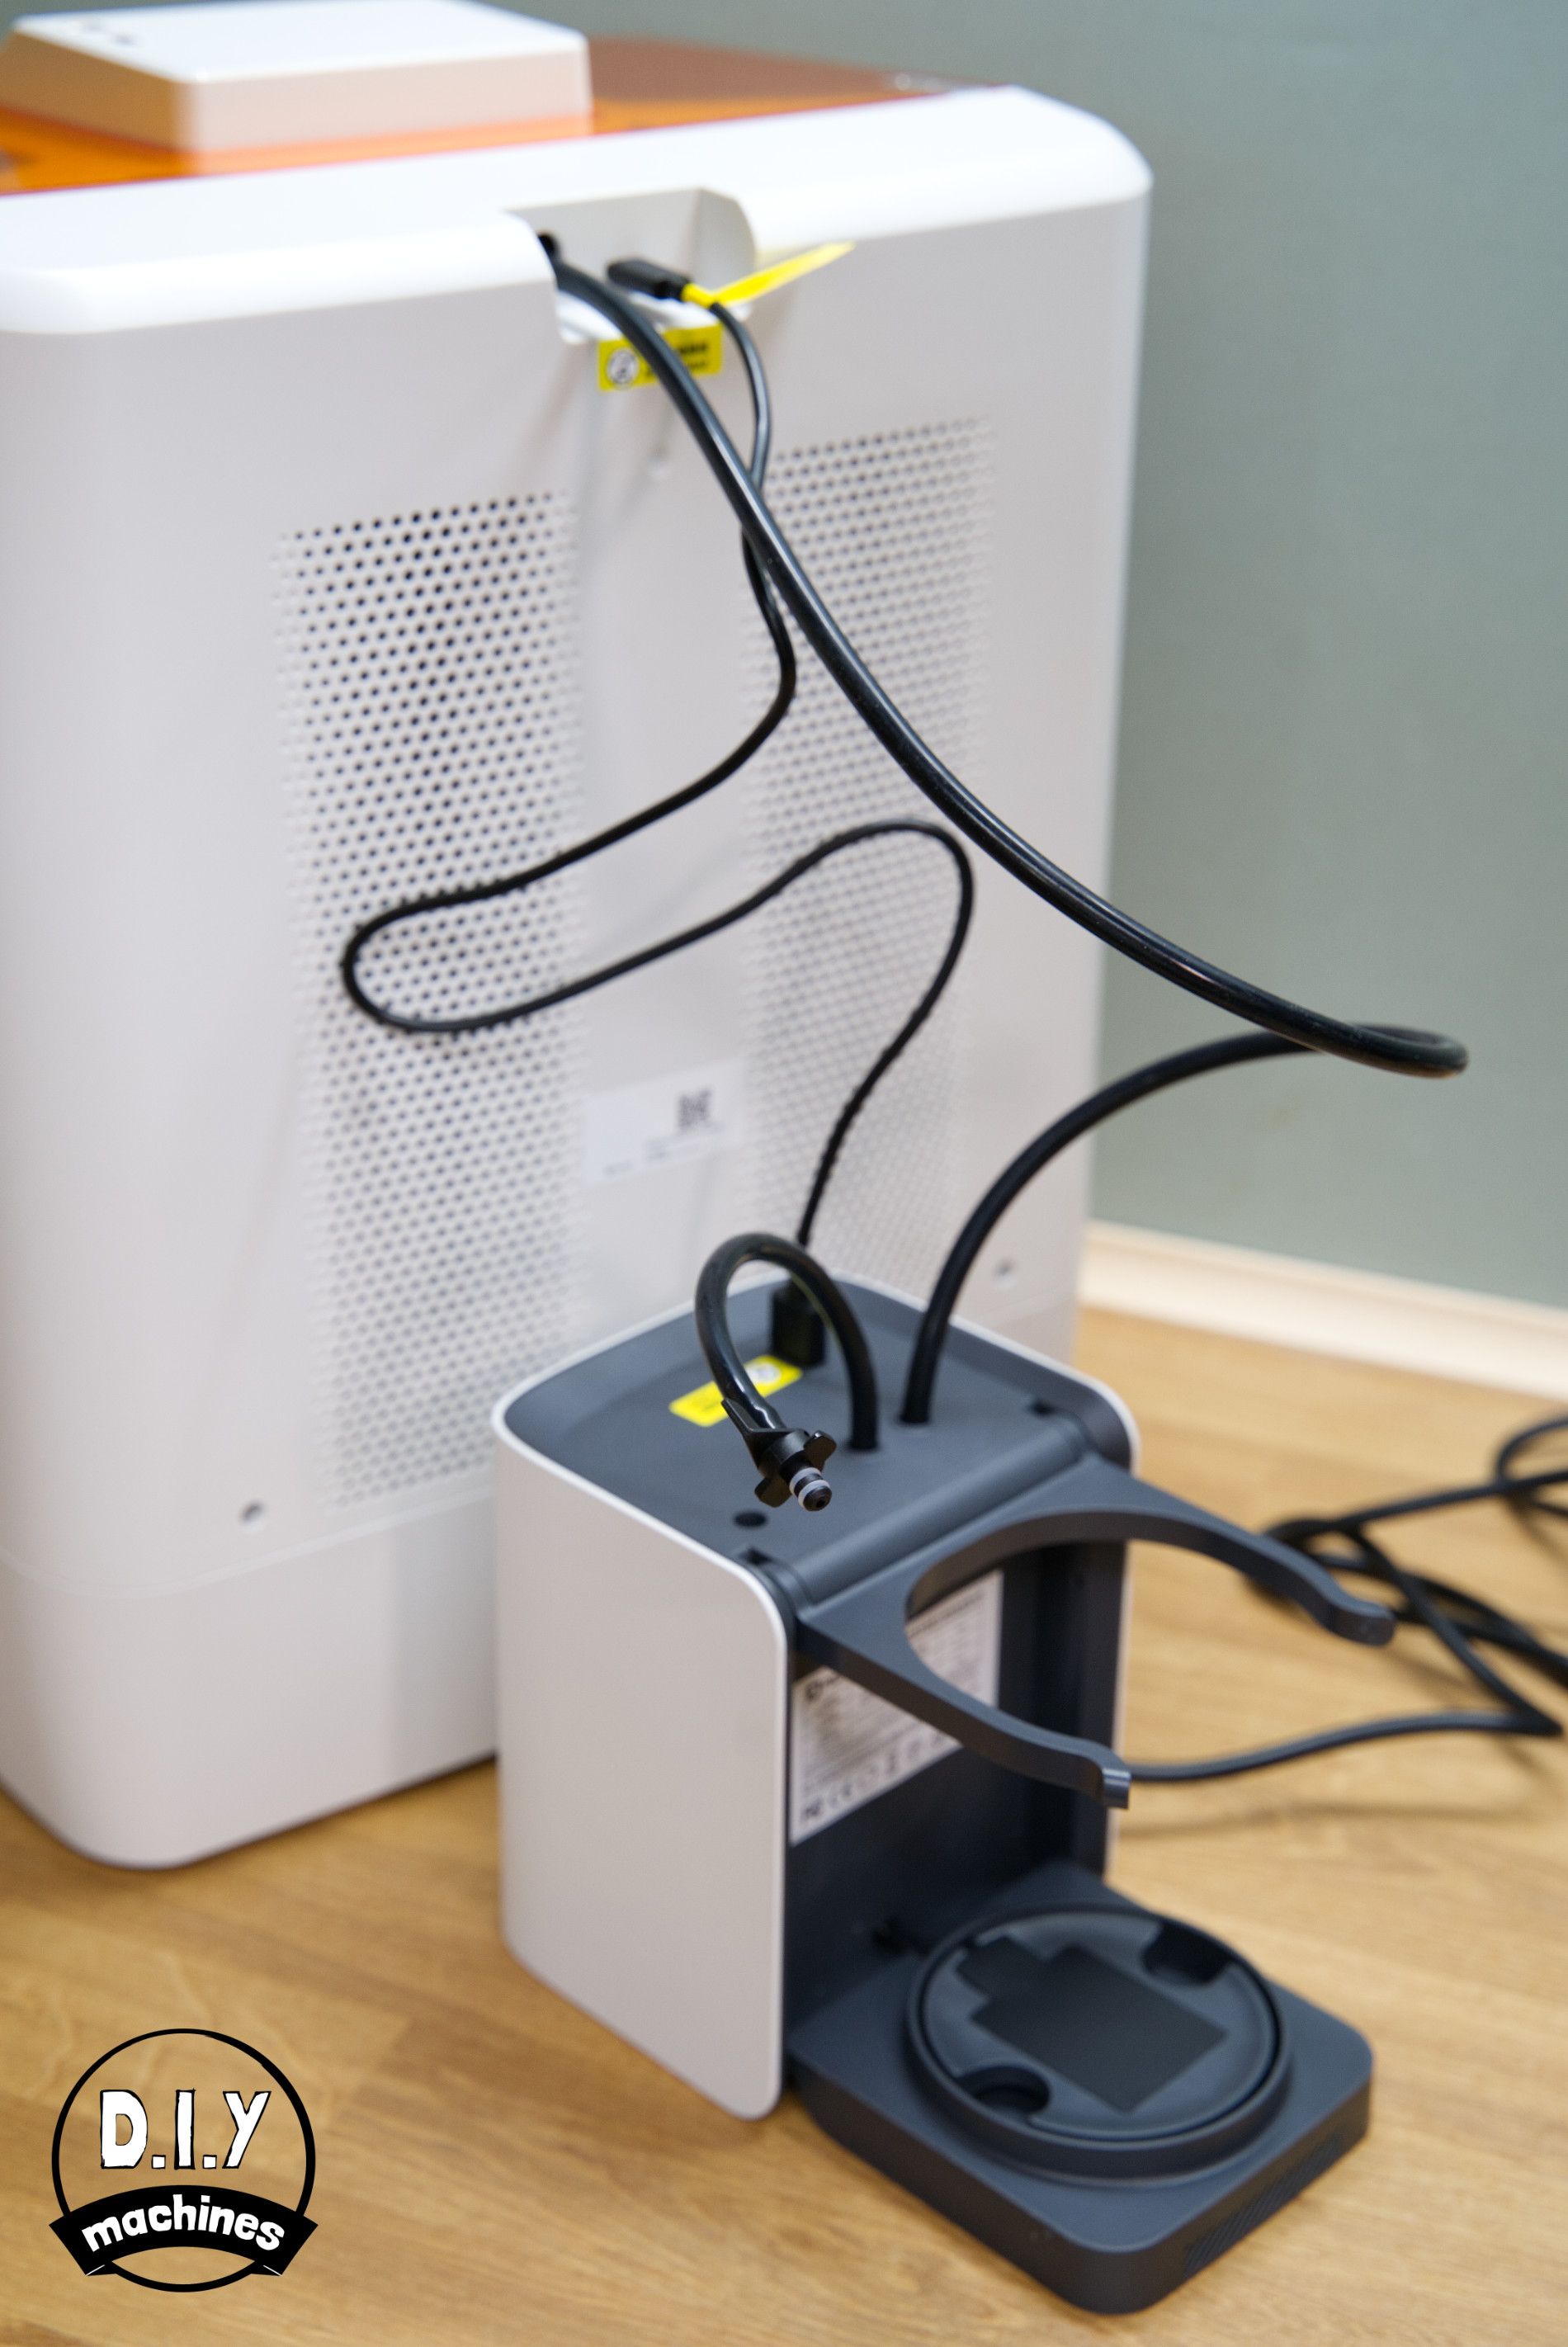
The power supply connection and power switch are both found on the rear of the machine at the bottom whilst the AFU's resin connection and data/power port is connected at the top of the rear side.
The screen is 3.98" and responds to your touch with zest which is refreshing compared to some other machines which have either a poor quality touch panel or a slow processor which introduces lag to the graphical interface.
The machine makes a gentle hum whilst printing which increases when the cooling fan kicks in a few minutes into printing. This is still not too loud, measuring about 49.1db from 1m away on average which the internet tells me is equivalent to a quiet office or normal conversation.
A hinged lid is very welcome, so gone are the days of needing additional desk/floor space to place the lid whilst you clean your machine or retrieve your model. On that note, the required footprint to be able to use the machine and open the lid is around 41cm depth, 34cm width (54cm with AFU beside it) and 82cm in height to be able to fully open the lid.

Levelling the print bed
Every time I review a rest printer lately this section is becoming shorter and shorter. To be honest, I might have well have removed it from this review but then how would you know for sure that no levelling in required. That's right - nothing, zilch, zero.
Well done PeoCreat.
How does it work?
To be honest, all I know is that it comes pre-calibrated from the factory and you don't even have to turn a knob to remove or replace it when retrieving your prints. The machine automatically secures and releases the platform.
So instead, I'll give you some trivia. PioCreat is a spin off brand from Creality to handle their line of resin printers. Glad this section is still here now?
WiFi set-up
When you first power on the machine a wizard pops up (not an actual Wizard) and steps you through accepting the usual T&C's and connecting to your Wi-fi network if you want to. Thankfully, the machine will still work without a Wi-Fi connection if you have any concerns with that, or just don't have signal where you are using your machine. In this case you will need to use sneaker-net to transfer files via the USB drive.
First Prints
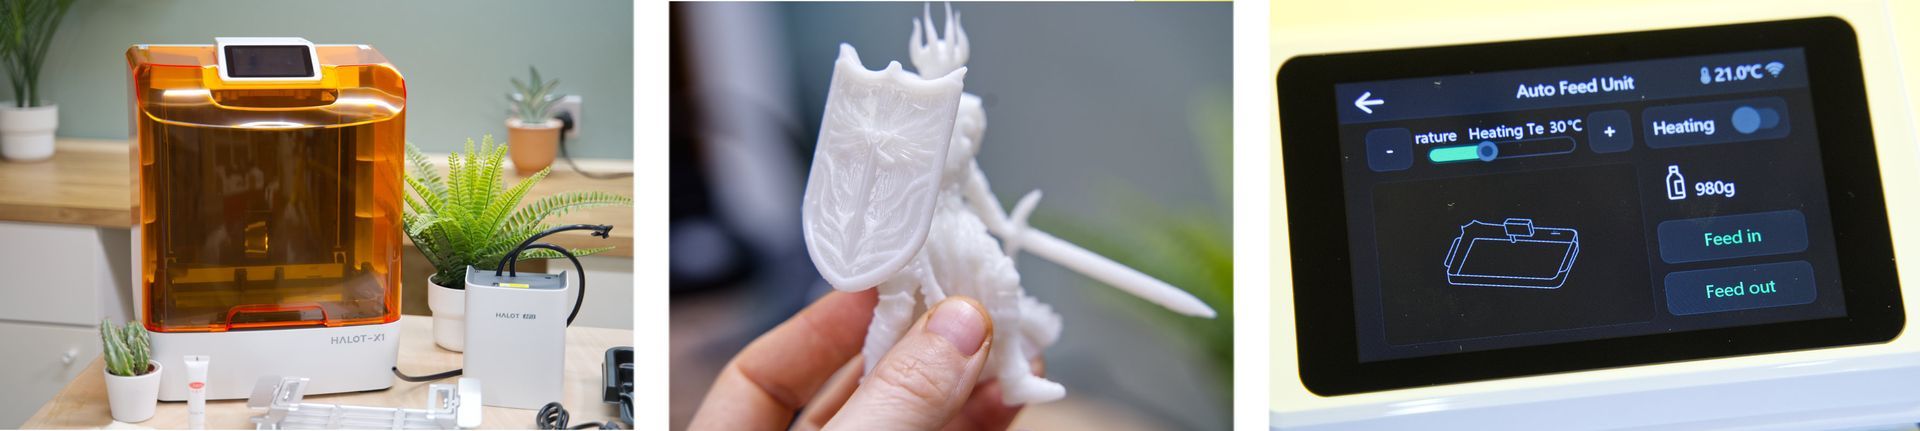
Loading Resin with the AFU
The Auto Feed Unit (AFU) is a small companion machine which attaches the main printer with a silicone tube to carry resin and single usb cable which provides both power and data to the units.
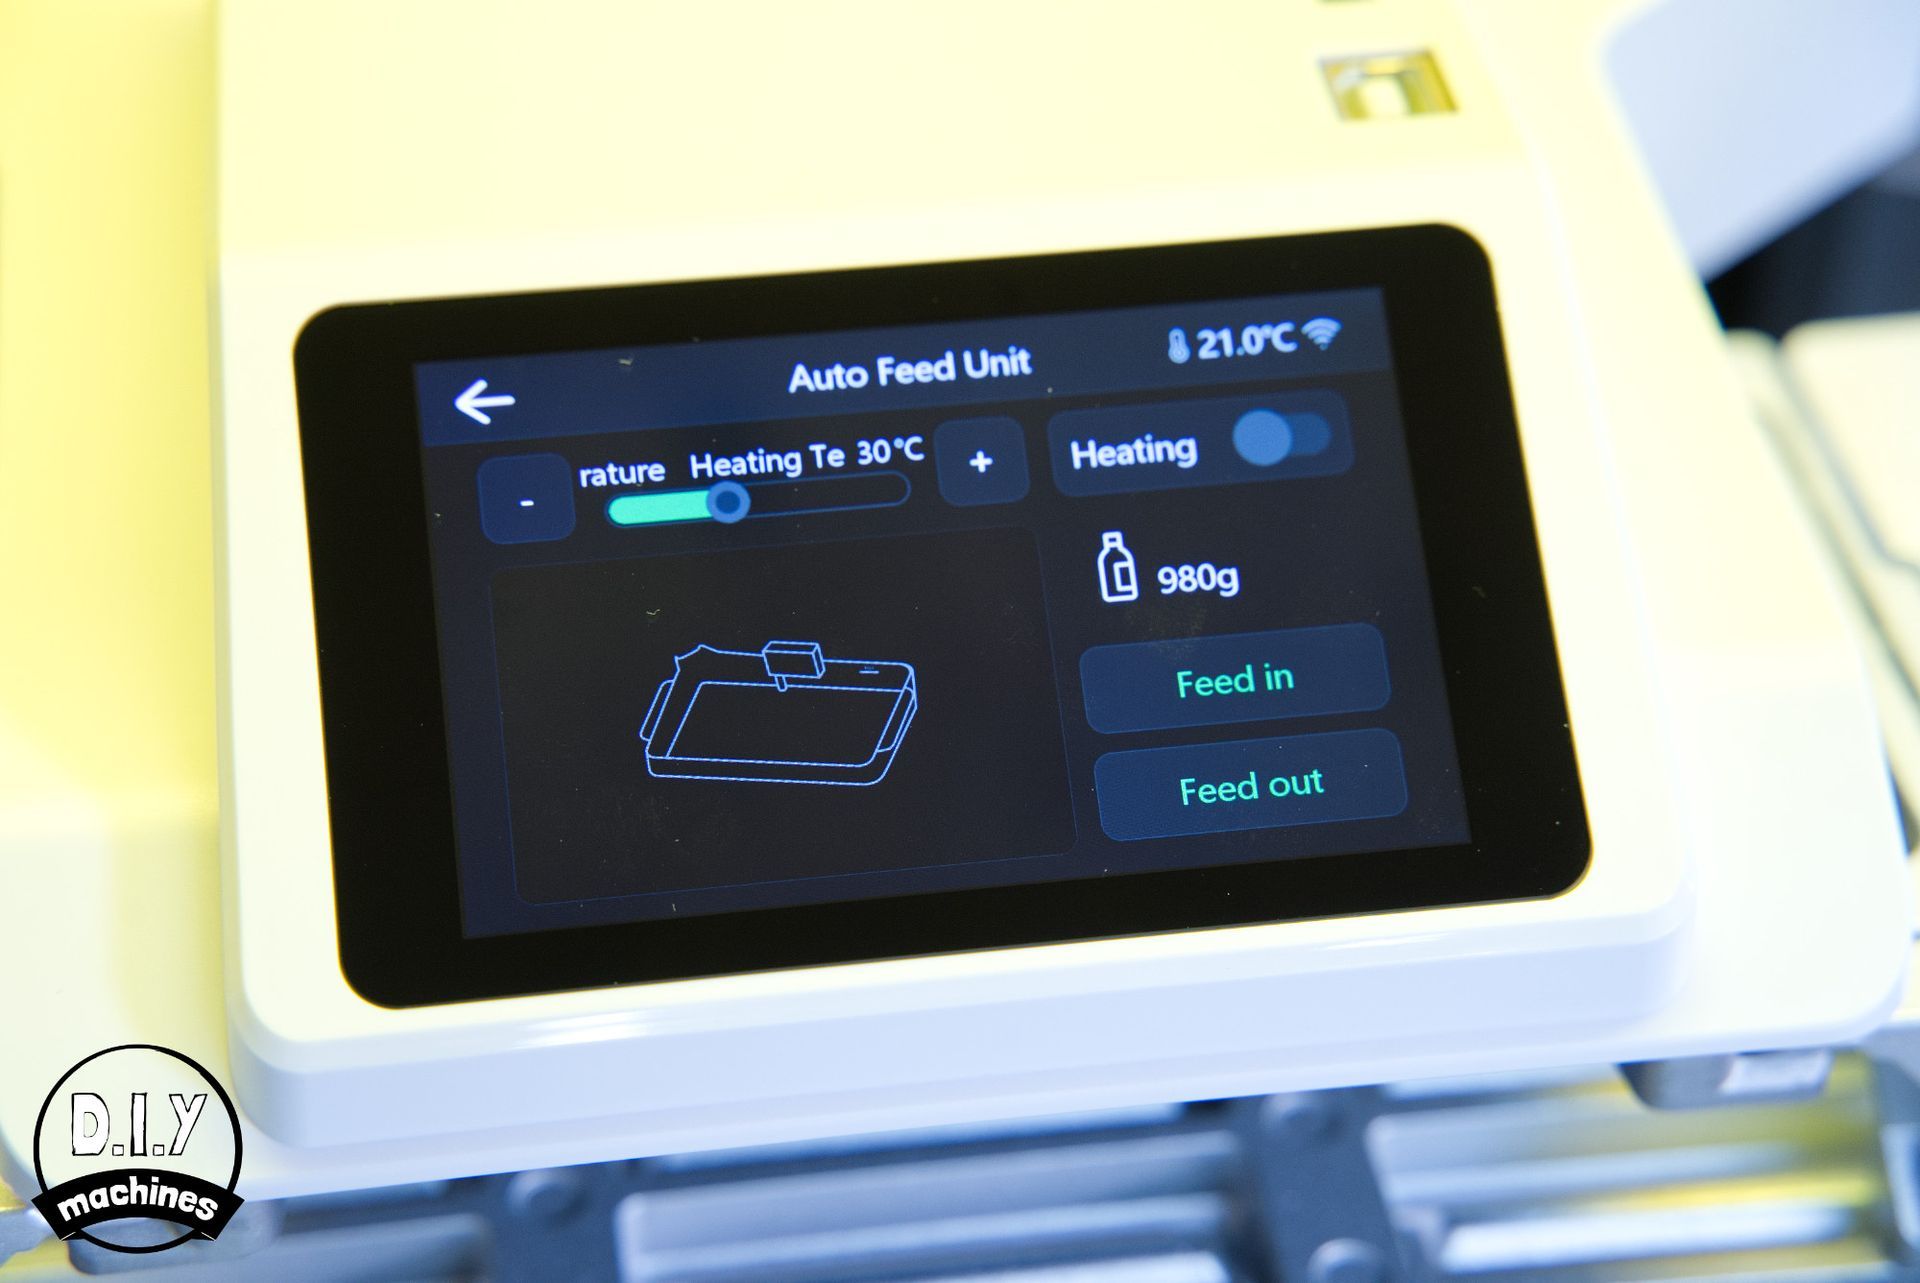
It does not have any controls on itself, but instead is automatically recognised by the HALOT-X1 and appears as additional controls on the printers screen. Very sleek.
The AFU provides several features tot he overall package:
- Auto Refill: The AFU pumps more resin into the vat when it is required both at the start of the print and during the print.
- Resin Reclaim: At the end of the print you can have the AFU pump most of the resin back into the bottle. (However some does remain in the vat.
- Partial Heating:
The AFU can pre-heat the resin on its way to the printer.
- RFID bottle-based resin profiles: If you use resin from PeoCreat the profile containing the best curing settings for that resin is automatically read by a reader in the base of the AFU and communicated to your printer.
- Fluid Level Monitoring: A laser is used to monitor the level of the resin in the vat so that the AFU can top it up when required. It also allows for the printer to pause should it run low on resin. The AFU also weighs the resin bottle it holds to know when this may be running low as well as letting you see how much you may have left in the bottle. This is useful as the bottles are intentionally produced opaque so as to prevent the resin from curing in storage - however this would normally make it a little more tricky to judge how much you have left.

In my first print the printer complained of problems with the AFU as I suspect it was trying to pump the resin to the print vat but was not seeing any arrive on its fluid monitor. This could be because it's the first use of the machine and the silicone tubes have not yet been primed with resin. I just needed to tell the printer to try again and this time (and every time onwards) it has worked without a hitch.
I have a few gripes with the system. I'm not so convinced with the AFU's ability to reclaim resin back into the bottle is 100% useful, it does manage to pump most of the resin back but you still need to pour the last bit back into the bottle by removing the vat and tilting it in through a funnel. The more pressing issue comes with switching resin types / colours. I mean for 95% of my prints I use white or grey resin as they're either going to be functional components or decorated with paint later. But, when I wanted to switch from the solid white to a clear blue you had to go through the tedious process of cleaning the lines.
I got around this by sticking with the AFU being used for my default white and grey solid resins. But then turning off the AFU in the settings and pouring (and retrieving) my blue clear resin the old fashioned way directly into the vat. This meant the AFU lines could continue to hold the solid white/grey resins without causing any issues.
That being said, the AFU has vastly reduced my need to interact with uncured resin and this is absolutely the way I hope designs continue to go.
Build Plate: The Quick Release Twist System
Once the print finishes, it can be left to drip back into the resin tray briefly. Next, it requires cleaning (using alcohol for this type of resin) and then curing. But to be able to do this we need to remove the printed object from the build plate and to aid us with this is the HALOT-X1's quick release plate.
It consist of internal groves which can move back and forth to pull away from the print and then push the print off the plate and this is all achieved by twisting the two levels/handles at either end of the plate.

I'm a big fan of this, as not only does it further reduce your interaction with uncured resin, but also helps to reduce the likelihood of damage to your model. A couple of twists and the print easily detaches itself and drops into the vat of alcohol ready to be cleaned. Before this, on other printers, you would often need to resort to rather aggressively attacking the base of the print where it meets the build plate with a metal scraper risking cut's to yourself and gloves, along with bit's flying off around the room. I have both cut myself and had a piece of uncured resin fly into my eye which required washing through uncomfortably. (Lesson learnt to always wear safety glasses).
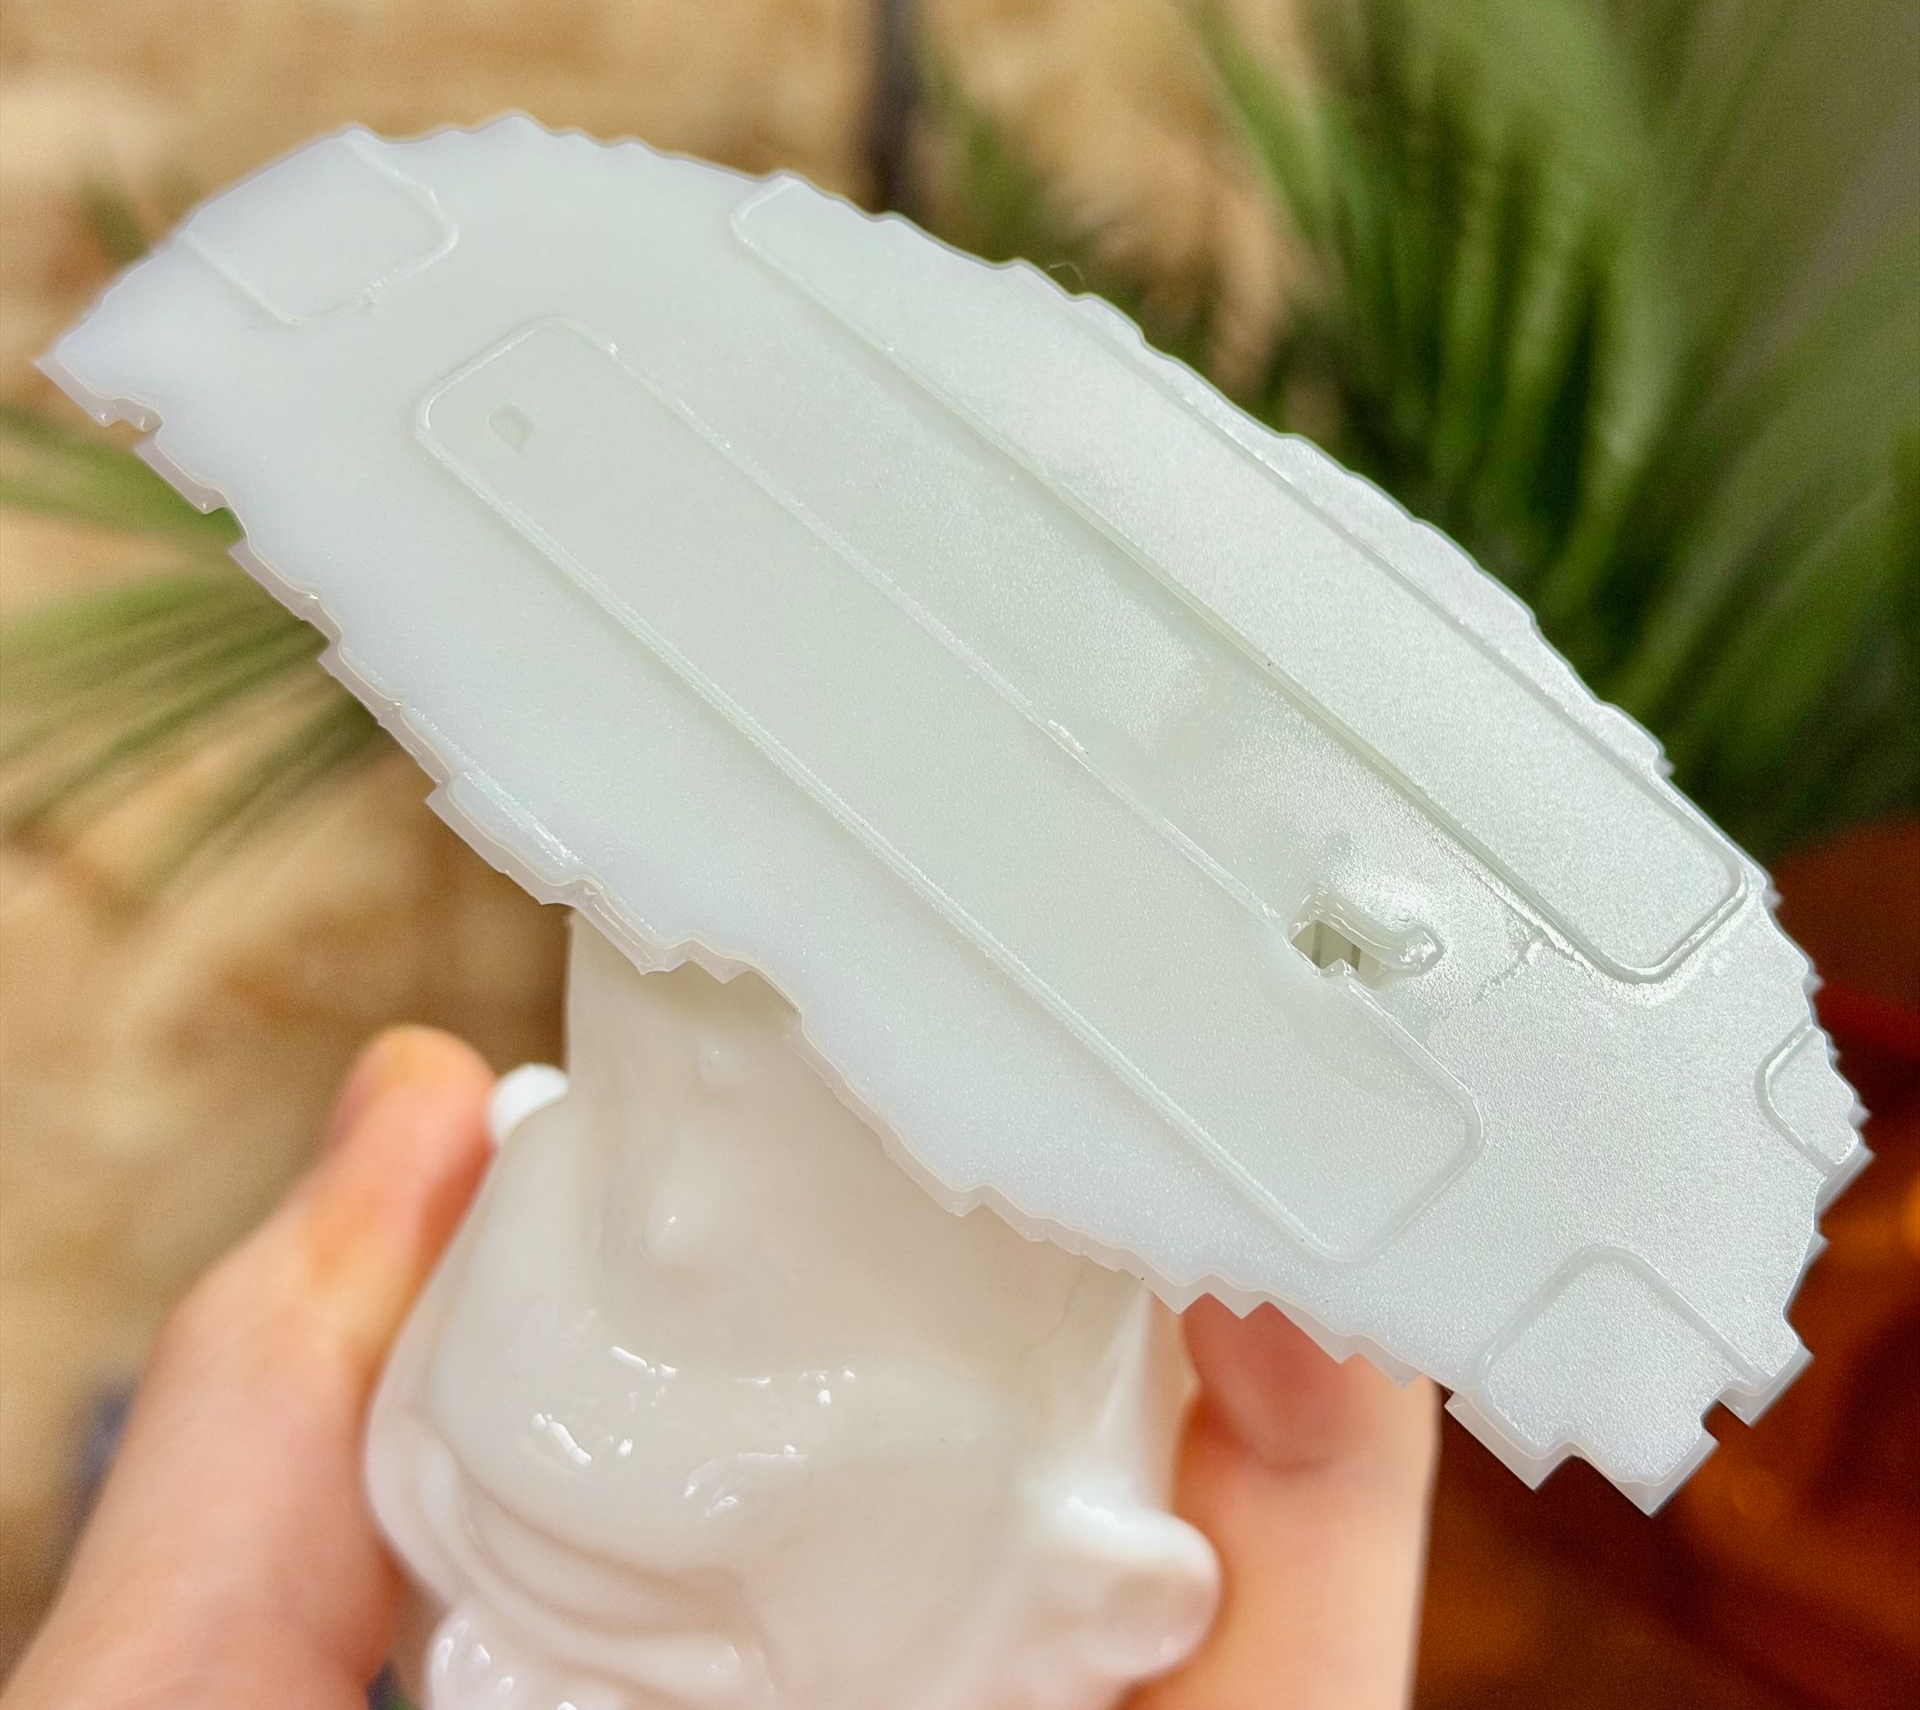
The system works well but is not entirely without its own pitfalls.
The not-entirely-flat build plate leaves an impression on your models. Most of the time for me this is not a problem, and if it will be you can always print your model raised up a few mm's on top of a raft and support structures.
Taking into account the transfer of the build plates topography it is a system I am absolutely enjoying. Also, having now printed ten models on the printer, only once has a model failed to attach itself during printing.
Washing and Curing - UW-03

The Creality UW-03 is a large-format wash-and-cure station designed to handle the increasingly big resin prints that modern MSLA machines can produce. The alcohol container can hold 10-litres (of models or alcohol) for a large washing capacity. It's a great addition for any users who want to streamline cleanup and post-processing. The unit feels sturdy, the controls are simple (didn't even need to read the manual), and the included rotating turntable ensures that light coverage during curing is consistent on all sides of your prints.
Washing performance is genuinely good. The UW-03’s large magnetic impeller creates a strong, swirling flow that removes uncured resin effectively—even on more delicate models with tight crevices. The direction changed every couple of minutes to help ensure the currents get into all the different areas of your models. Being able to submerge big build plates directly is a big timesaver, though smaller prints benefit from using the provided basket. The lid seals well, which helps keep IPA fumes to a minimum, and the wide tank makes it easy to decant and filter your solvent when it needs refreshing.
The wire basket can support the build platform so you can either wash the print and platform together at the same time (though this requires leaving the lid off the solvent bath) or you can twist the base and drop the print into the basket to clean the print whilst you return the build platform back to the resin printer and get going with your next job. Super efficient workflow.
After the wash, I like to remove any support structures whilst they are still soft (personal preference) and let the solvent air dry before moving onto the process of curing.
Curing is handled by a tall column of 385/405 nm LEDs in one corner that does a reliable job of hitting models evenly. I tend to reposition the model a few times during curing to improve the reach of the UV rays. The turntable rotates smoothly, and the curing results are predictable: surfaces come out fully hardened, with no under-cured areas unless the print is extremely geometrically complex. It’s also quieter than many of the compact wash-and-cure units I’ve used, which is a welcome improvement. There are two speeds of curing offered, and the only change I can see when you pick 'fast' is that the turntable turns around quicker. I don't think you actually achieve a faster curing time.
There are a couple of considerations worth noting. The UW-03’s size is both a blessing and a drawback: you get masses of space for big prints, but you need a large enough workshop area to accommodate it, and filling the tank requires significantly more IPA than smaller systems. The lack of heated curing or agitation-speed control may also matter to much more advanced users. That said, for anyone working with medium to large resin printers, the Creality UW-03 provides a reliable, straightforward post-processing workflow with enough capacity to keep up with modern machines like the HALOT-X1 on trial here. It’s a solid and practical upgrade from the typical small wash-and-cure combos.
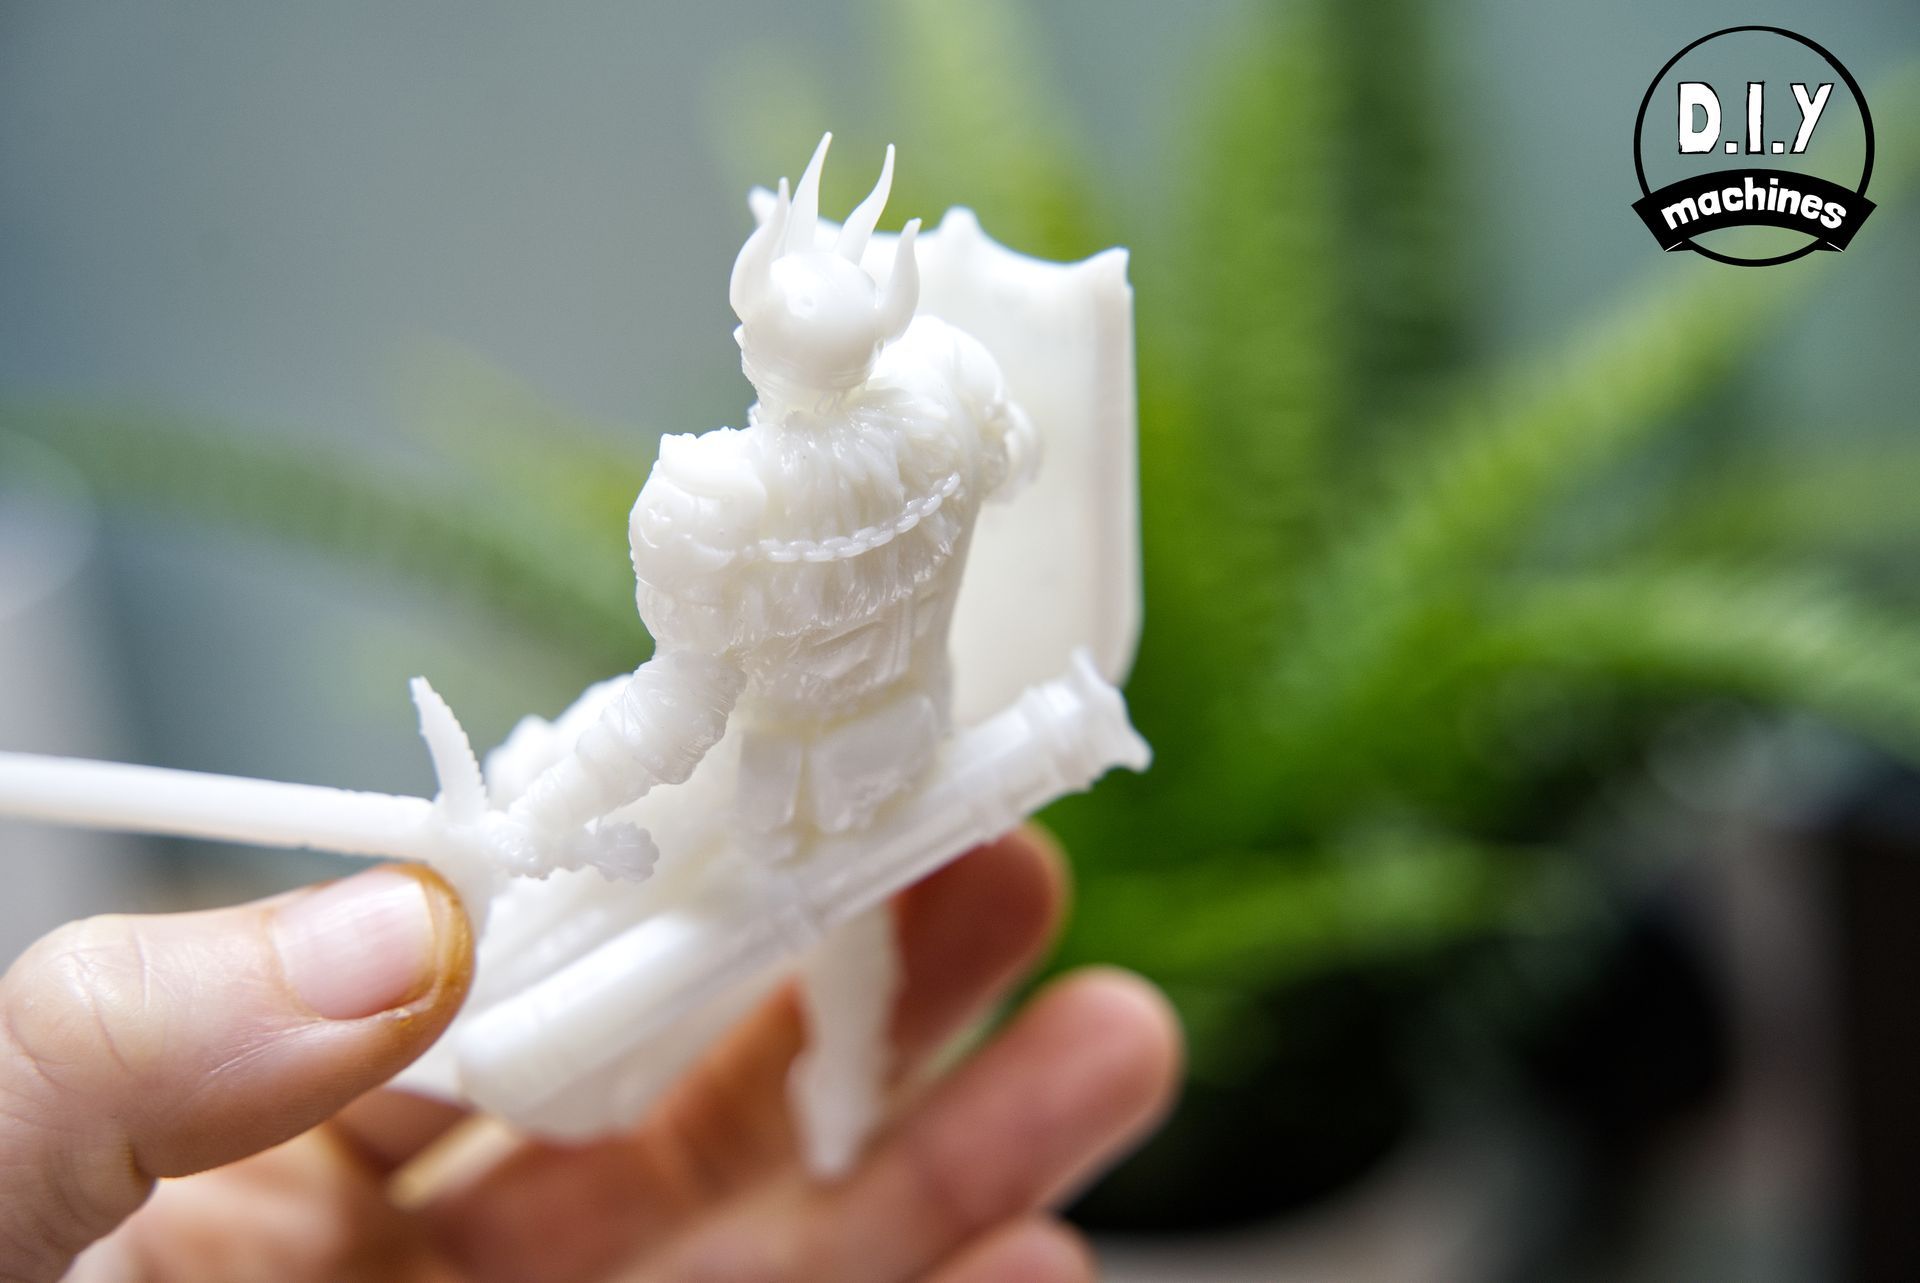
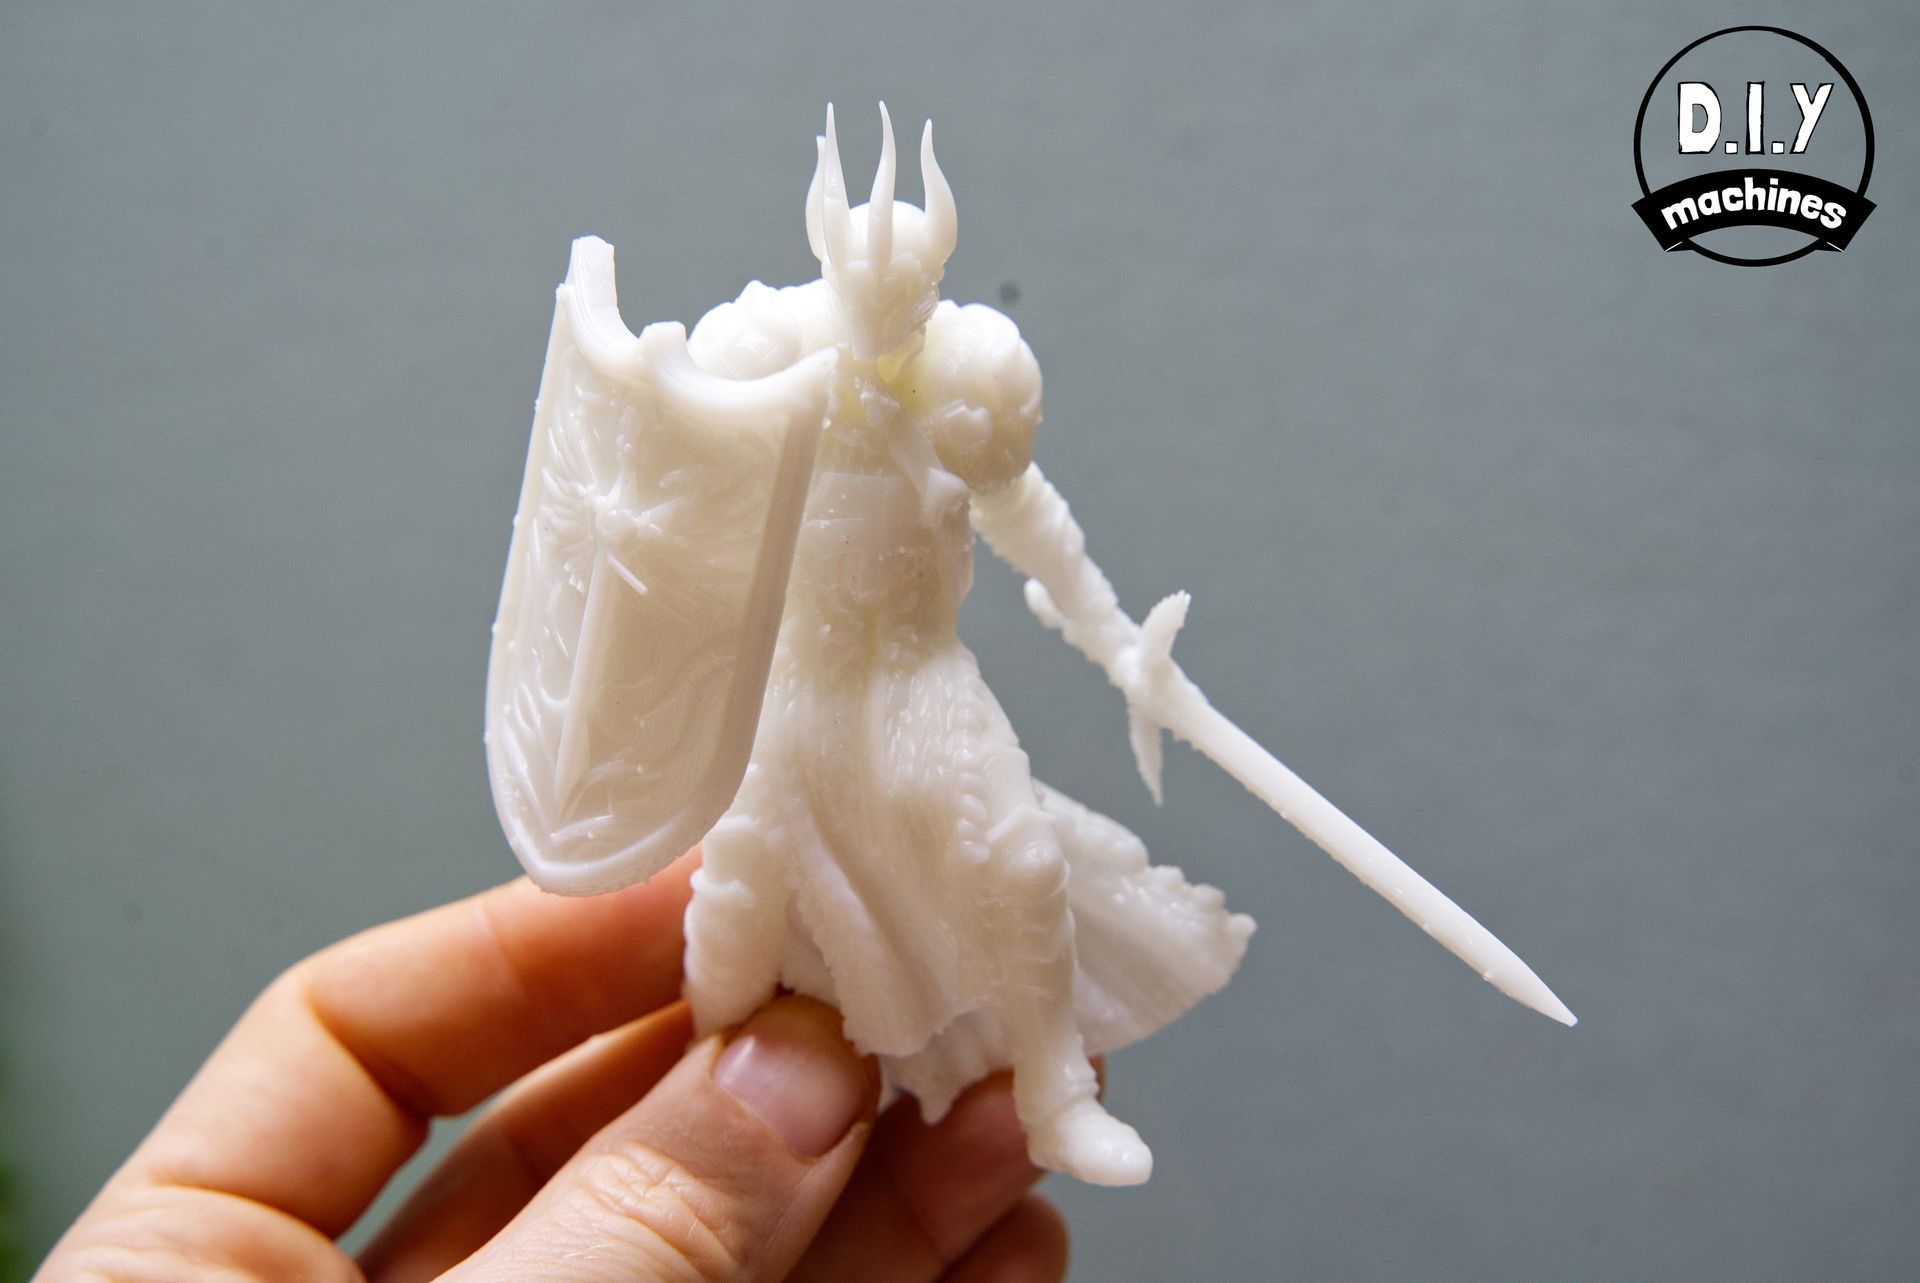
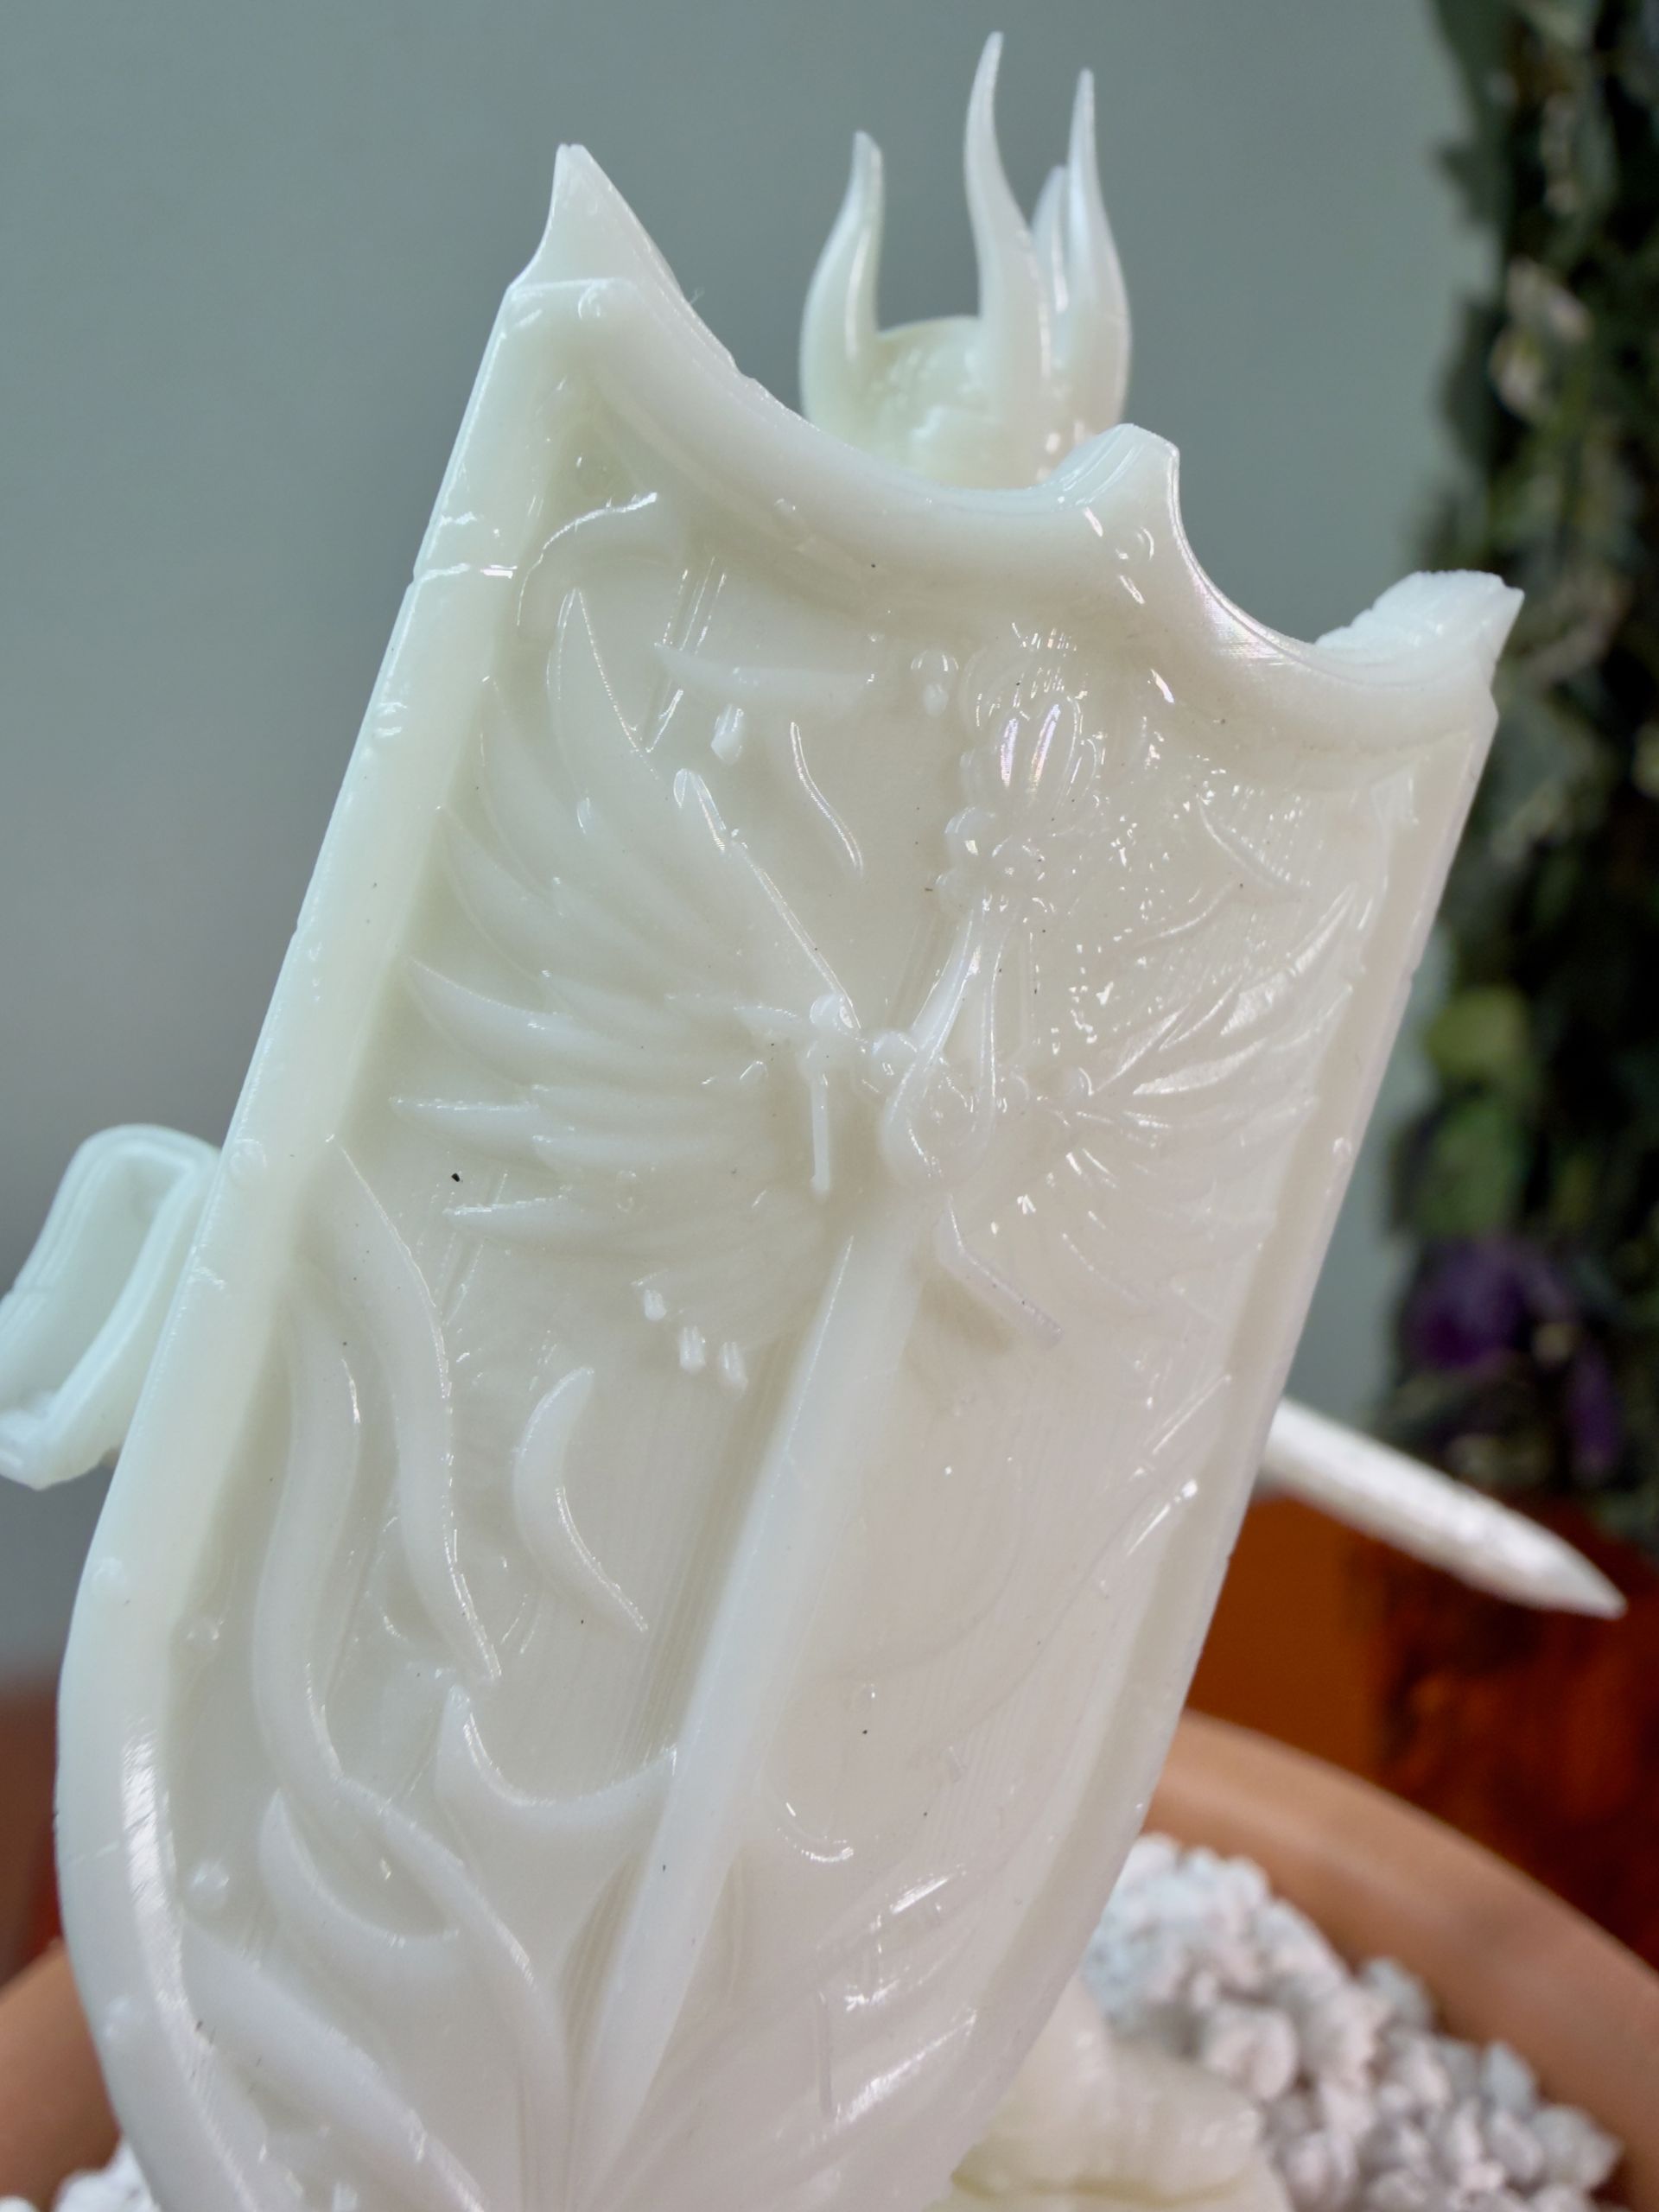
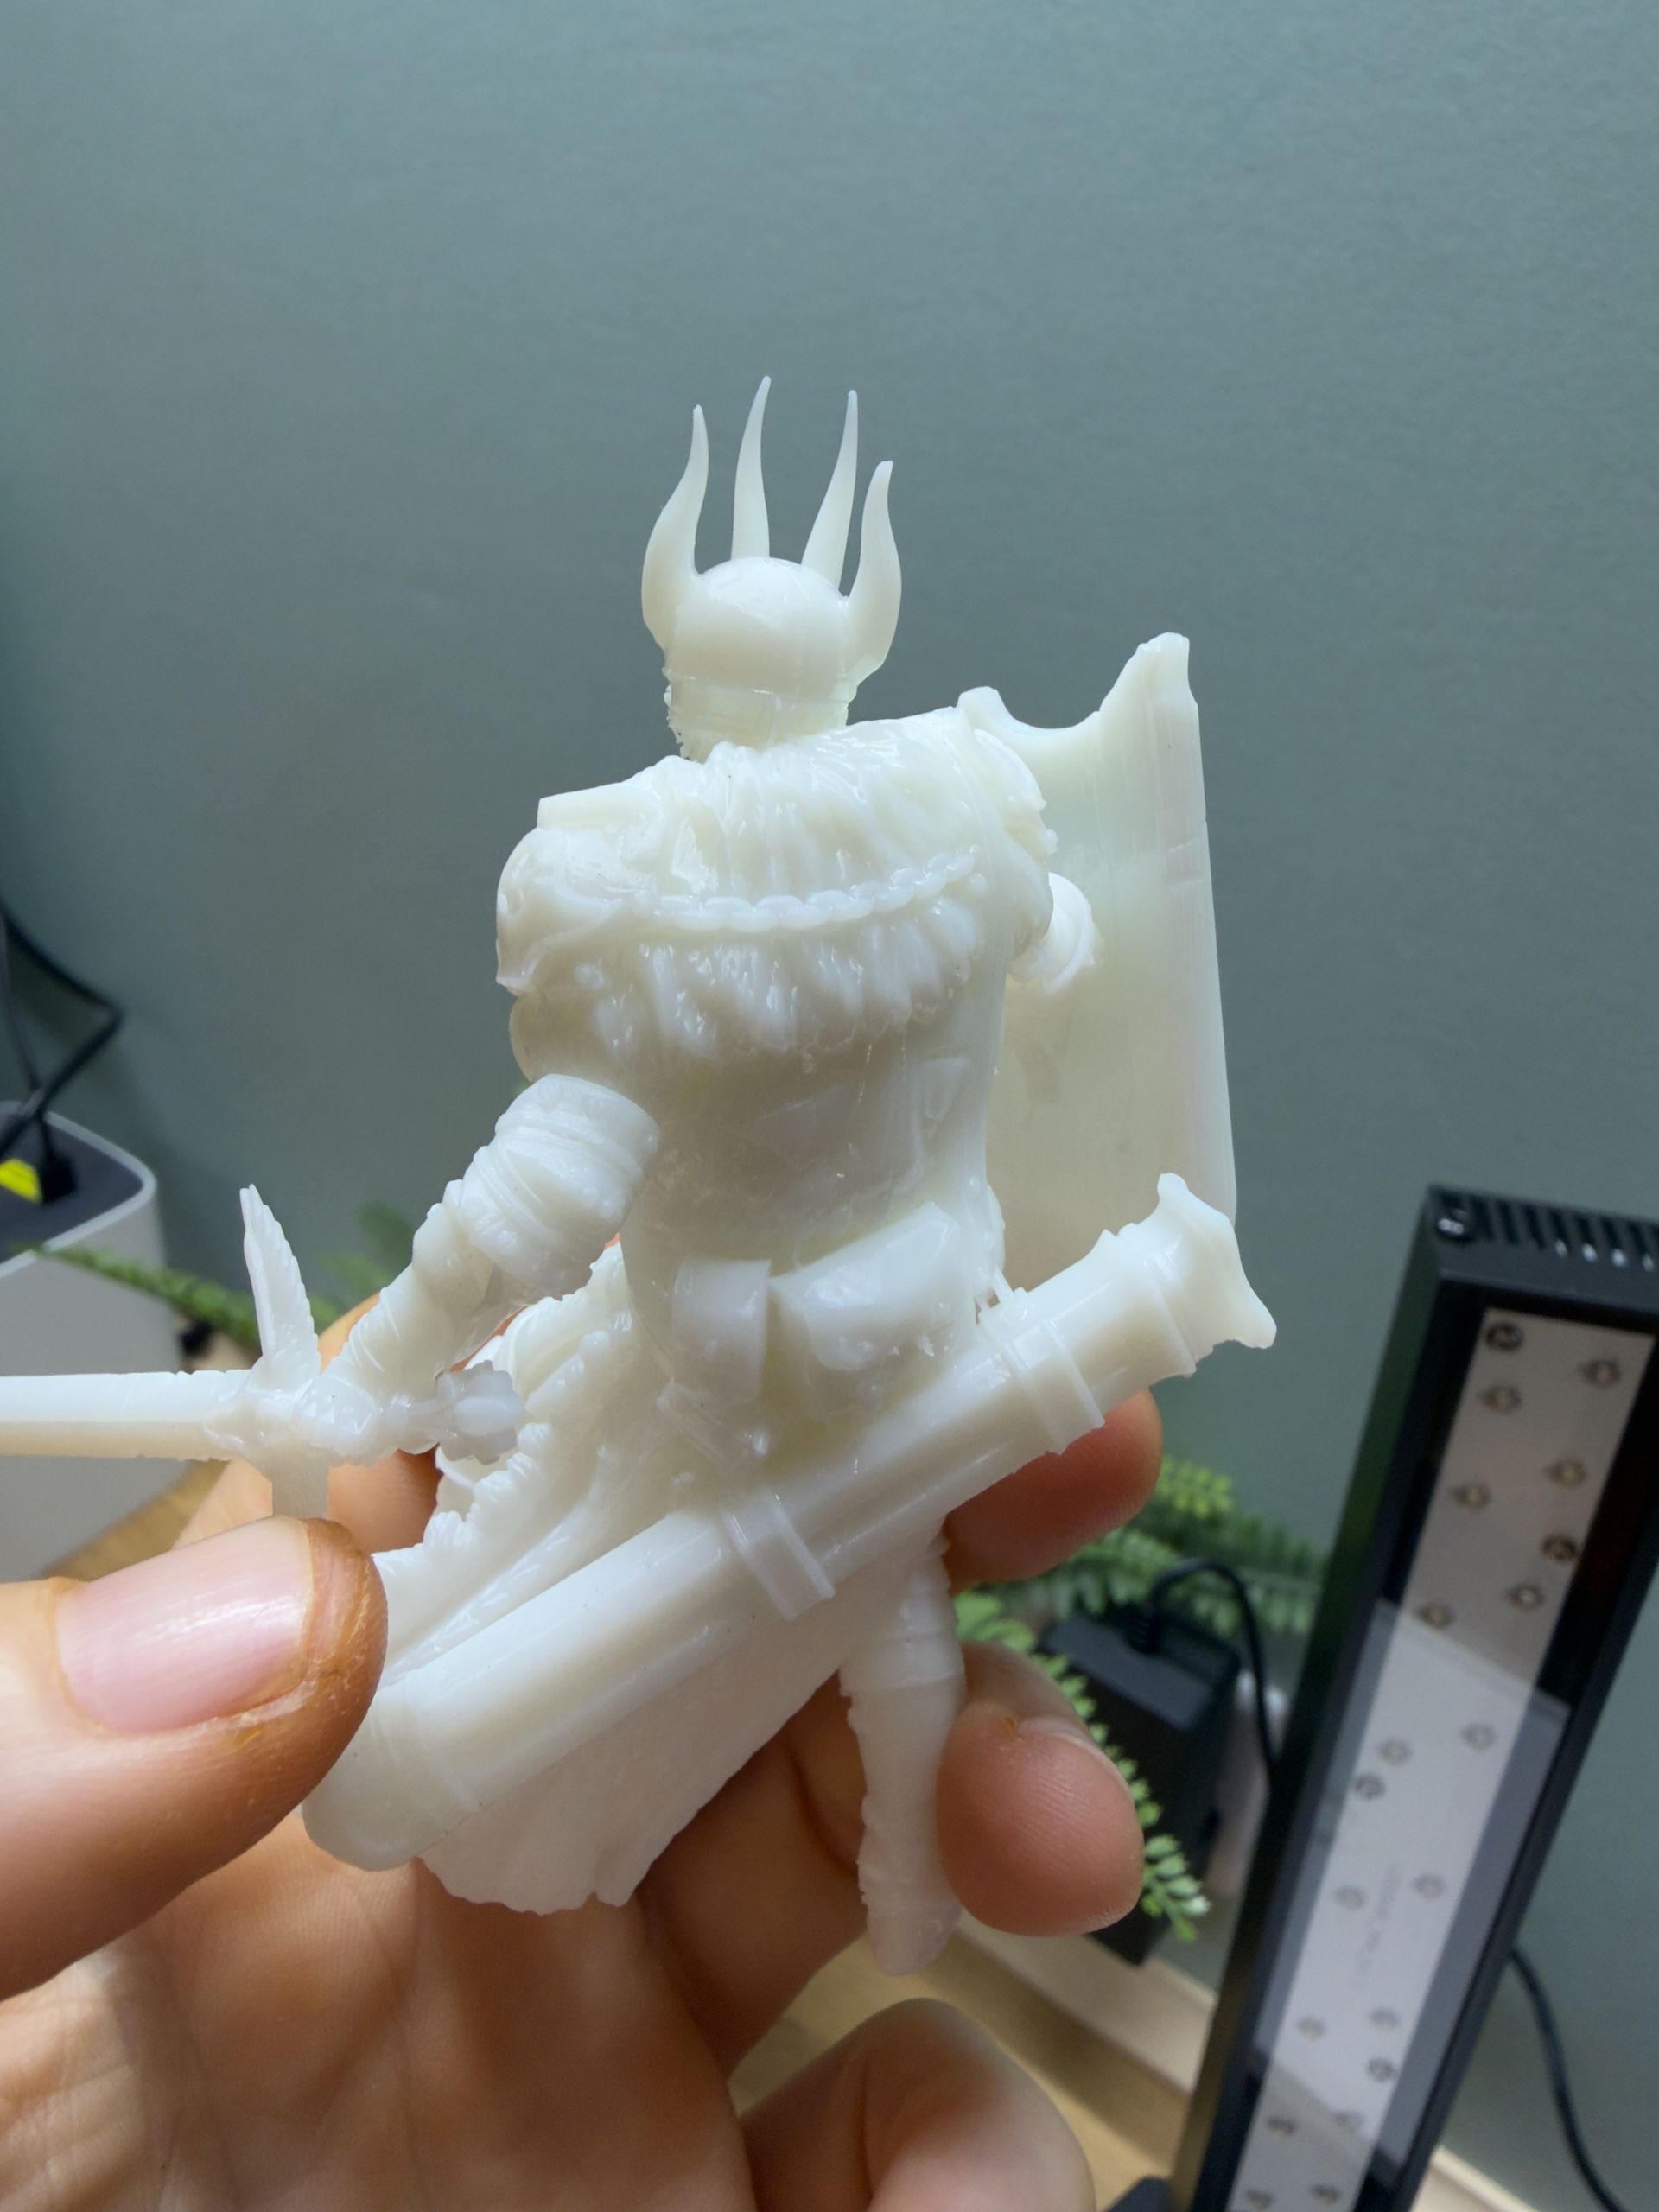
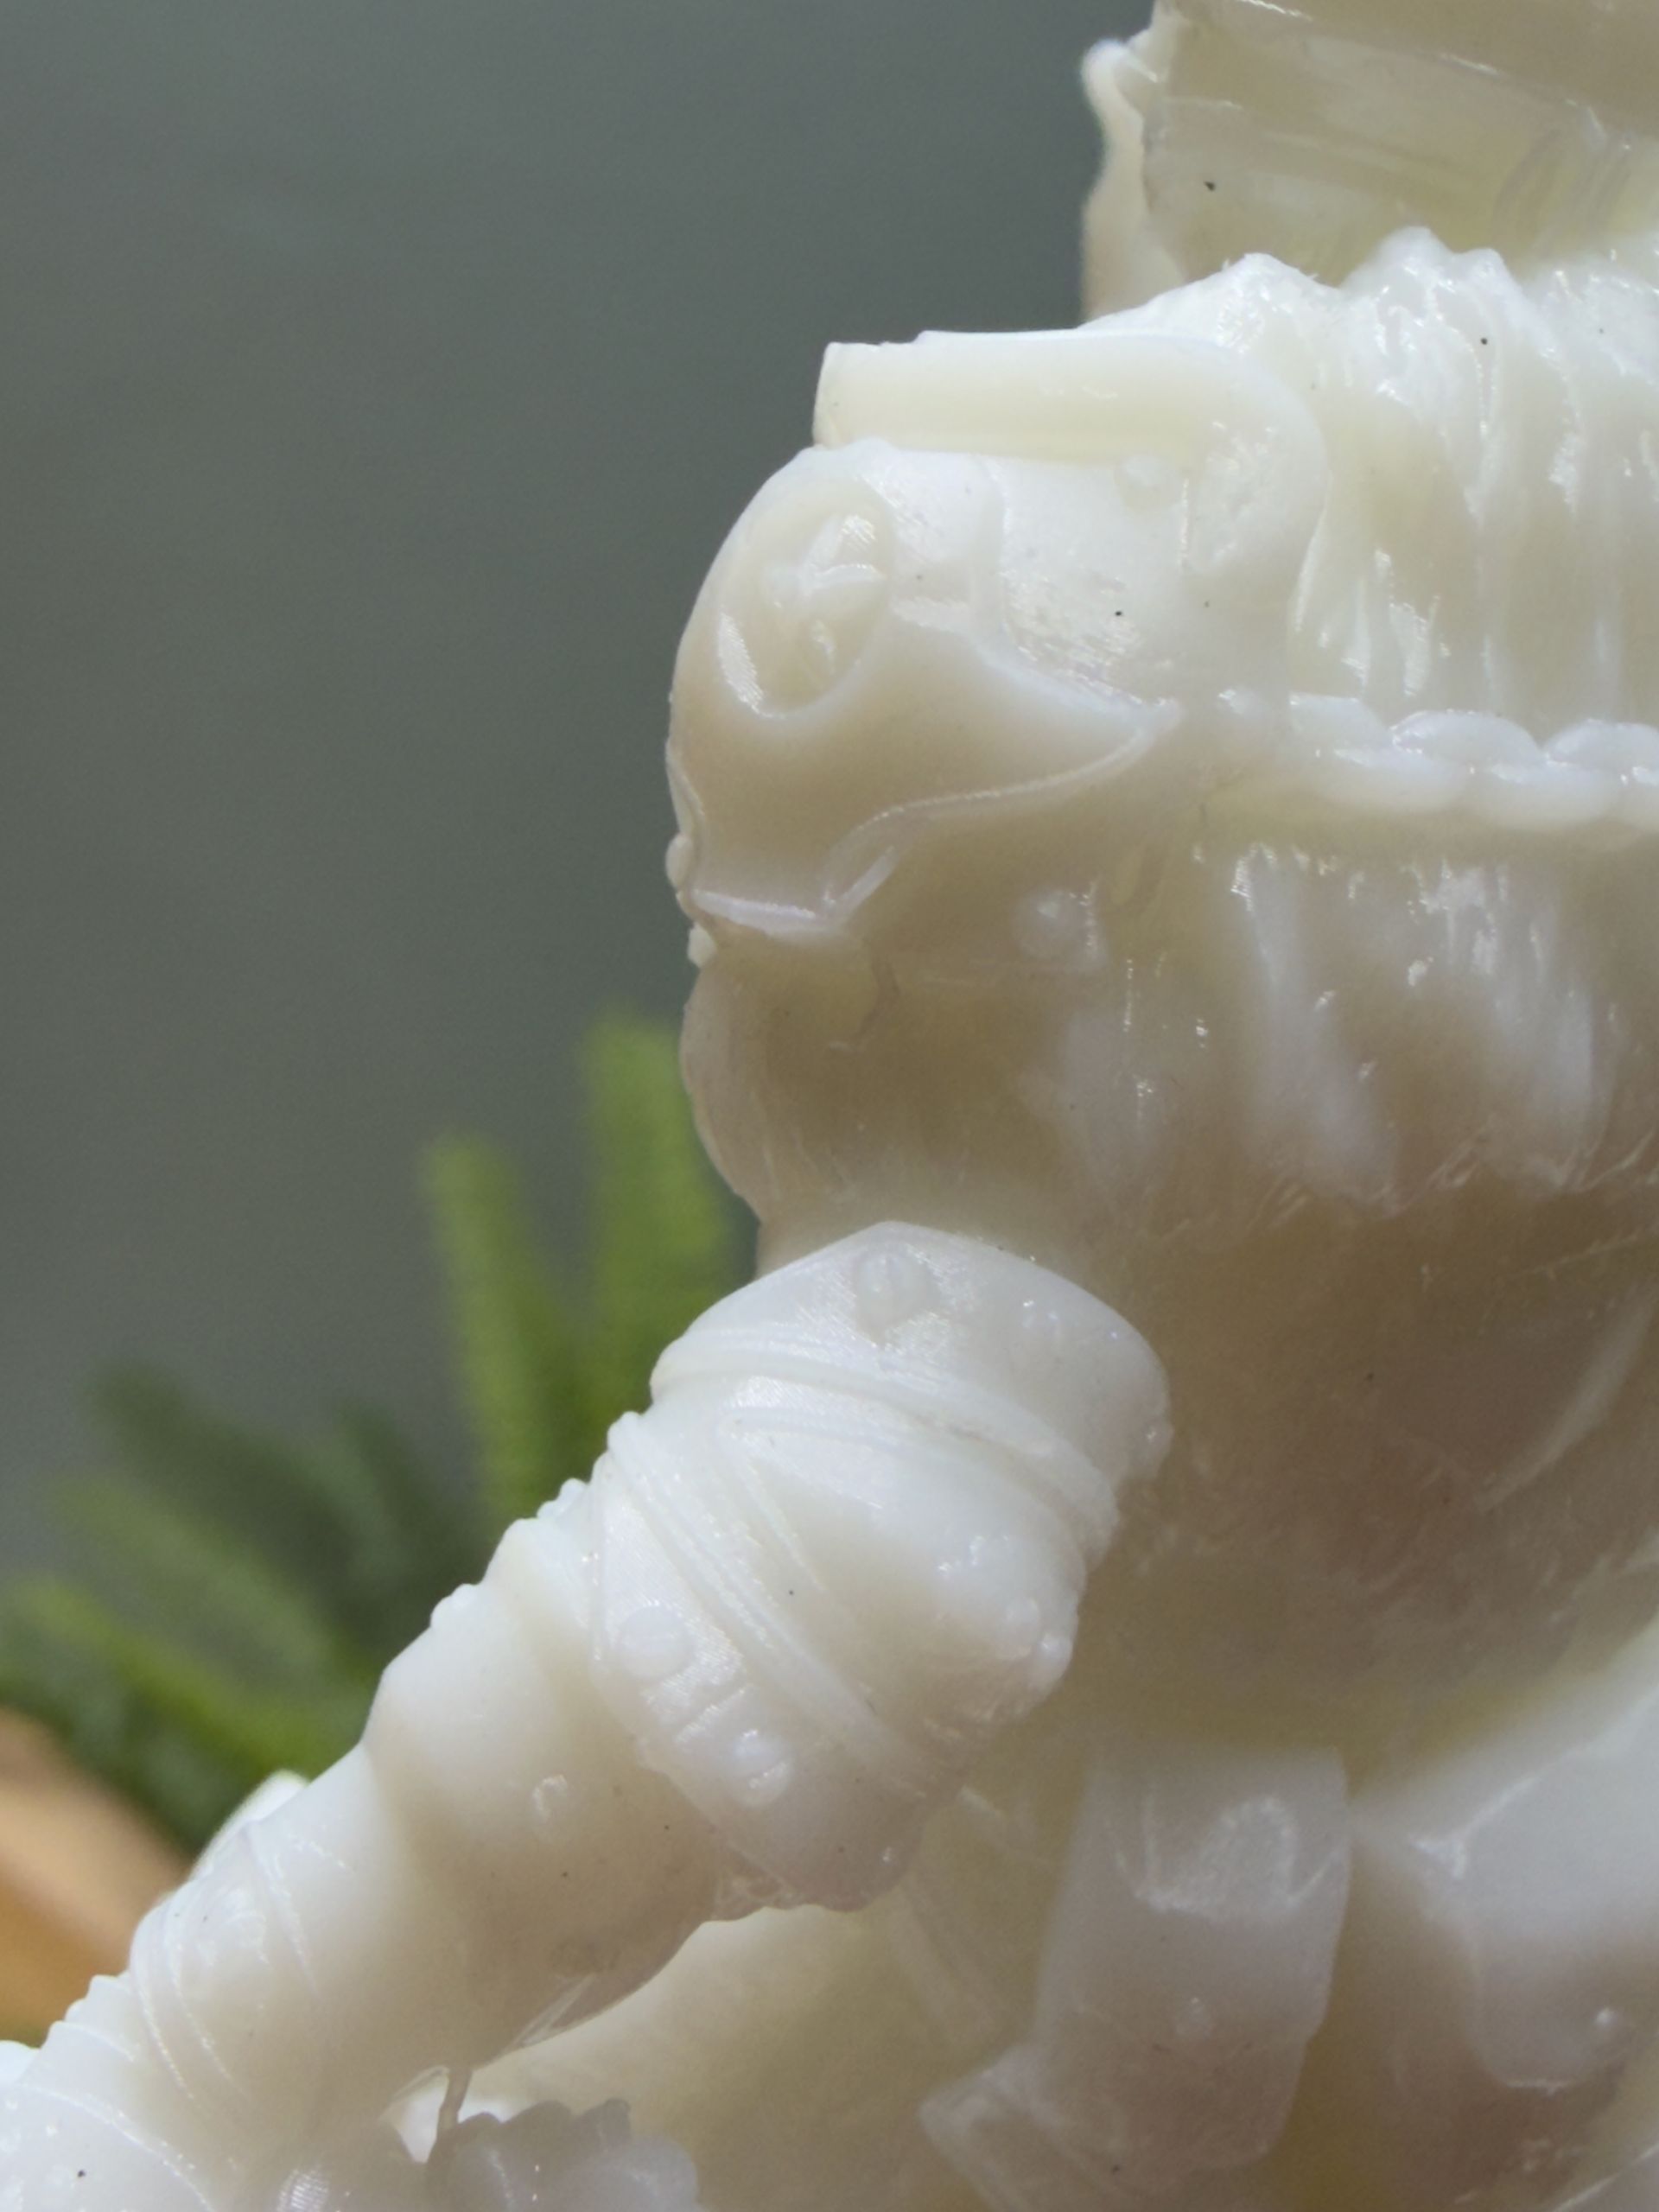
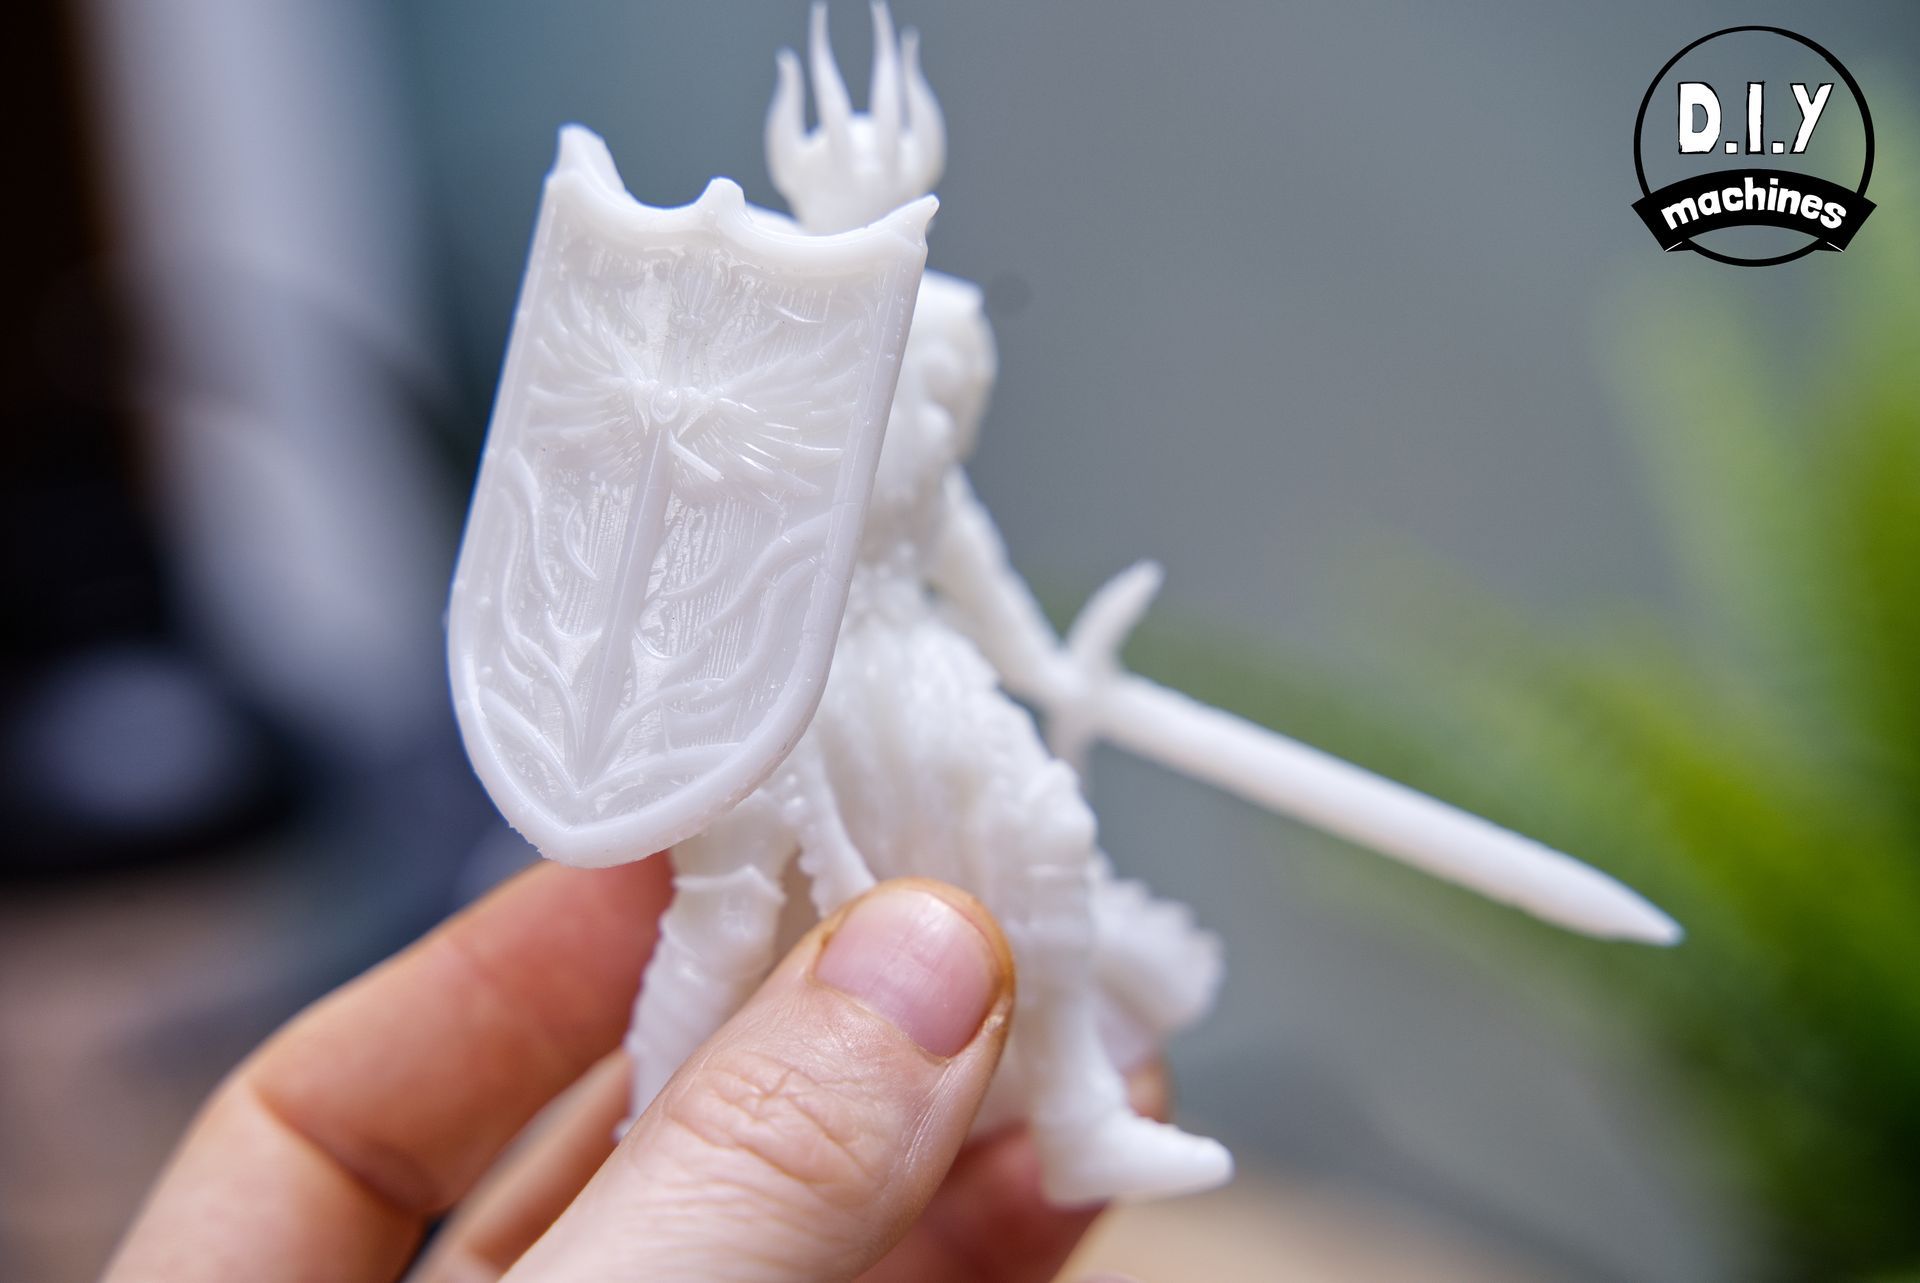
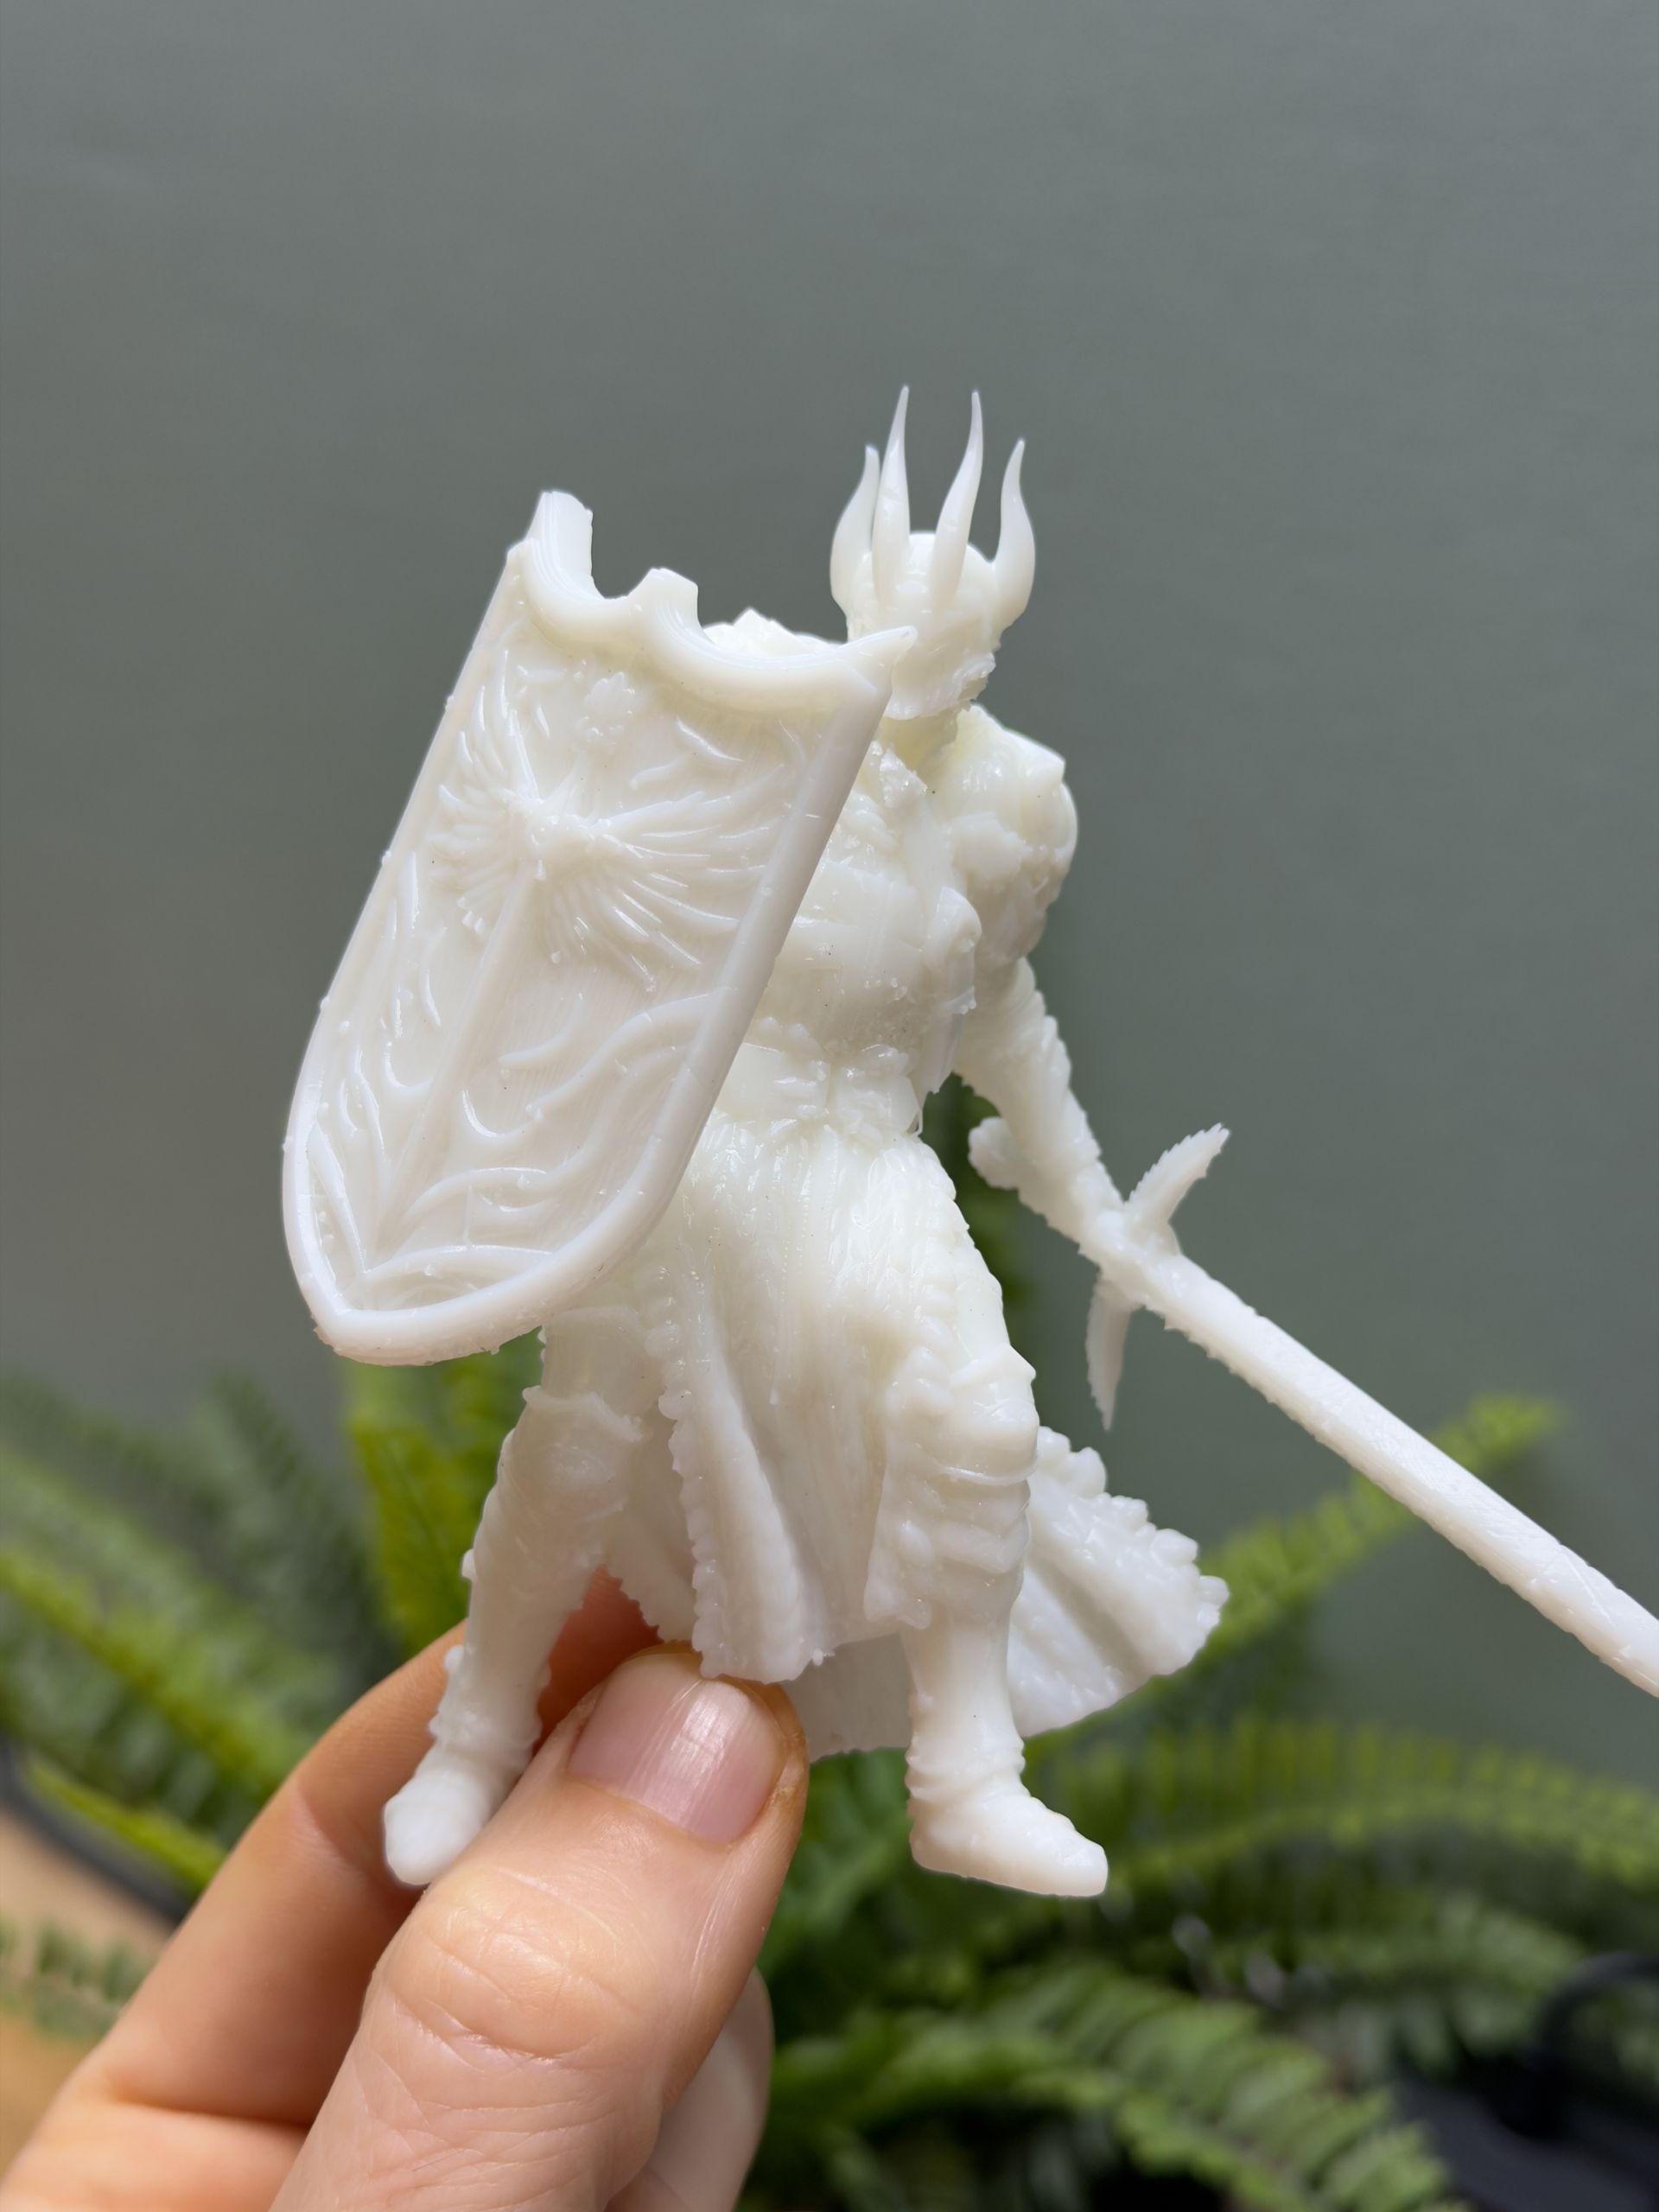
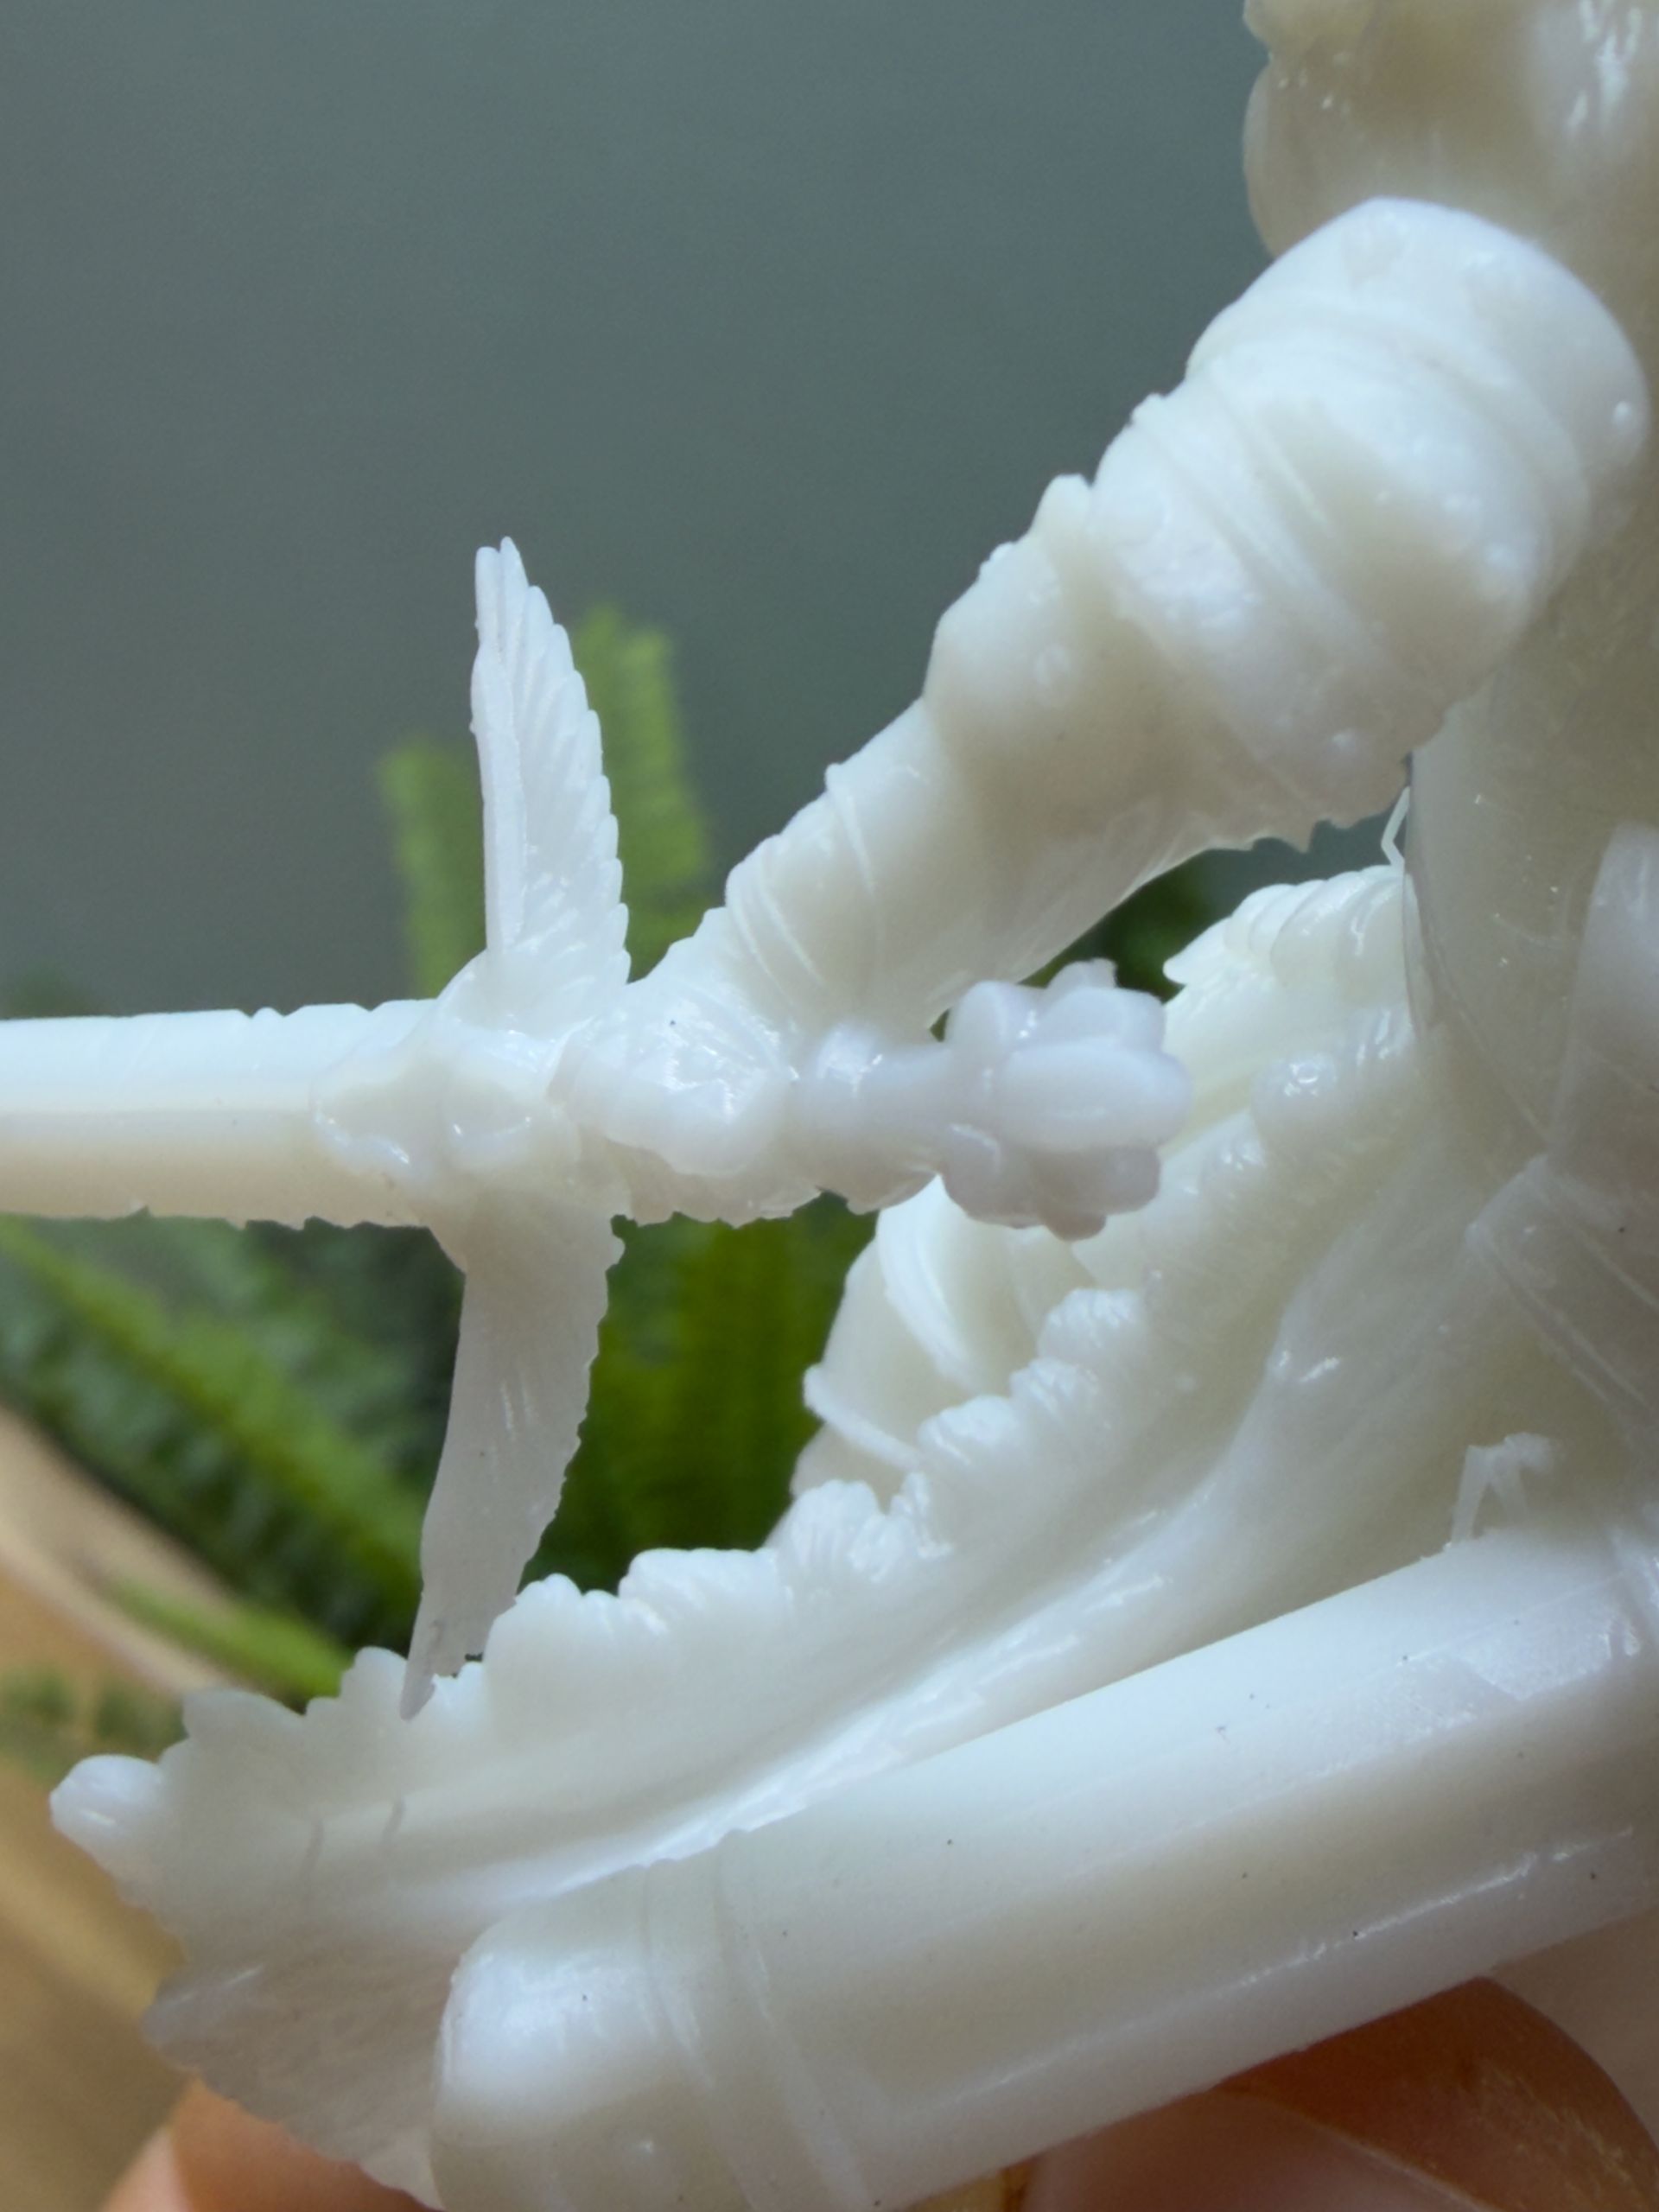
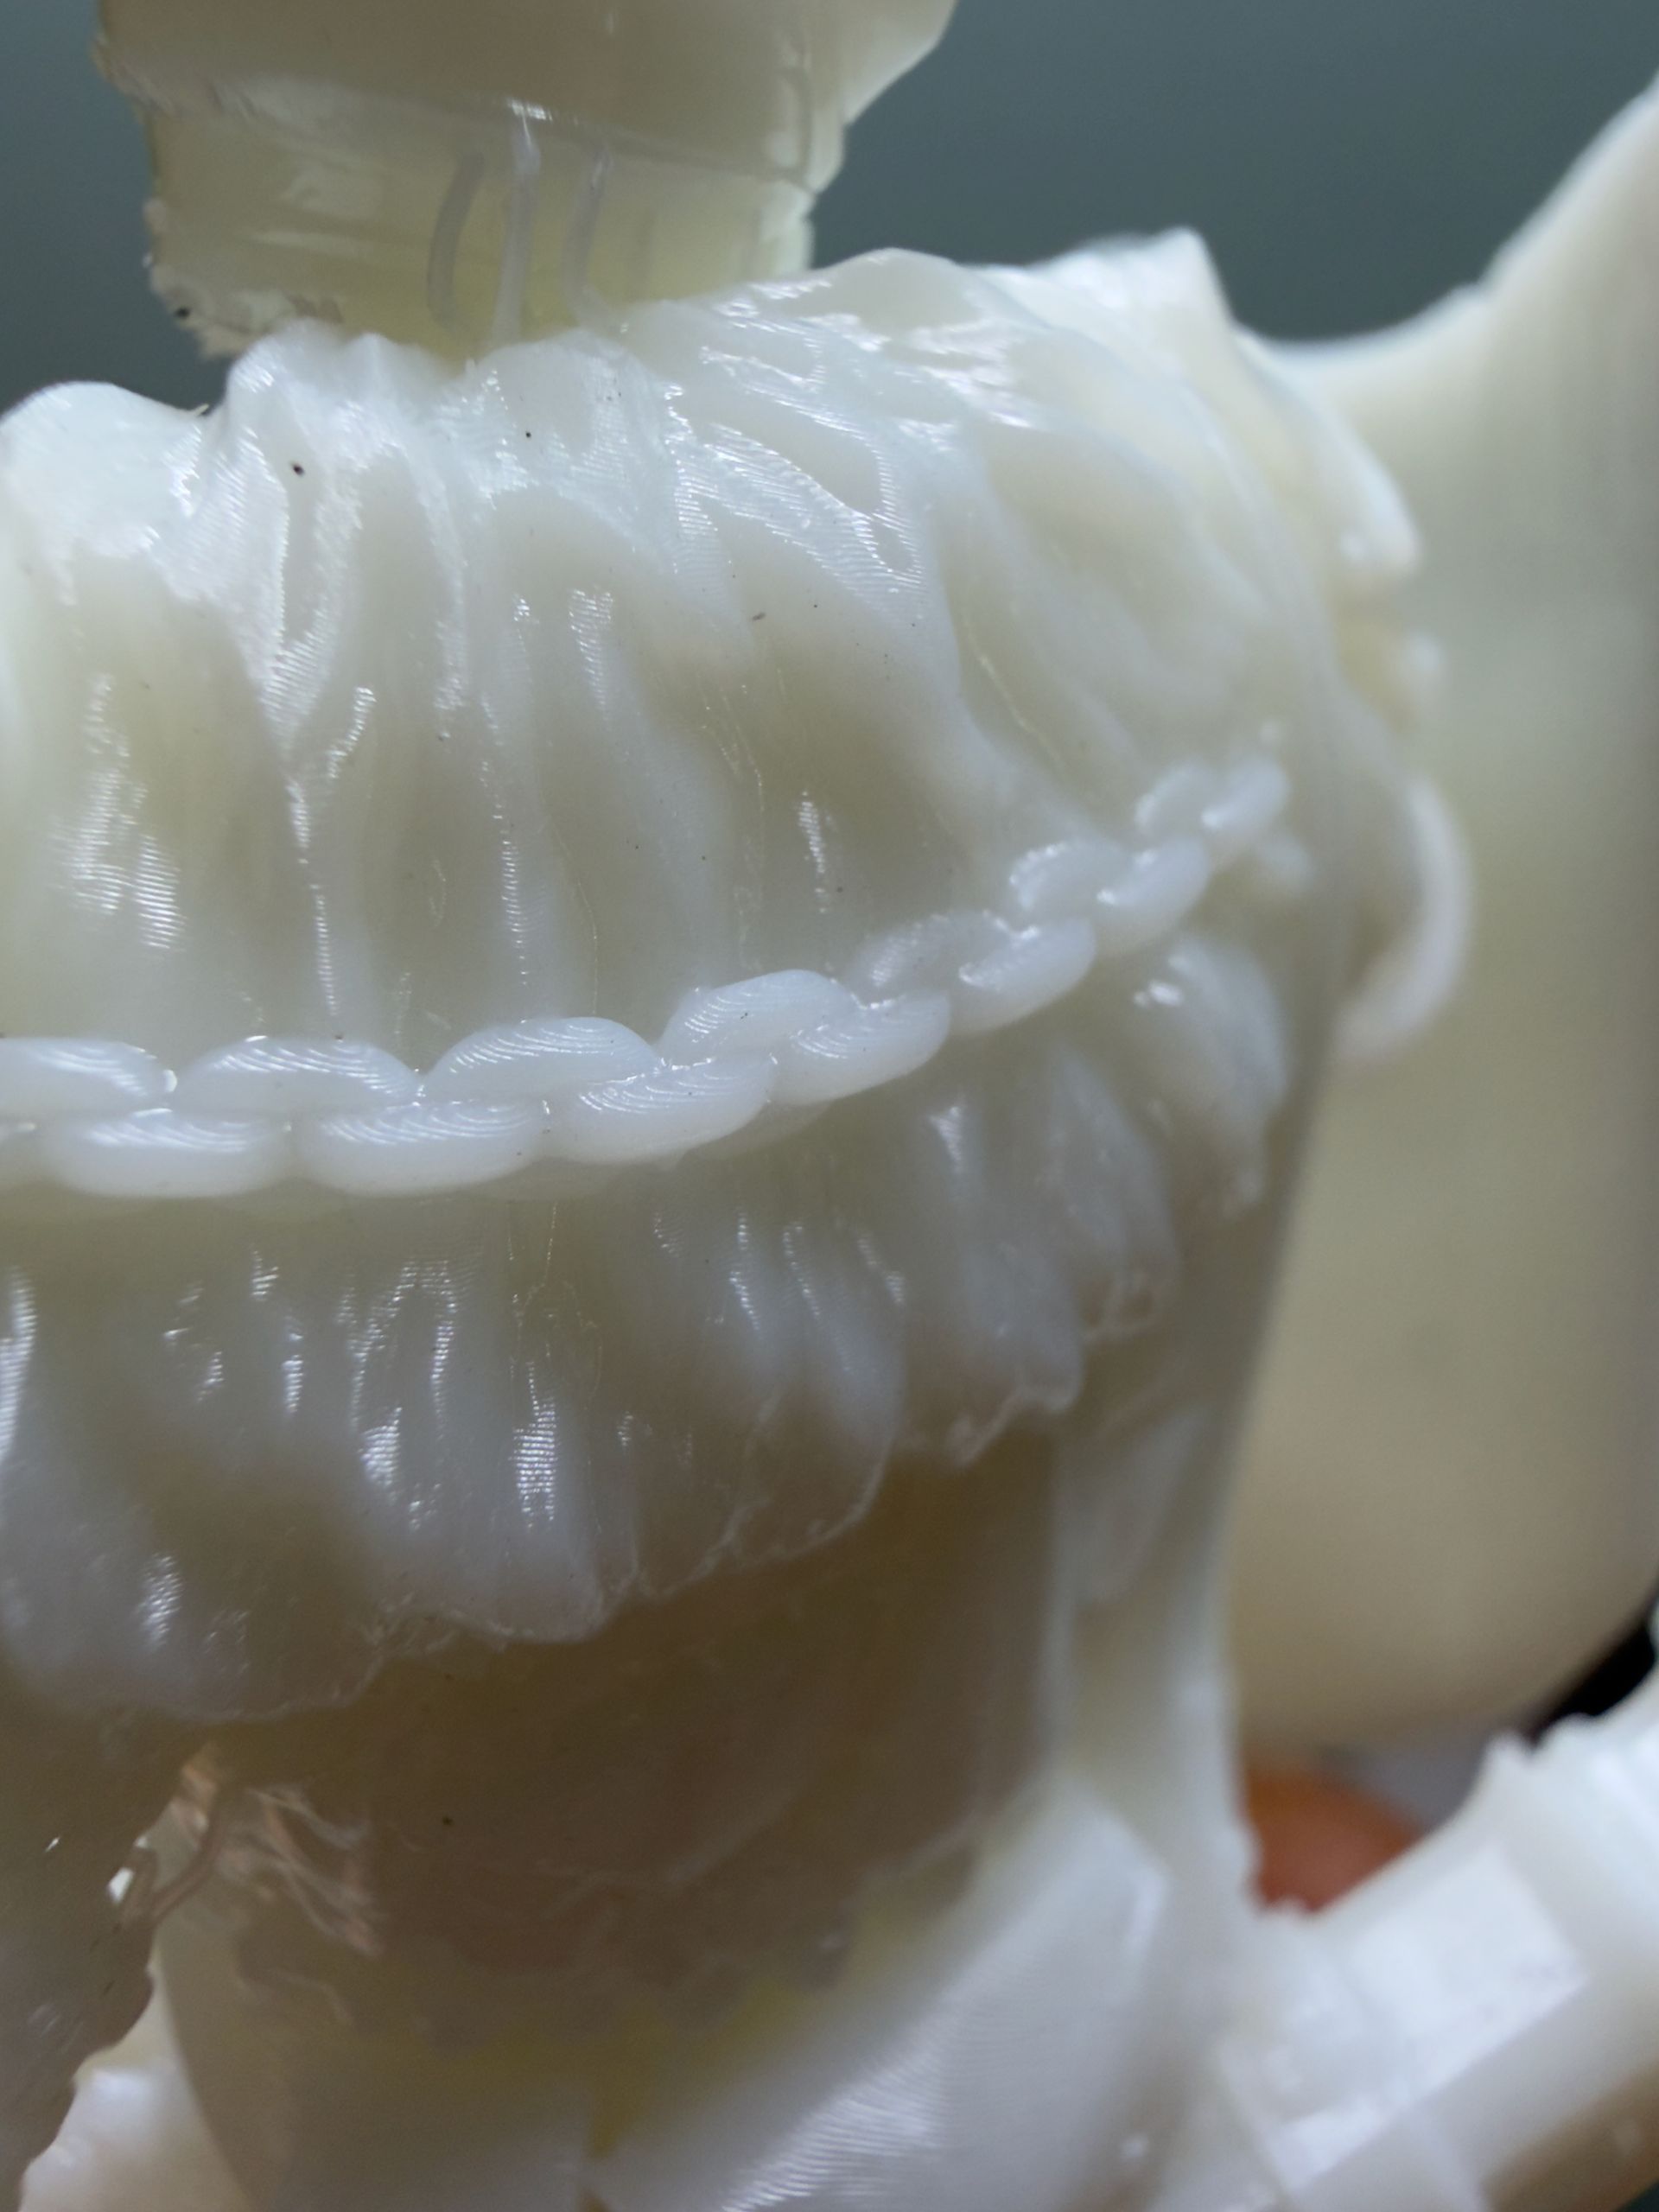
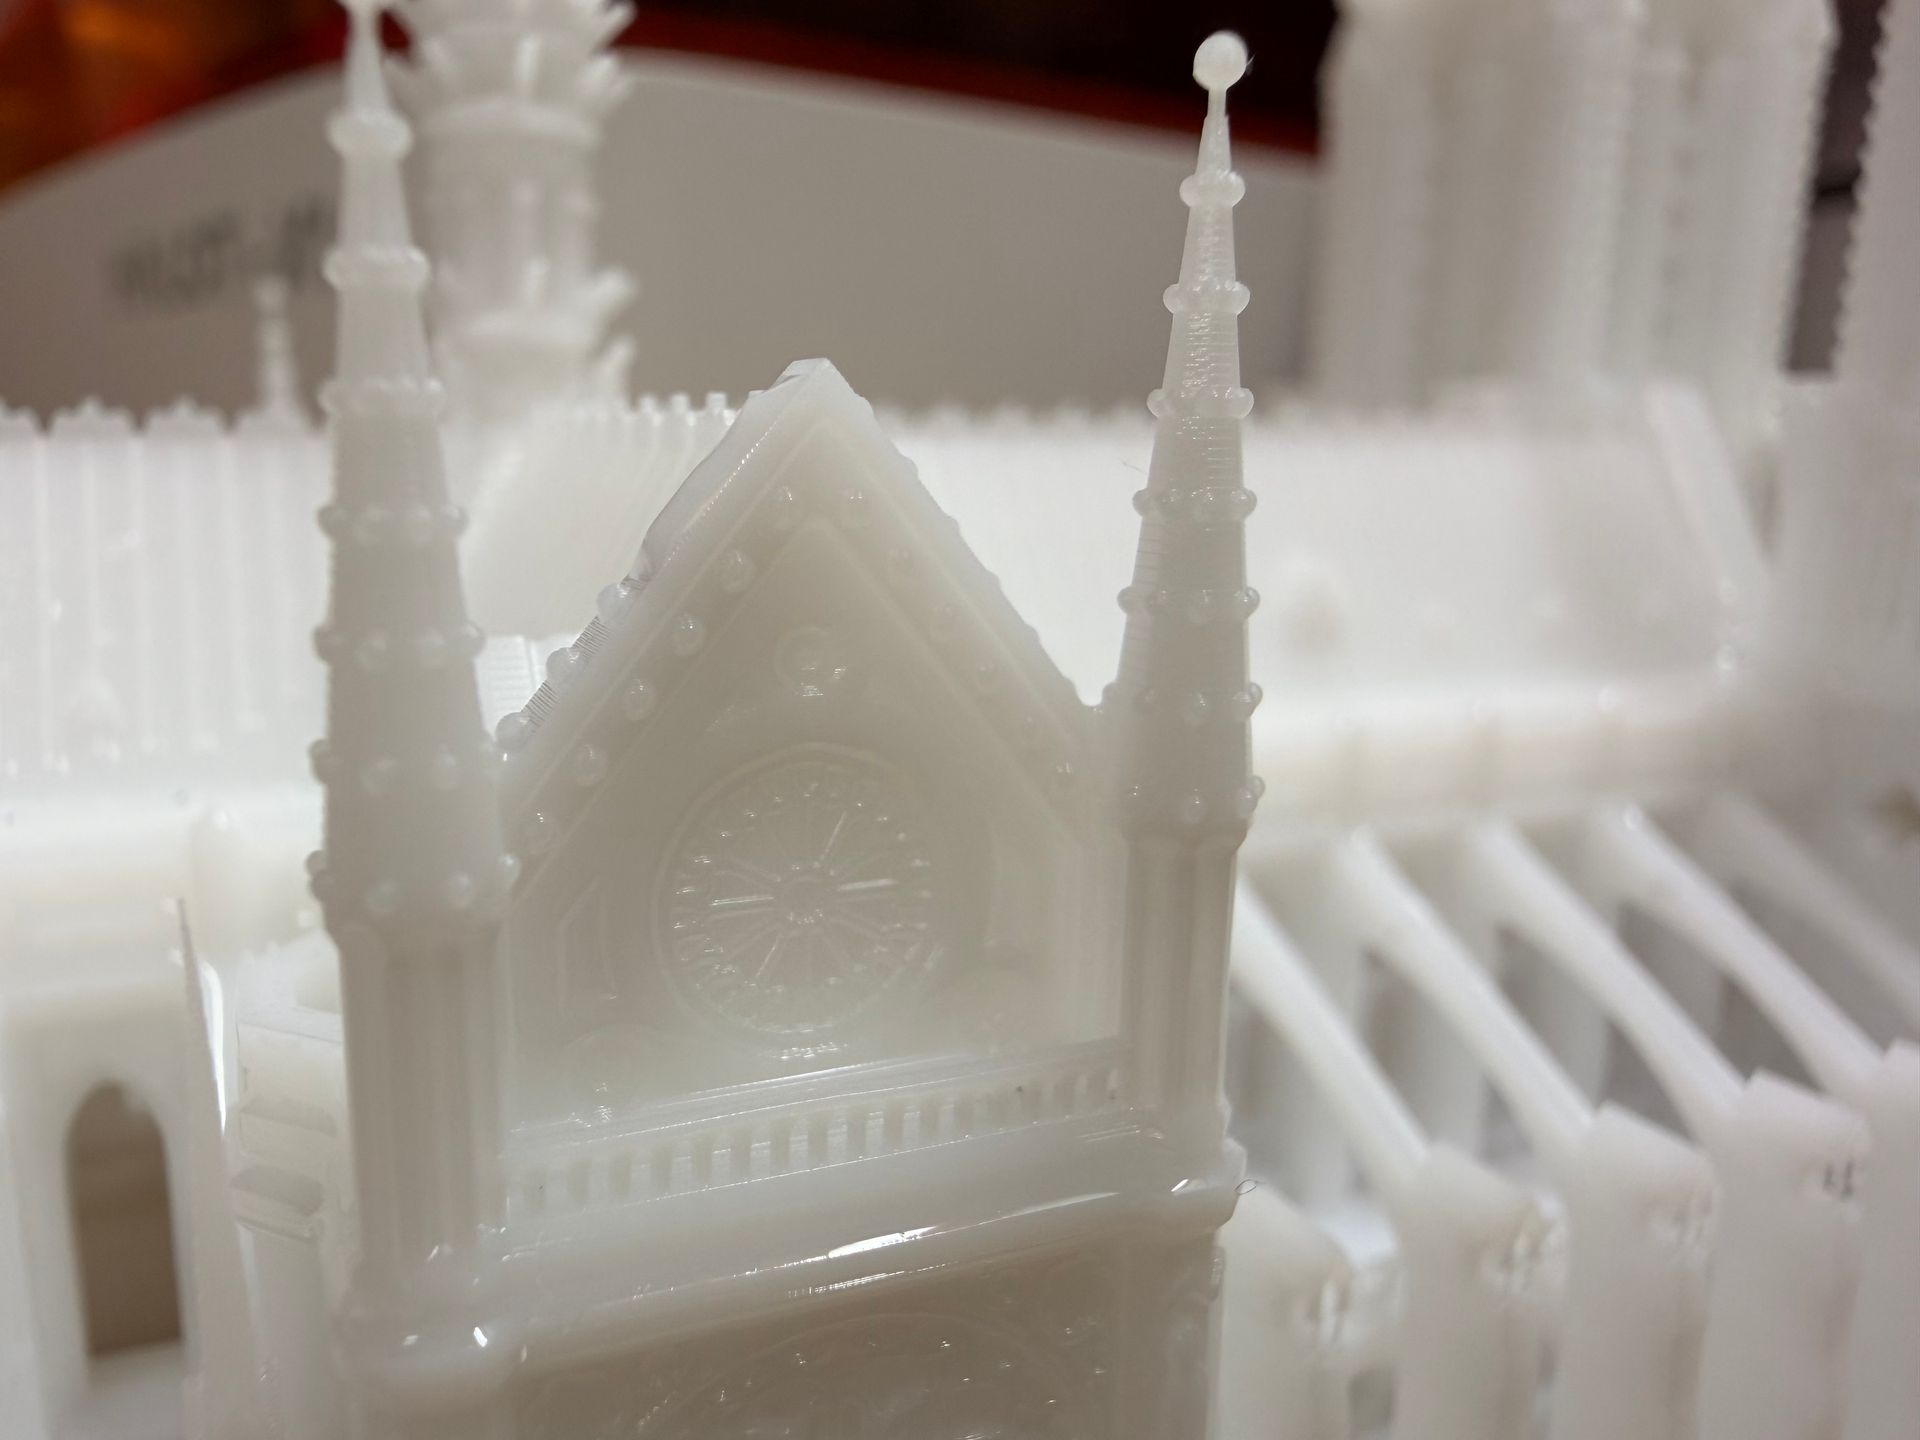
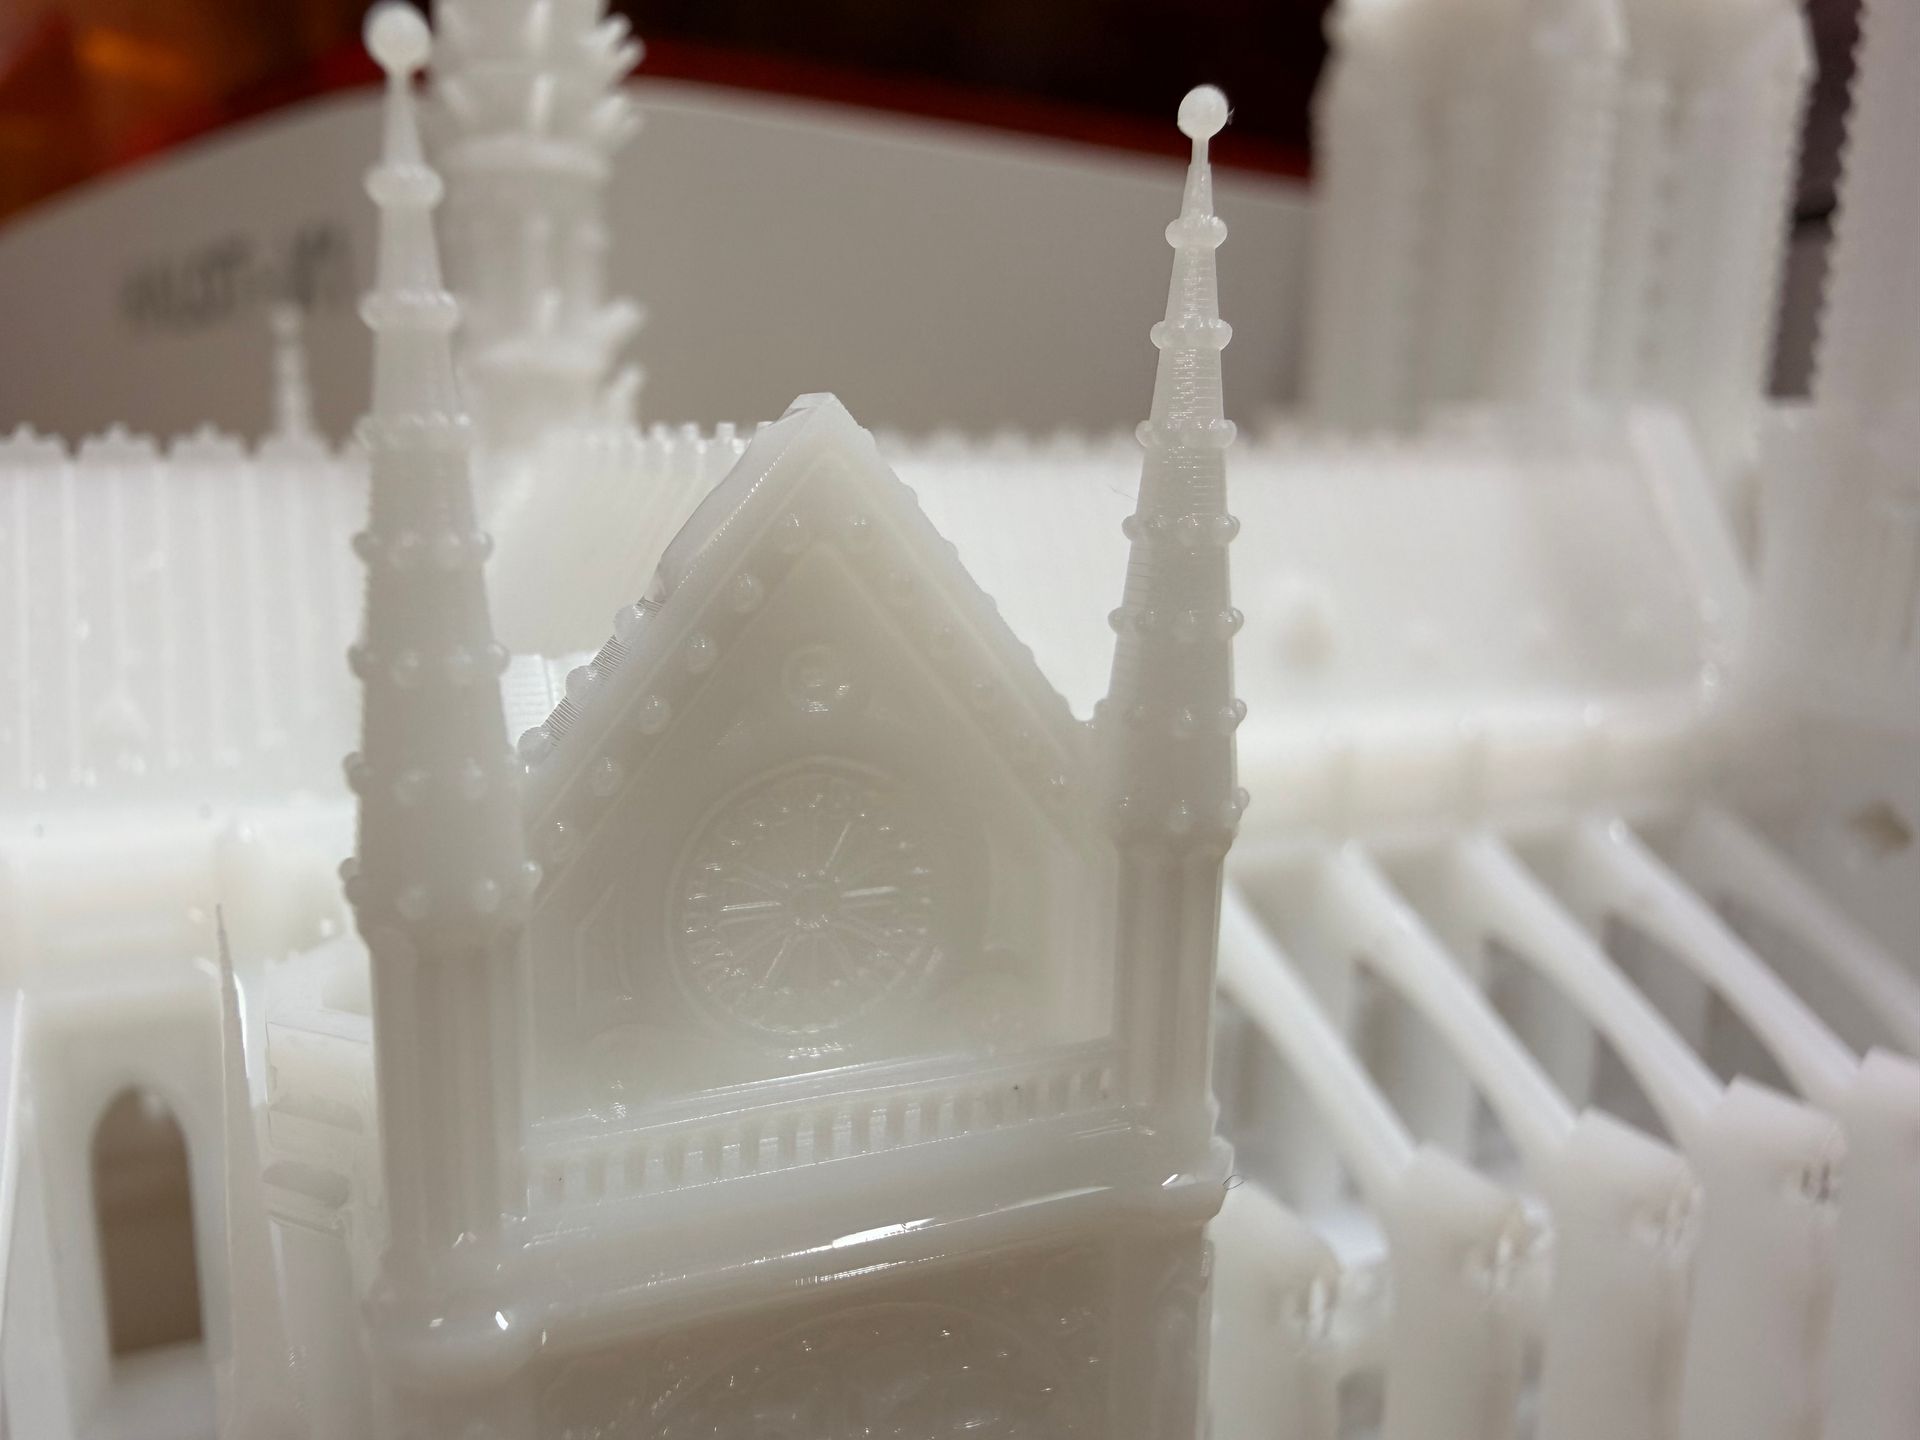
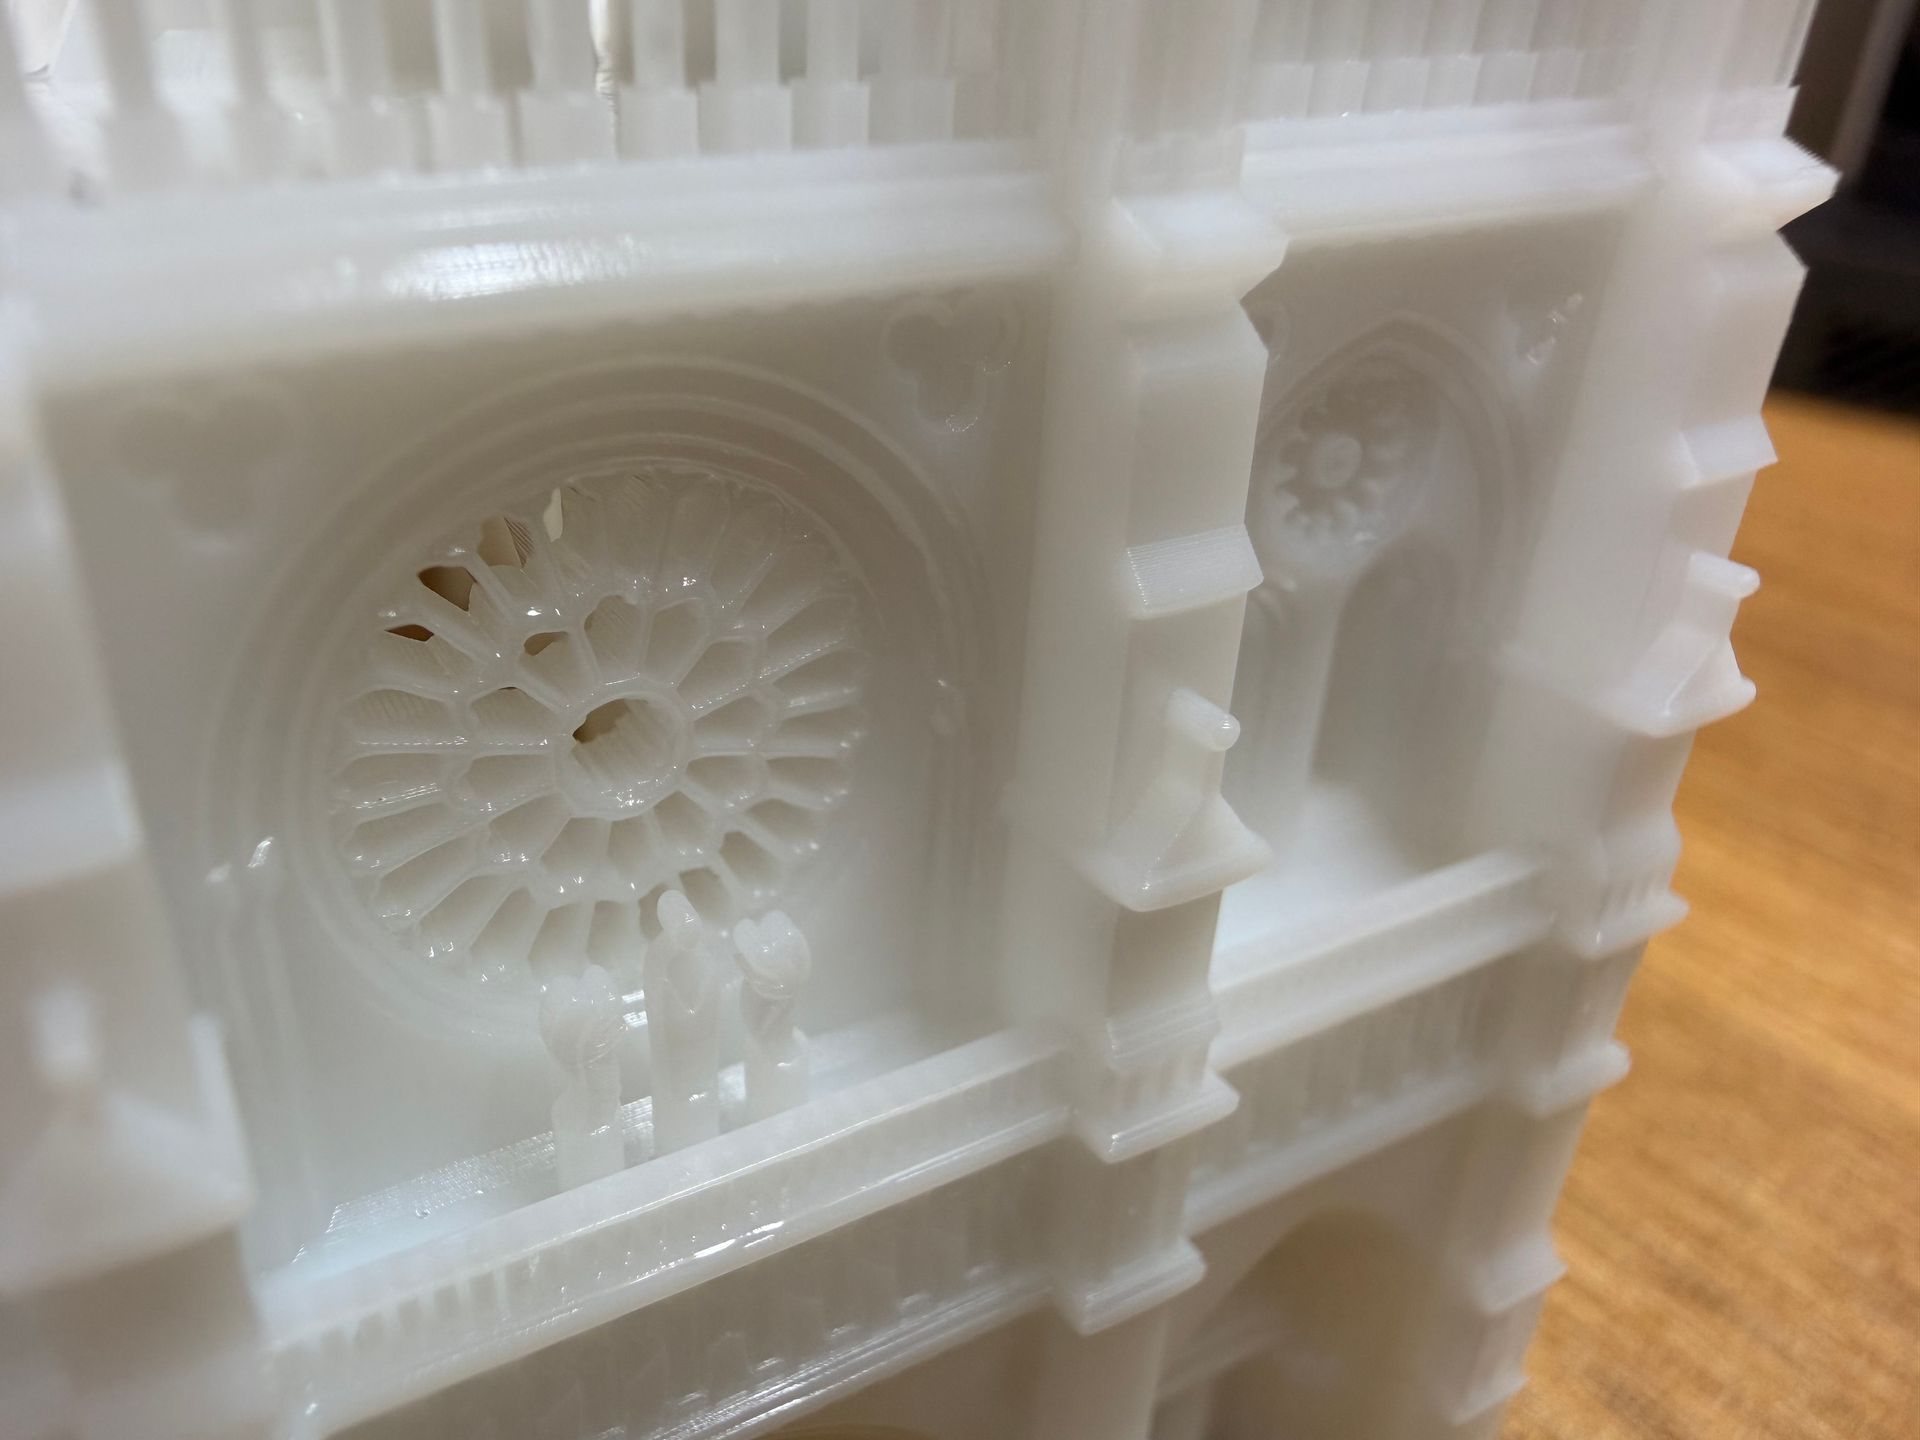
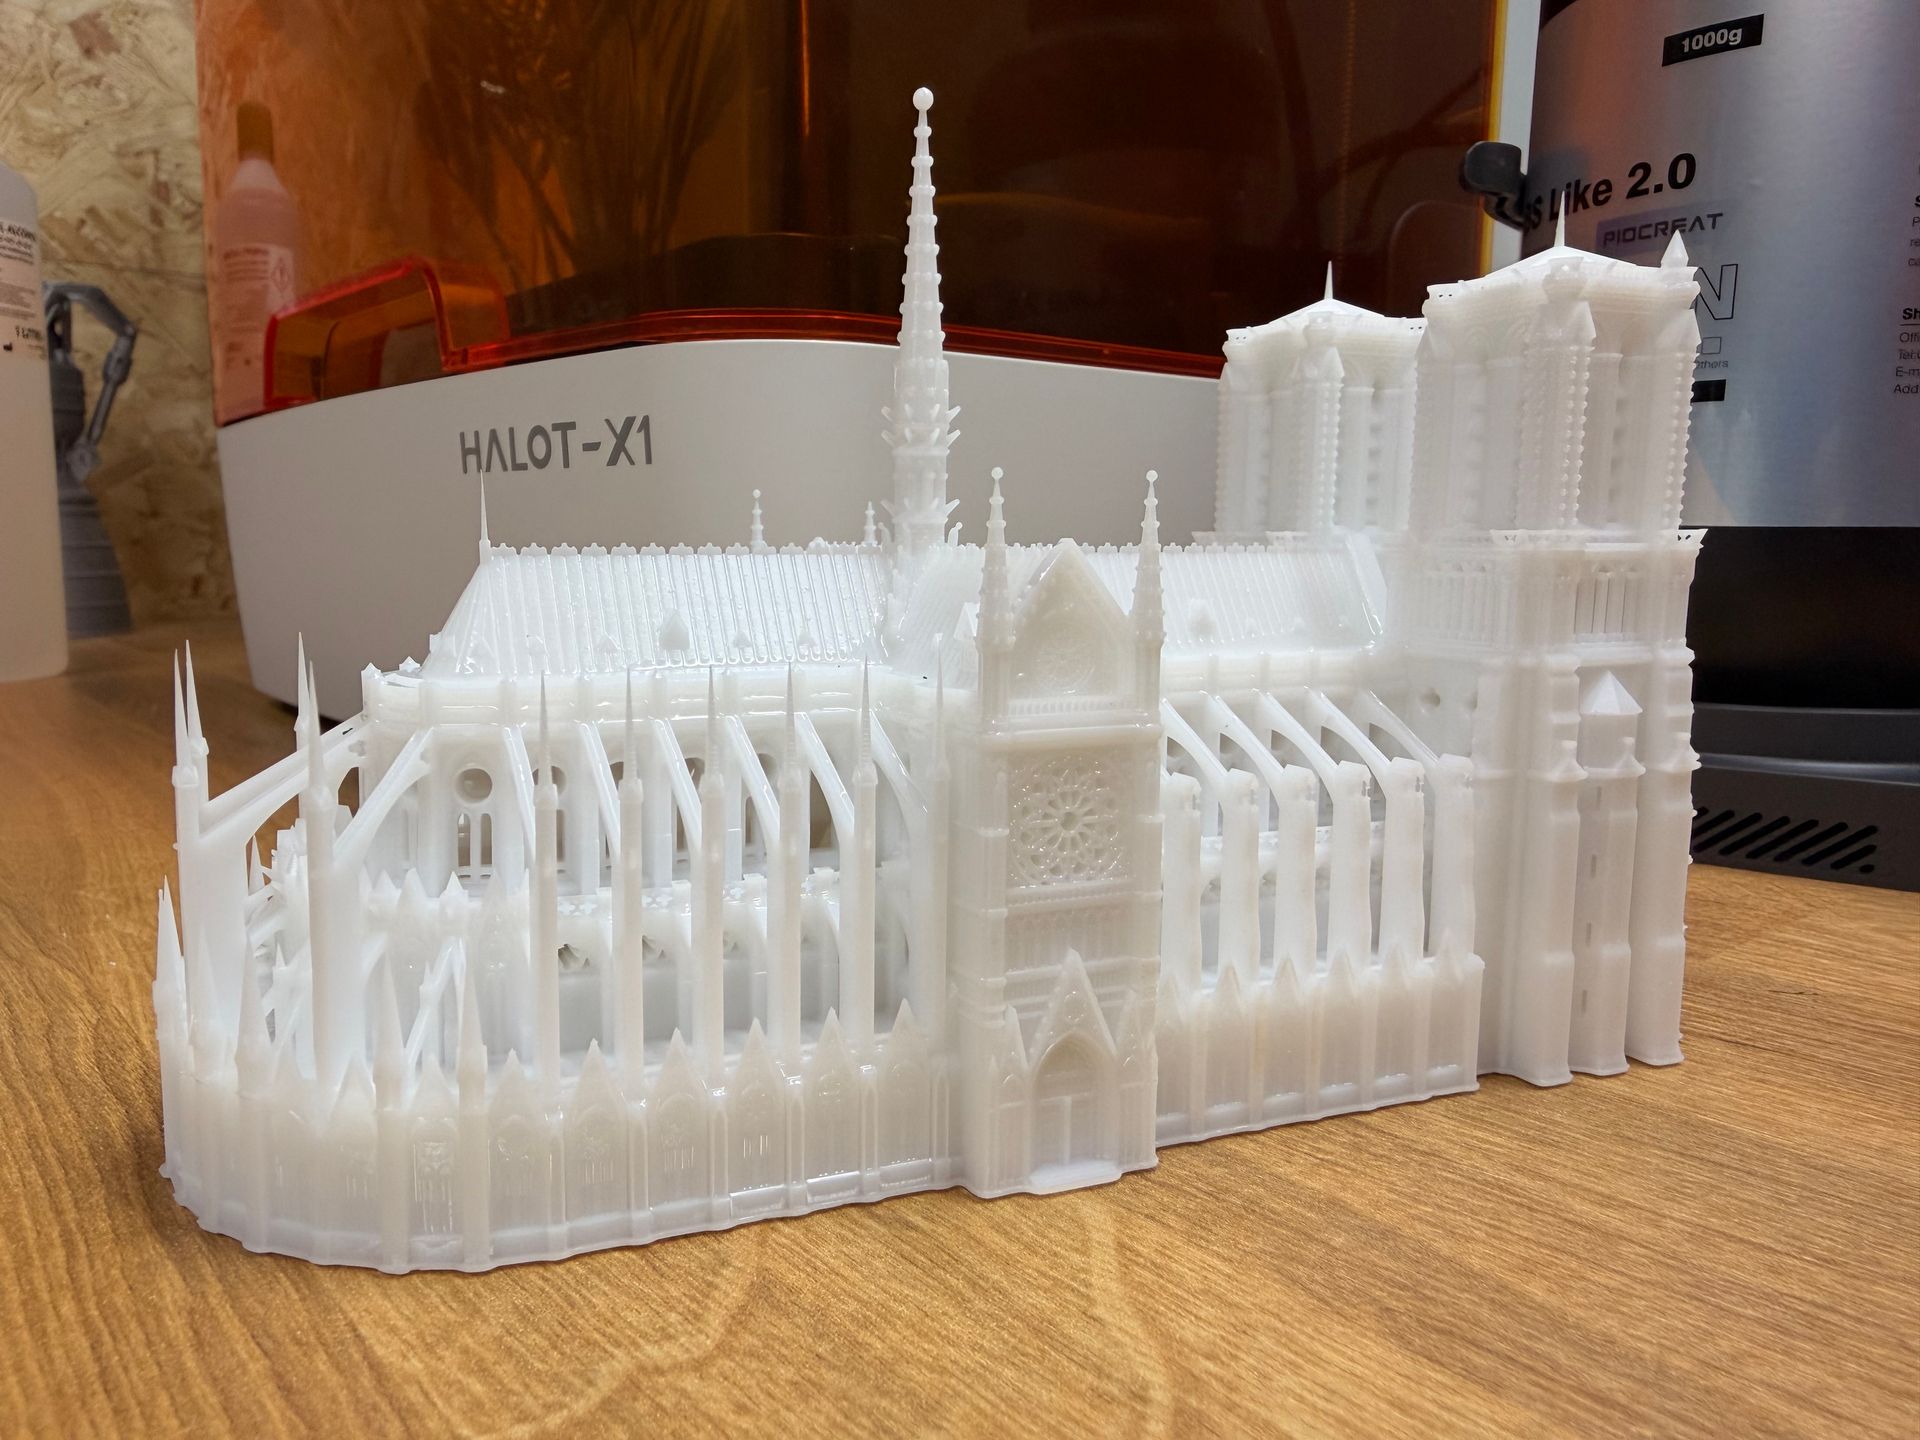
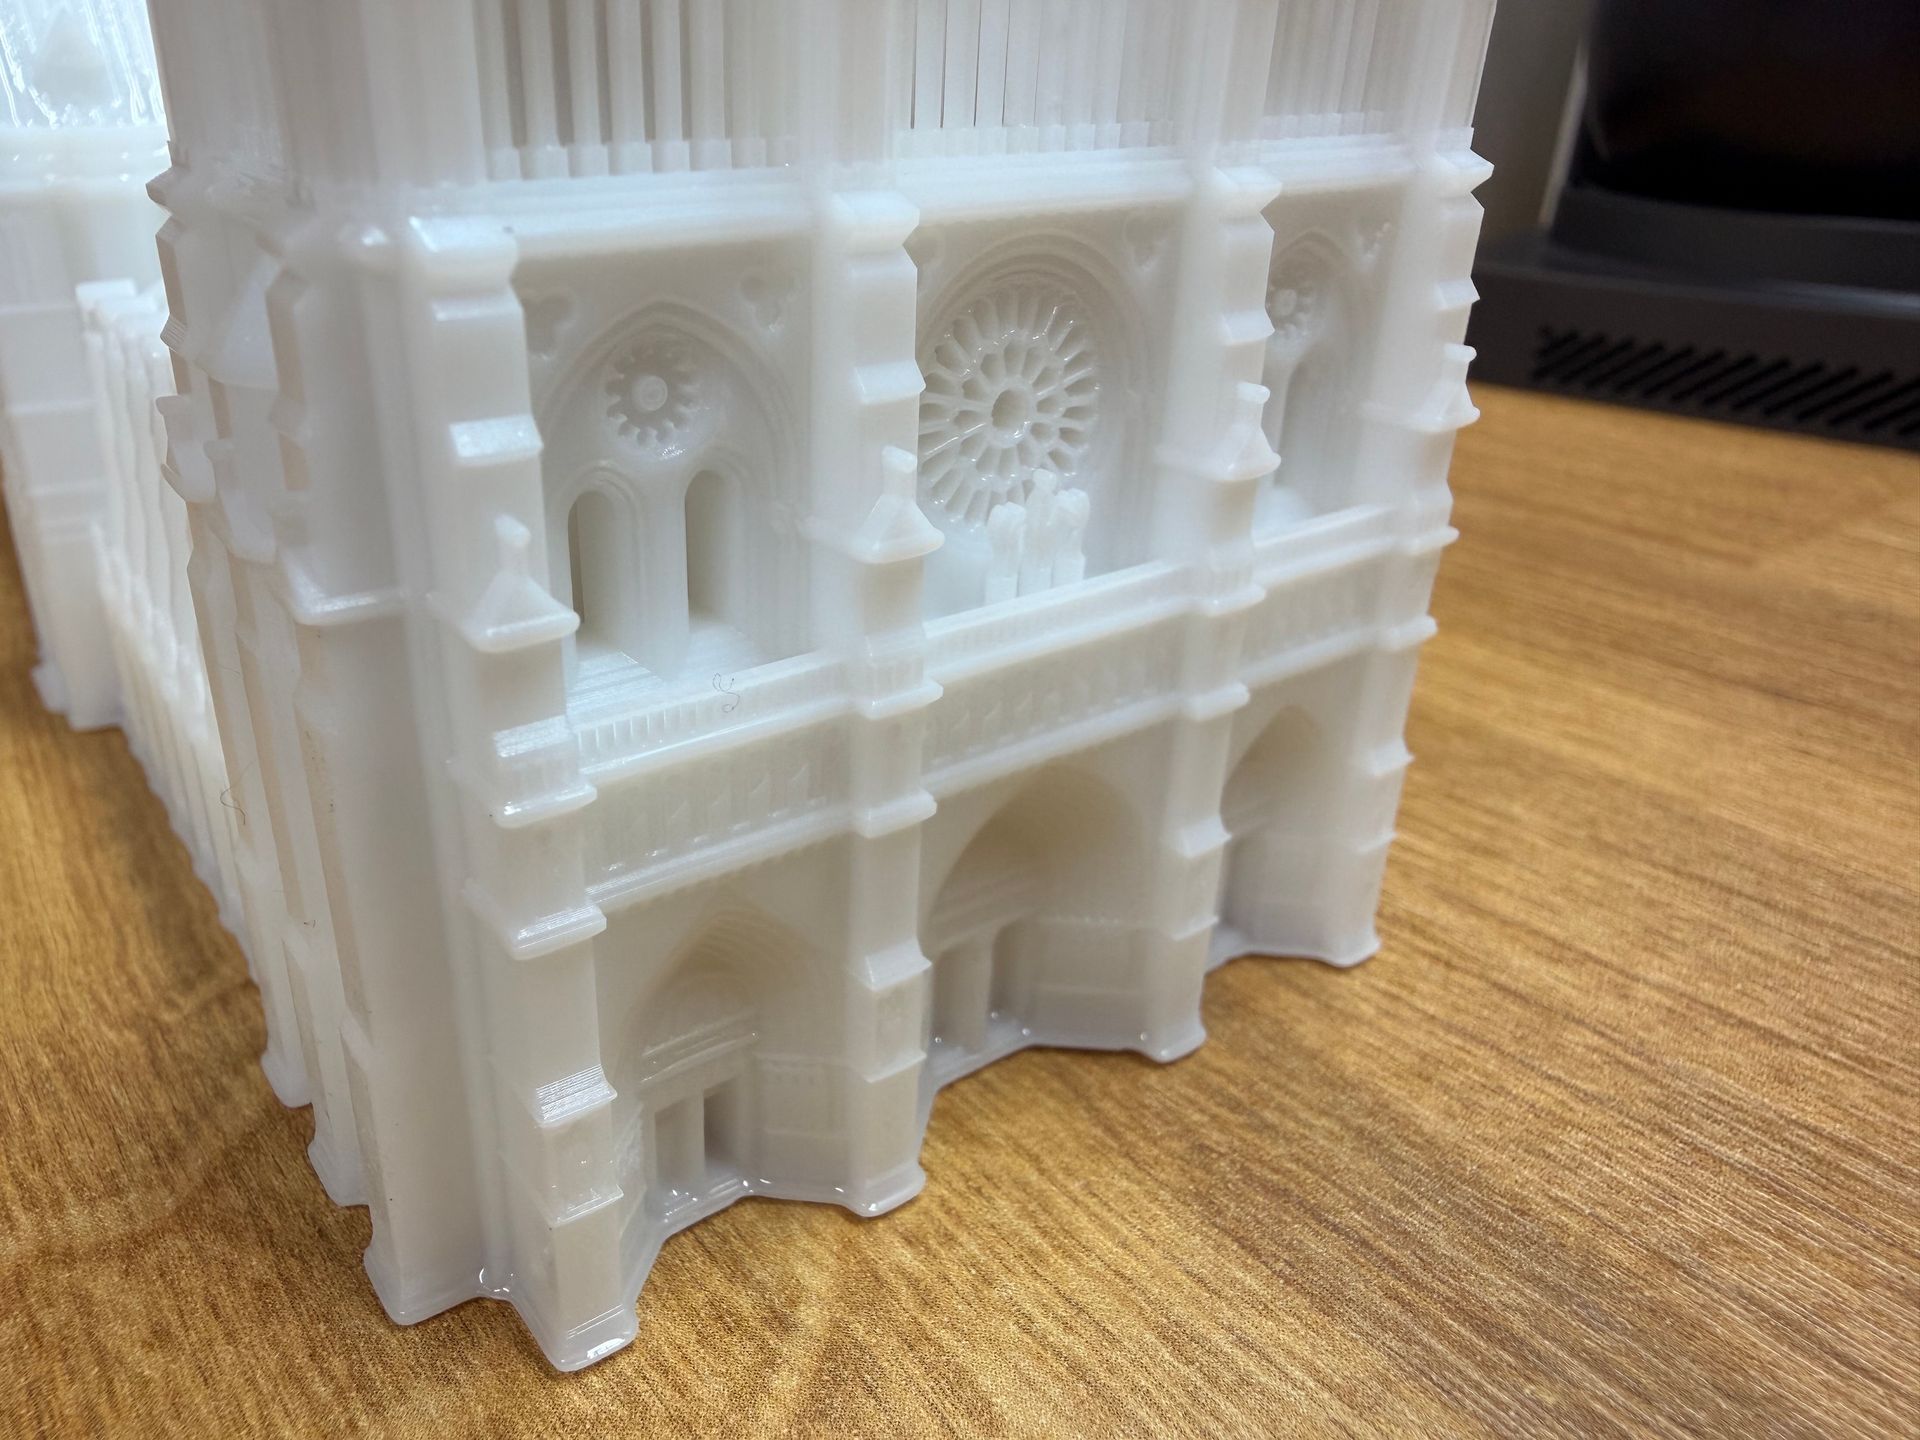
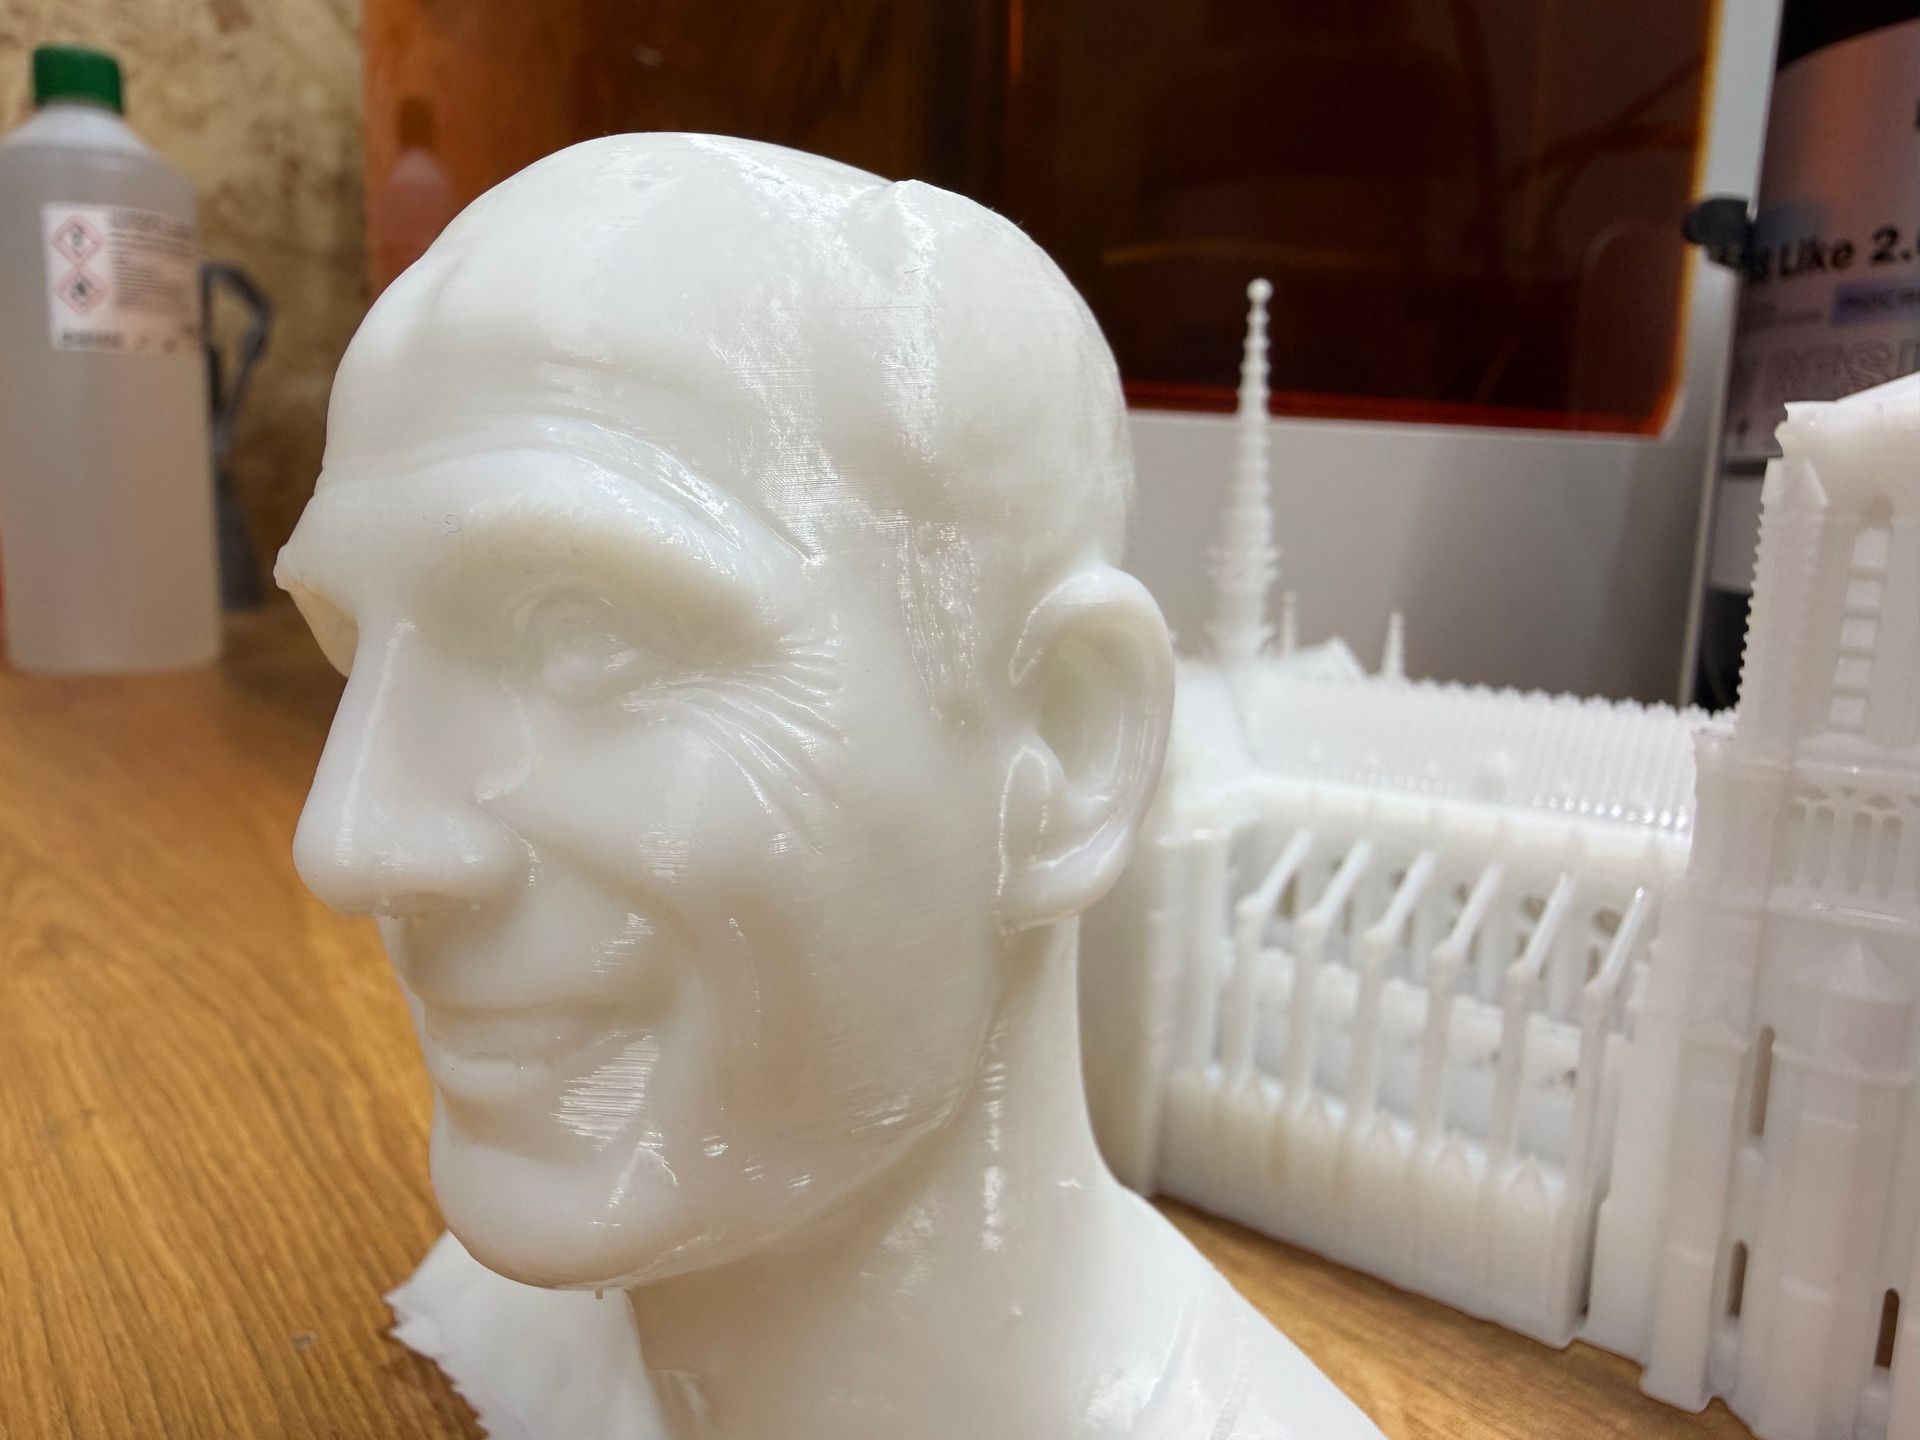
The Completed Prints
Below you'll find some high-resolution images of prints which I have been doing on the machine. They have all been printed using the AFU and PioCreat's own 'ABS like' resin and its default settings. They were washed in alcohol, air dried and then cured for 5 minutes. Click on any of the images to see a larger version.
Dimensional Accuracy
Many modern resin printers, including the HALOT-X1, use a technique known as Z-axis compression during the first few layers of a print. This means the build plate intentionally presses slightly deeper into the vat than the Z-zero point would normally allow. By increasing the contact pressure between the first layer, the resin, and the FEP film, the printer compensates for tiny variations in film thickness, plate flatness, and auto-levelling tolerances. The result is far more reliable adhesion right from the start of a print, which helps reduce early-layer failures and makes the machine feel very “plug-and-play.”
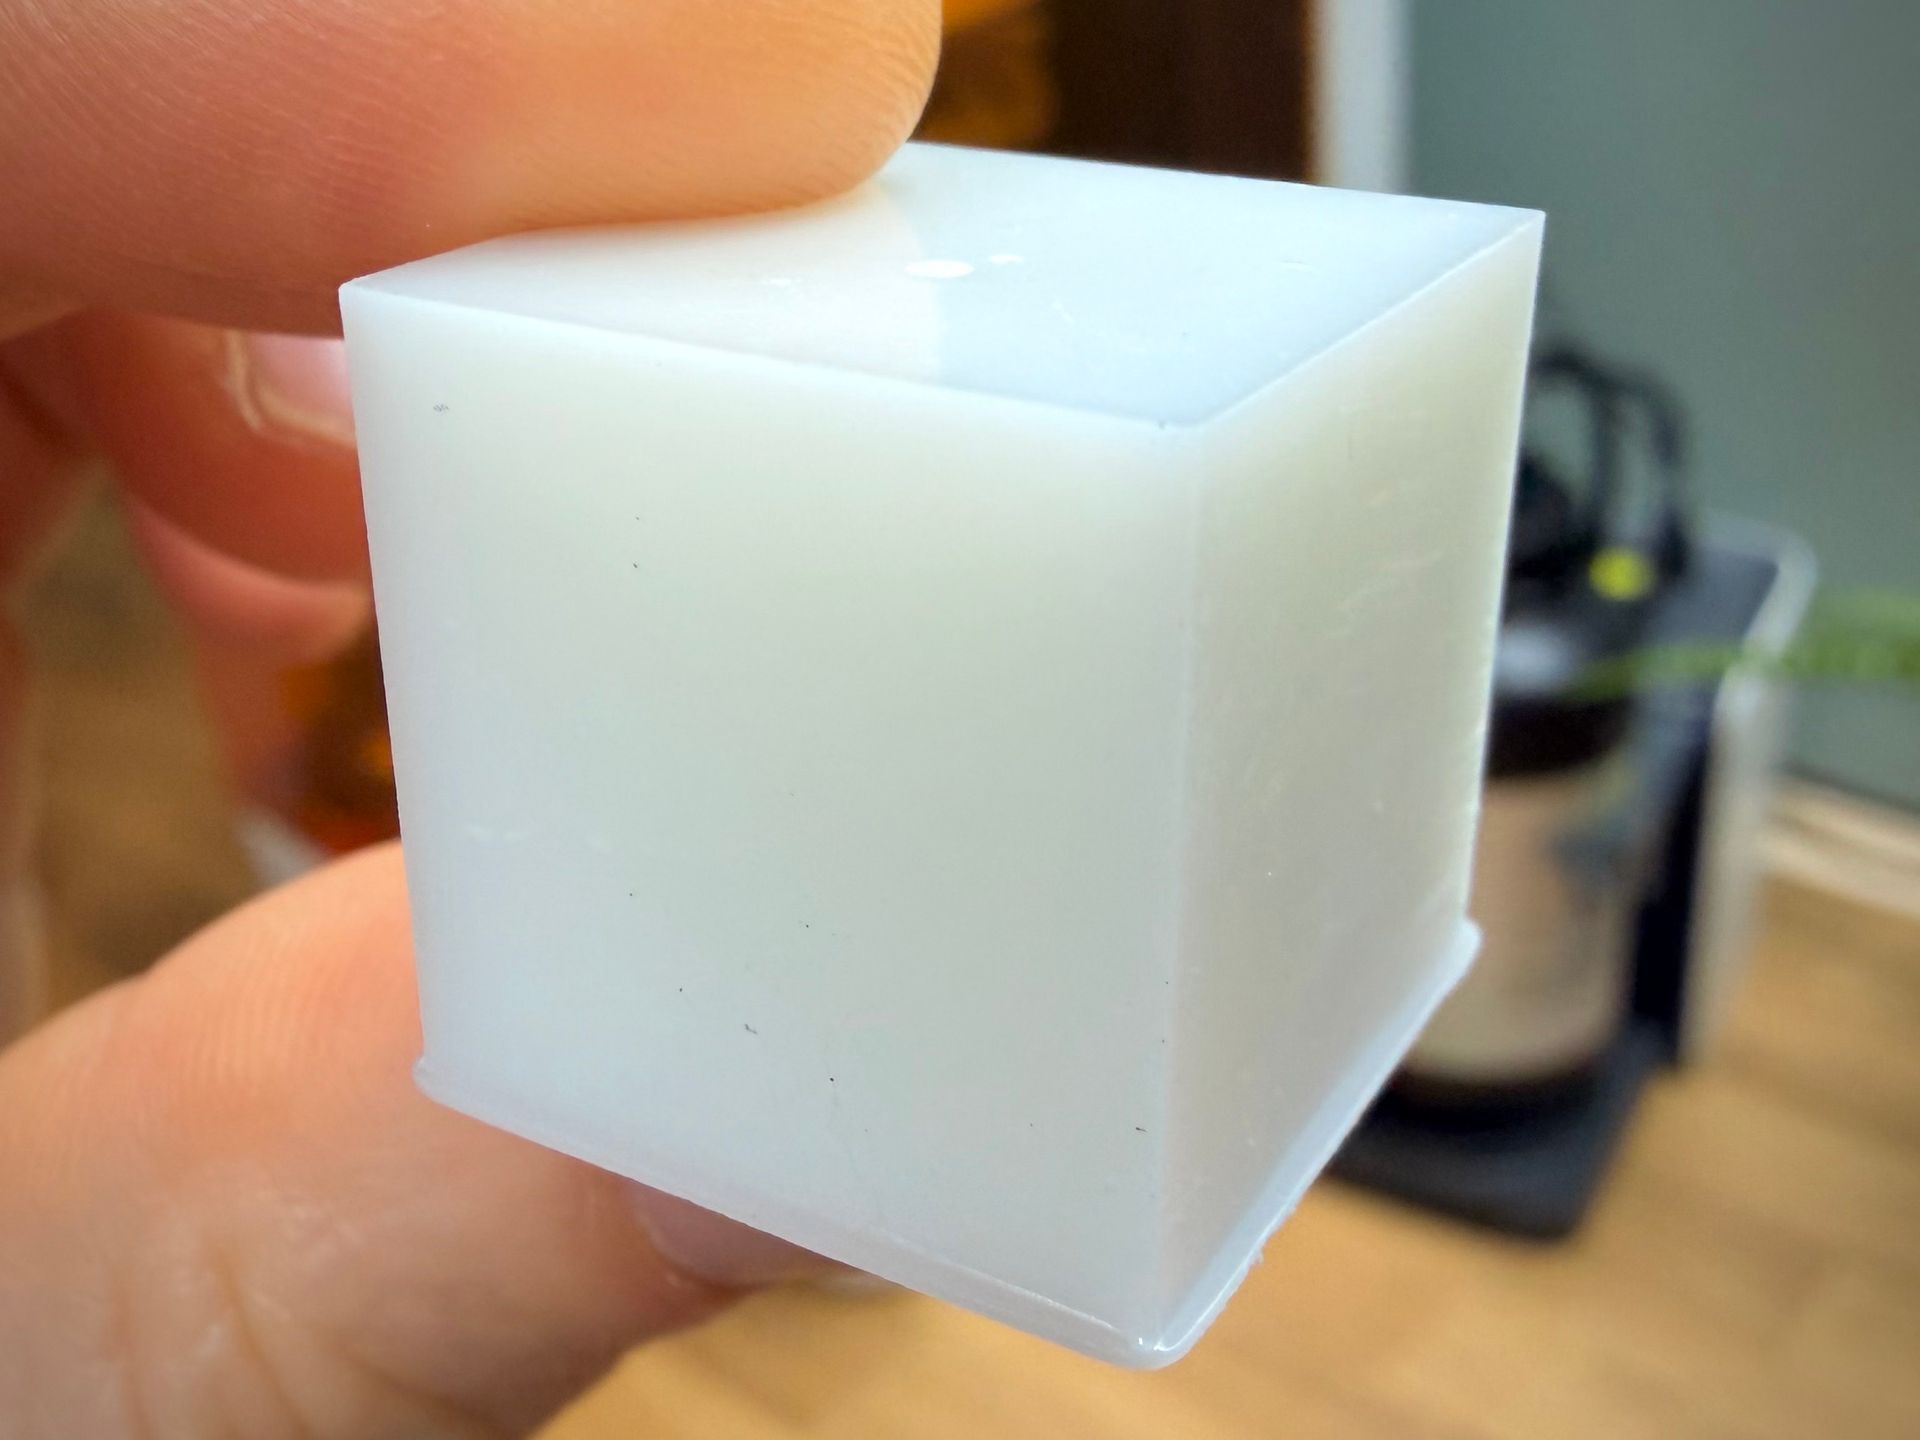
The trade-off is that this compression can sometimes leave the first layers a little more squished than the slicer settings suggest. Users may notice slightly flared edges on bases (often called “elephant’s foot” as you can see in the above image of my cube) or find that the first few layers are a bit thicker than expected. It can also make those first layers adhere quite strongly to the build plate. That said, when calibrated sensibly—as it appears to be on the HALOT-X1—Z-axis compression is generally a net positive, giving beginners and experienced users alike a more forgiving and consistent printing experience without requiring manual fine-tuning.
This is not a problem unique to the HALOT-X1 but is worth knowing about in general - especially if you require dimensional accuracy. Similar to mitigating the chances of having an imprint of the build surfaces contours on your print, the same trick of elevating the model and adding supports can work around the problem of this early layers 'squish'. The photographed cube I printed was 20x20x20mm in the model, the measure cube is 20.67 high x 19.95 wide x 19.92 deep.
Software
You download a copy of ChituBox software and its Network Manager. It has a free tier with enough features for your modelling needs. The printer does come with free upgrade to ChituBox Pro by the way of a scratch of card and coupon number. There are some great AI/Auto tools for preparing your model in the Pro version. But you can also achieve 95% of what you need to do with the free version.
Once you have gone through the stages of importing -> hollowing and adding holes -> adding supports and raft -> slicing you can then either transfer the model via WiFi using the ChituBox Network Manager or with the USB drive. Transfers via WiFi were a little slow and can only be done when your printer is on its Home Screen. You can't queue up jobs onto the printers menu whilst it is printing because of this quirk.
ChituBox comes with the HALOT-X1 model already included in its database of machines. I have checked Lychee slicer but don't see it there, though I did reach out to them today (28th November 2025) and requested it to be added.
Final thoughts
The Halot-X1 is an interesting shift from what we usually expect in a consumer resin printer. Its inverted-kinematics approach, levelling-free setup, and thoughtful usability touches make it feel more refined than many printers in its price range. Creality / PioCreat has clearly focused on making the early stages of the printing process as painless and reliable as possible, and in day-to-day use that effort really shows. Features like the quick-release plate, quiet operation, and AFU help keep the workflow smooth and beginner-friendly, while the speed and consistency of the machine make it appealing to more experienced users, too.
I think the AFU is fantastic for people printing a large number of models in the same colour, or large models which require a large quantity of resin. It's of a help should you be constantly swapping resin types/colours. The wash and cure station is also a blessing and I believe a basic need for any resin printer - especially consider the price point and how it not only makes the work easier, but also safer. You'll also find workflows on the printers screen to aid with cleaning the print bed, and resin vat.
It isn’t perfect—no printer is. The Z-axis compression system does an excellent job of improving adhesion, but can slightly exaggerate the first layer if you’re aiming for absolute dimensional precision. The touchscreen interface is very usable, intergarets nicely with the AFU but also at times is inconsistent. For example, when previewing a print on the machine you see one estimate print time, then when you go to print the file you see another with a difference of hours. This is likely something they can resolve with a firmware update. And as with any resin printer, the slicer ecosystem and firmware updates will ultimately determine how well the machine matures over time.
But overall, the Halot-X1 offers a compelling blend of print quality, reliability, and ease of use. It’s a machine that removes a lot of the usual friction points associated with resin printing without demanding extra complexity or calibration. If you’re looking for a capable, modern resin printer that prioritises user experience and delivers consistently strong results, the Halot-X1 deserves a spot high on your shortlist. It looks as though we have a new line of competition worthy printers coming from PioCreat which is always a good thing for us consumers.
Technical Details:
| Printing Technology | Mono LCD Resin |
|---|---|
| Print volume | 211.68 x 118.37 x 200mm |
| Layer height | 0.01 - 0.2mm |
| Motion System | Fixed platform, moving light source |
| UV Wavelength | 405nm |
| X/Y Resolution | 14x19μm (15120x6230px) 16k |
| Control | 3.98" Inch Touch Screen |
| Connectivity | USB memory stick & WiFi |
| Print Speed | 170mm/h |
| Self Leveling System | Yes |
| Print release system | Yes - Twist to release |
| Auto Feed System | Yes, with preheat and resin parameters via NFC |
| Light source | Honeycomb Matrix Light Source |
| Slicing Software | HALOT BOX / Chitu Box |
| Power | 350w |
| Input Voltage | 100-120v / 200-240v, 50-60Hz |
| Gross Weight | 16.01kg |
| Net Weight | 12.75kg |
| Power Failure Recovery | Yes |
| Print Failure Detection | Yes |