
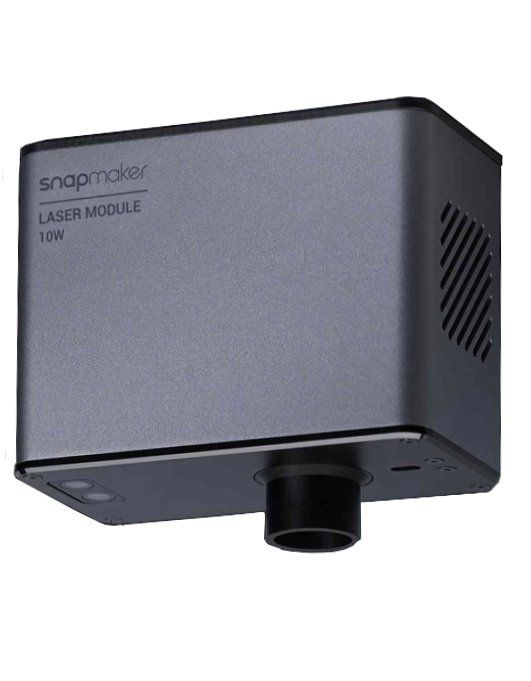
Snapmaker 10w Laser Module

Snapmaker 10w Laser Module
A massive improvement in so many ways over the original 1600mw laser module and the best upgrade yet I've added to my Snapmaker A350T.
Pros:
- Significantly faster whilst cutting or engraving
- The autofocus system removes the need to measure 99% of materials
- Single capture camera for artwork placement
Cons:
- Noisiest component of the Snapmaker whilst in operation
- Snapmaker Luban doesn't yet realise all its possible speed gains
Where to buy:
- Amazon: https://geni.us/Snapmaker2-3in1
- Snapmaker direct:
https://snapmaker.com/snapmaker-10w-laser-module
What is it?
The Snapmaker 10w Laser Module is the latest upgrade for Snapmaker's range of desktop CNC machines whose distinguishing feature is their interchangeable modules/tool heads. This allows their range of machines (you can read my review of the A350T) to quickly swap between functioning as either a 3D printer, CNC router, or a laser cutter/engraver.
This 10w laser is an optional, and in my opinion, totally worthwhile upgrade if you use the laser function even semi-regularly.
The included standard 1.6w laser module has done me well, but for reasons I'll go into throughout this review, has now long been buried in the cupboard and forgotten about. Whilst, with the 10W laser module, I get to feel the excitement of new possibilities all over again thanks to the new found possibilities this newer, smarter, stronger, and faster 10w laser delivers.
The Technical Overview
| Laser power | 10w | |
|---|---|---|
| Max cut depth (basswood) | 8mm | |
| Technology | Fast-axis Collimating Lenses | |
| Laser Focus | 0.005mm x 0.2mm | |
| Focus | Fully Automatic | |
| Camera Capture | Single Shot HD Camera | |
| Software Inc. | Snapmaker Luban | |
| Safety Features | Gyro sensor for tilt detection |
For a more detailed technical table please see the end of this review.
Machined from stylish and sturdy metal the module fits in with the same design aesthetics and solid build quality as the rest of the Snapmaker range.
In comparison to the standard 1.6w laser module, with the 10w module, you're able to cut deeper with fewer passes as well as seeing improvements to engraving speeds with its tighter more parallel laser beam resulting in sharply defined markings.
The additional power also expands the range of materials you can work with - I'm now able to etch powder-coated aluminium with decent results. Something the previous module was almost incapable of achieving.
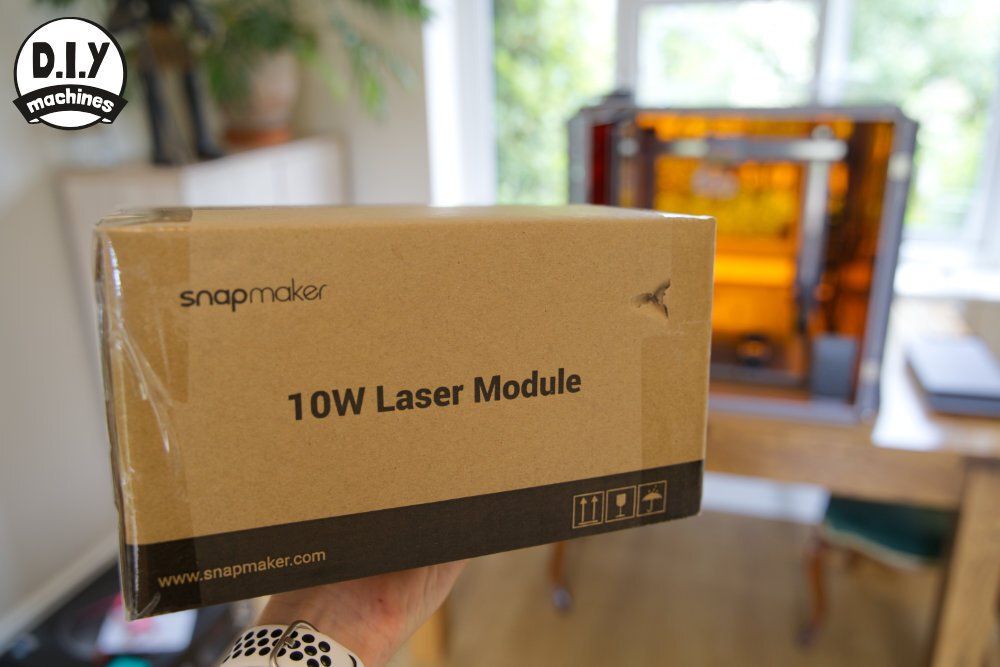
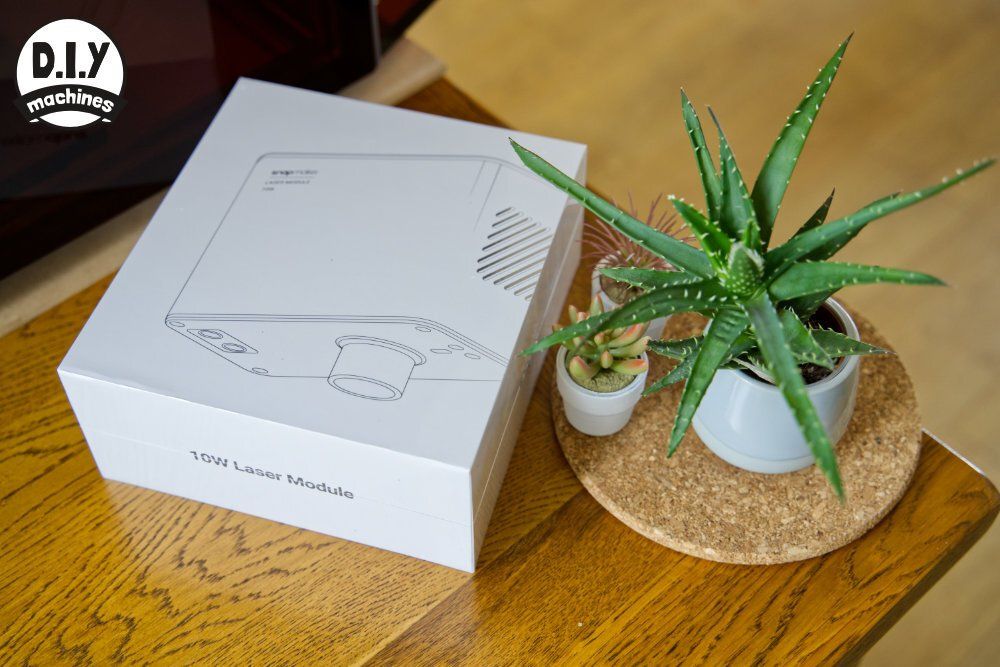
Shipping and Packing
The package arrived in a sturdy outer box without barely a mark so I had no worries about the condition of what was inside. After opening up the brown shipping box you're greeted with a very Apple-like brilliant white shrink wrapped packaging emblazoned with an illustration of the module and foil text proudly announcing its arrival.
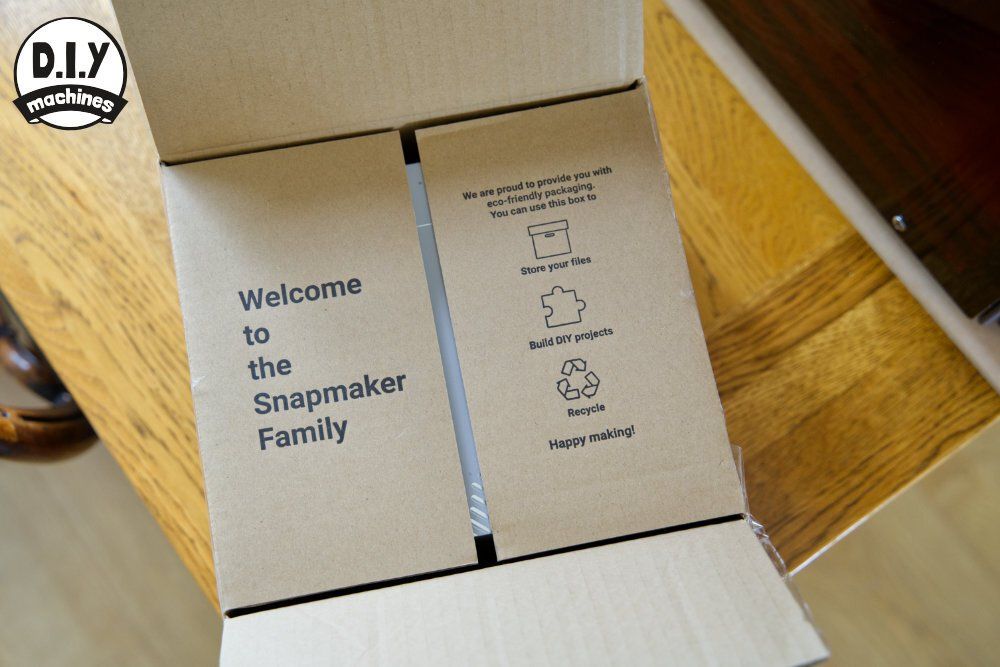
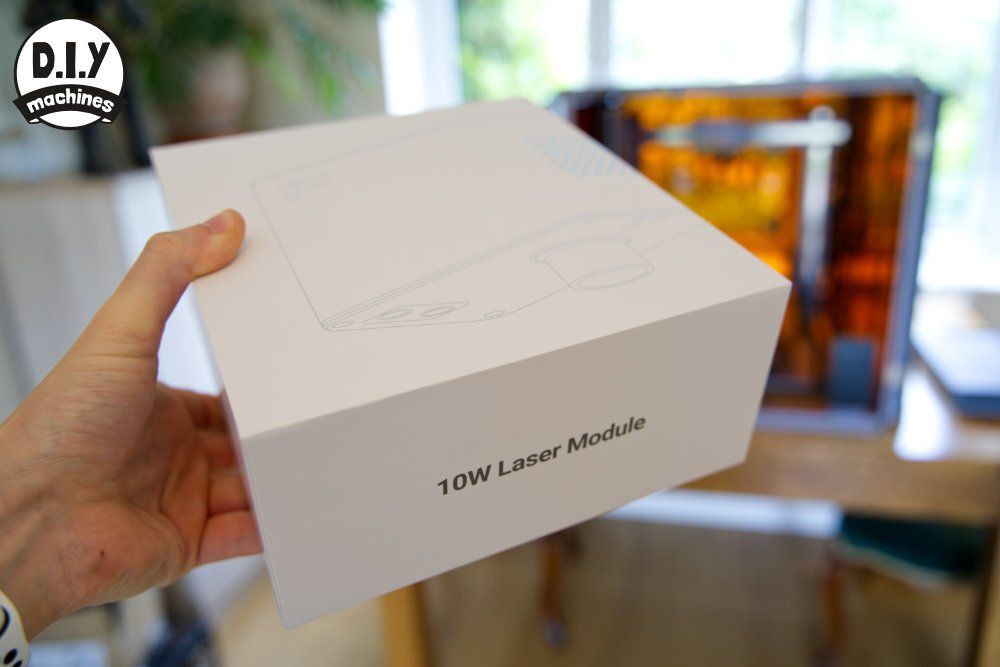
I'm sure I can't be the only person who enjoys a well packaged and thought out unboxing experience and this so far was delivering.
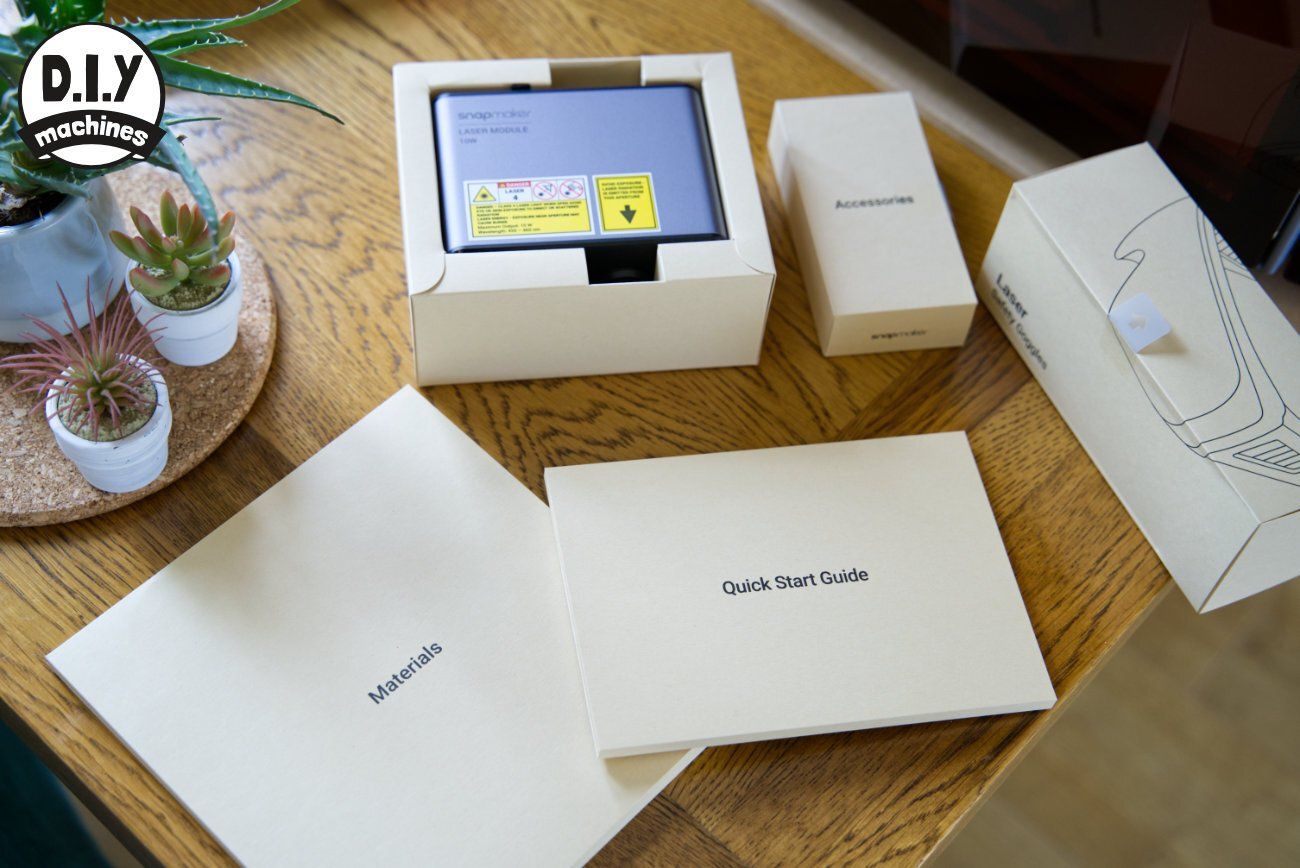
What else is included?
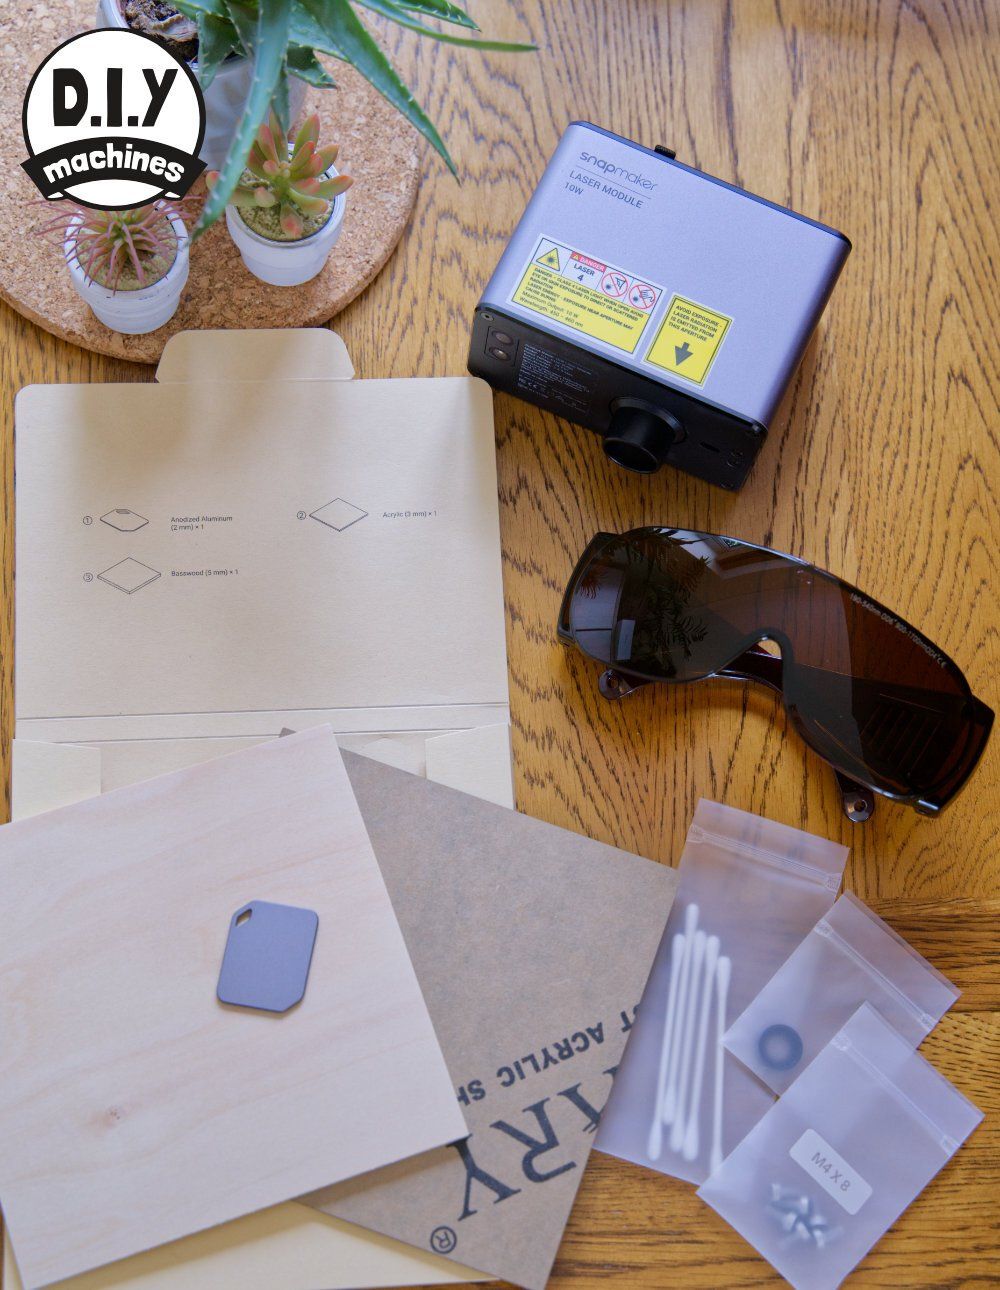
- Laser safety glasses
- 10w Laser Module (no surprise there)
- Cotton buds for cleaning lens
- Spare replacement lens
- Bolts for securing to Snapmaker
- Sample of Acrylic
- Sample of basswood
- Sample of powder coated aluminium
- Printed quick start guide
Don't forget that the cardboard it shipped in also provides additional materials to work with.
They also offer a kit which includes the metal ridged laser bed you install onto the Snapmaker to play your materials on. This is ideal if you purchased their 3D printing model and now want to add laser capabilities to your Snapmaker F350 or F250
Assembly
Attaching the 10w Laser Module is trivial. It involves removing whichever tool head is currently installed on your machine by disconnecting a quick clip cable (after powering off your machine) and then undoing four easy to access bolts.
Installing the 10W Laser is a simple case of repeating these steps in reverse.
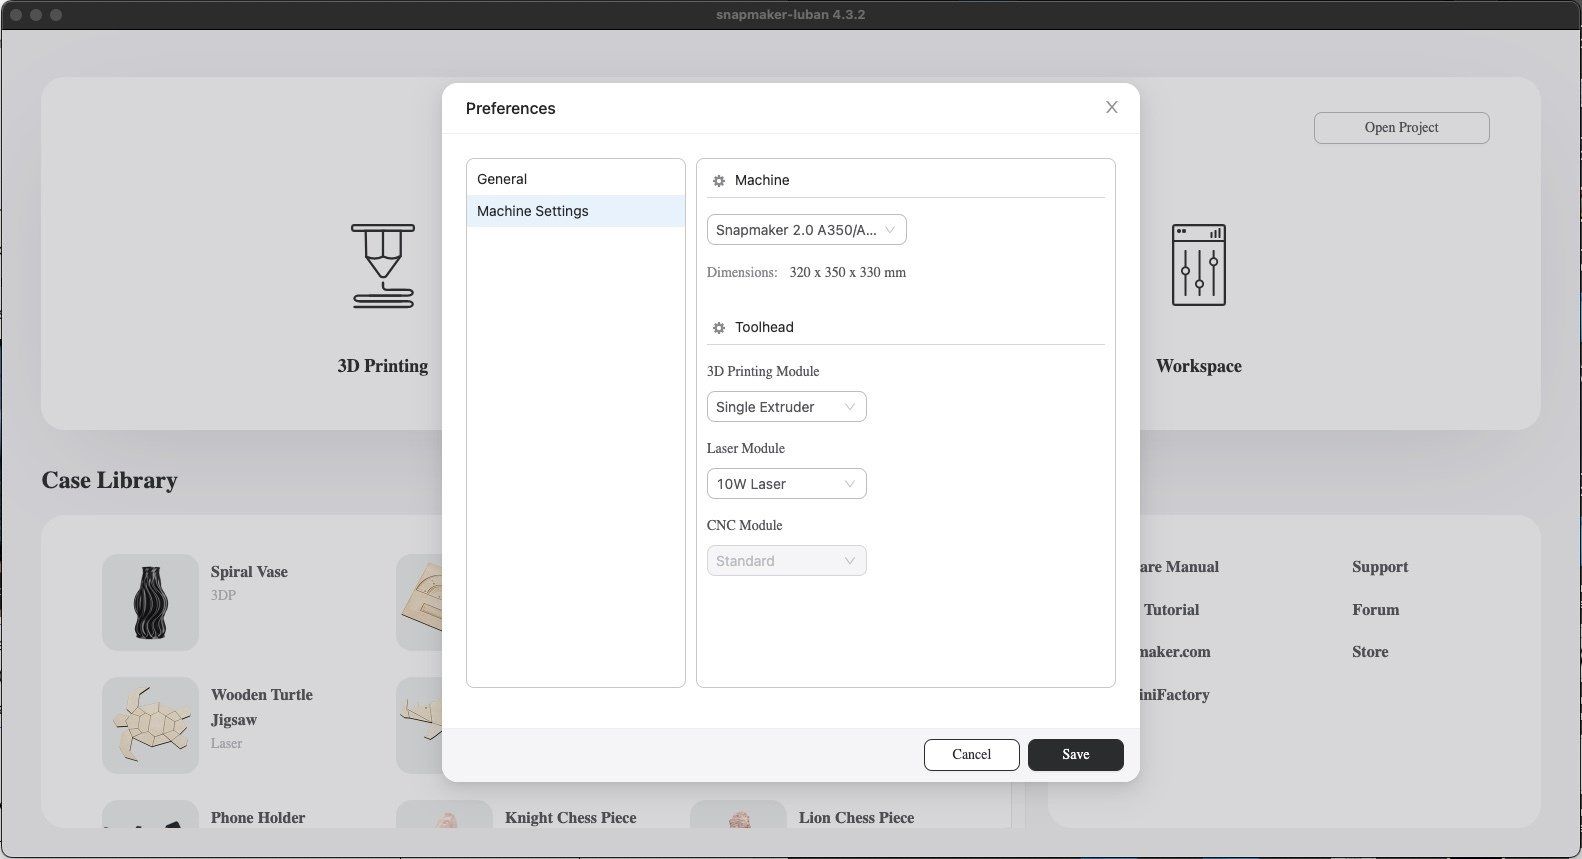
We also need to let Luban (Snapmaker's free software for preparing projects for the machine) know that we have the 10W laser installed. On my Mac, this is just a case of heading to apps preferences and selecting the 10W Laser in the 'Laser Module' drop down in the 'Machine Settings' pane.
Instruction manual
The instructions are concise. Predominantly made up of warnings (which you would do well to read) and then a step-by-step guide for producing your first project. The Snapmaker's onscreen controls will also conveniently guide you through using your new module.
Using the laser module
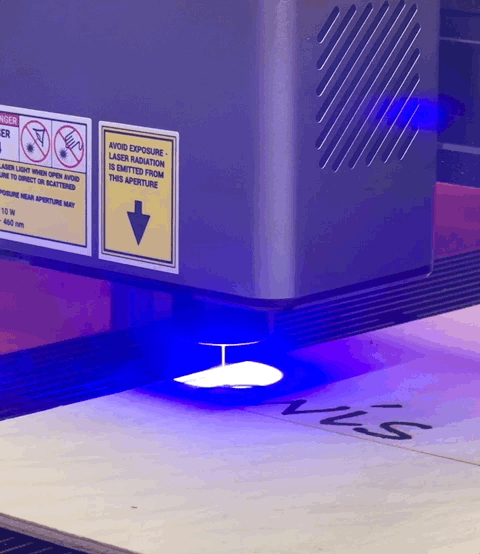
The steps required for programming and running the laser are almost identical to that of the 1.6w laser module the Snapmaker A350T came with - accept the engineers at Snapmaker have managed to completely remove the need to manually focus the laser before each job and the camera capture preview technology is vastly improved.
Let's go through a typical job so if you've not used a Snapmaker Laser before you will learn what it entails and I'll highlight where the process differs for those of you who are thinking of upgrading from an existing 1.6w laser.
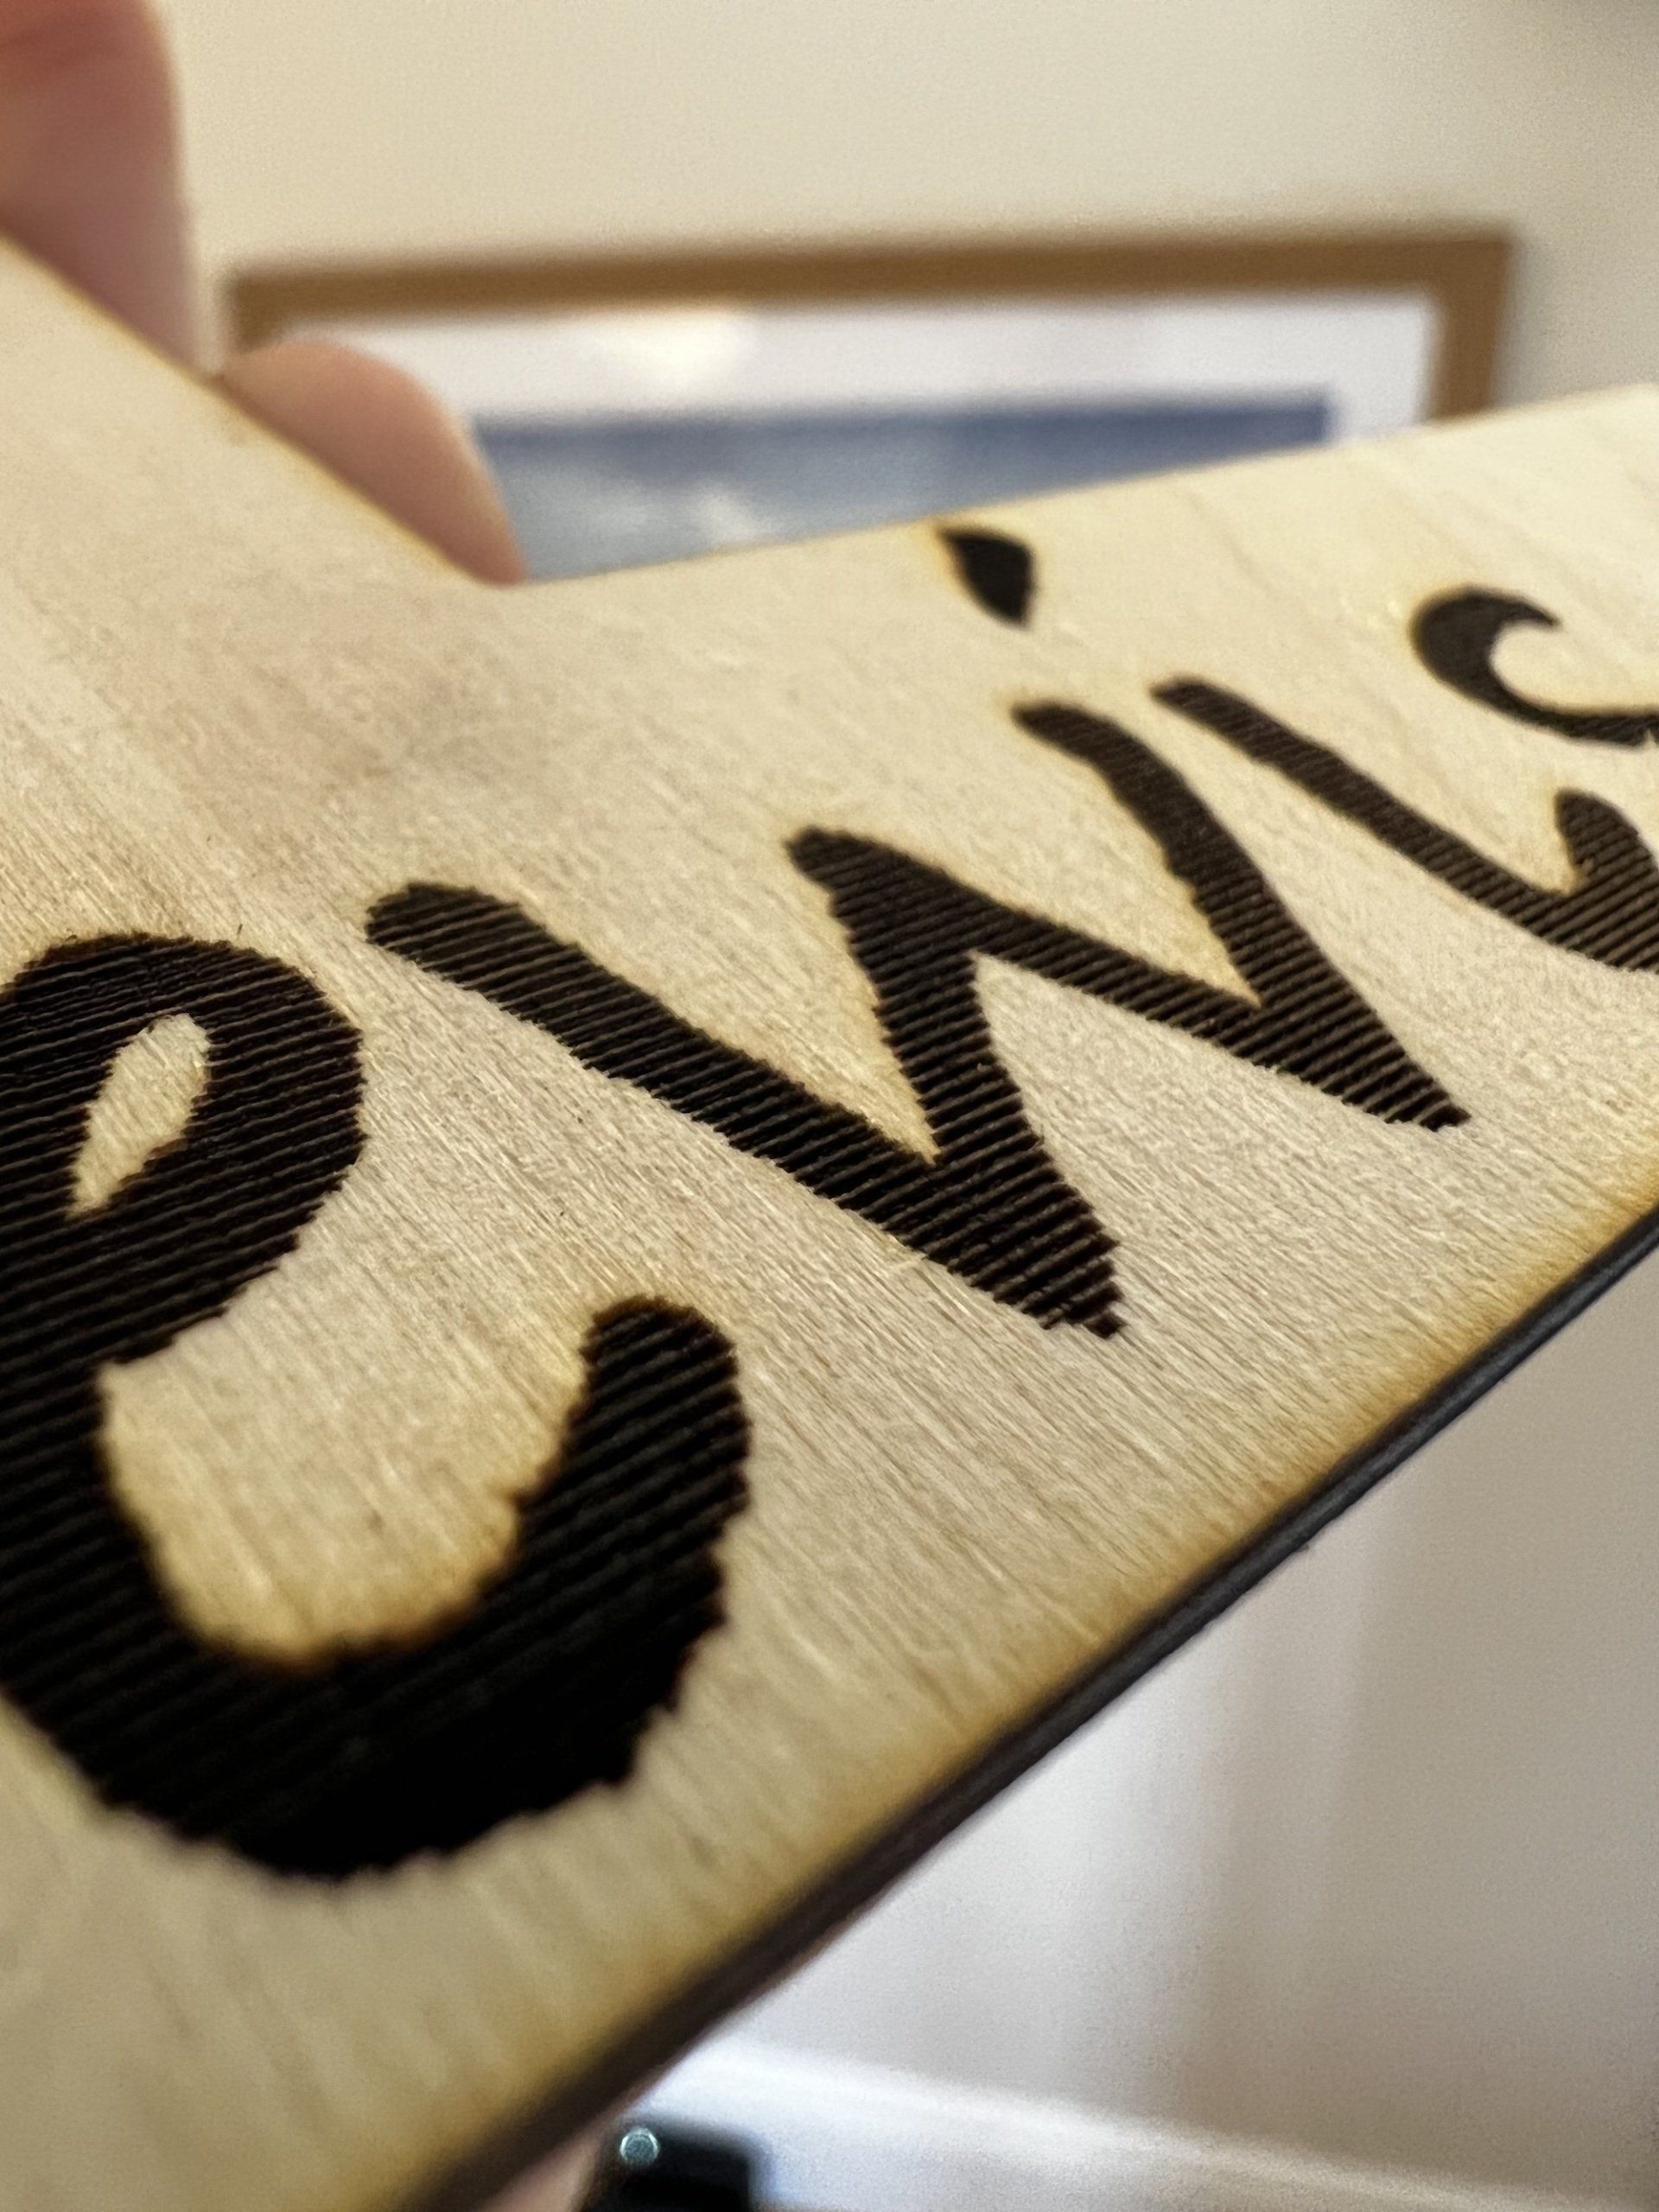
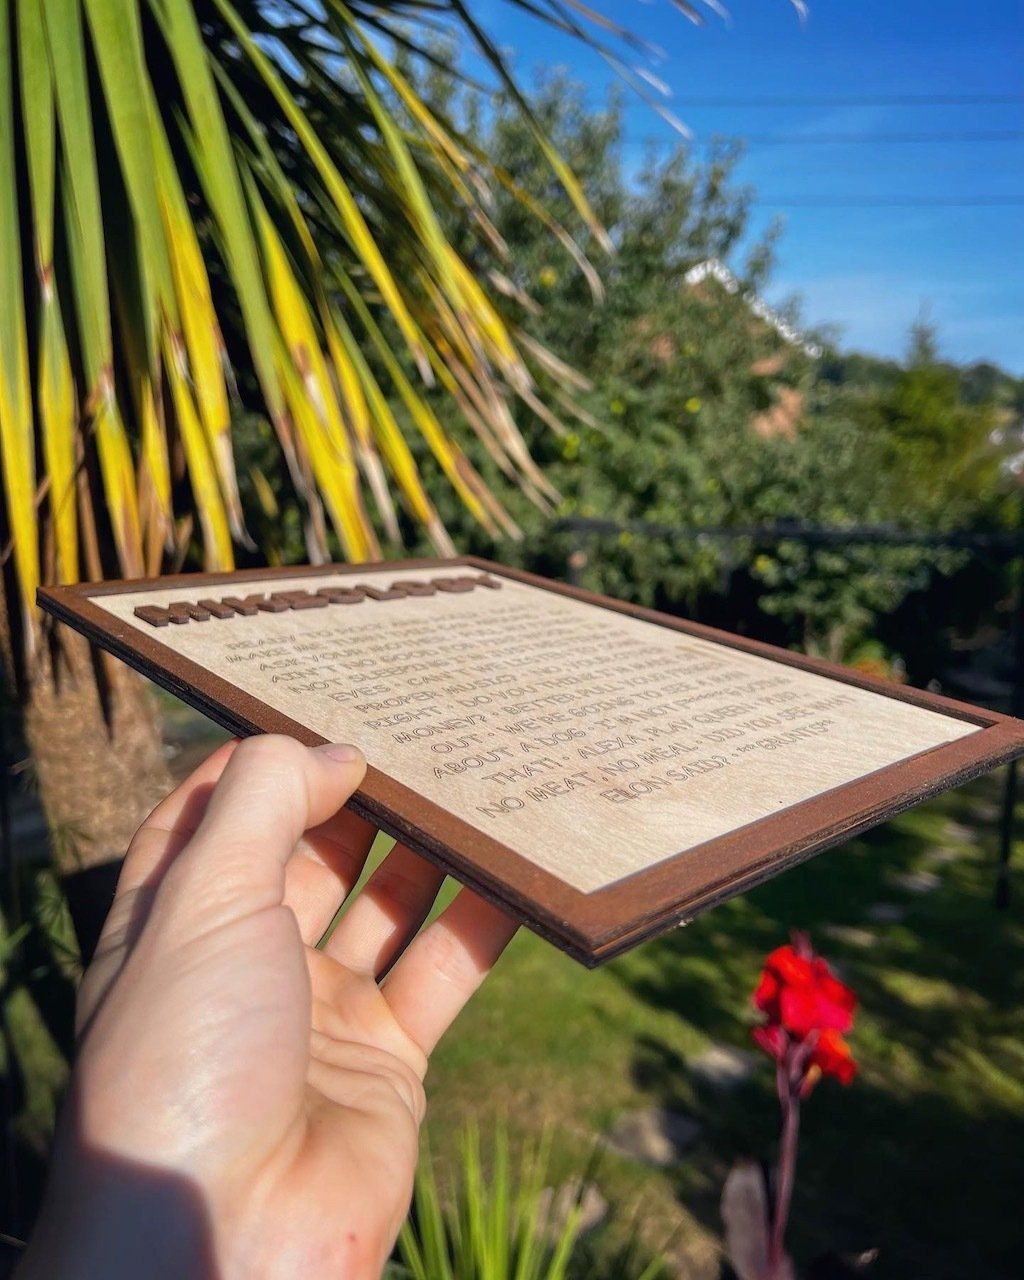
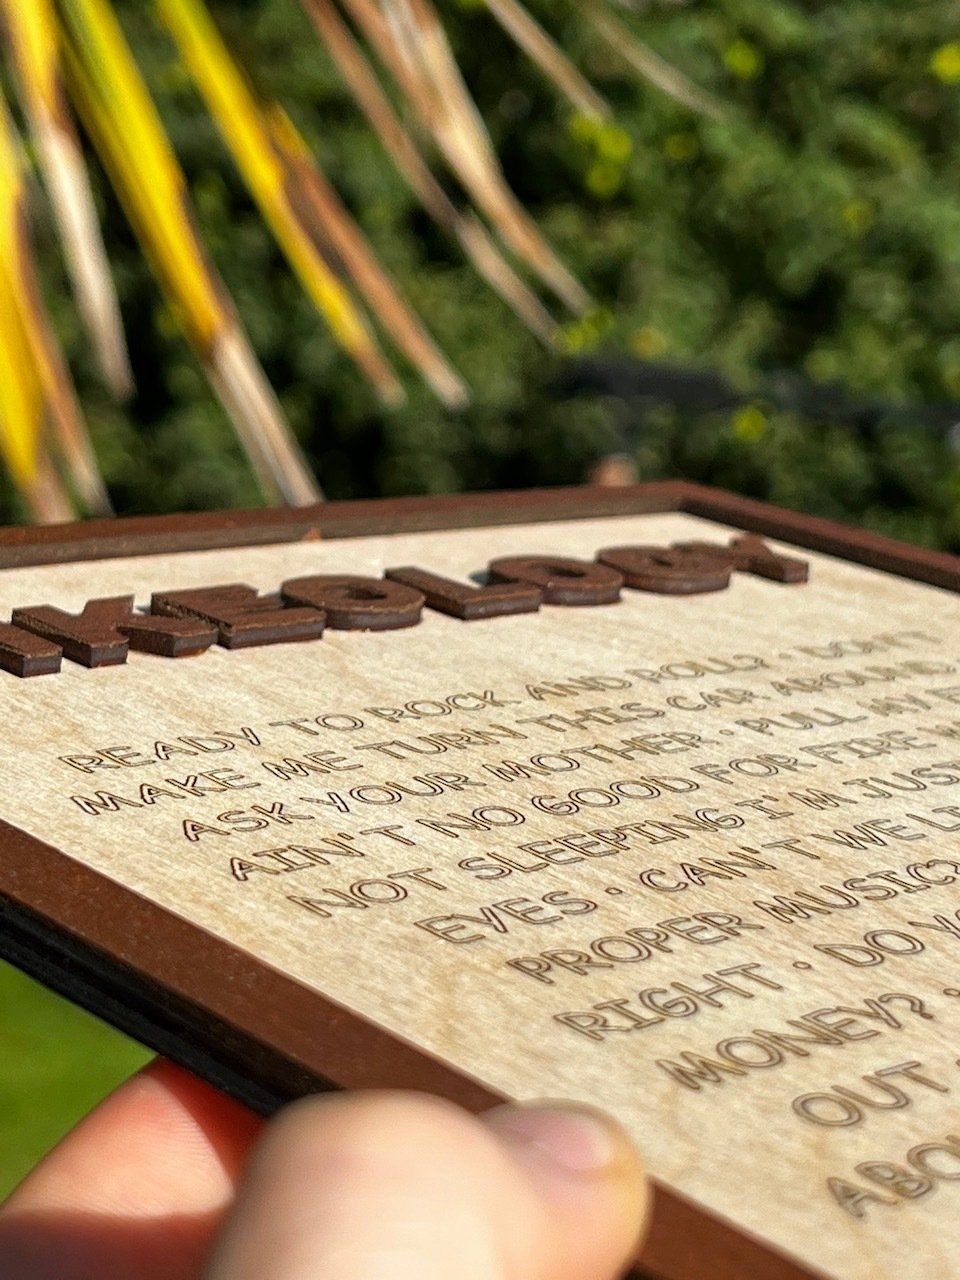
We will use Snapmaker Luban to cut out Letter 'L' out of a piece of wood and also engrave my name (Lewis) inside the 'L' during the same job. A hole will also be cut at the top to allow for hanging.
Capture an image of the work material
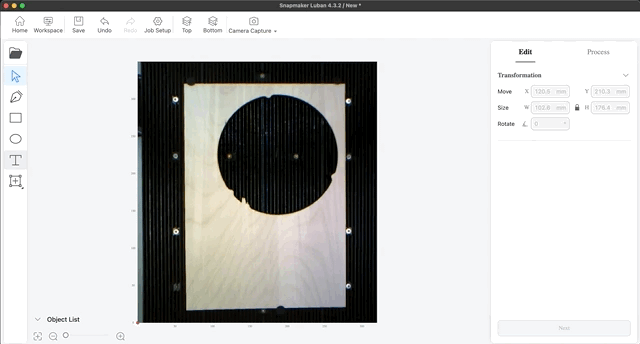
I want to use up an off-cut of 5mm wood from a previous project. Snapmaker's Camera Capture is perfect for this - and it's been enhanced with the 10W Laser Module. With the new module, after we have connected to the Snapmaker, we can simply click 'Camera Capture' and then 'Add Background'.
The tool head will quickly move to the centre of the workspace and capture an image in a single shot using its upgraded higher resolution wide-angle camera. We can now position our artwork as we create it with an accuracy of about 2mm. Plenty of precision for general positioning.
The previous 1.6w incarnation of the laser needed to take a series of 9 images in a 3x3 grid and then attempt to stitch them together. I honestly had little success with this - even after recalibrating the stitching process a few times - so it was a feature I stopped using. However, I capture a background image every time now as a matter of course. It's quick and provides some reassurance when preparing your artwork's position on the software canvas.
Creating the artwork in Luban
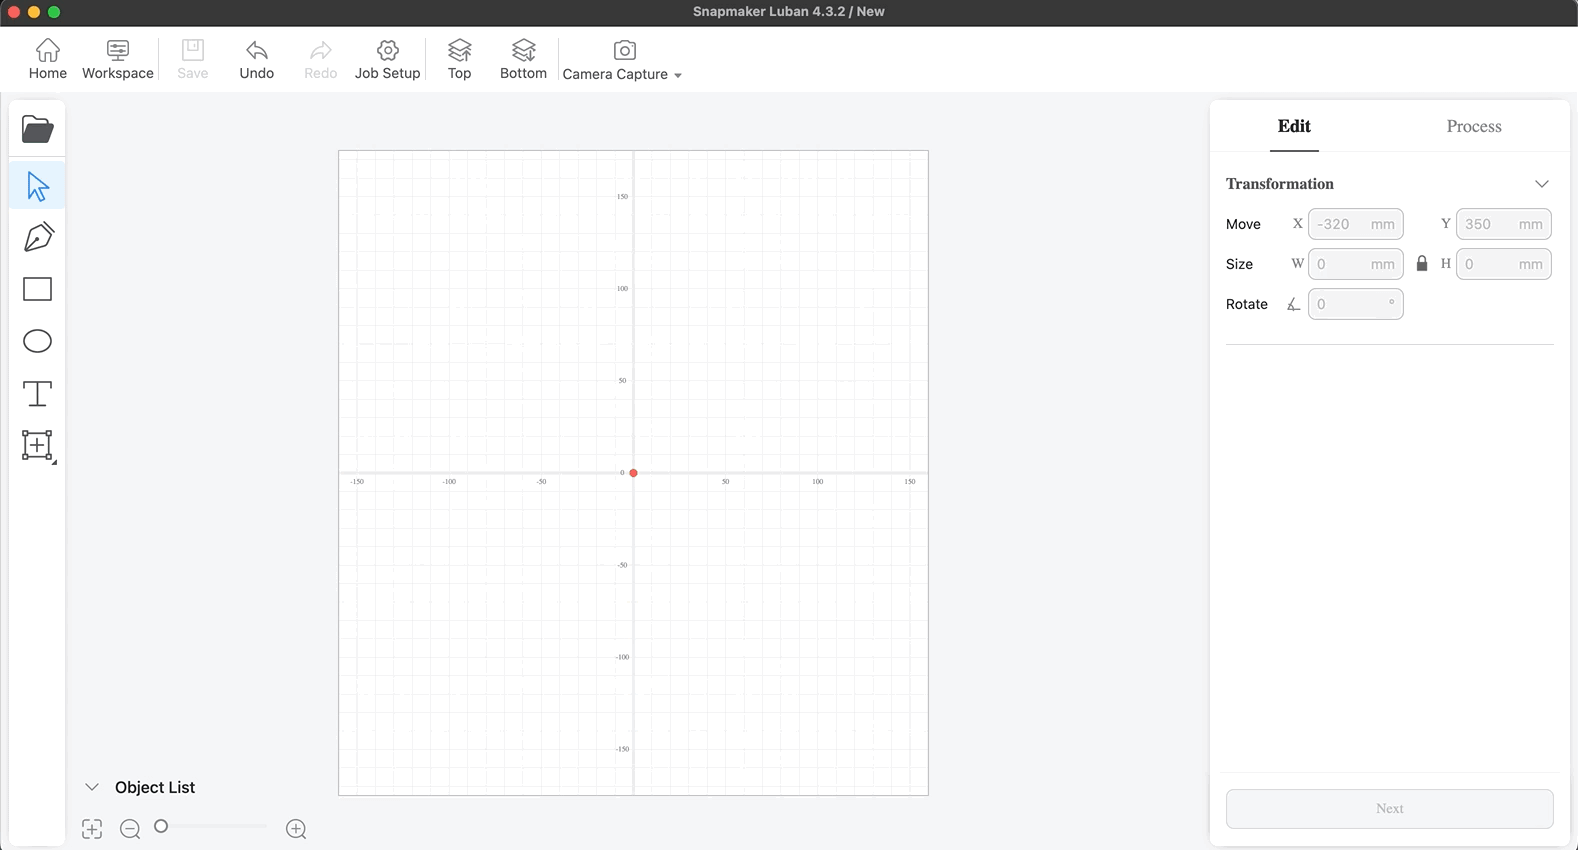
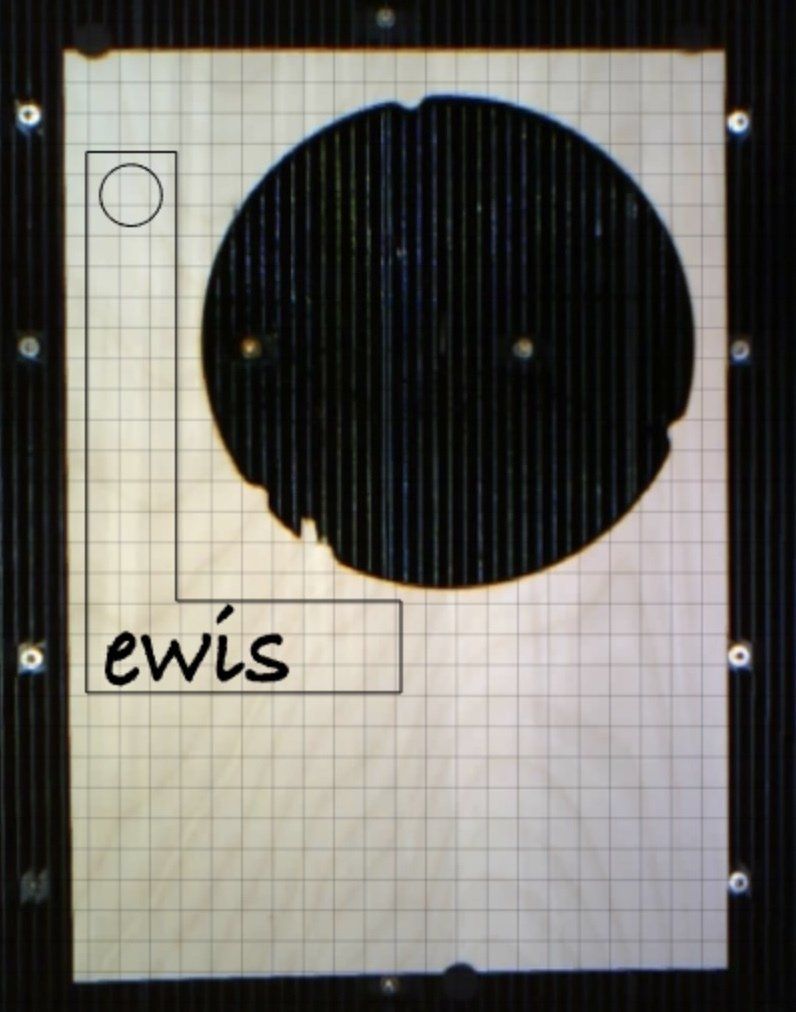
With the background in place we add a text box. In this textbook we put the capital letter 'L' and enlarge its font size. We can then move it around so it a few mm away from the edges of the material. Thanks to the camera capture we can place it to the bottom left of the circular cutout and make good use of our materials.
We can then continue adding another text box with 'ewis' written inside of it. We will have this engraved in a more handwritten like font. The circular cut out will be made up of the circle shape available within Luban. The sizing is accurate, so by setting the dimensions of the circle to 20mm x 20mm that is the finished size we will have in our wooden cutout. With these three pieces of artwork added we can continue onto the next stage.
Adding machining processes
The next tab on the right labelled 'Process' is where we can select one or more artwork objects on our canvas and apply a machining process to them. We can start by selecting the giant 'L' and the circle shape at the same time and then pressing the 'Create Toolpath' to apply a process to these assets.
Adding a cutting tool path
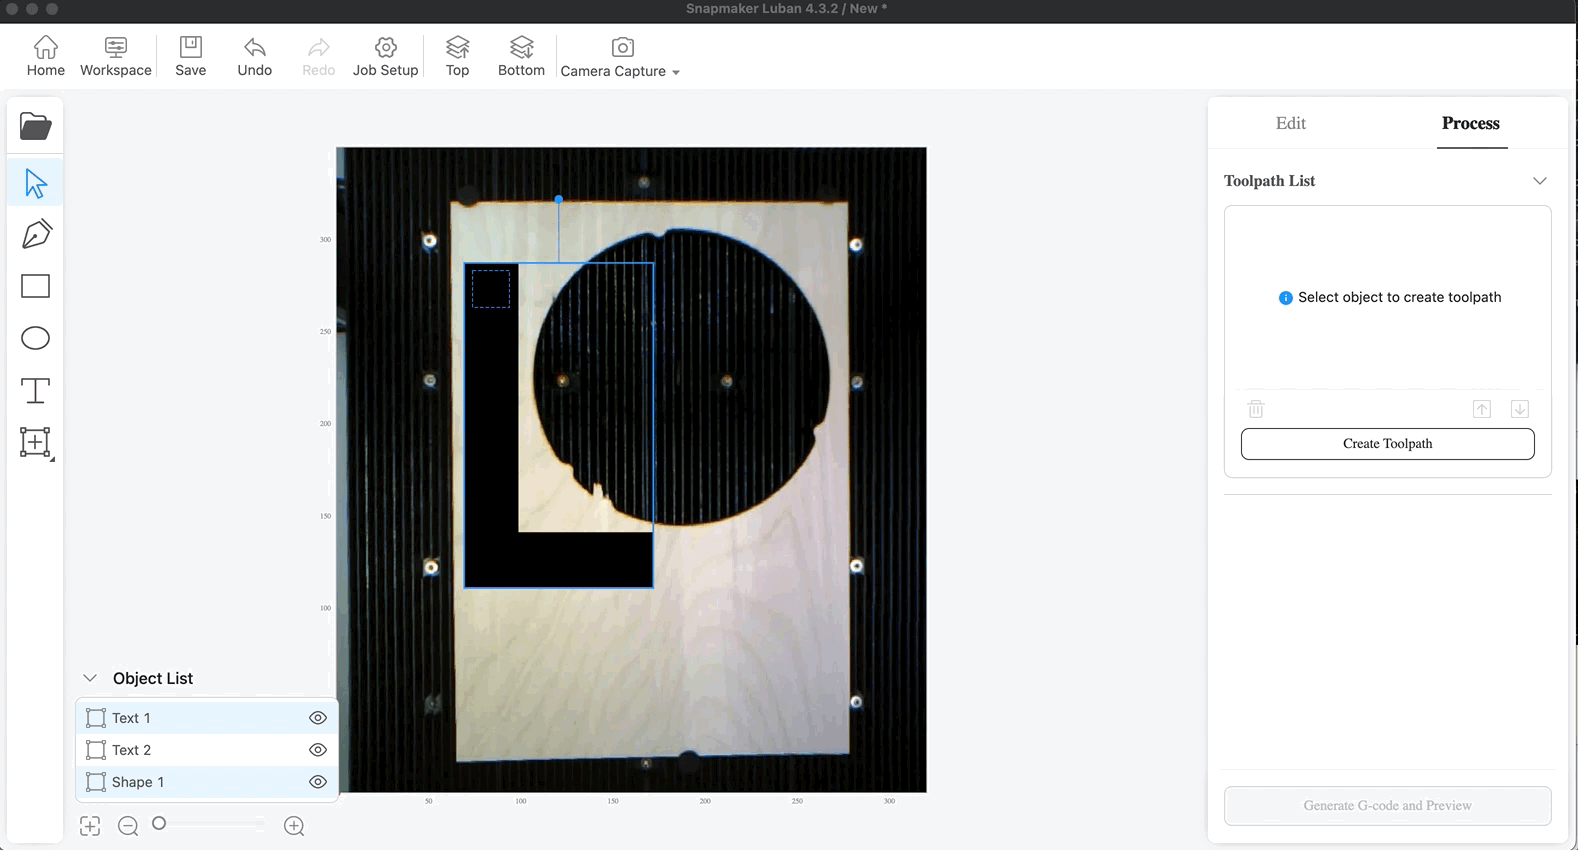
Adding an engraving tool path
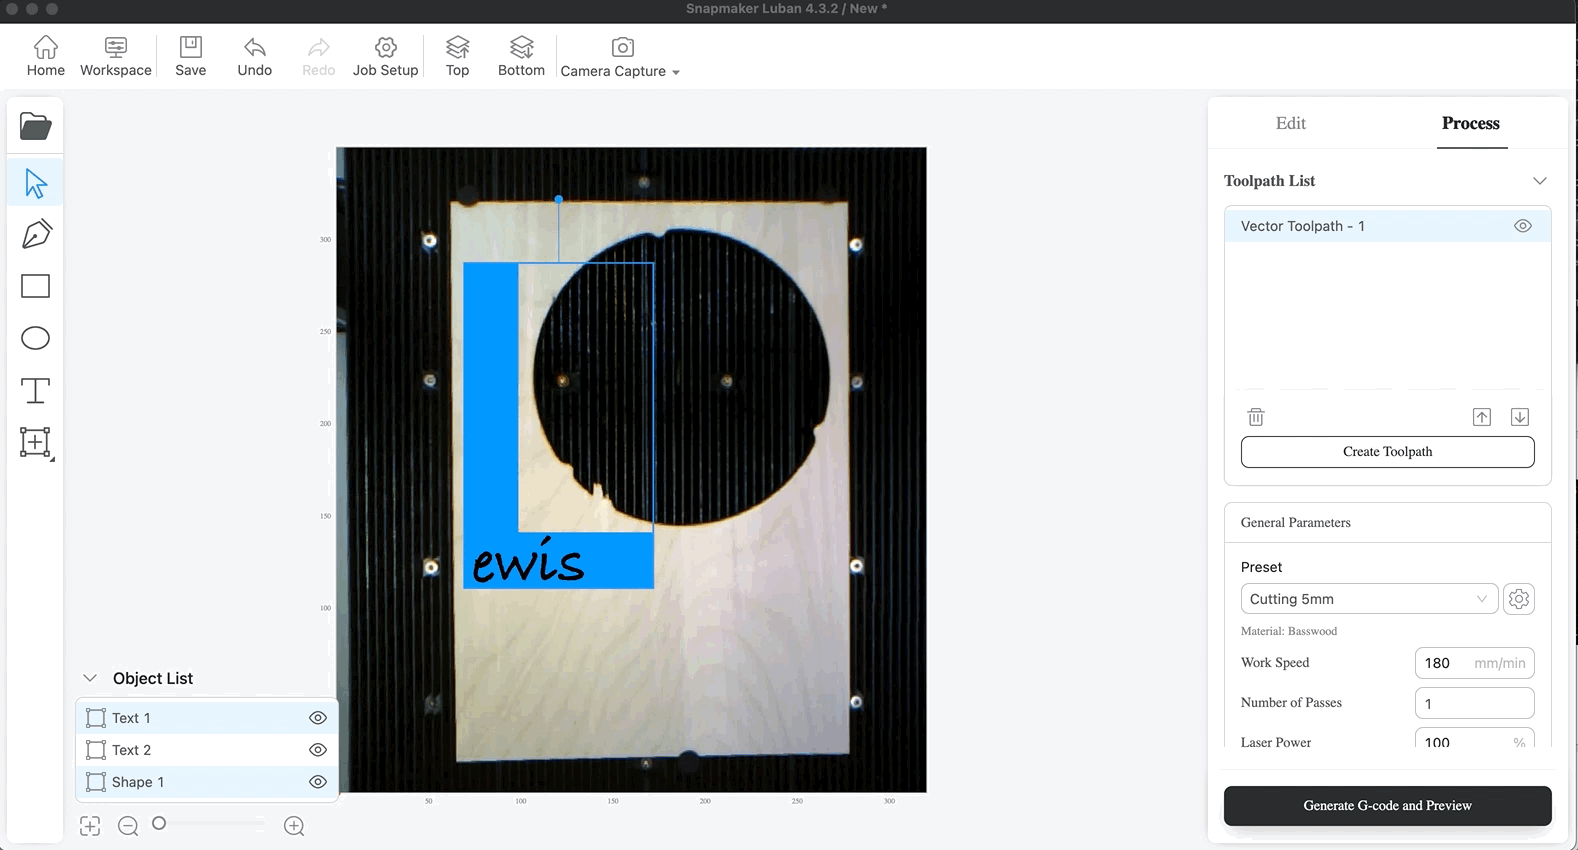
You'll notice that Luban already contains a large set of presets for a variety of materials. I'm using the preset for cutting through 5mm basswood.
For the engraving, select the text to be engraved then click again on 'Create Toolpath'. This time I'm choosing the options for 'Line Filled Engraving'. This will light burn the text into the surface of the wood by drawing a series of closely packed lines.
Luban will then generate a preview of the machining process and estate a time for completion. For me, this is predicting 7 minutes.
Transferring programme to the Snapmaker
There are two main methods for transferring your machining program to your Snapmaker; USB memory stick or WiFi. I like to use the WiFi streaming method for convenience if the program will not take too long to complete. For some jobs, where the machining might be an hour or more I then like to cut out my laptop from the loop (incase it goes to sleep or similar) and save the program to a USB flash drive and insert it directly into the Snapmaker.
To submit the job to the Snapmaker Wifi we press 'Generate GCODE and Preview' which does exactly what it says on the button:
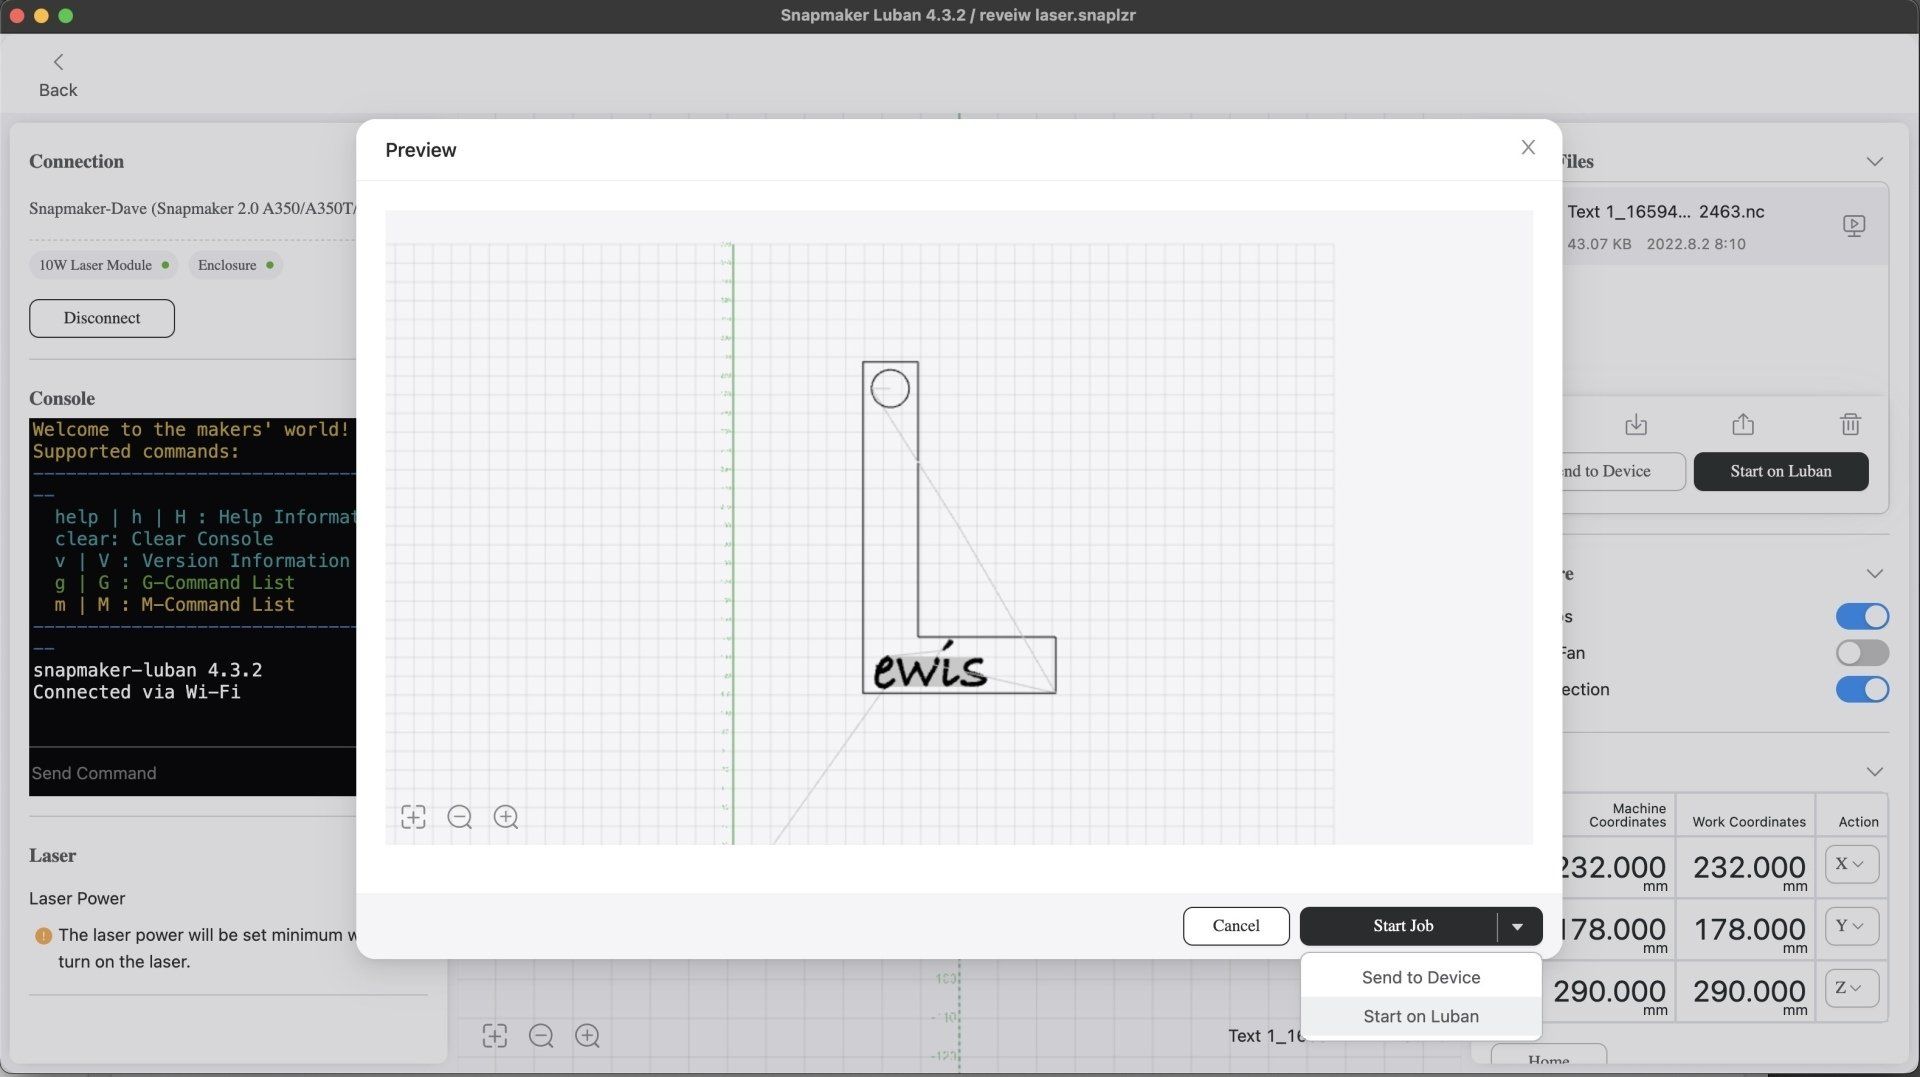
We then see the GCODE the machine will receive (minus the background image now). After pressing 'Start Job' and choosing 'Start on Luban' the Snapmaker will spring into life. Ensure you have your safety glasses on and the enclosure closed before you submit the job to the printer.
Setting autofocus and machining
So how does the Snapmaker know the correct focus distance and height of the work material?
When using the original 1.6w Laser Module you would be required to manually measure the material thickness and then input this information directly to the Snapmaker using its touchscreen. Even when repeating the same job several times over on what should be the same consistent supply of material I always measured the thickness, it's surprising how it can vary, especially with natural materials such as wood or leather.
This is one of the big upgrades and most helpful features on the 10W Laser Module. It now uses a combination of a red point of light and its camera to automatically calculate the height of the material using mathematical triangulation. It does this before every job and only takes a few seconds. There are some instances (very reflective surfaces or incredibly dark ones) where this may fail but I am yet to experience this myself.
Well done Snapmaker for entirely removing a process. 👍🏼
Once this is done the job will begin and seven minutes later we can take a look at what's waiting for us on the build platform:


And to demonstrate the accuracy of the improved Camera Capture system here is the preview from Luban (on the right-hand side) as well as the finished job on the platform for comparison. Impressive right?

Is it really faster, better and stronger?
In a word - YES.
In two words - Yes absolutely. (Can you tell I love it?)
Let's go over the highlights of the 10W Laser module and where appropriate compare it to the original 1.6W module.
High-powered wind channel
This is heavily redesigned in the 10W module and delivers a constant and strong stream of air towards the laser beam blowing fumes away as it works. This ensures that any fumes are blown down into the metal channels supporting the workpiece and away reducing their ability to interfere with the laser doing its thing.
Auto Focus
We touched on this earlier in the review so you already know how it works. In comparison though, I needed to use my verniers to manually measure the thickness of the material before securing it to the cutting platform and then entering this measurement into the Snapmaker's touch screen when requested.
Camera Capture
A substantial improvement in my opinion, though this is reflected on paper as well. With the previous incarnation, where the module captured a grid of nine photos and then attempted to stitch these together into a mosaic, was rarely successful for me. To the point I just stopped using this 'feature'.
However, it is now quick and dependable with the newer upgrade and I now use it every time as a matter of habit. The clarity of the image has improved and the accuracy of its placement on the canvas in Luban is more than precise enough for my needs.
Orientation Detection
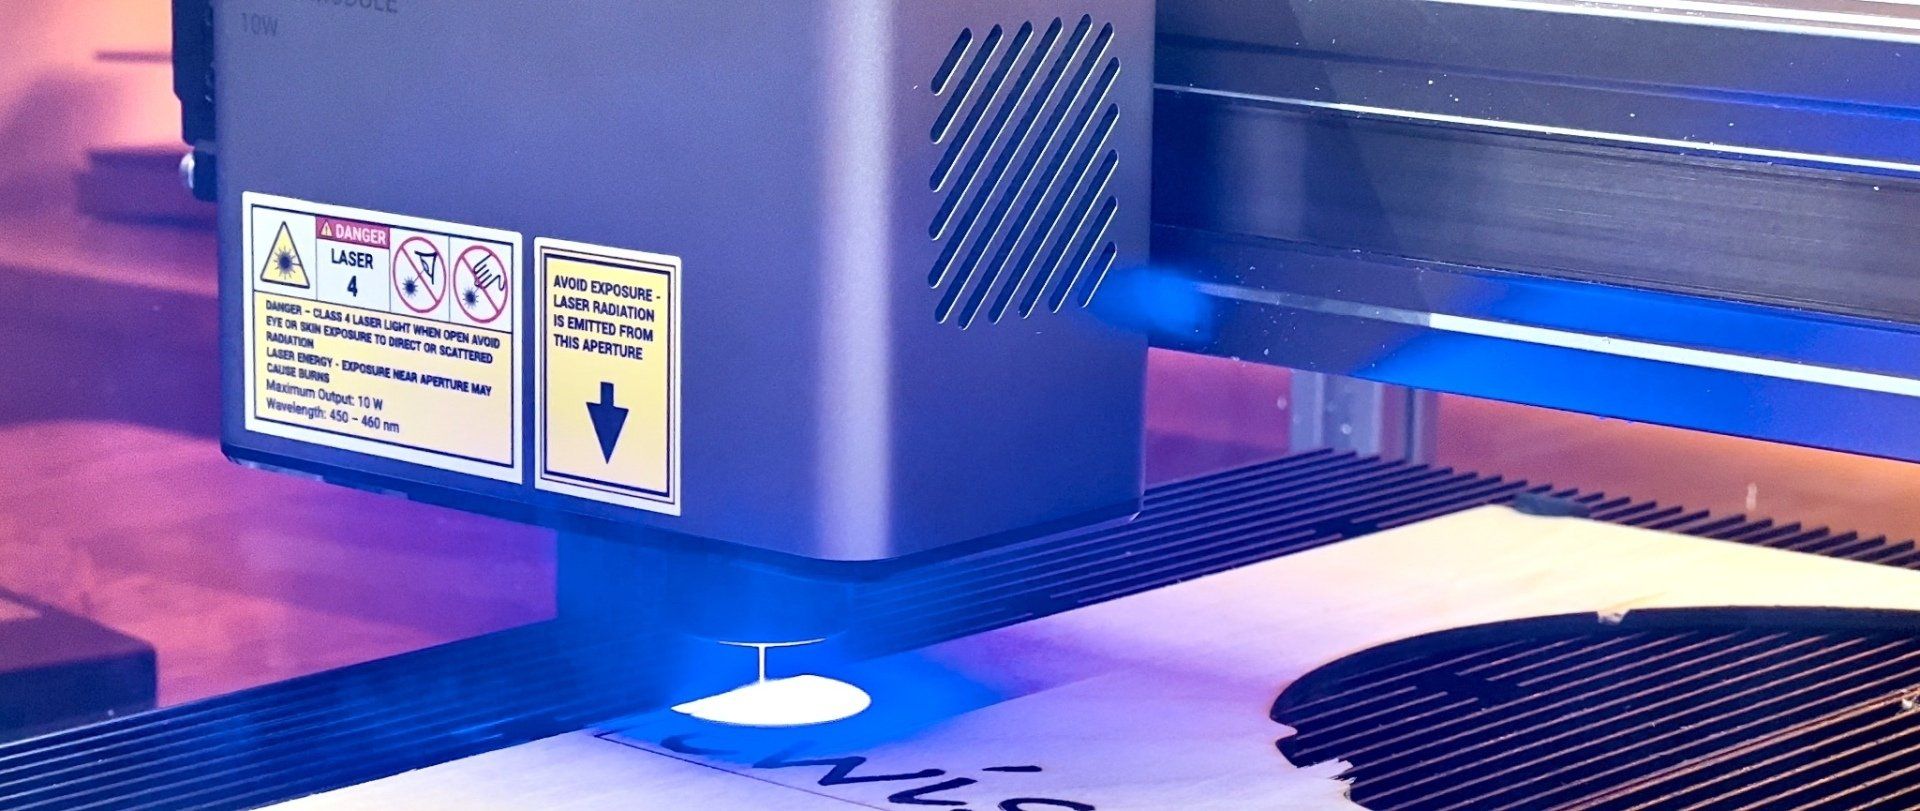
As far as I am aware this was not a feature in the older module. The newer module now includes a gyro (like that found in your smartphone) so that the laser beam will be disabled if the tool head is positioned anyway other than absolutely vertical with the laser aperture pointing downwards. This protects the user and bystanders from the rare possibility of a stray sideways beam causing harm.
Laser strength and associated working speeds
Well, it's obvious that a 10W laser is more powerful than a 1.6W laser, but this one number does not tell the entire story. Other factors such as how parallel/convergent the beam also effects its ability to achieve good results. It would be more useful to look at actual examples of processing different projects.
For this reason, I created three projects using the 10W laser and then calculated the time to machine these projects on either the 10W or 1.6W laser to get some real world results. Here are the there projects and their related statistics:
Engraved chopping board

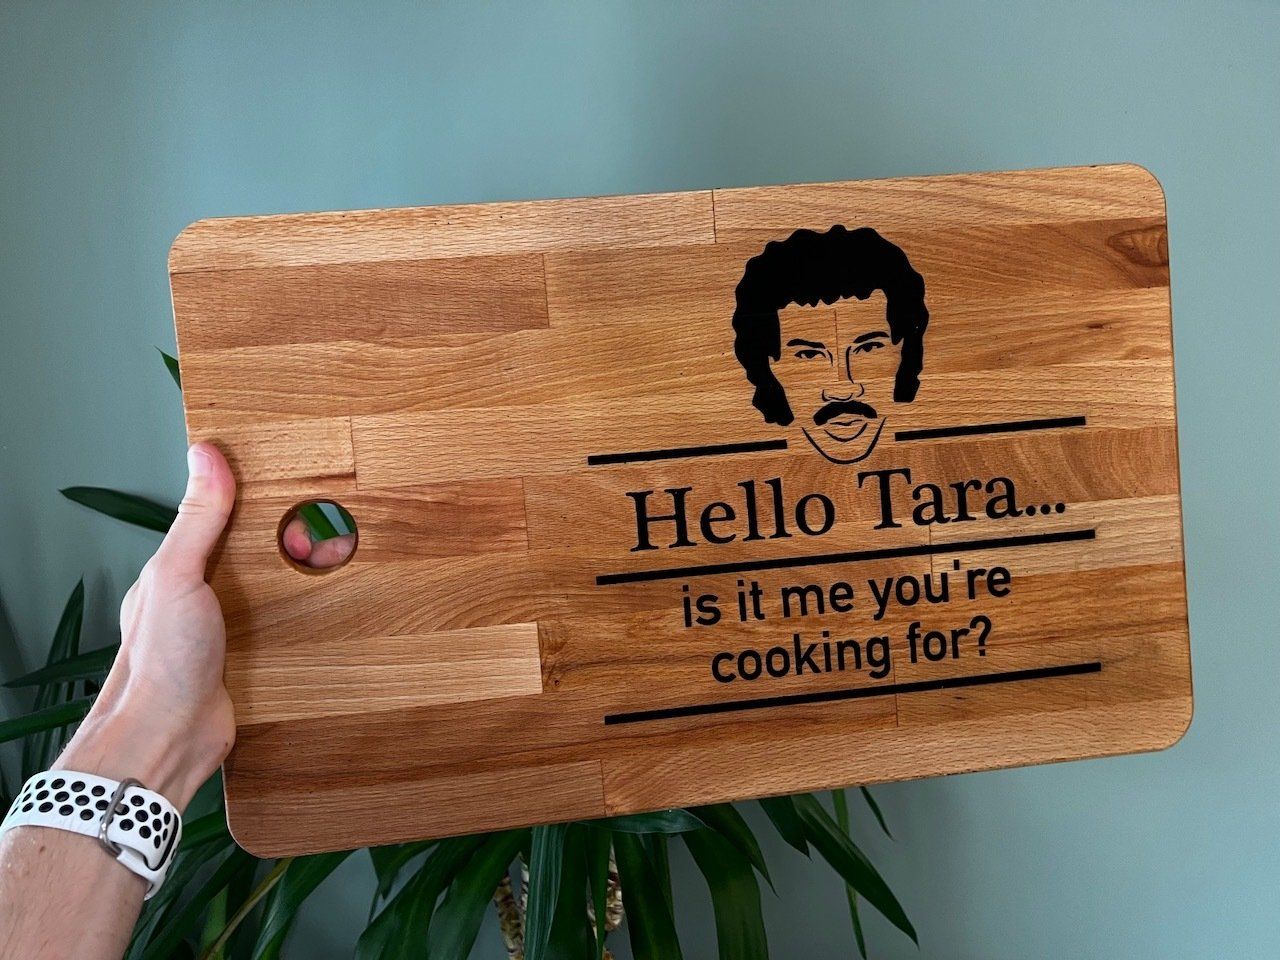
This is an untreated chopping board which I purchased from Ikea and then laser etched a graphic (of Lionel Richie) and a message for the recipient. The contrast is brilliant and the edges are very sharp. I then treated the chopping board with some finishing oil suitable for use on a food preparation surface.
Time to laser with 10W module: 1hr 24mins. Time to laser with 1.6W module: 2hr 1min. Speed improvement of 44%
Cut and engraved plant signs
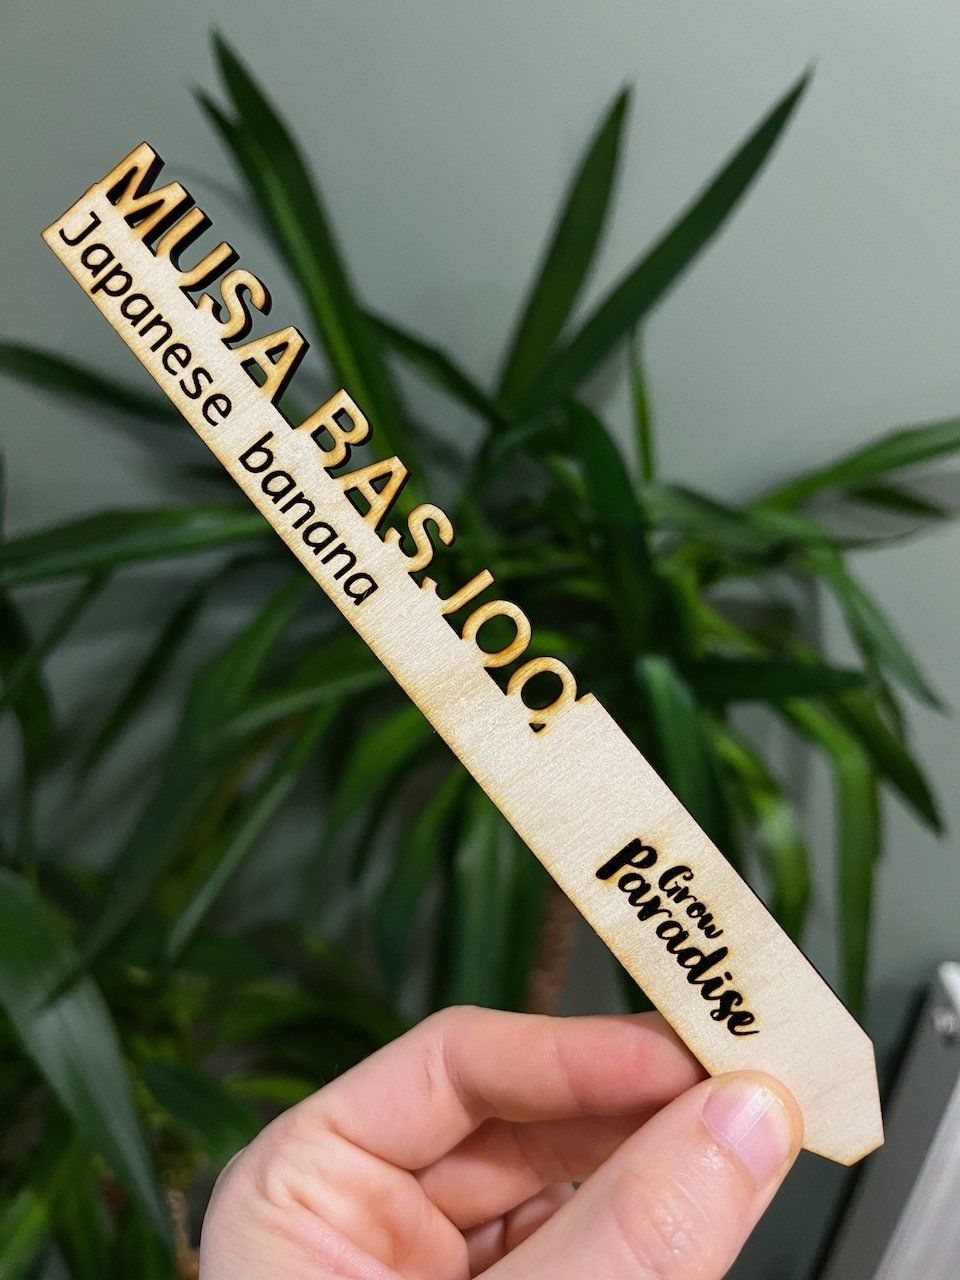
The wooden plant labels are cut from 4mm thick birch plywood. The text is engraved before cutting to ensure the workplace does not move during the etching phase.
I designed a variety of these and they can be purchased on my Etsy shop if you would like any. Every purchase helps fund my next project here on DIY Machines.
The 'Grow Paradise' logo was a coloured JPEG image which Luban was more capable at processing in order to recognise the outlines of the logo.
Time to laser with 10W module: 7mins
Time to lapse with 1.6W module: 43mins
Speed improvement of over 600%
Birthday present artwork

This was cut from two separate sheets of 4mm thick Birch plywood. The backer was first etched with the text along with a faint guideline of where the letters where to be glued to ensure they were properly spaced and positioned. This was then cut out from a slightly larger sheet ensuring it was true in size and would match that of the darker frame.
The top layer consists of a wooden frame and the letters making up the title. These were painted with a wash of darkening wood stain. Only one coat was used to help insure that the natural grain of the wood was still visible.
Time to laser with 10W module: 38mins. Time to laser with 1.6W module: 2hr 55min. Speed improvement of 500%
Software
Snapmaker maintain their own GCODE generating software, Luban, to help you prepare your artwork for 3D printing, CNC machining or Laser etching/cutting. It's available for free and runs on all the major operating systems. Mac, Windows, and Linux.

For those of you who are interested, the software itself was built on the codebase of cncjs and uses the CuraEngine as the backend 3D slicing engine. Luban itself is open source and hosted on Github.
I have been using it for over a year now for all my projects except for the most advanced CNC routing ones which I program from inside Fusion 360.
One criticism of the software is that its path planning is clearly far from optimal which needlessly increases the run time of each program - I hope they can send some time to spend improving this. As the 10w laser module is absolutely quicker at cutting and engraving, but the long winded moves back and fourth between each ‘zap’ unnecessarily wastes time. It's already fast but could be even faster.
Where to buy:
Where to buy:
- Amazon: https://geni.us/Snapmaker2-3in1
- Snapmaker direct: https://snapmaker.com/snapmaker-10w-laser-module


