
Elegoo Neptune 2
Elegoo Neptune 2 FDM 3D Printer
A budget friendly FDM printer from Elegoo. It has some nice features for the price point, simple to set-up and great introduction to 3D printing for makers.
Pros:
- Very budget friendly price
- It's simplicity in design leads to easy maintenance and troubleshooting
- Filament sensor
- Near silent stepper motor drivers
Cons:
- Some misleading English translations
- Print head fan is noisy
Where to buy:
What is it?
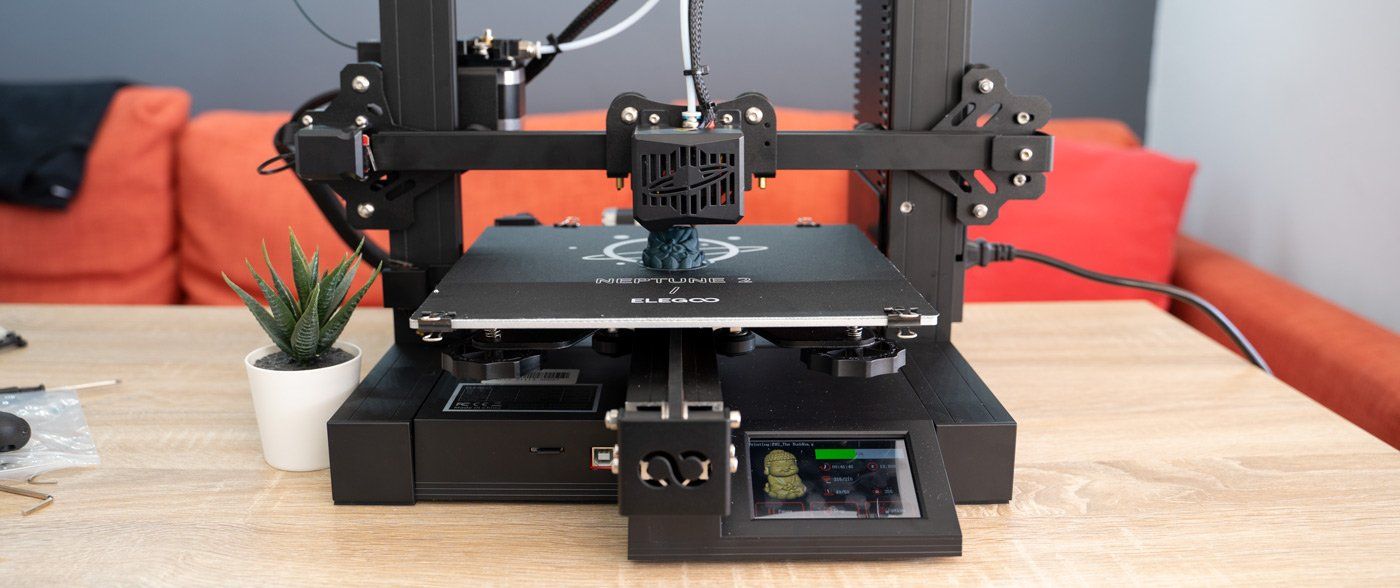
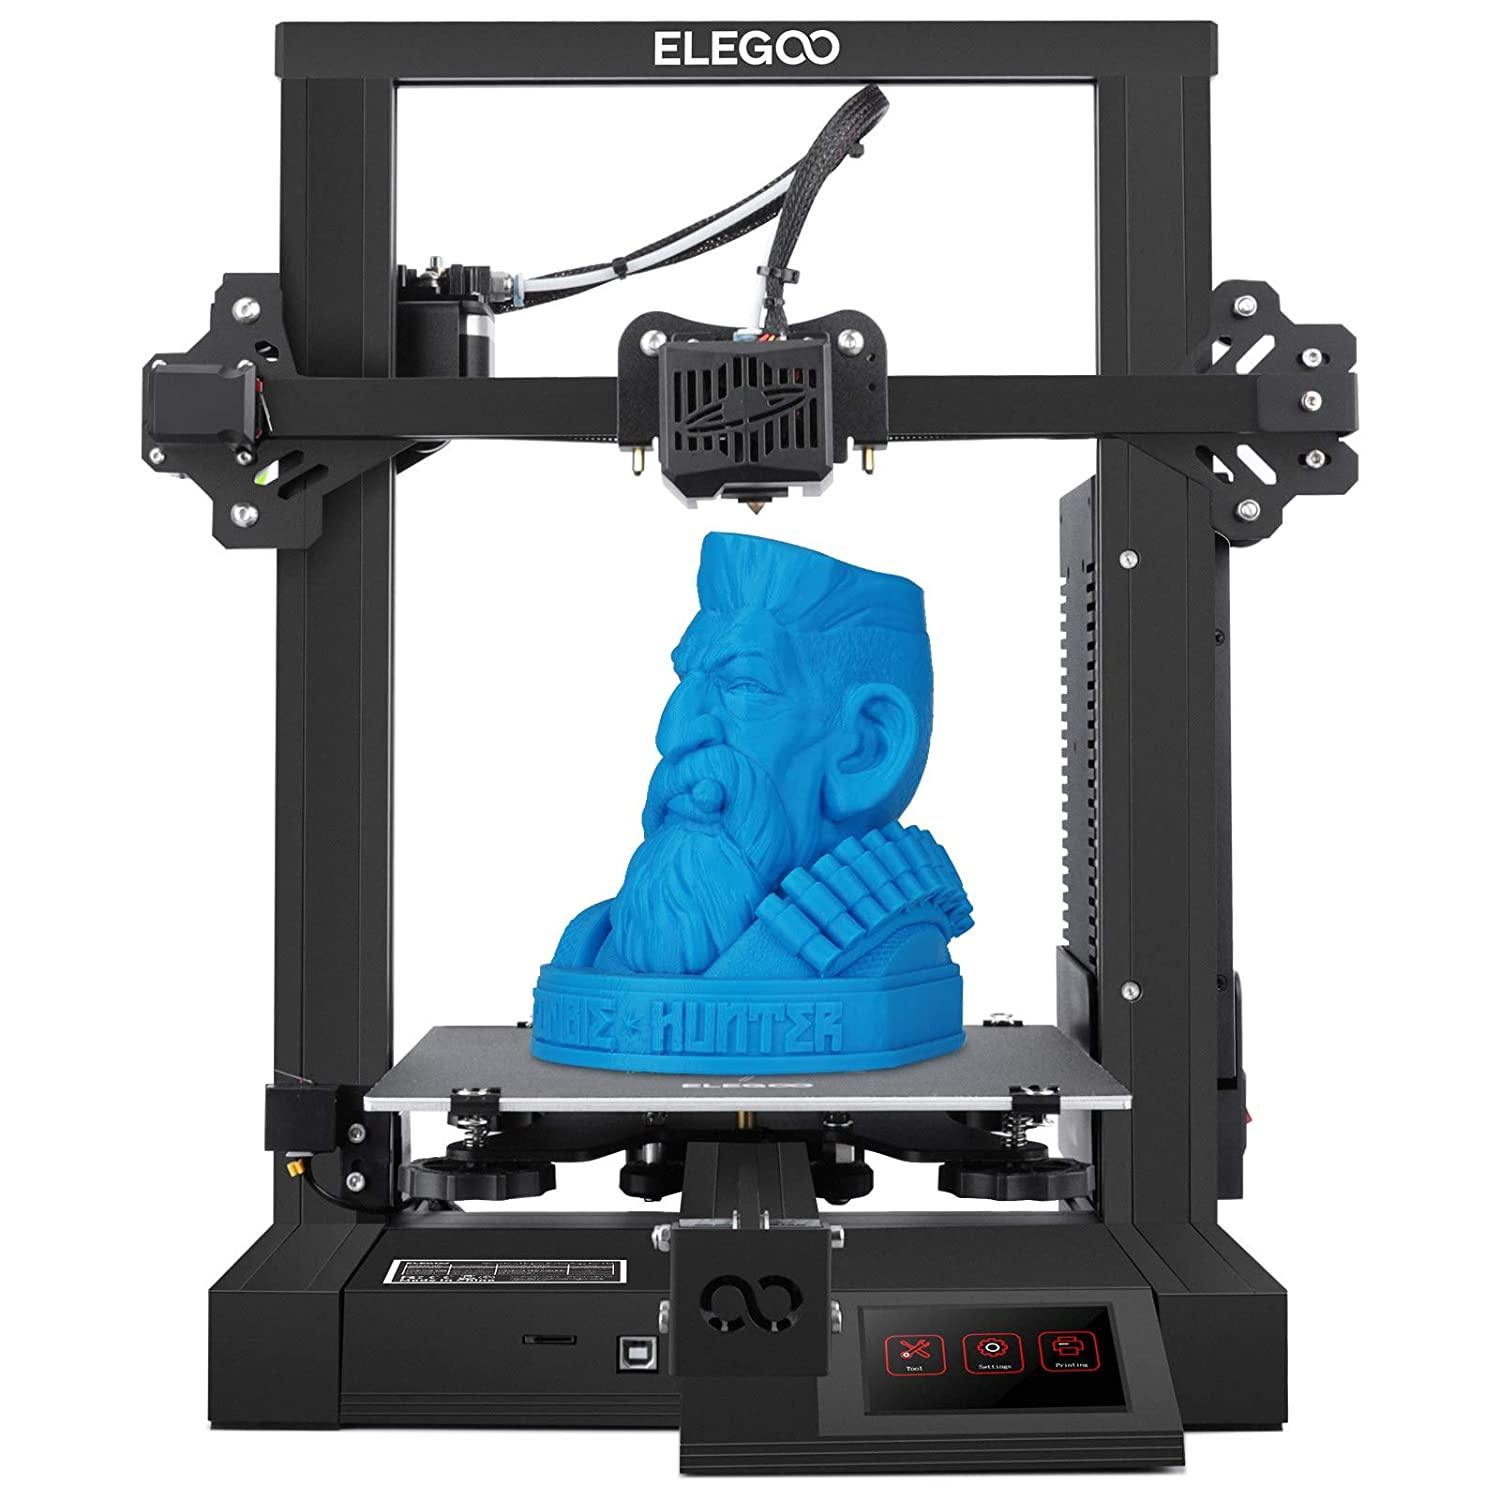
The Neptune 2 is a Fused Deposition Modeling (FDM) 3D printer from Elegoo. FDM printers create the 3D parts by depositing one layer of hot plastic at a time on top of the previous which is fused together by the temperature of the plastic. It appears to positioned to compete with the more pricier and very popular Creality Ender 3 Pro, and though each has their own differentiating features, during my time with the Neptune 2 I have grown to respect the choices Elegoo have made when designing it.
Technical Overview
| Printing Technology | FDM |
|---|---|
| Print volume | 220 x 220 x 250mm |
| Layer height | 0.1 to 0.4mm |
| Max. nozzle temperature | 280° C |
| Max. bed temperature | 100° C |
| Printable filaments | PLA, ABS, PETG, and infused (i.e wood, marble etc.) |
| Safety / Convenience features | Resume printing after a power interruption and filament run-out sensor |
For a more detailed technical table please see the end of this review.
The build volume is 220 x 220 x 250mm - a very common build volume so you should be able to print most of the models you may find from others without difficulty.
The machines
Bowden style extruder (as opposed to direct drive) will make the printing of flexible materials much more difficult, and any filament breakages which occur inside the Bowden tube will be trickier to remove.
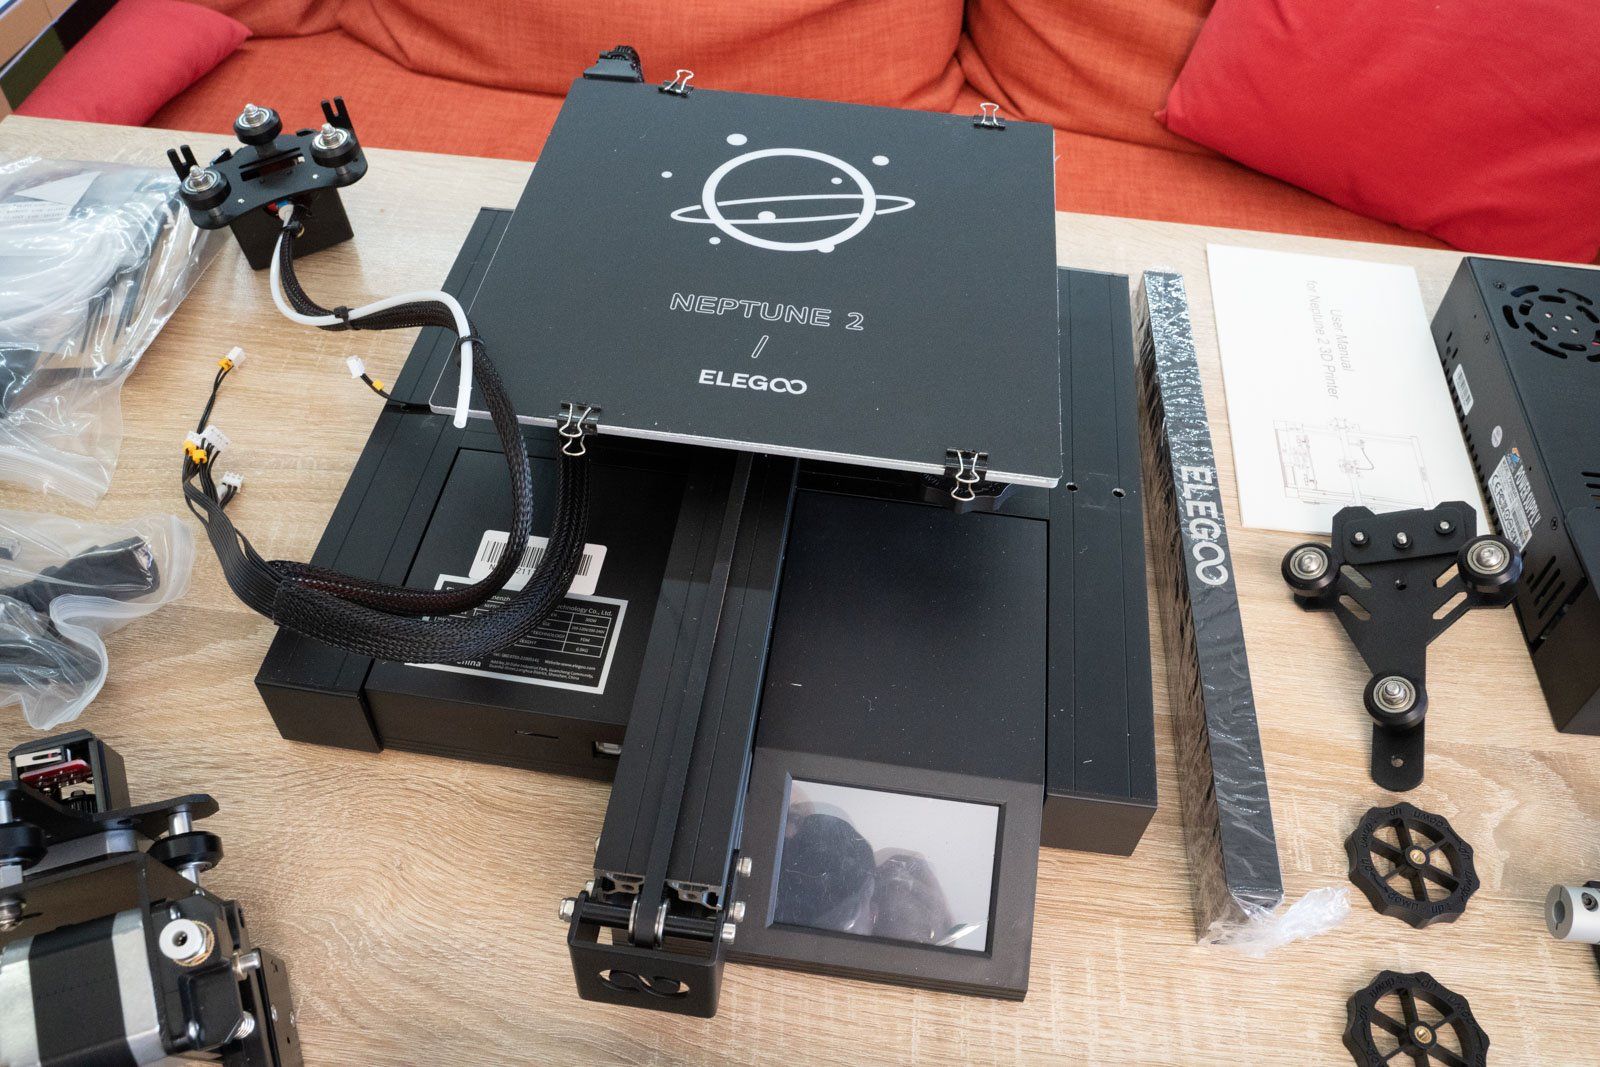
A removable print bed is included and is held in place using four bulldog clips at the edges.
The print surface appears to be similar to BuildTak surface and I did not have an difficulty in the prints adhesion to the print surface.
Shipping and Packing
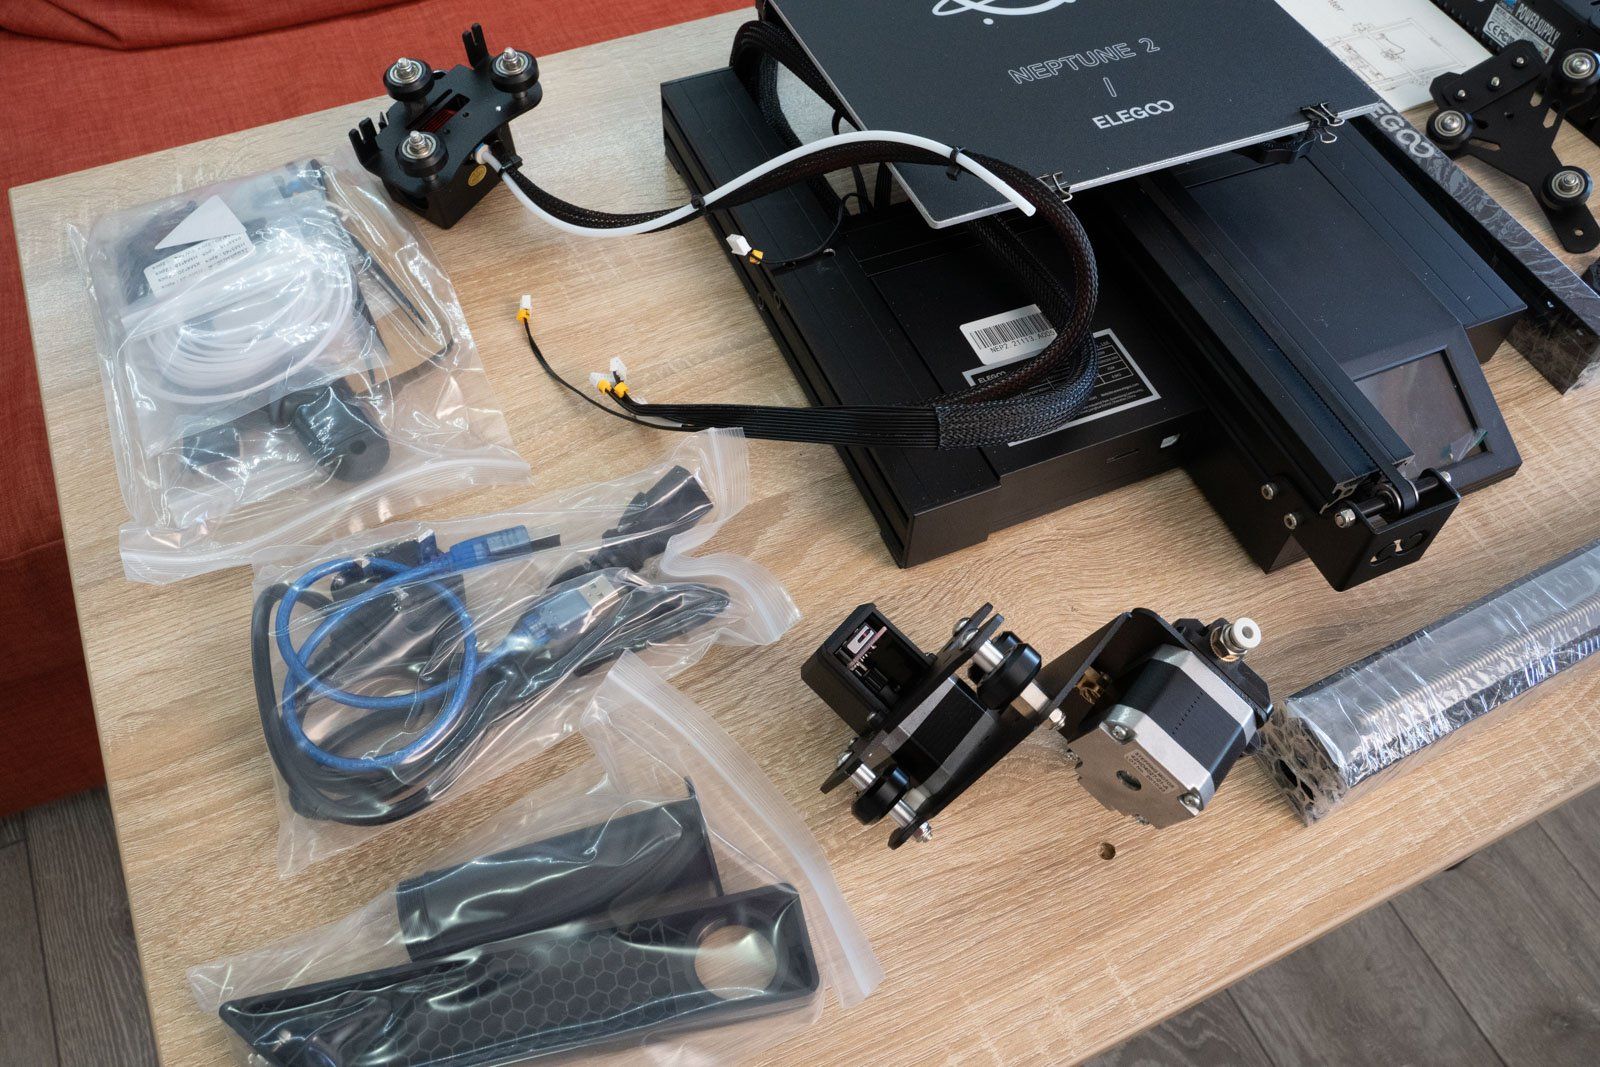
When the parcel arrived directly from Elegoo everything seemed well packed. Nothing sounds loose or can be heard when shaking the packaging (carefully) before opening. This is a promising start. I have had resin printers from Elegoo previously and they have always arrived well packaged.


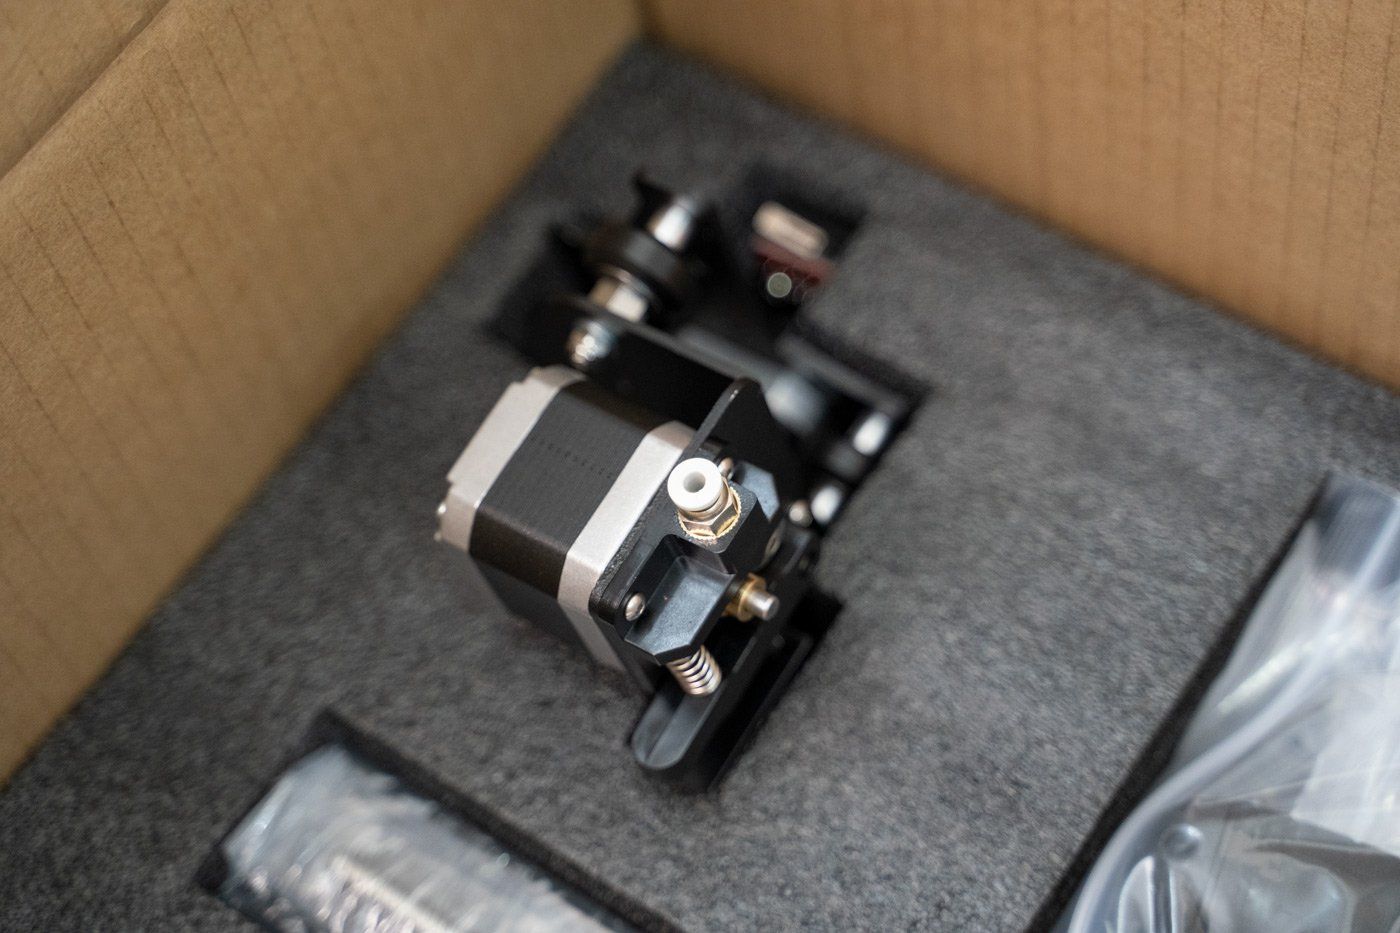
The components which make up the printer are split over two layers, each surrounded by plenty of foam/polystyrene. One part (a motor) can be seen in the top tray of parts but is actually in the bottom. This meant I tried to pull it free while unpacking the top layer before realising it was part of the layer tray. No damage caused - just good to note.
What else is included?
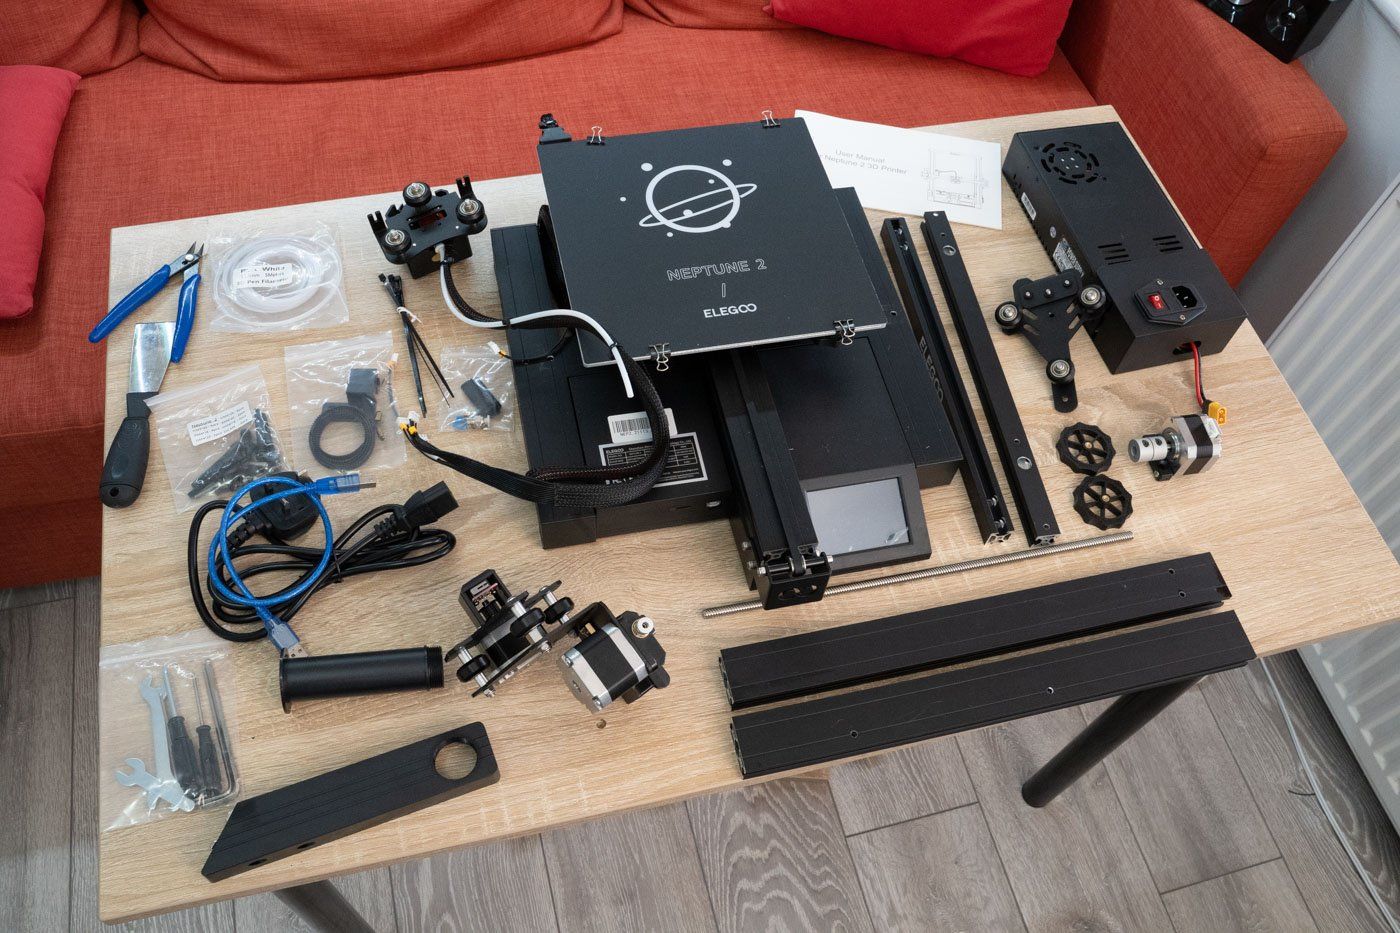
Besides the expected 3D printer Elegoo also provided a generous selection of tools and accessories in the box, everything a beginner would need to start in their adventure in 3D printing:
- Some PLA filament
- 8GB Micro SD card
- USB Micro SD card reader
- Spare 0.4mm nozzle
- USB cable
- Screwdrivers
- Flush cutters
- Spare cable zip ties
- Set of Allen keys
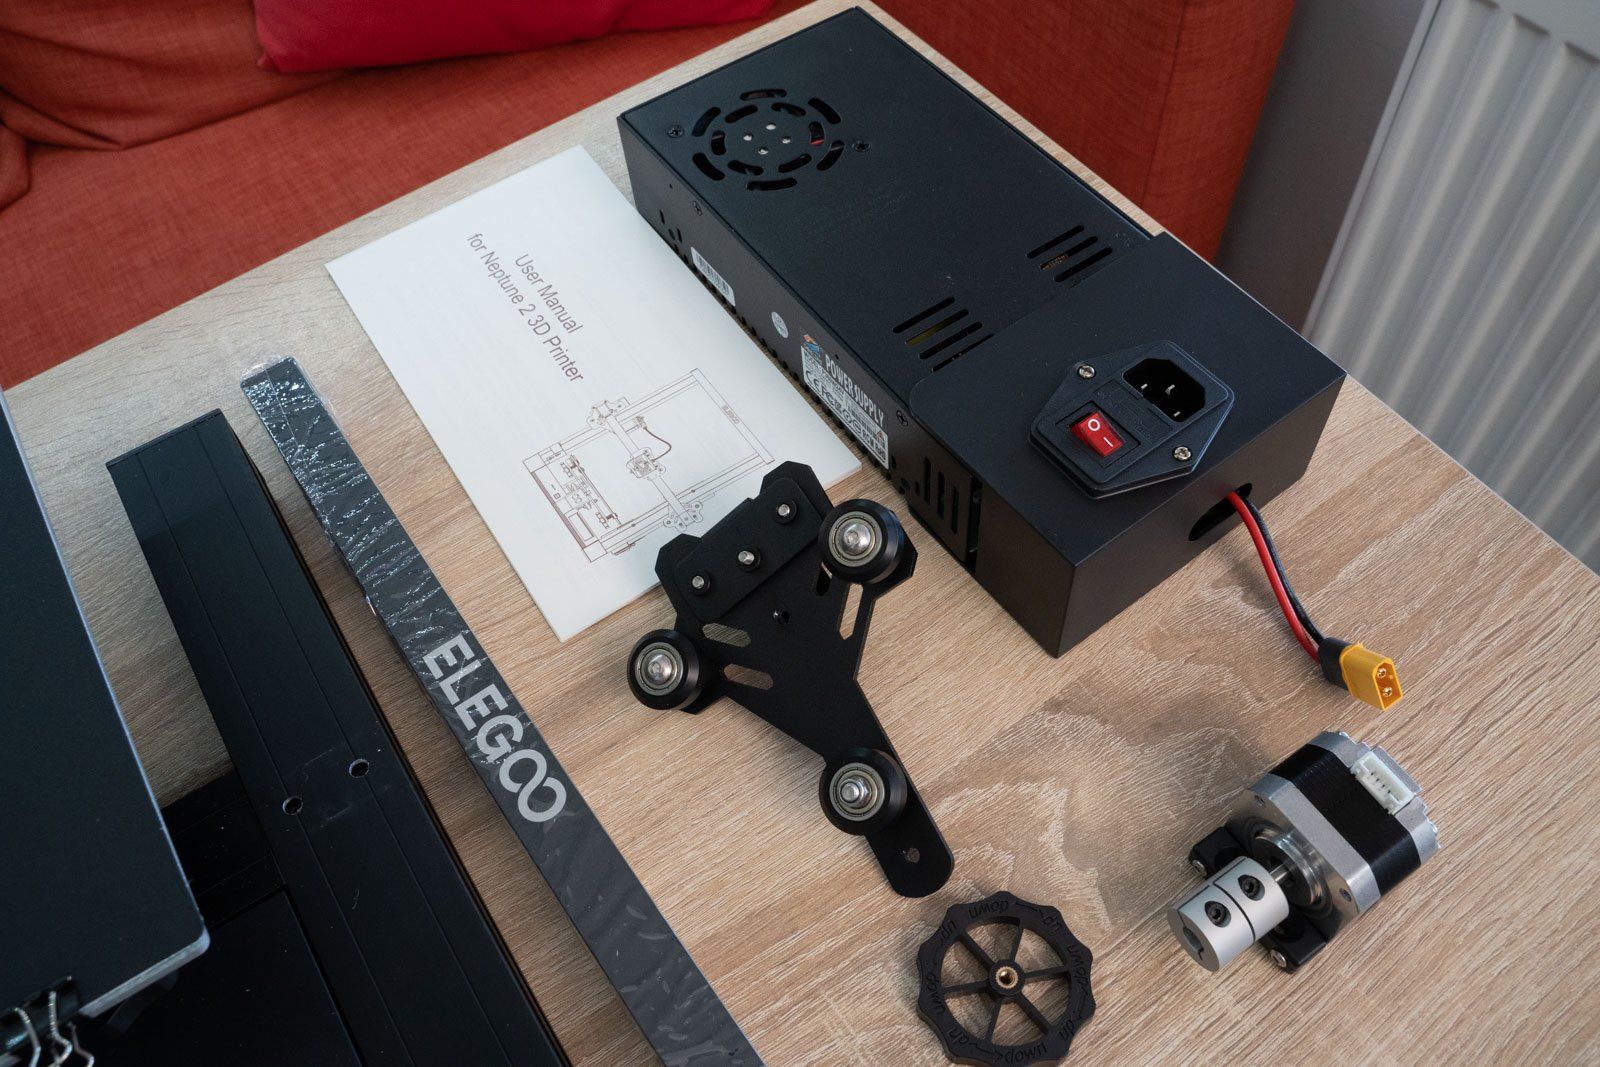
- Two spanners
- Stainless steel scraper (for removing prints)
Assembly
This printer arrives as a few mostly pre-assembled parts which require less than an hour to assemble into a completed printer. You're provided with all the tools required and some additional ones for good measure. It briefly involves bolting the large sections together, fitting the timing belt (or 'synchronous belt' as the instructions refer to it) and then connecting the various electrical components together.
This is easily achieved on your own with little need for frustration and very few opportunities to make damaging mistakes.

All the metal components were very well machined and the bolts were installed with no problems. The timing belt is simple enough to fit and the tensioning mechanism is easily adjustable at any point. The electrical connections are labelled clearly along with the illustrations for the wiring in the instructions.
The instructions themselves are brief but adequate, relying on very little language similar to an Ikea instruction booklet. There are some of the expected, slightly auto-thesaurus like, Chinese to English translations which provide a little humour but do not confuse the build process.
Instruction manual
The instructions were more than capable of showing me how to assemble the machine. But there are a few things I found missing or some tricks that I would like to pass on to help you assemble your own with ease. You can also download a copy of the instructions to see for yourself:
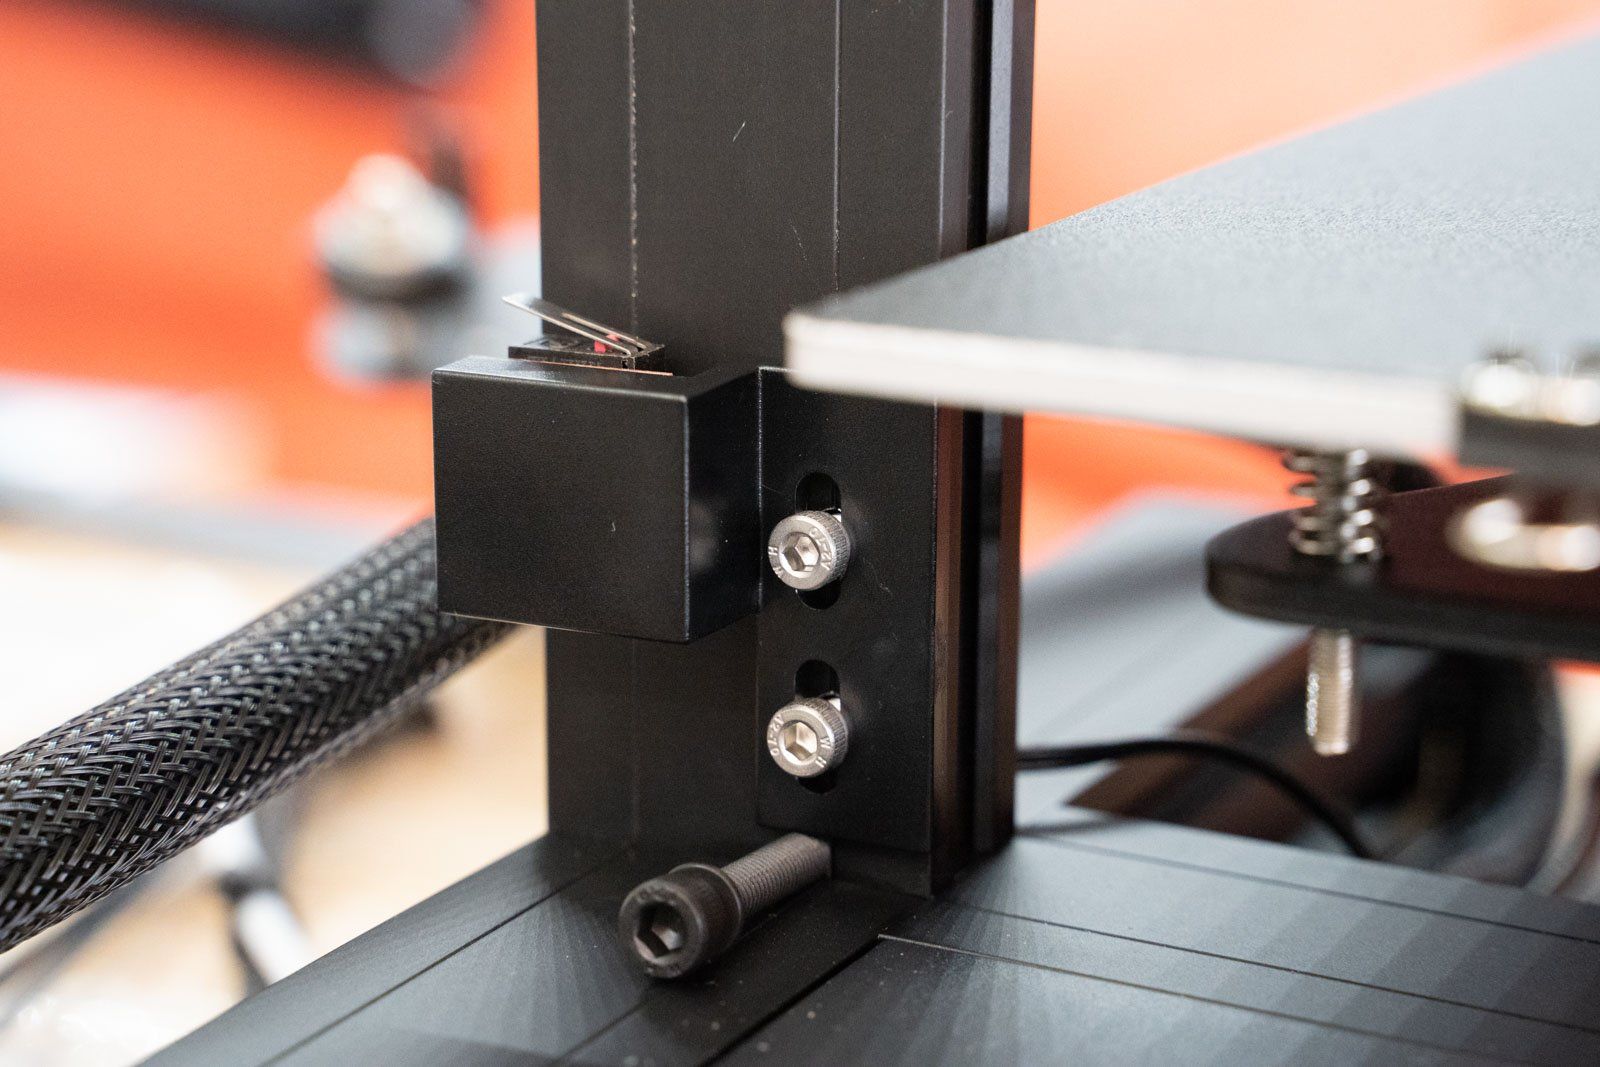
Z Homing Switch
On page five of the instructions you are instructed to install the Z axis homing switch assembly with a 5mm gap between its base and the floor of the machine. I used a spare 5mm bolt from the bag placed underneath whilst tightneing the two silver ones above to easily achieve the required spacing.

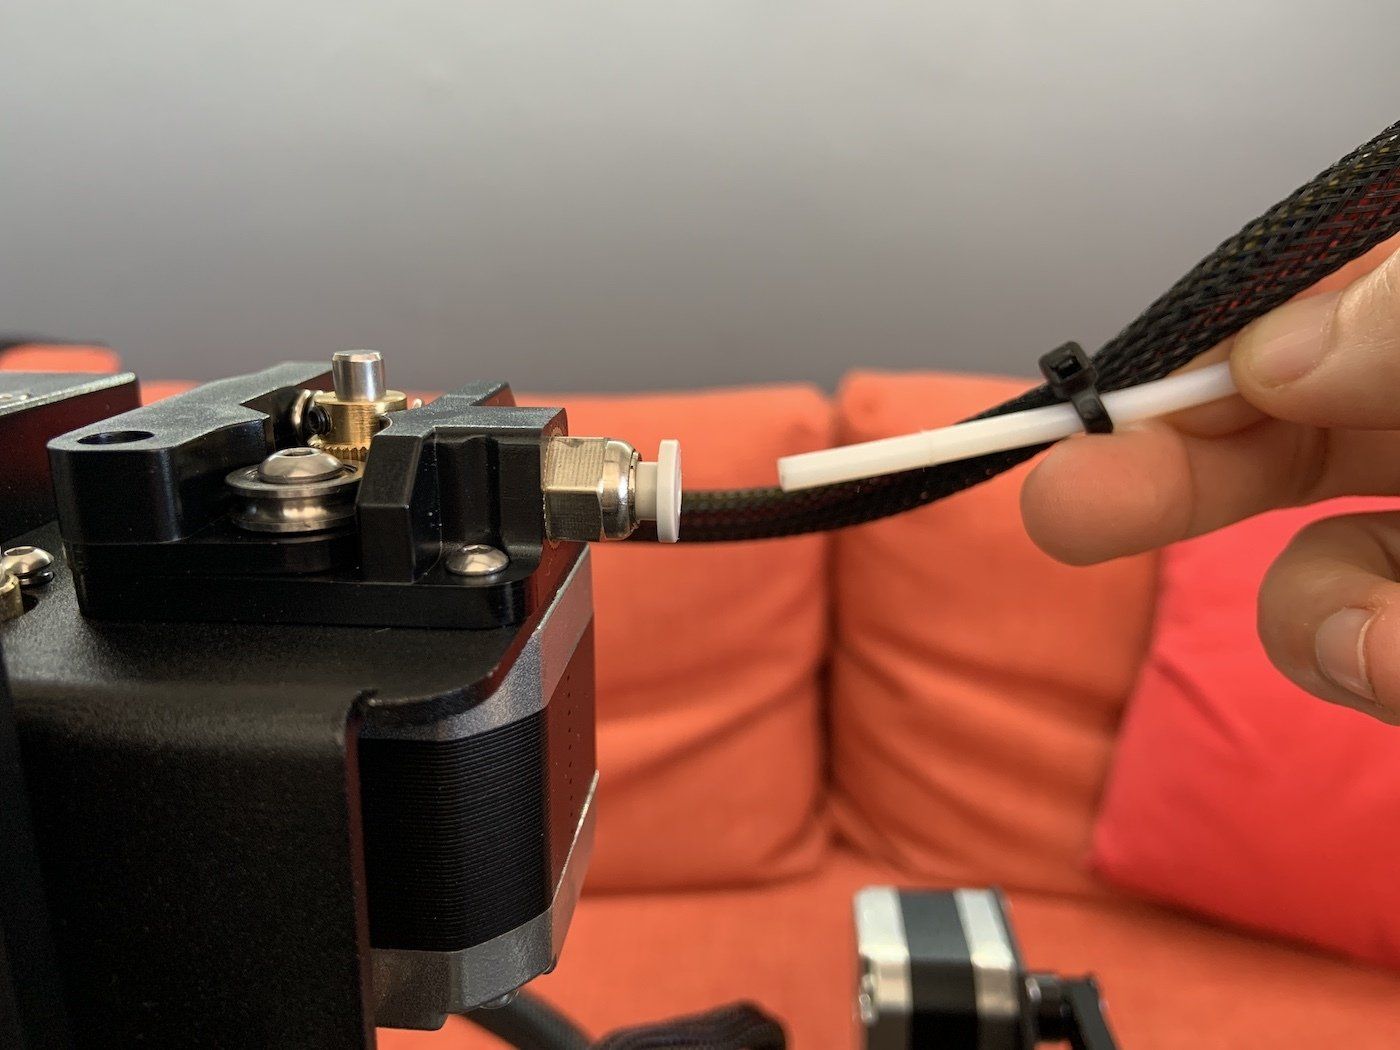

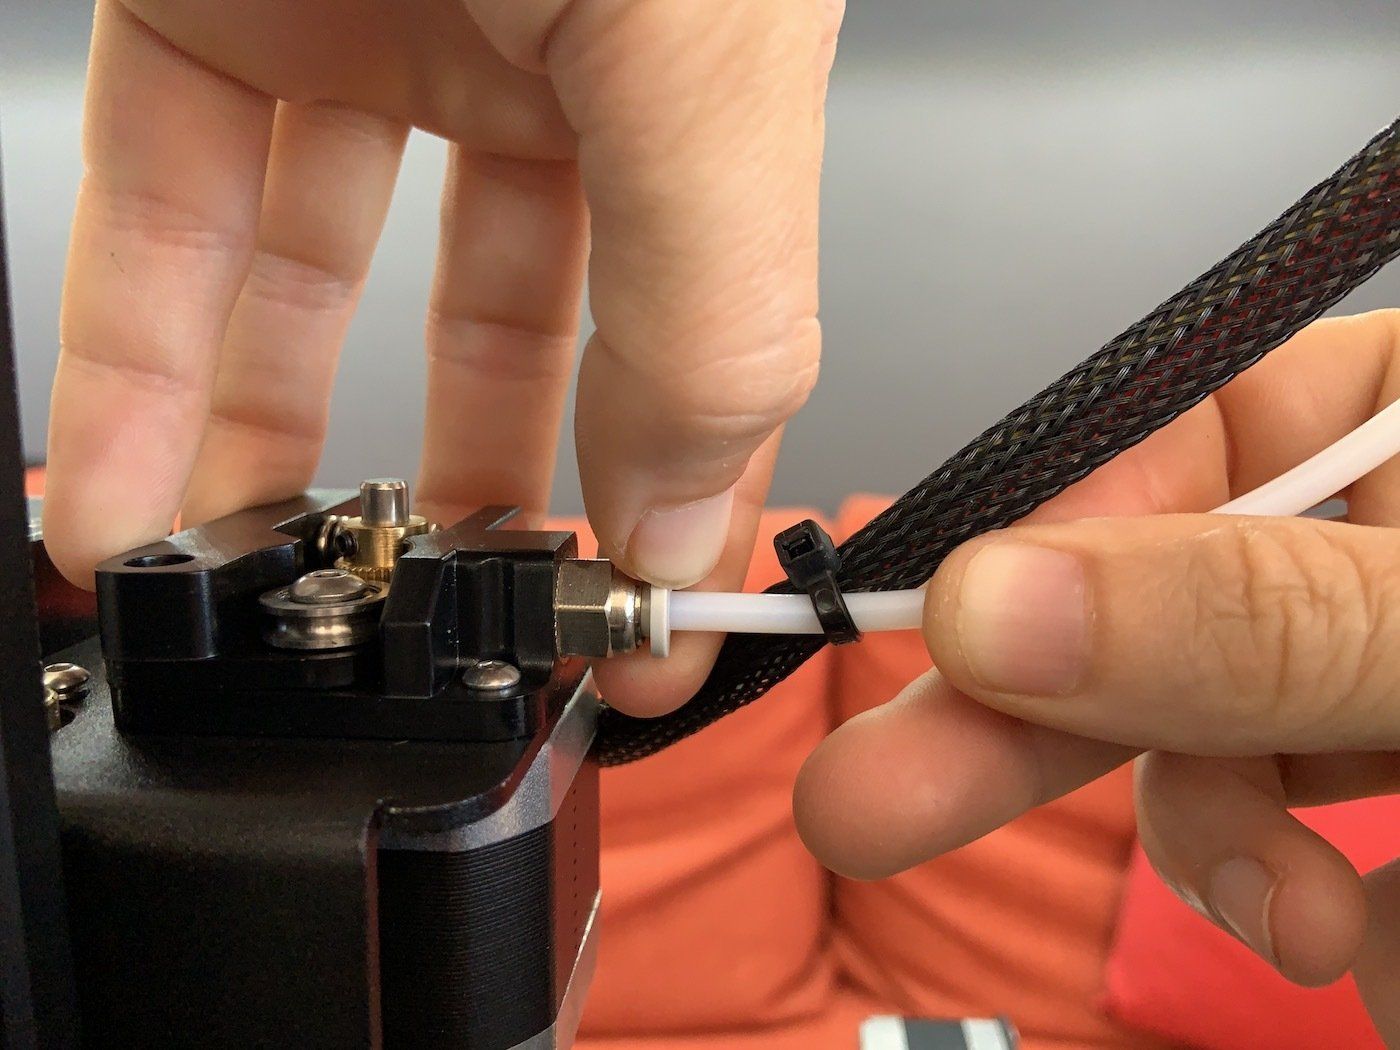
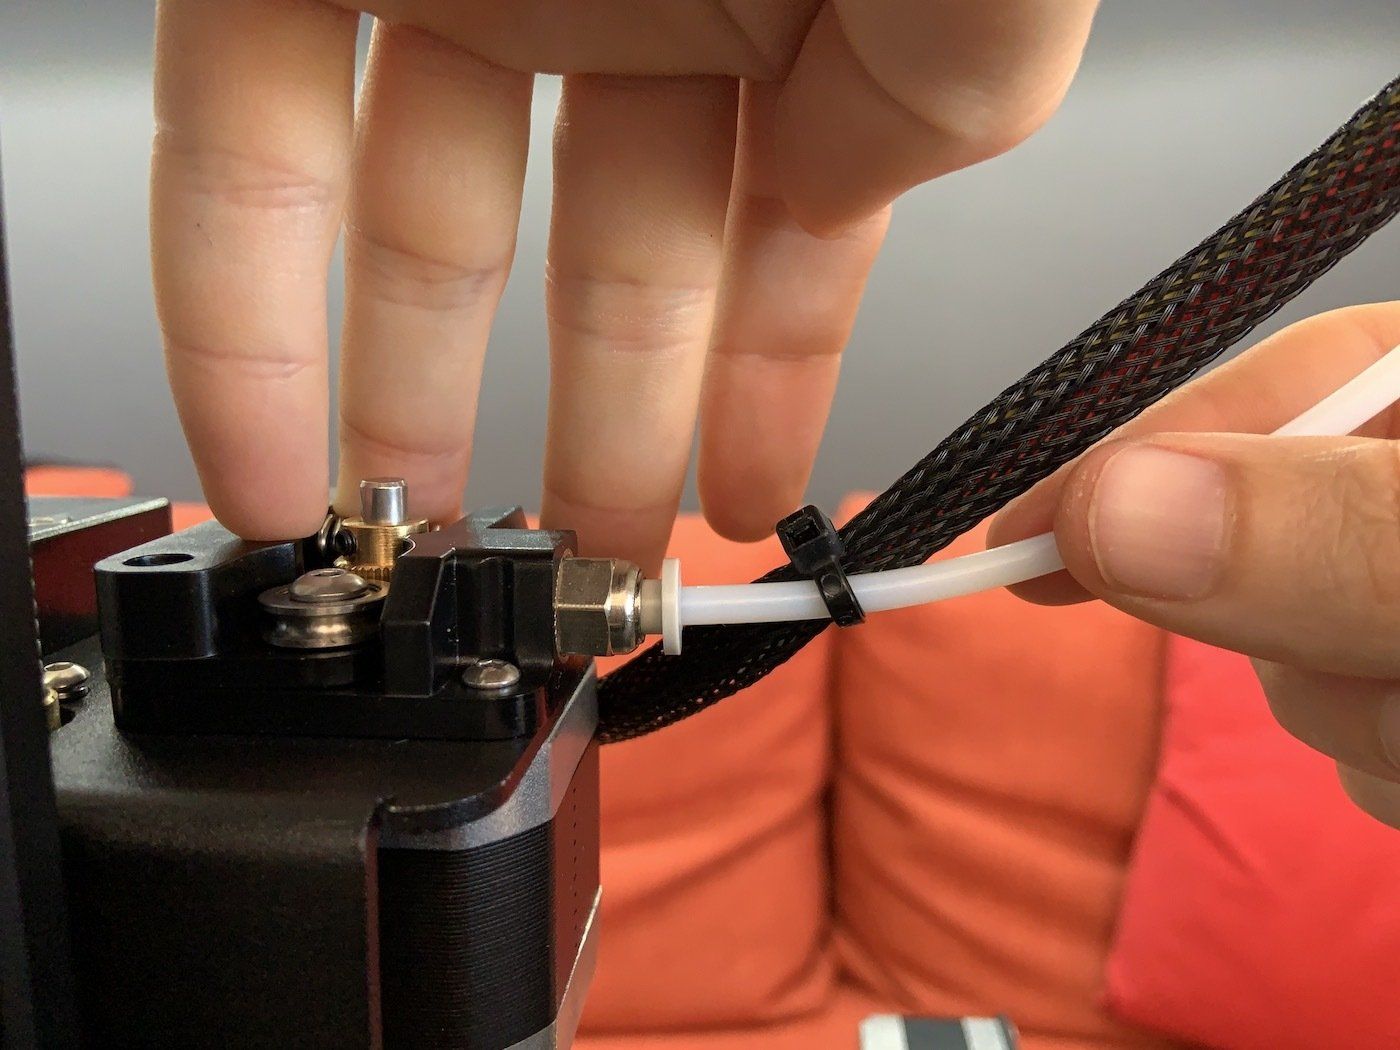
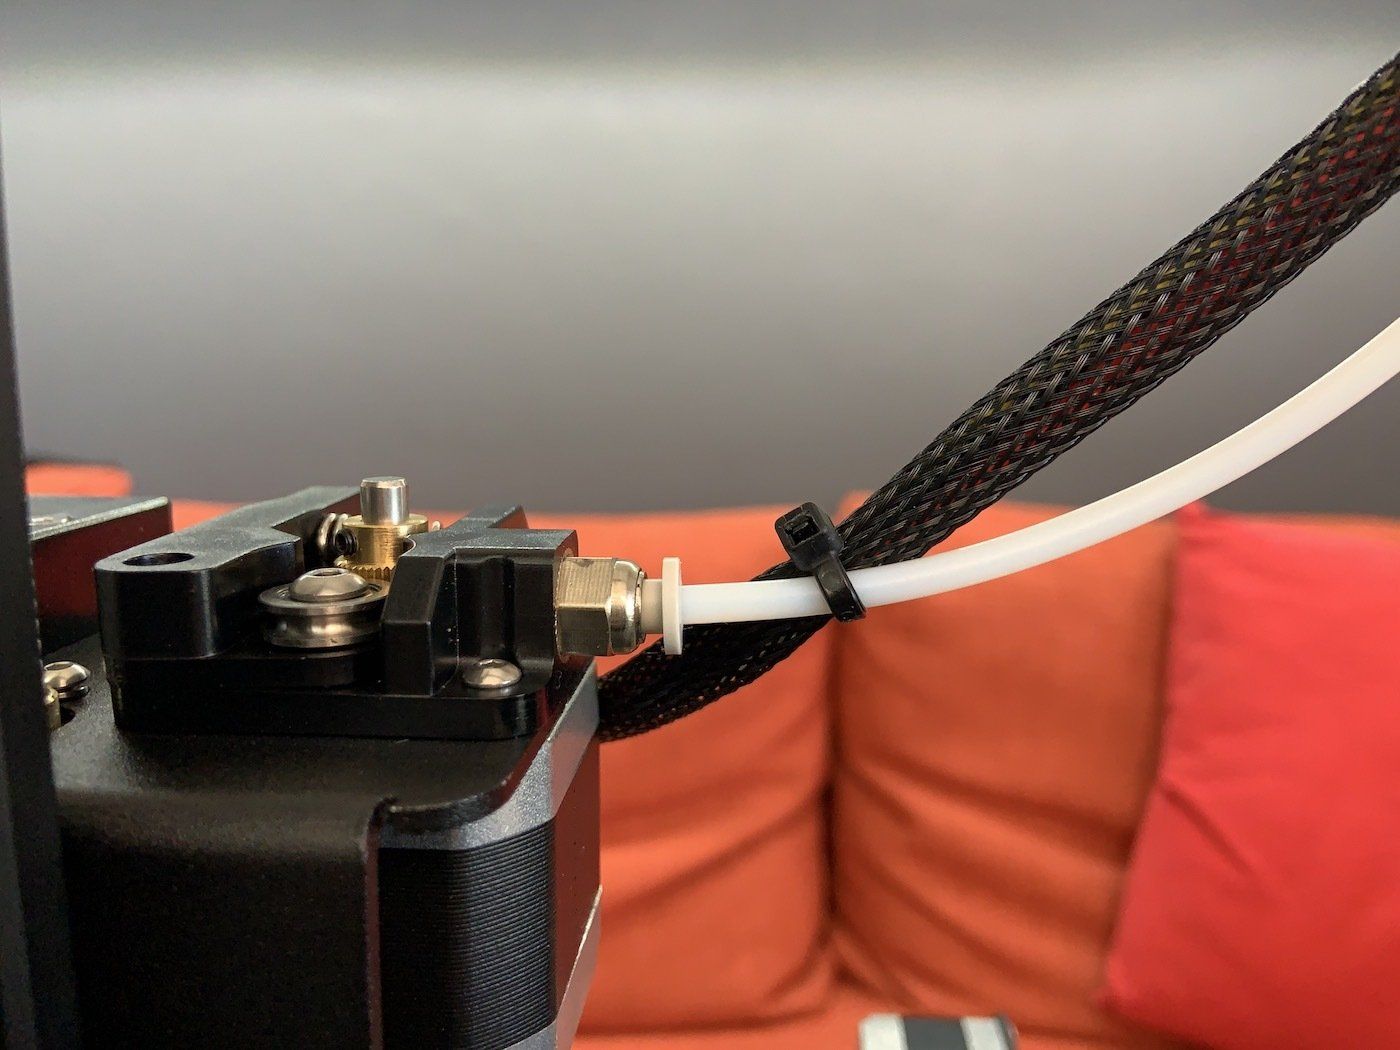
Bowden (filament) tube installation
The instructions neglect to ask you to connect the bowden tube between the output of the filament stepper and the extruder assembly.
To do this, it is just a case of pushing in the grey collar at the stepper motor, inserting the bowden tube whilst keeping the collar pressed in, and then pulling the collar back out to secure the tube in place.
A gentle tug can confirm this.
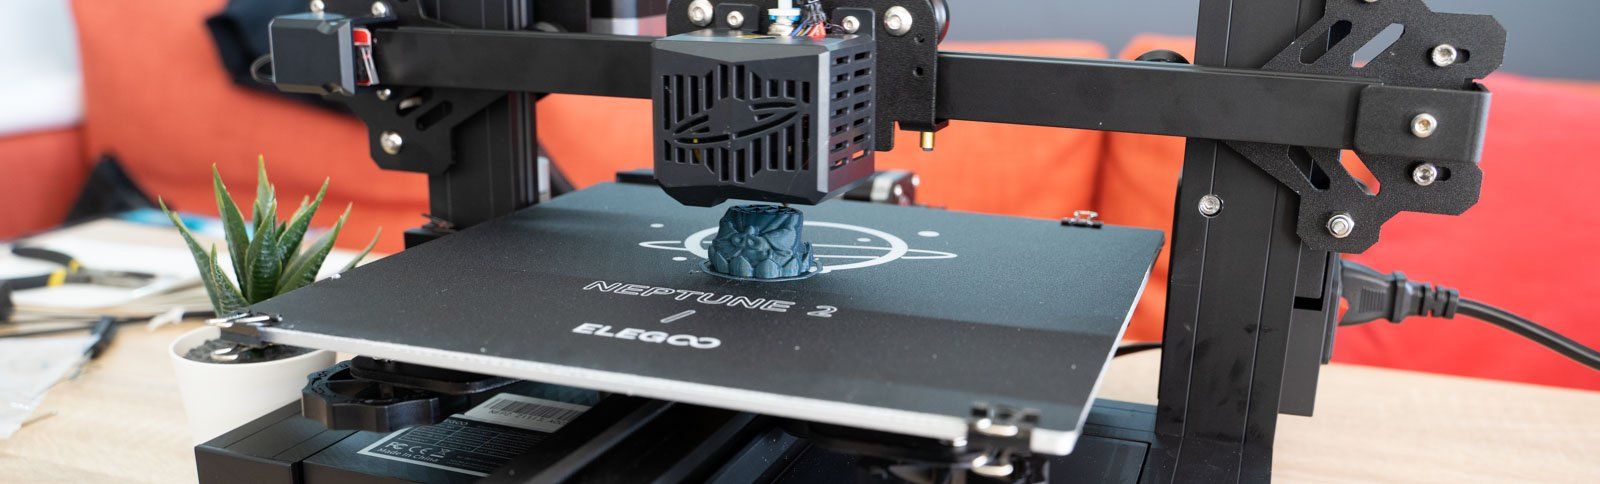
First prints and impressions
The first thing to note once the assembly was complete is that my machine had a rather pronounced wobble. The machine itself was solid so it was not going to result in a notable deterioration in print quality - however when the print bed begins going back and fourth rythimcally it created a tapping on the table top. This was easily remedied with some card wedged under one corner though. Perhaps an adjustable foot on just one corner would have prevented this - but I understand every feature is a cost, and this printer does still deliver a lot of features for little cost.
Levelling the print bed
This is the first printer I have used which required manual levelling and the thought of this was extremely daunting. However, I had nothing to fear.
Once the machine is powered on you can navigate to 'Tool' and then 'Levelling' on the touchscreen. Grab yourself a piece of paper and place it on the print bed. Choose 'Point 1' on the printers screen and the printing nozzle will move to the front left corner. Simply rotate the large adjustment wheel beneath this corner of the bed to change the height until you can slide the paper around easily between the nozzle and printed with just some light friction caused by the nozzle. All four adjustment wheels are easily accessed from the front of the machine.
Repeat this for each of the five points (the fifth one is a centre point) until you can move between all five of them without needing to make any adjustments. Simple as that. :)


Loading the filament and printing
The loading of the filament went without a hitch once I realised you could squeeze open the path between the extruder gears so that you could manually insert the filament through the filament sensor (which lights blue the moment it detects the presence of filament) and feed it all the way through the bowden tube until it is stopped by the cold printing nozzle. Before this I was using the controls on the screen to repeatably feed a few mm's through at a time which was painfully slow.

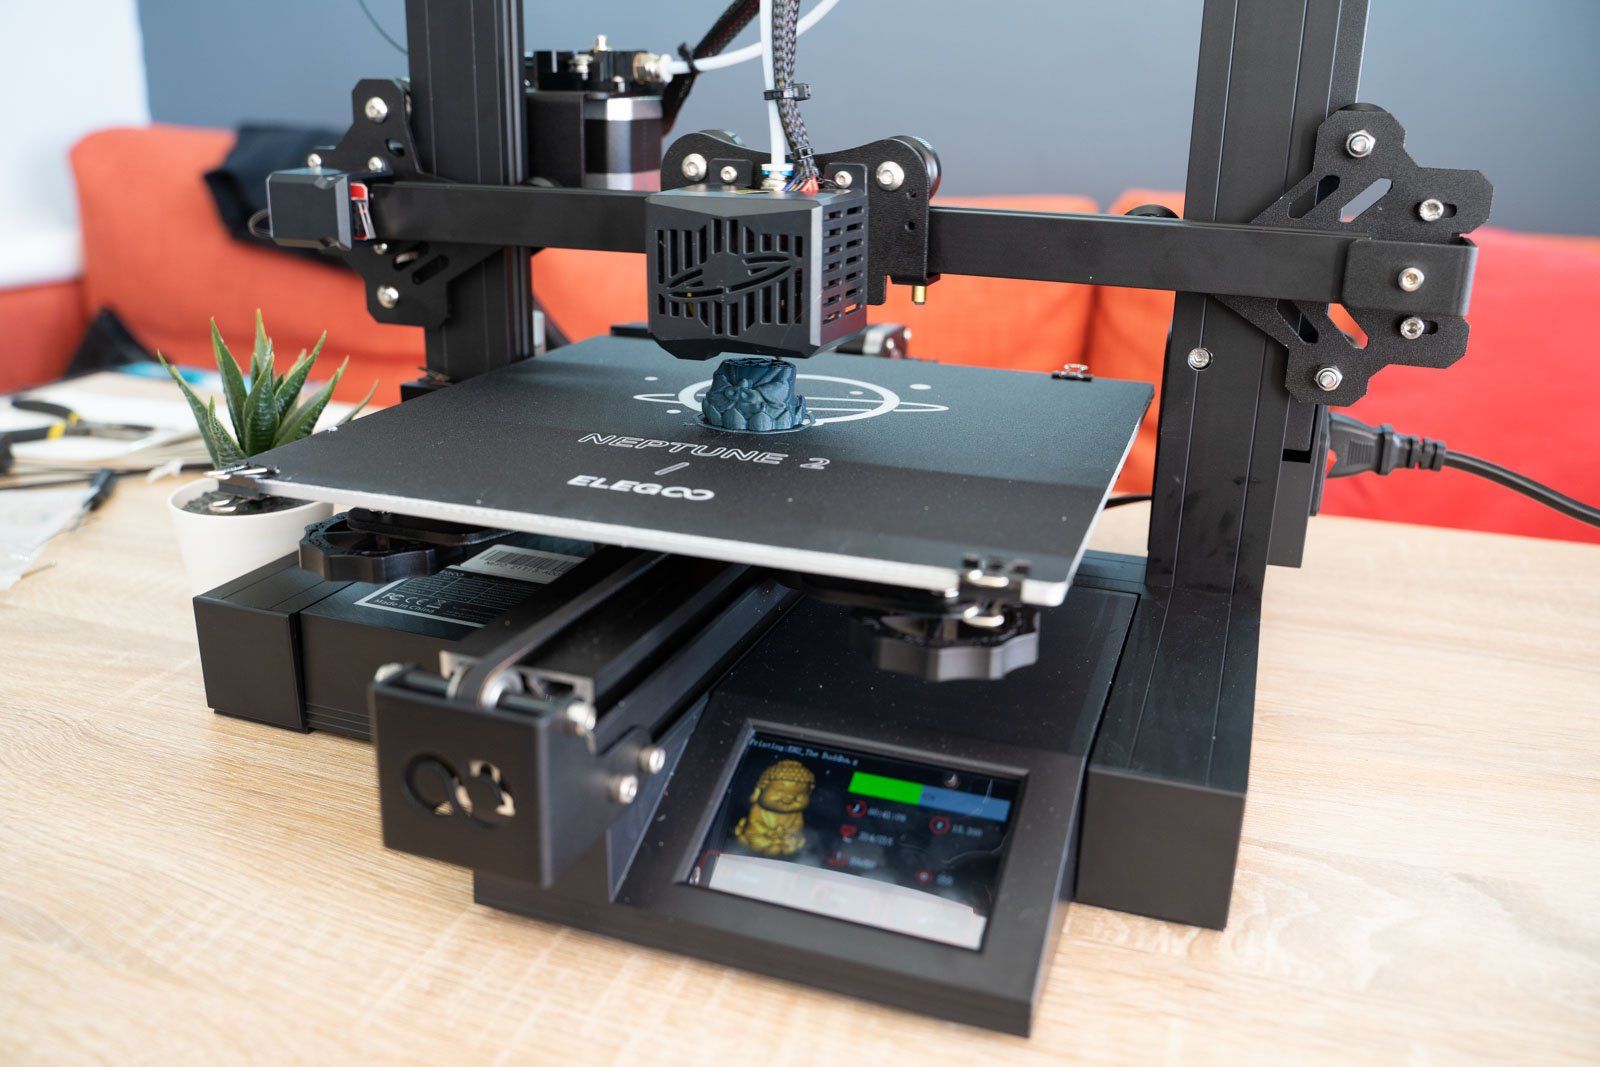
With the filament loaded I started the first print which I found on the included Micro SD card. Elegoo all include a very handy USB Micro SD card reader in the box - which was very useful for me as my Apple laptop does not (to my frustration) include an inbuilt SD card reader. Thank you Elegoo.
The machine began to pre-heat the build platform and then nozzle. As soon as the nozzle hit 50 Celsius its fan kicked in (as it is supposed to do) but the volume of the fan was surprising. One of the great features of this printer are it very quite stepper motor drivers which just can't be appreciated all that much when the fan is so pronounced. This is probably my biggest gripe and would be the first thing I will replace in order to make the biggest improvement. However, later when printing overhangs it is apparent that despite the fan being good at making a noise, it is also good at cooling the prints leading to an impressive ability for this machine to print overhangs.
The results of the first prints are below. The model was printed in PLA plastic. As mentioned before it is the pre-sliced model included on the SD card which looks to be a fairly high layer height (evident in the stepping). There is very little sign of droop on the overhangs or stringing at the top. Click the below images to inspect a larger version for yourself.

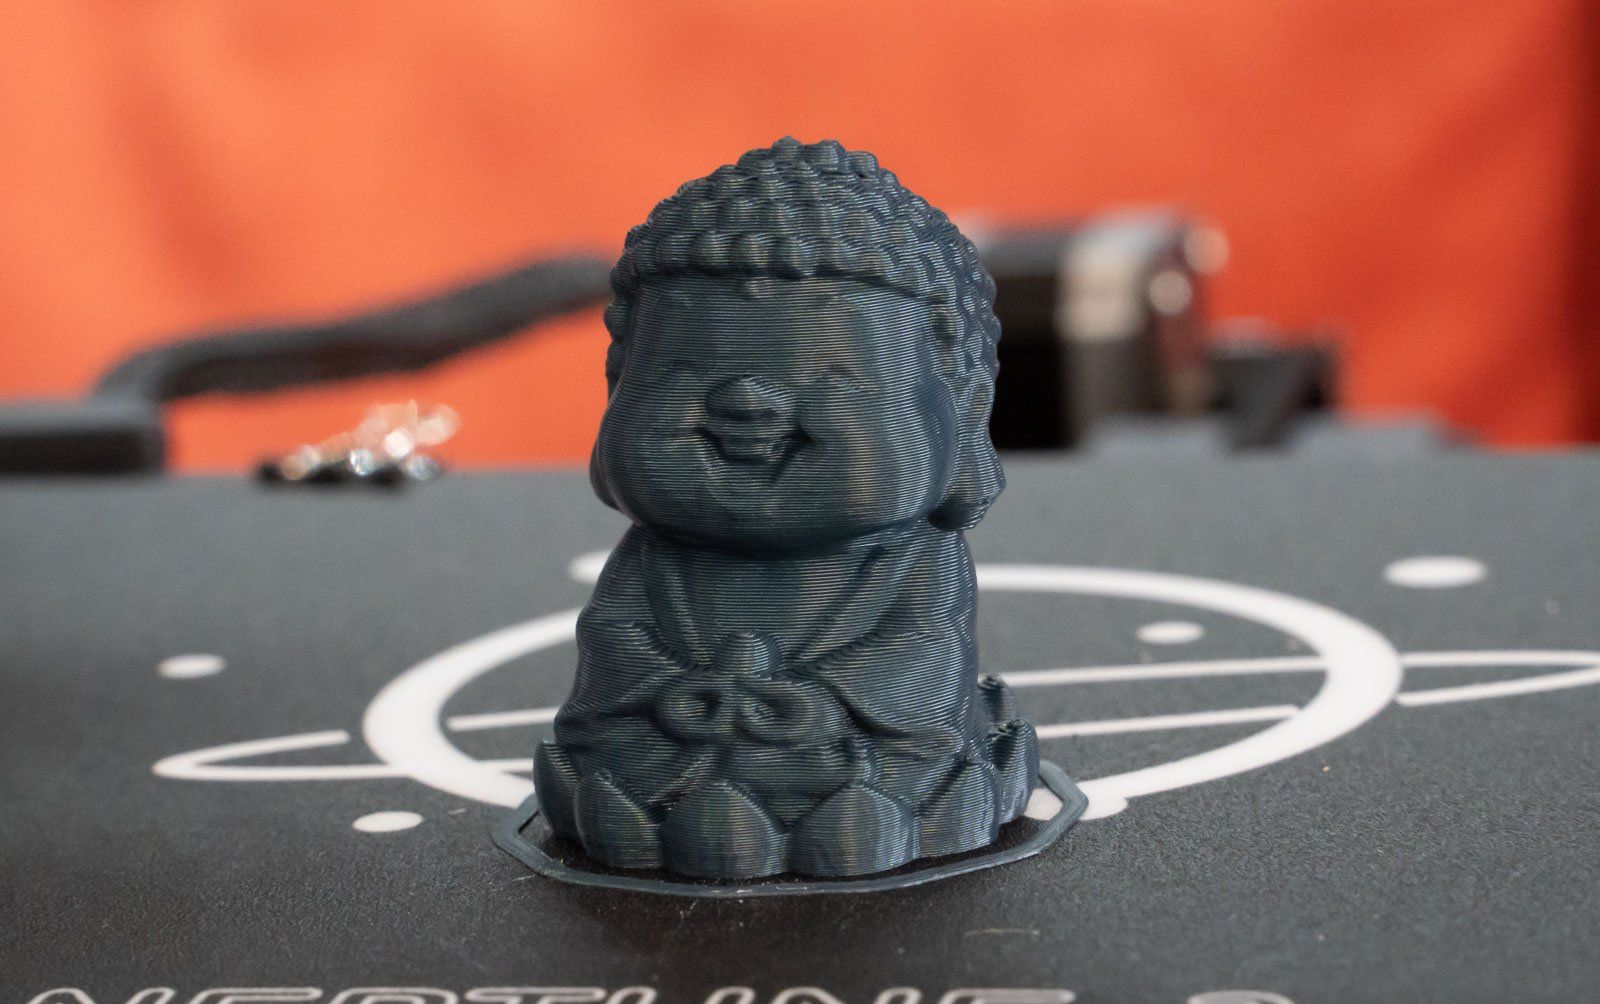
Considering the price of this printer - I am extremely impressed with the print quality and ease of use. Adhesion was perfect and no intervention was required during the printing.
Software - Cura
Elegoo include a customised copy of Cura on the Micro SD card. I found the Windows version but had to download the Mac version for free from Elegoo website: https://www.elegoo.com/pages/3d-printing-user-support
On the SD card is a detailed introduction to using Cura and some advice on what retraction, infill, perimeters, supports etc. are including how to use them in Cura and some advice on knowing when you might want to adjust them from their default values pre-set by Elegoo.
There are plenty of instructional videos on the internet for using Cura, it is a popular slicing software package also used by the likes of Ultimaker so I will not be going into details about Cura here.
If you're not a fan of Cura, you are also free to use other slicing software such as the open source PrusaSlicer.
Technical Details:
| Printing Technology | FDM |
|---|---|
| Print volume | 220 x 220 x 250mm |
| Layer height | 0.1 to 0.4mm |
| Max. nozzle temperature | 280° C |
| Max. bed temperature | 100° C |
| Printable filaments | PLA, ABS, PETG, and infused (i.e wood, marble etc.) |
| Safety / Convenience features | Resume printing after a power interruption and filament run-out sensor |
| Time to assemble | 1 hour |
| Connectivity | USB, Micro SD |
| User interface | 3.5inch colour touch screen |
| Manufacturers site | https://www.elegoo.com/collections/neptune-series-fdm-printers/products/elegoo-neptune-2-fdm-3d-printer-with-silient-motherboard |
| Included software | Elegoo Cura |
| Number nozzles | 1 |
| Nozzle diameter | 0.4mm(can be replaced with 0.3mm and 0.2mm nozzles) |
| Filament diameter | 1.75mm |
| Print speed | ≤180mm/s, normal speed at 30-60mm/s |
| Controller board | STEM32 F103 |
| Languages | English, French, German, Russian, Italian, Spanish, Japanese, Chinese |
| Frame construction | CNC machined aluminium extrusion |


