
Geoleaf - 3D Printable Nanoleaf with ESP8266, Alexa & Hue
How to build your own Nanoleaf like panels
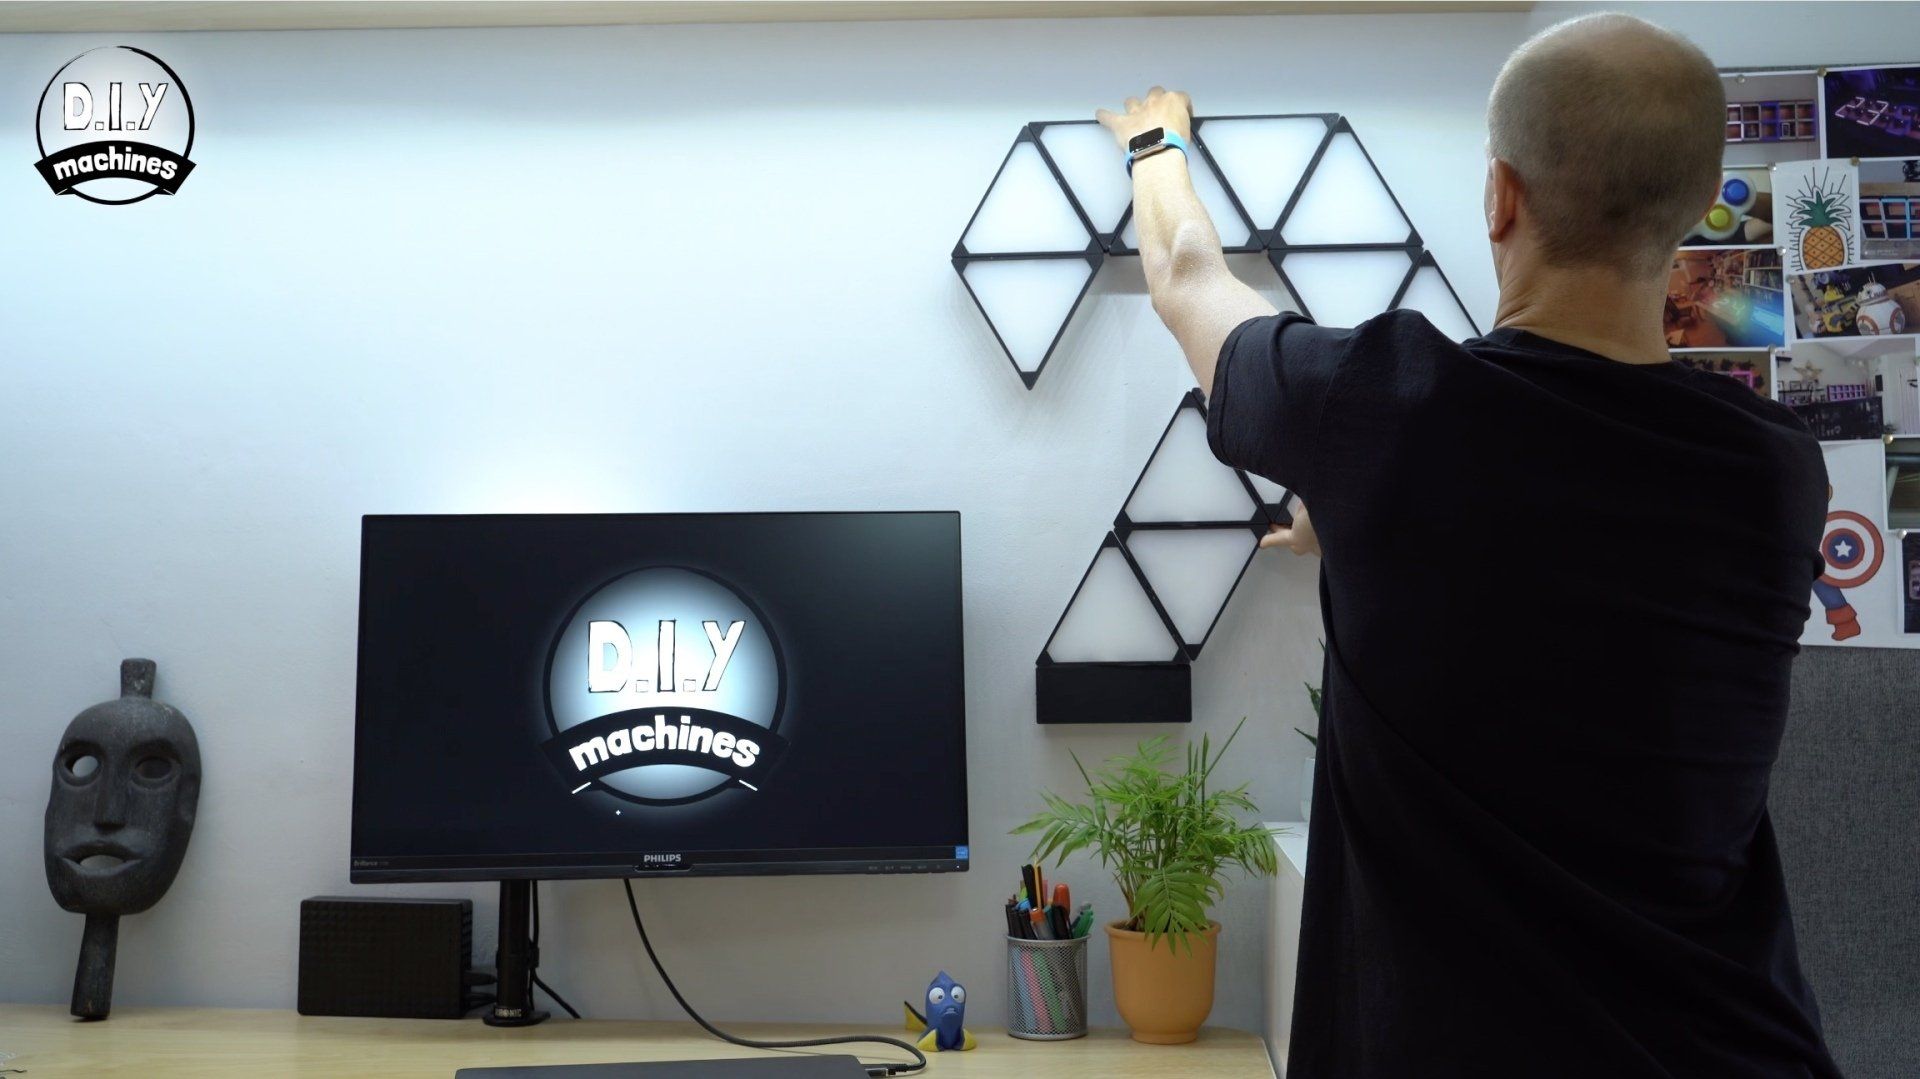
I have wanted some Nanoleaf lights for a long time but the price has always been too high for me. So I thought I would set about creating my own version using a 3D printer. Each lit panel works out at about £3.40 in materials to make and I’m very happy with the end result.
You can assemble them in any order to suit your wall space and other shapes can be included such as the square panels. I have offset them from the surface to allow a stylish glow out across the wall in the evenings and the panels themselves are bright enough to be seen in the daytime.
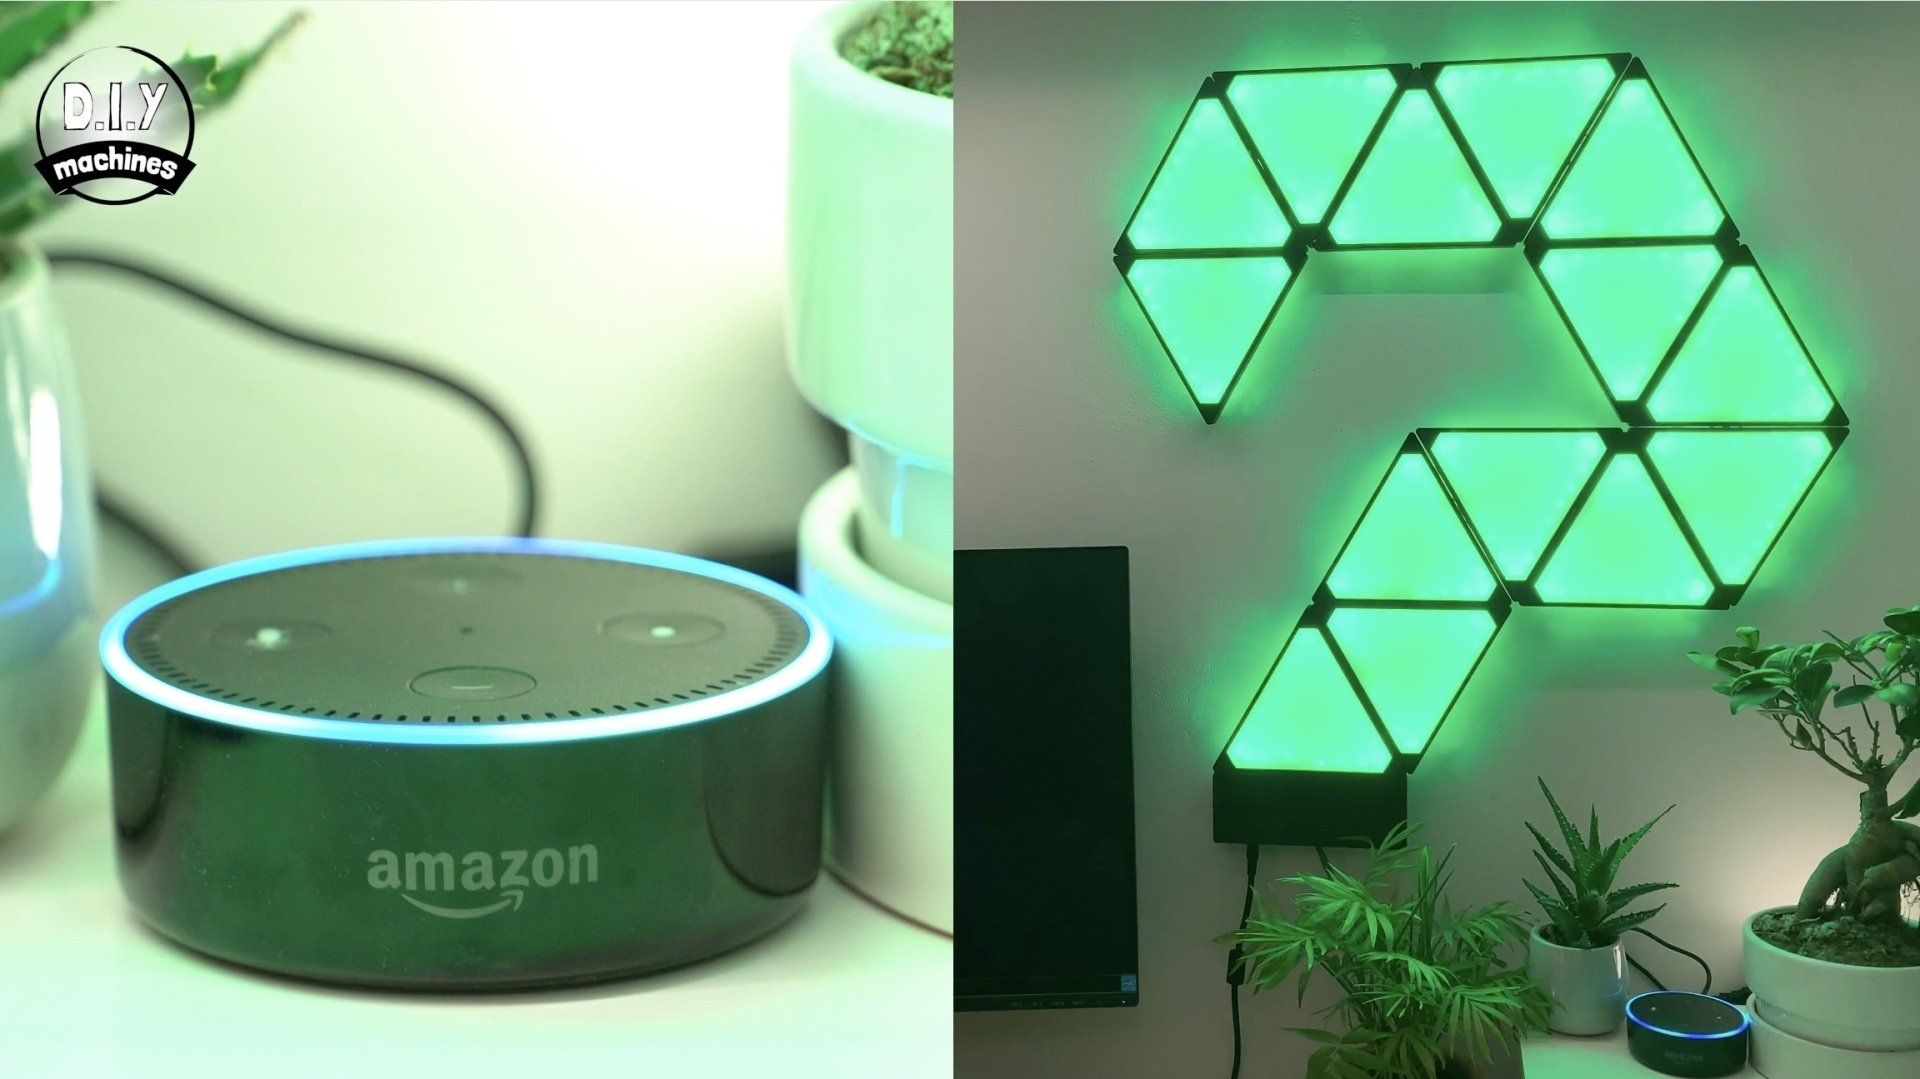
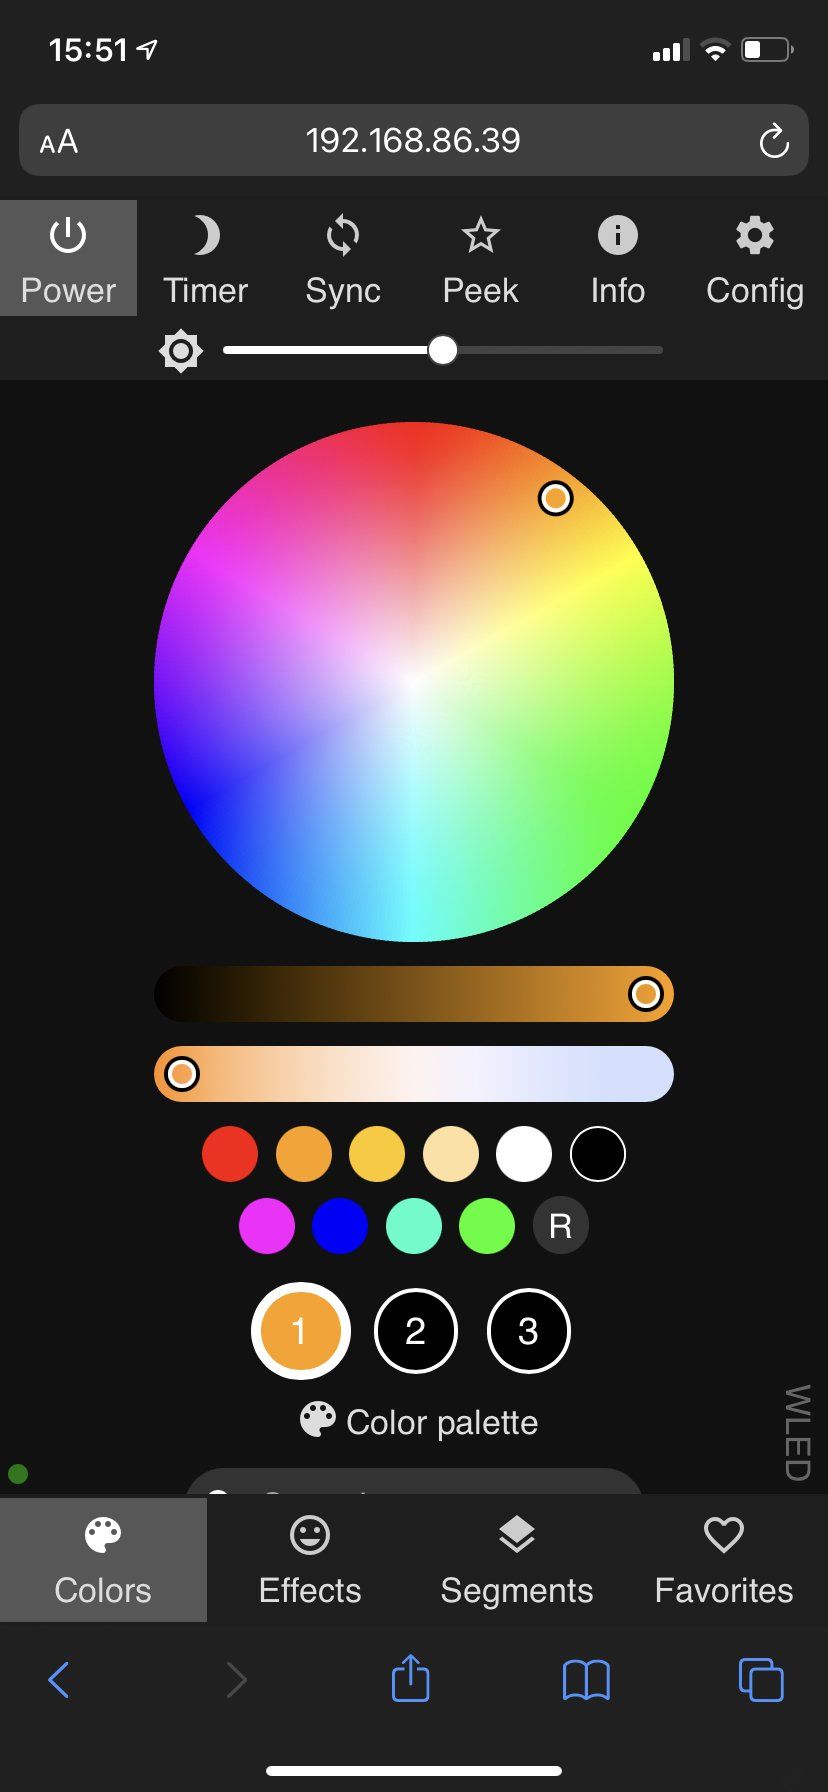
I’m using an ESP8266 to control them using the brilliant WLED firmware and its built in webserver. The smarts for the project are all housed in the small rectangular panel at the bottom. They can also be programmed to automatically mimic a Phillips hue bulb or respond to Alexa commands.
I’ll share with you how I made them - they’re really rather simple. As always there is a complete list of parts and links to amazon down below this video, and included some helpful tips and an FAQ here on my site. Enjoy.


Downloads:
3D models for printing: https://www.prusaprinters.org/prints/107555-geoleaf-3d-print-your-own-nanoleaf-project-alexa-h
Optional square panels to upgrade your project: https://www.etsy.com/uk/listing/1067981962
WLED Code for project (use Chrome web browser for the best experience): https://install.wled.me/
STL model of triangular acrylic diffuser for reference:
List of items used in this project and where to find them / BOM:
- 12v WS2811 LED’s (A 5 meter roll is enough for 12 panels): https://geni.us/WS2811-60
- 10mm LED connectors - one per panel: https://geni.us/3Pin10mmLEDCable
- 3D Printer Filament: https://www.3djake.uk
- Acrylic sheets (1 A4 sheet = 3 triangles. I used 3mm thick): https://geni.us/OpalFrostedA4Acrylic
- DC to DC Buck converter (Mini 360): https://geni.us/Mini360
- Logic Level Shifter (74AHCT125): https://geni.us/74AHCT125-LLS
- ESP8266 Dev Board: https://geni.us/wemosD1
- Plenty of M3x8 bolts: https://geni.us/NutsAndBolts
- Barrel connector suitable for at least 5amps https://geni.us/HighAmpDCBarrel
- 12v Power Supply (6 amp+): https://geni.us/12VPowerSupply6A
- Dual T splice connectors (x2): https://geni.us/DualTSplice
- Some 20AWG wire (0.8128mm in diameter): https://geni.us/20AWG
- Projects PCB: https://geni.us/GeoLeafPCB
or optionally
- PermaProto Board: https://geni.us/HalfPermaProto
- Wago Connectors: https://geni.us/Wago2
You can order a pre-soldered PCB with the Wemos, Mini360 and Logic Converter already attached and configured here: https://www.etsy.com/uk/listing/1093166401
Or a kit of parts for you to solder yourself here: https://www.etsy.com/uk/listing/1084096956
- Optional square panes to enhance your project: https://www.etsy.com/uk/listing/1067981962
Nuts, bolts and screws needed:
- M3 x 8mm (for assembling the panels and attaching PCB)
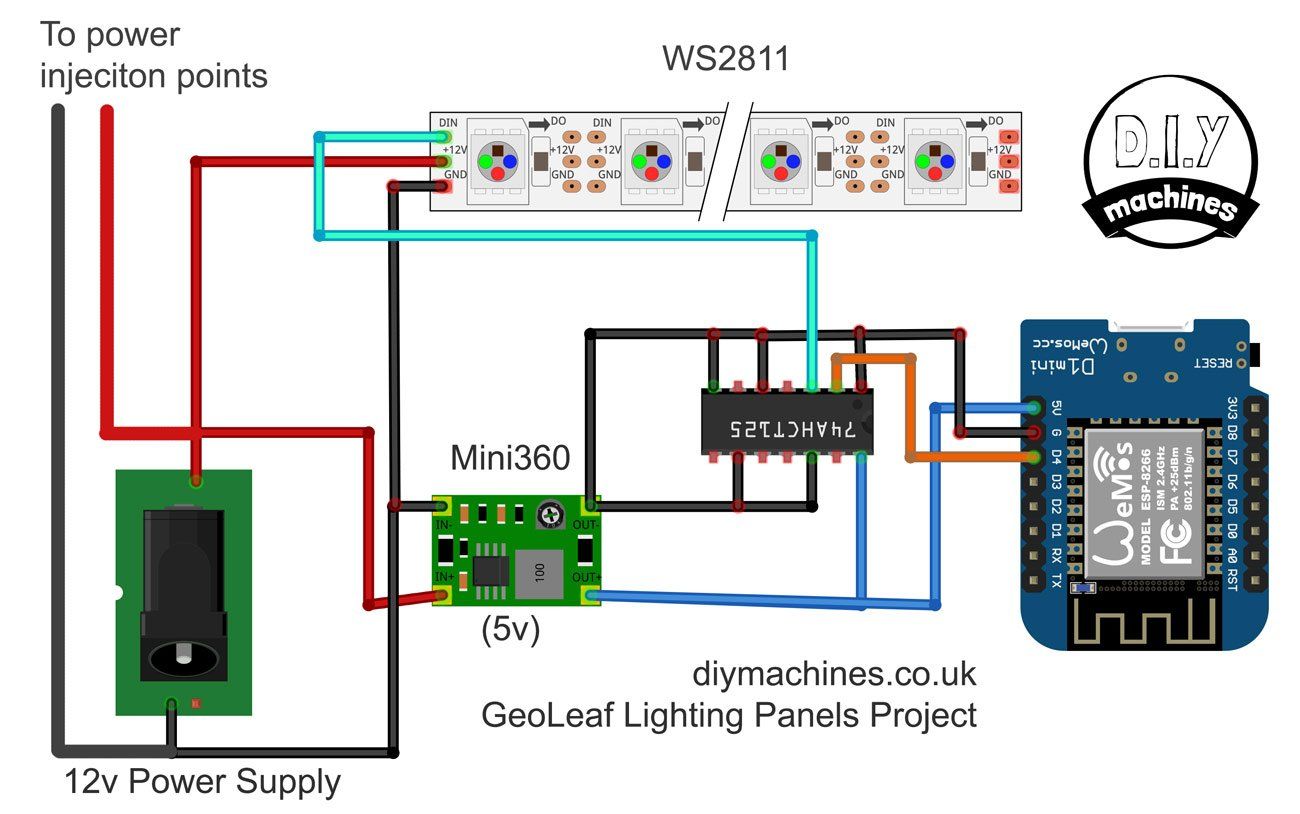
Wiring Diagram:
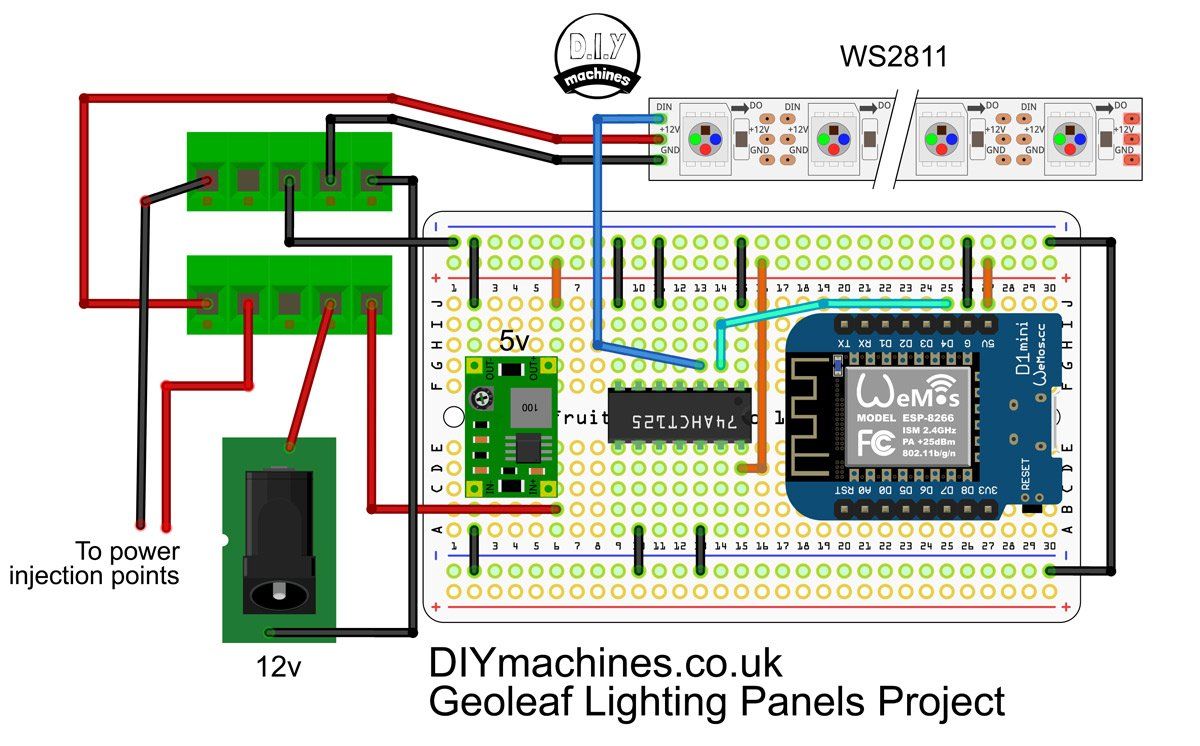
Wiring using an Adafruit Perma-proto half size board (PCB alternative):
I showed a piece of perforated board in the main project video but after further consideration have described how to use a piece of Adafruits Perma-proto board. This small change makes the wiring much simpler and greatly reduces the amount of soldering required.
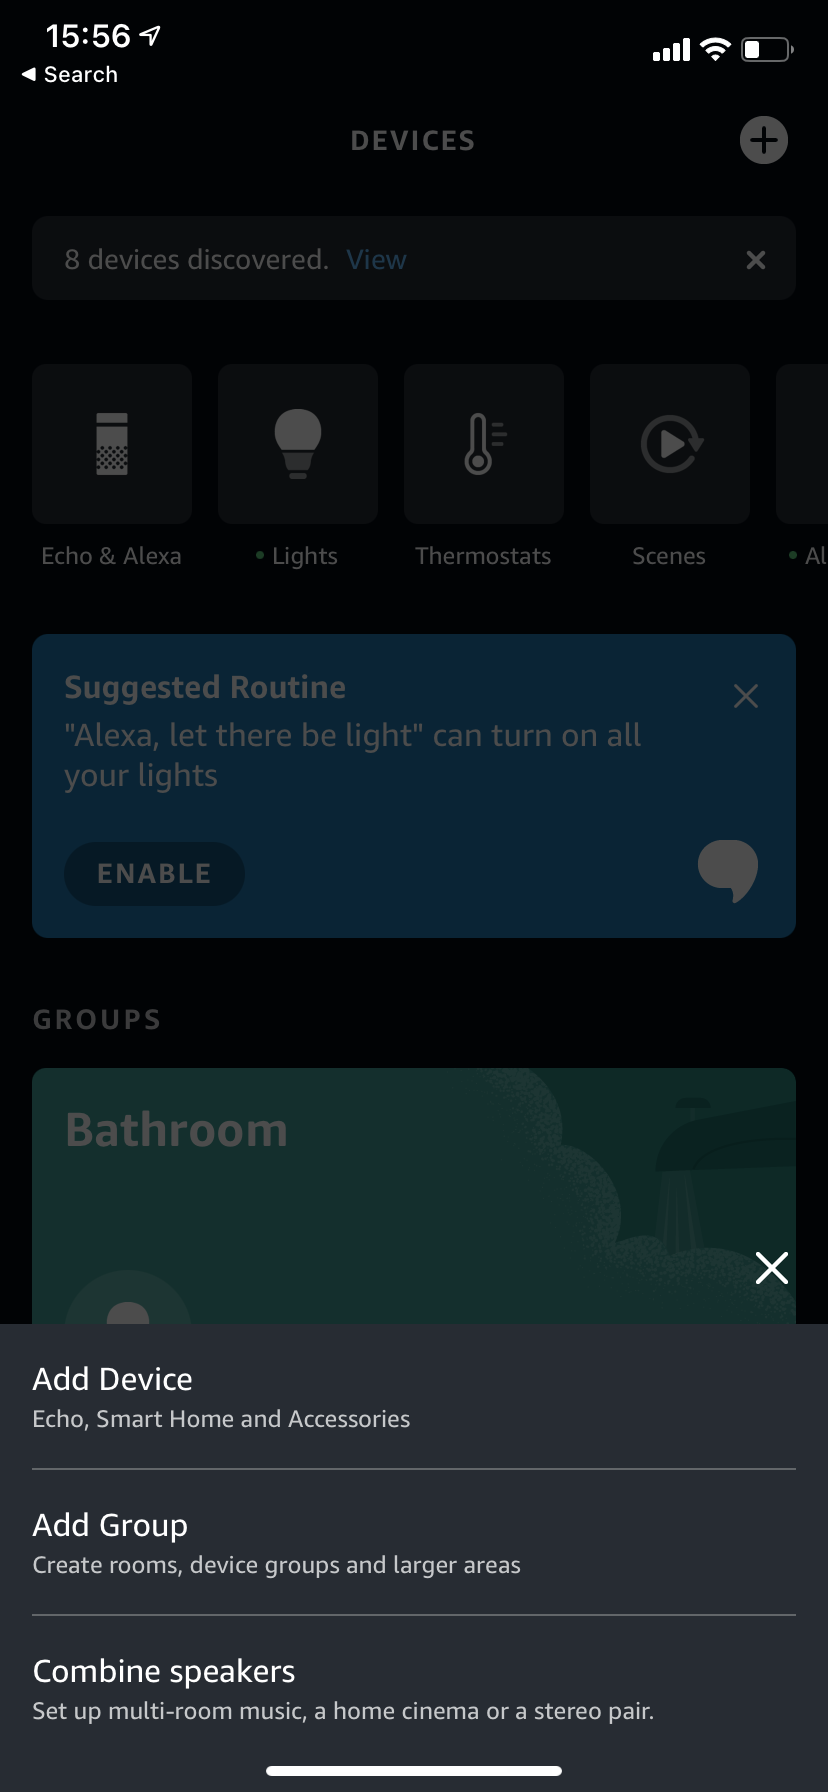
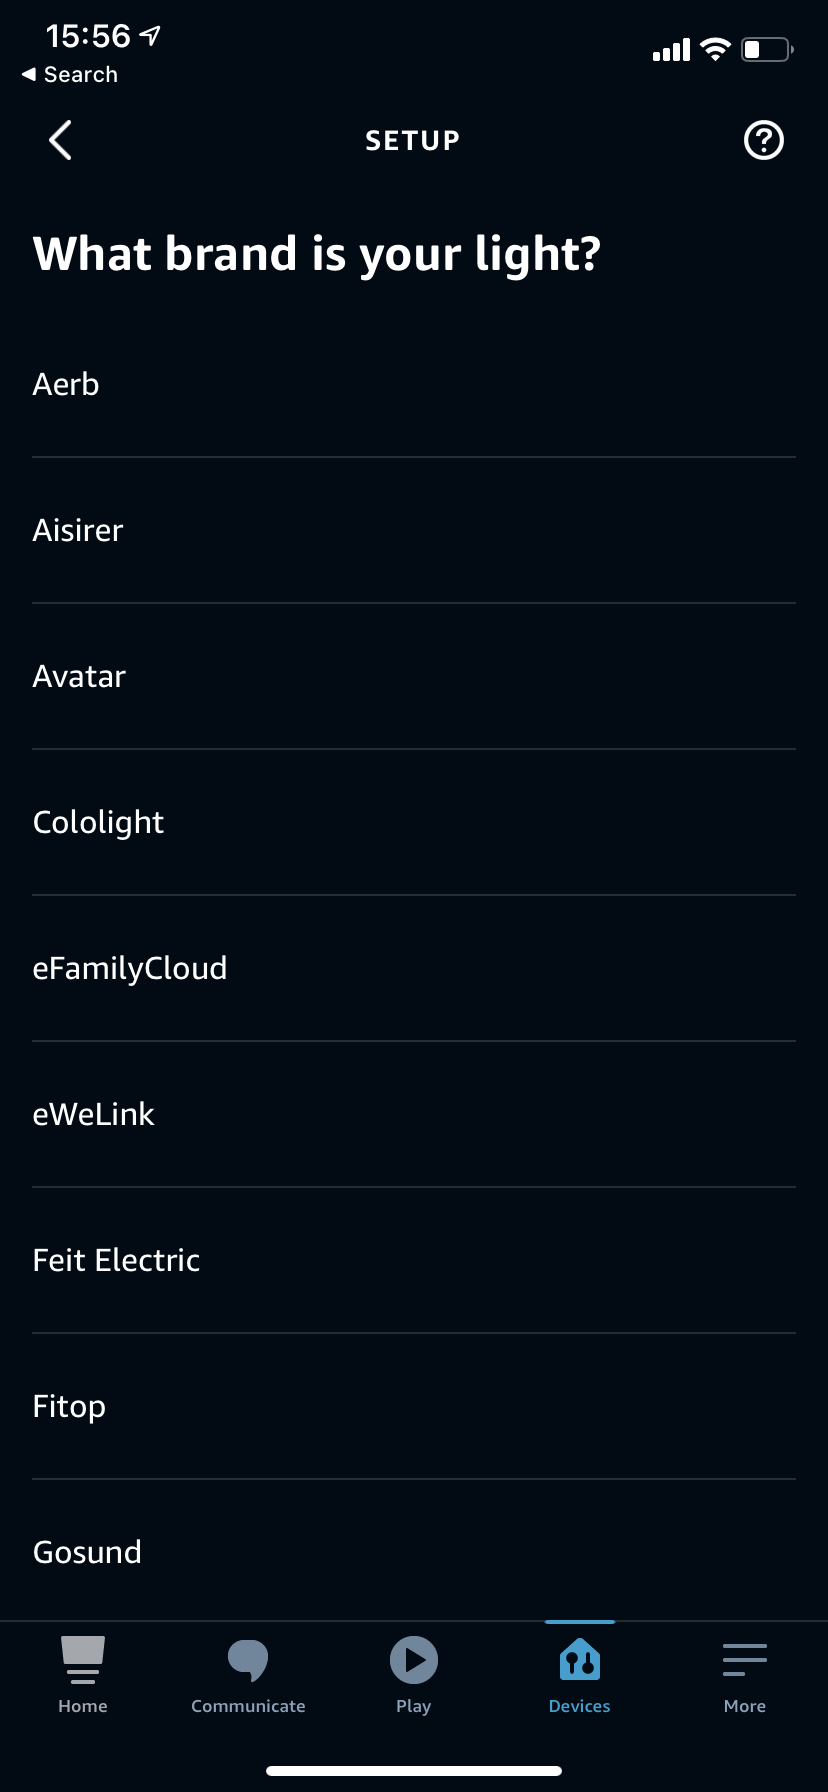
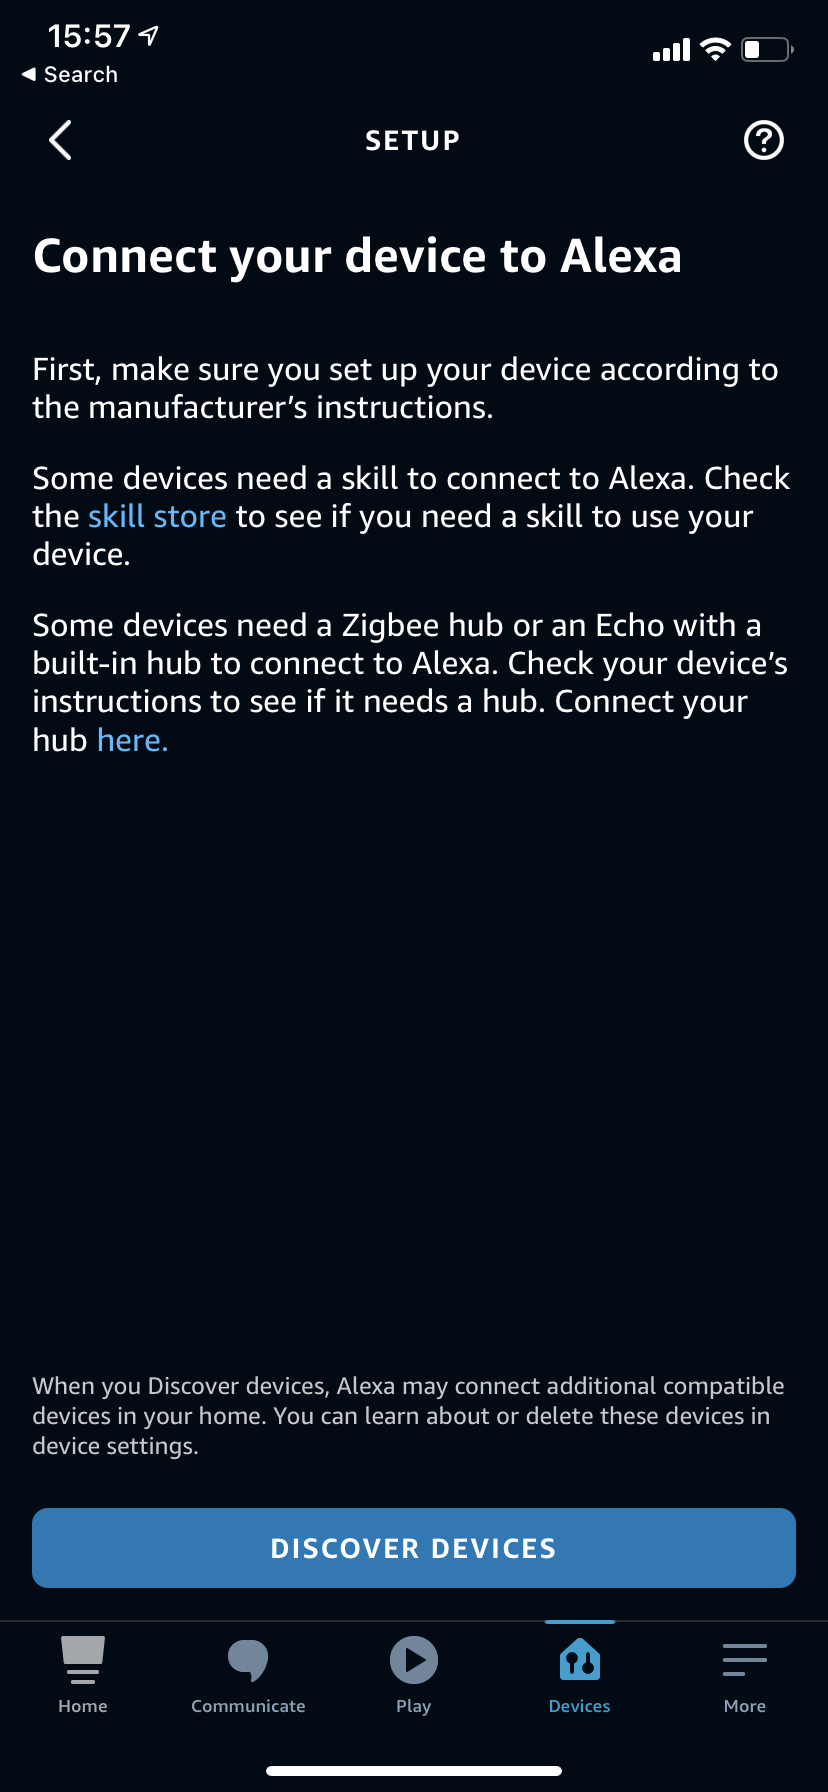
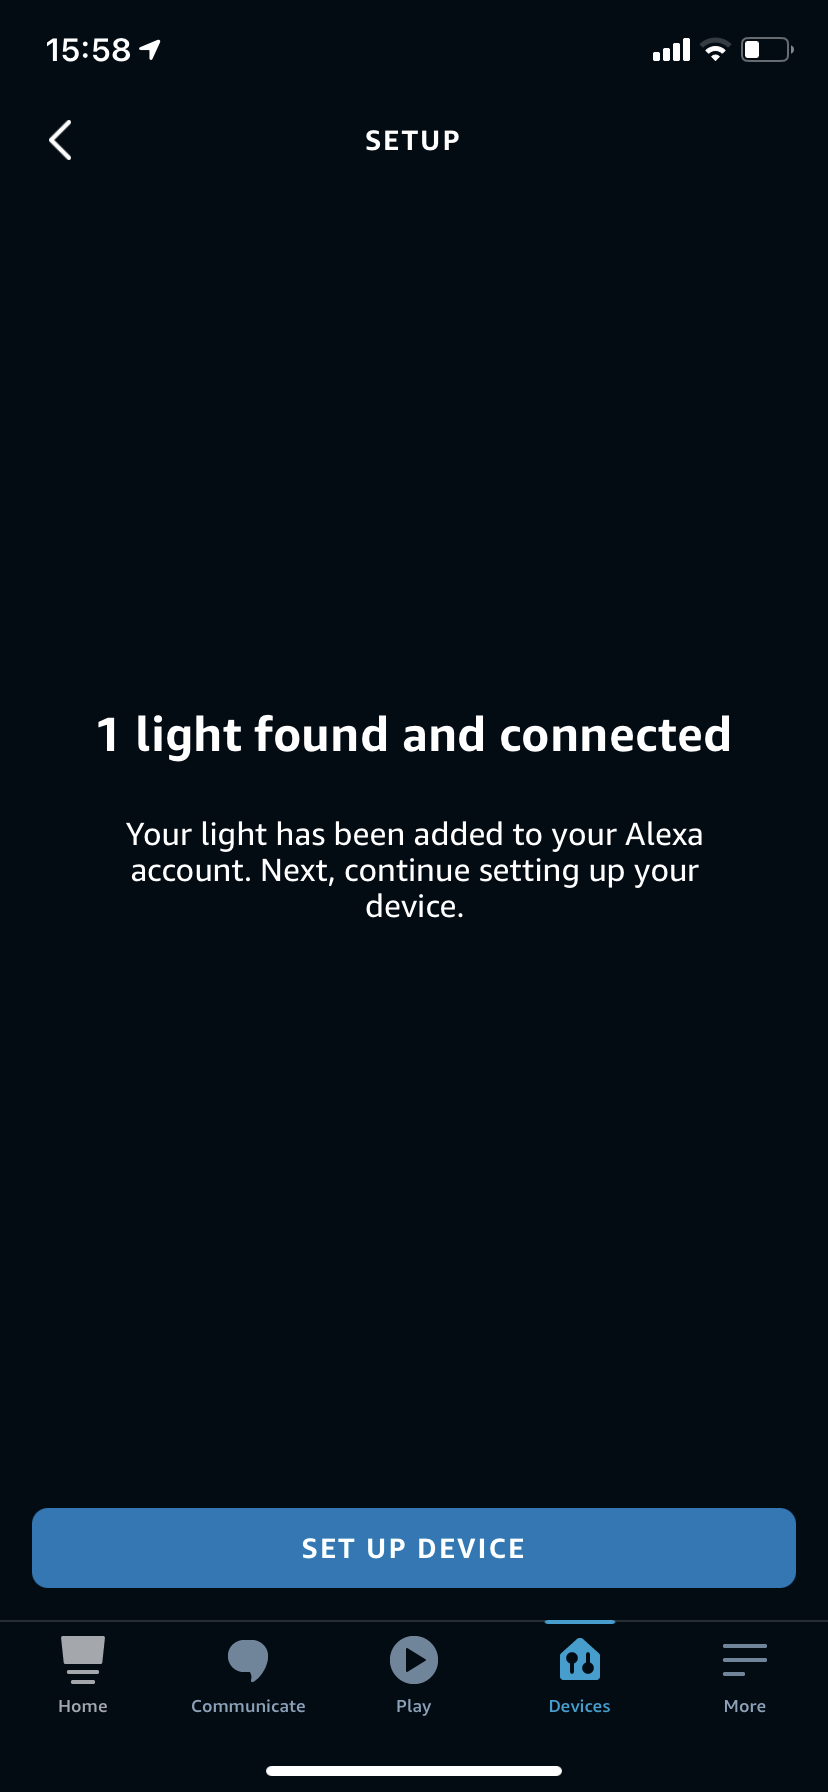
Integrating with Amazon Alexa
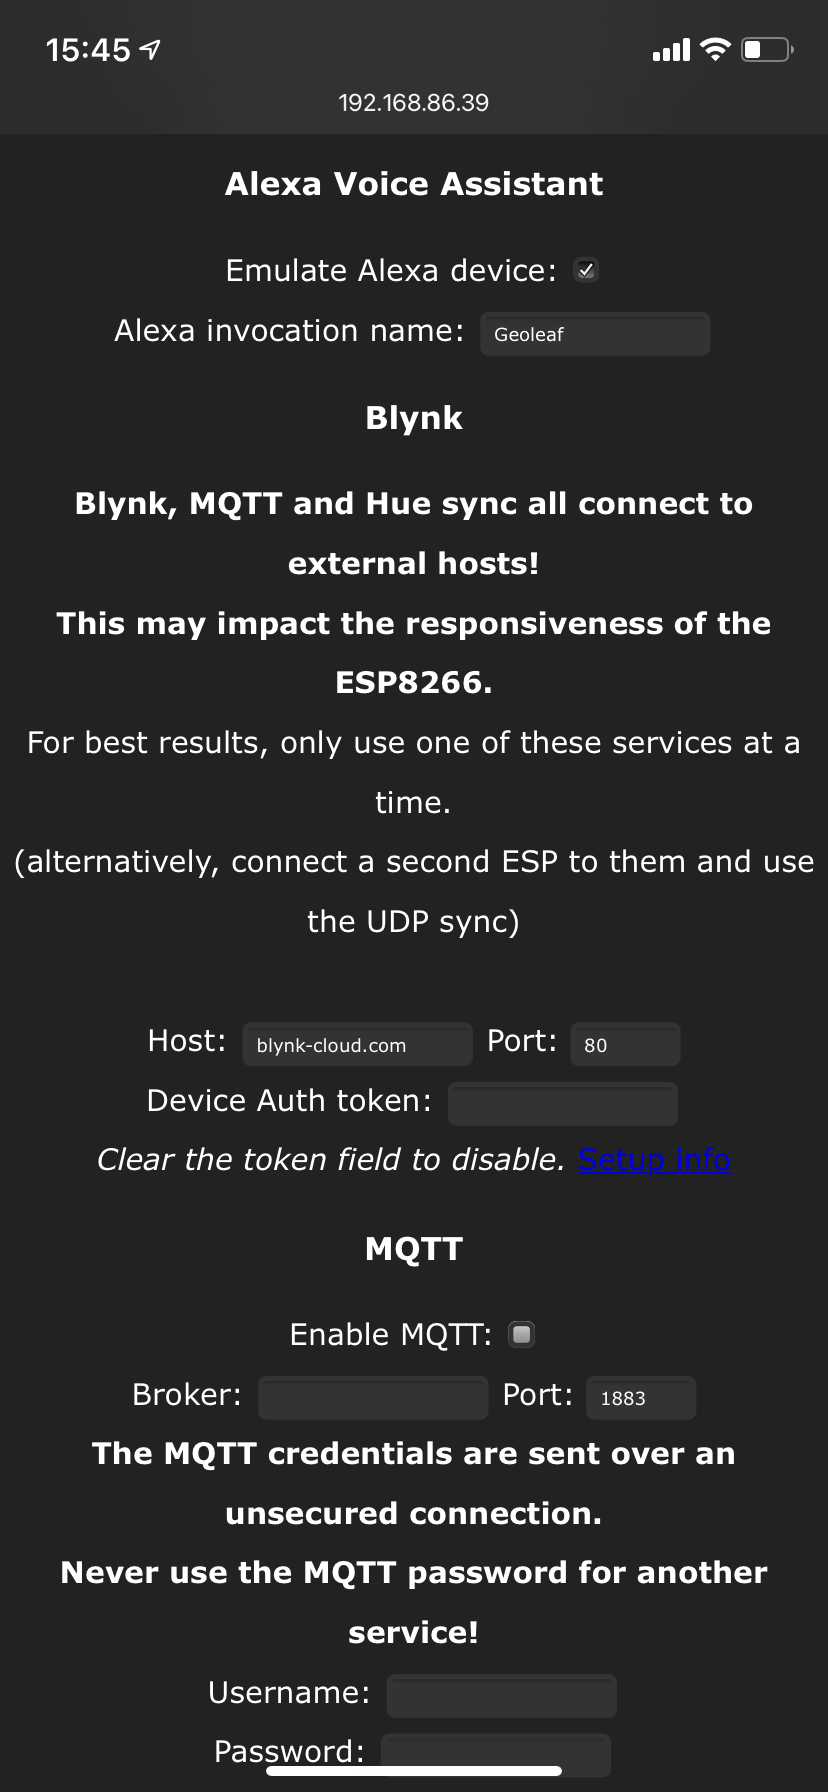
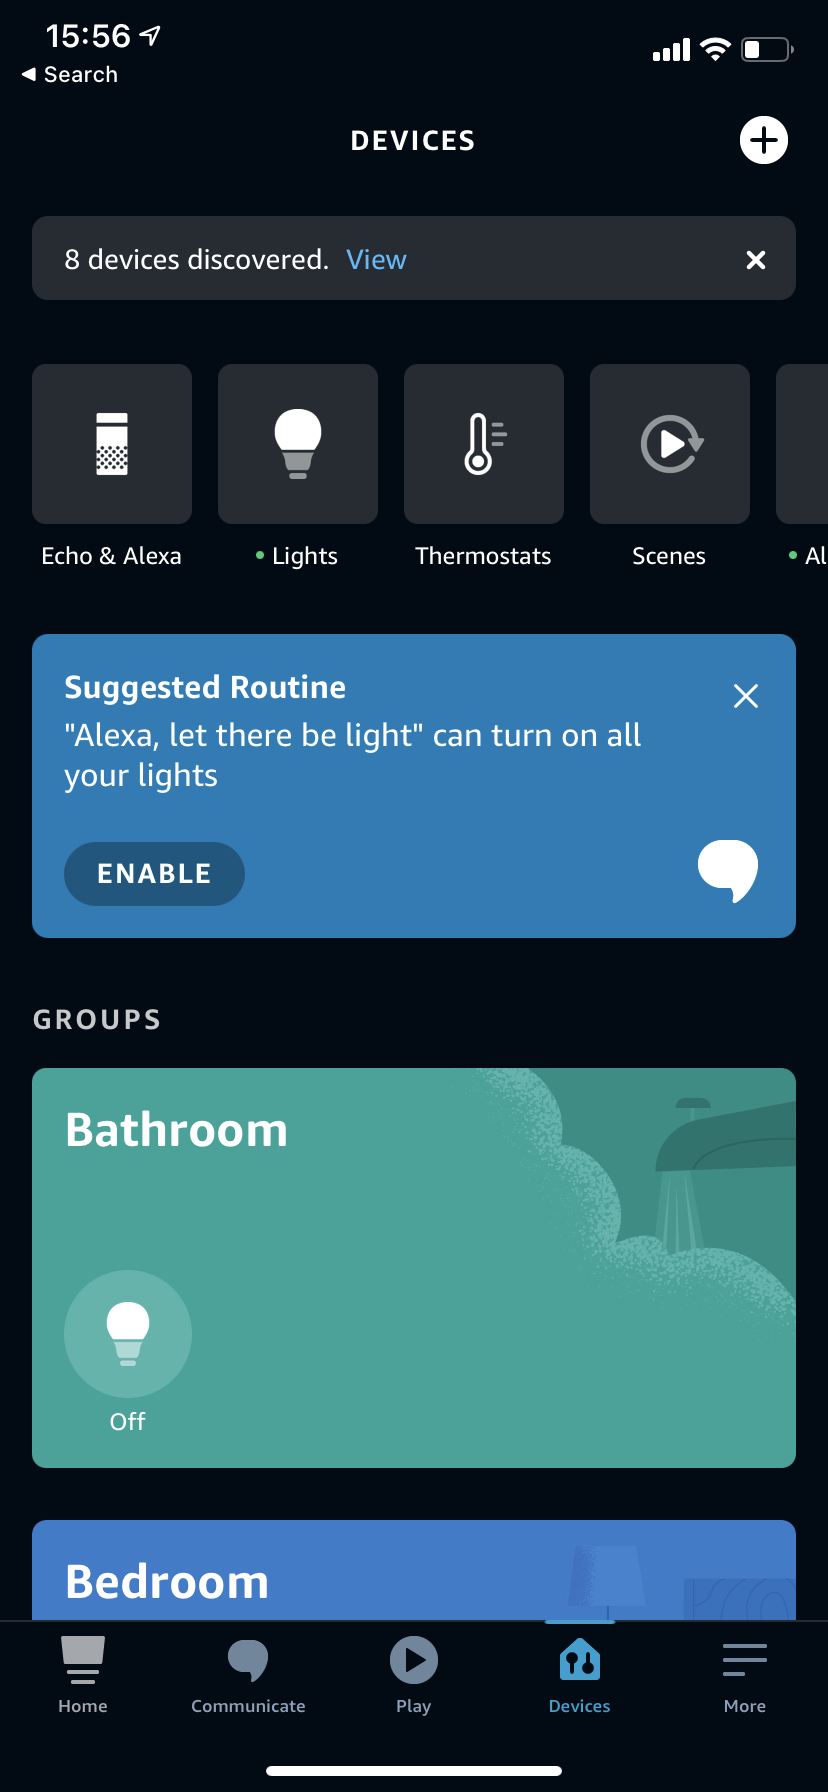
The Nanoleaf project can be integrated with Amazon's Alexa voice assistant service to allow you to control the colour, brightness and toggle the panels on and off with your voice. This option also allows you to further integrate it into other services such as IFTT's routines. It is very easy to add:


Integrating with Philips Hue
Integration with Philips Hue's smart lighting system is a little more involved than the Alexa integration shown above. To integrate with Hue we will have the project poll the Hue Bridge regularly and ask it about the status of one of your existing lights. The Geoleaf project will then try to replicate the settings of this build as closely as it can. For example, my Geoleaf panels are in my office and I have t follow the brightness of my ceiling light bulb. This way it switches on and off when I enter and leaf my home office space.
Here is some documentation provided on the official Wiki for WLED: https://github.com/Aircoookie/WLED/wiki/Philips-hue-sync
and here is some documentation from Philips Hue on interacting with your Hue bridge to find bulb IDs which you need to enter int the WLED app: https://developers.meethue.com/develop/get-started-2/. Both of these resources might help you with this integration but here is a super concise run through of what is required:
- Find the IP address of your Hue bridge by either clicking here(if you're on the same network at the moment) or by opening the Hue app, go to the settings menu, go to Hue Bridges, select your bridge and note its IP address.
- In a web browser navigate to: https://<bridge ip address>/debug/clip.html (ensuring you substitute your IP address). This will open the 'CLIP API Debugger' of your Hue Bridge.
- To be able to ask for more sensitive information about your Hue system you need to ask for a username to prove who we are. Do this by entering the following into the fields of the API Debugger:
URL = /api
Message Body = {"devicetype":"my_hue_app#geoleaf"}
And then press the 'POST' button. This should return an error saying 'link button not pressed'. This is a security step to ensure you should be allowed access to your Hue data. Press the physical button on top of your Hue Bridge and then press 'POST' again.
This time it will generate unique username for you. Note this down - it will be a long string of letters and numbers. - This time enter the following information into the fields:
URL = /api/YOUR-UNIQUE-USERNAME
And press the 'GET' button. This will return all the information about your Hue system. - This information can then be copied from the results and pasted into a JSON viewer such as http://jsonviewer.stack.hu. From here you can find the bulb you would like to mimic, take note of its ID and enter this into WLED.
FAQ
Discord sever for project: https://discord.gg/sbqyCmmYjc
Comments


