Build a COLOUR E-INK DASHBOARD
How to make your own colour InkyPi e-Paper Dashboard
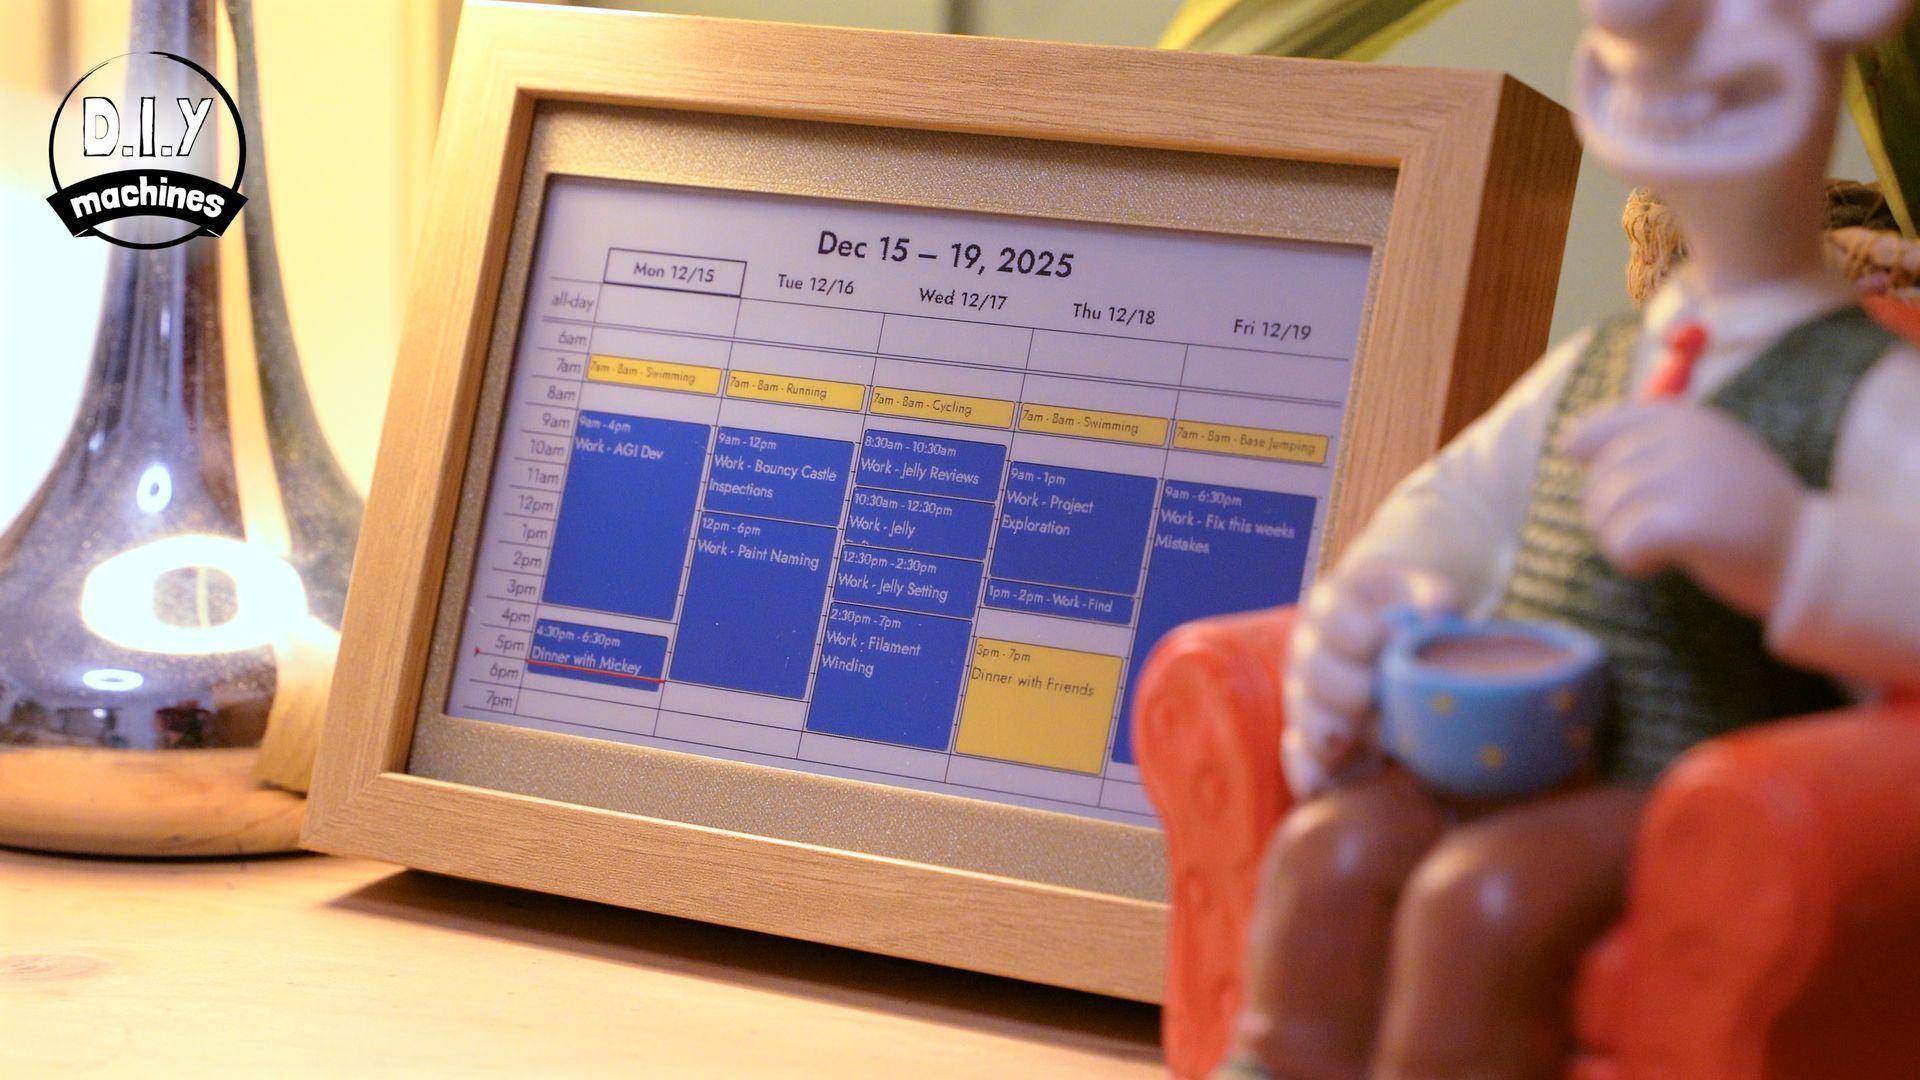
Hi, I’m Lewis and this is DIY Machines. The channel where I show you step-by-step how to make awesome projects. Today's projects are these very popular colour e-ink paper display digital dashboard’s. An amazing addition to any ones smart home or smart life.
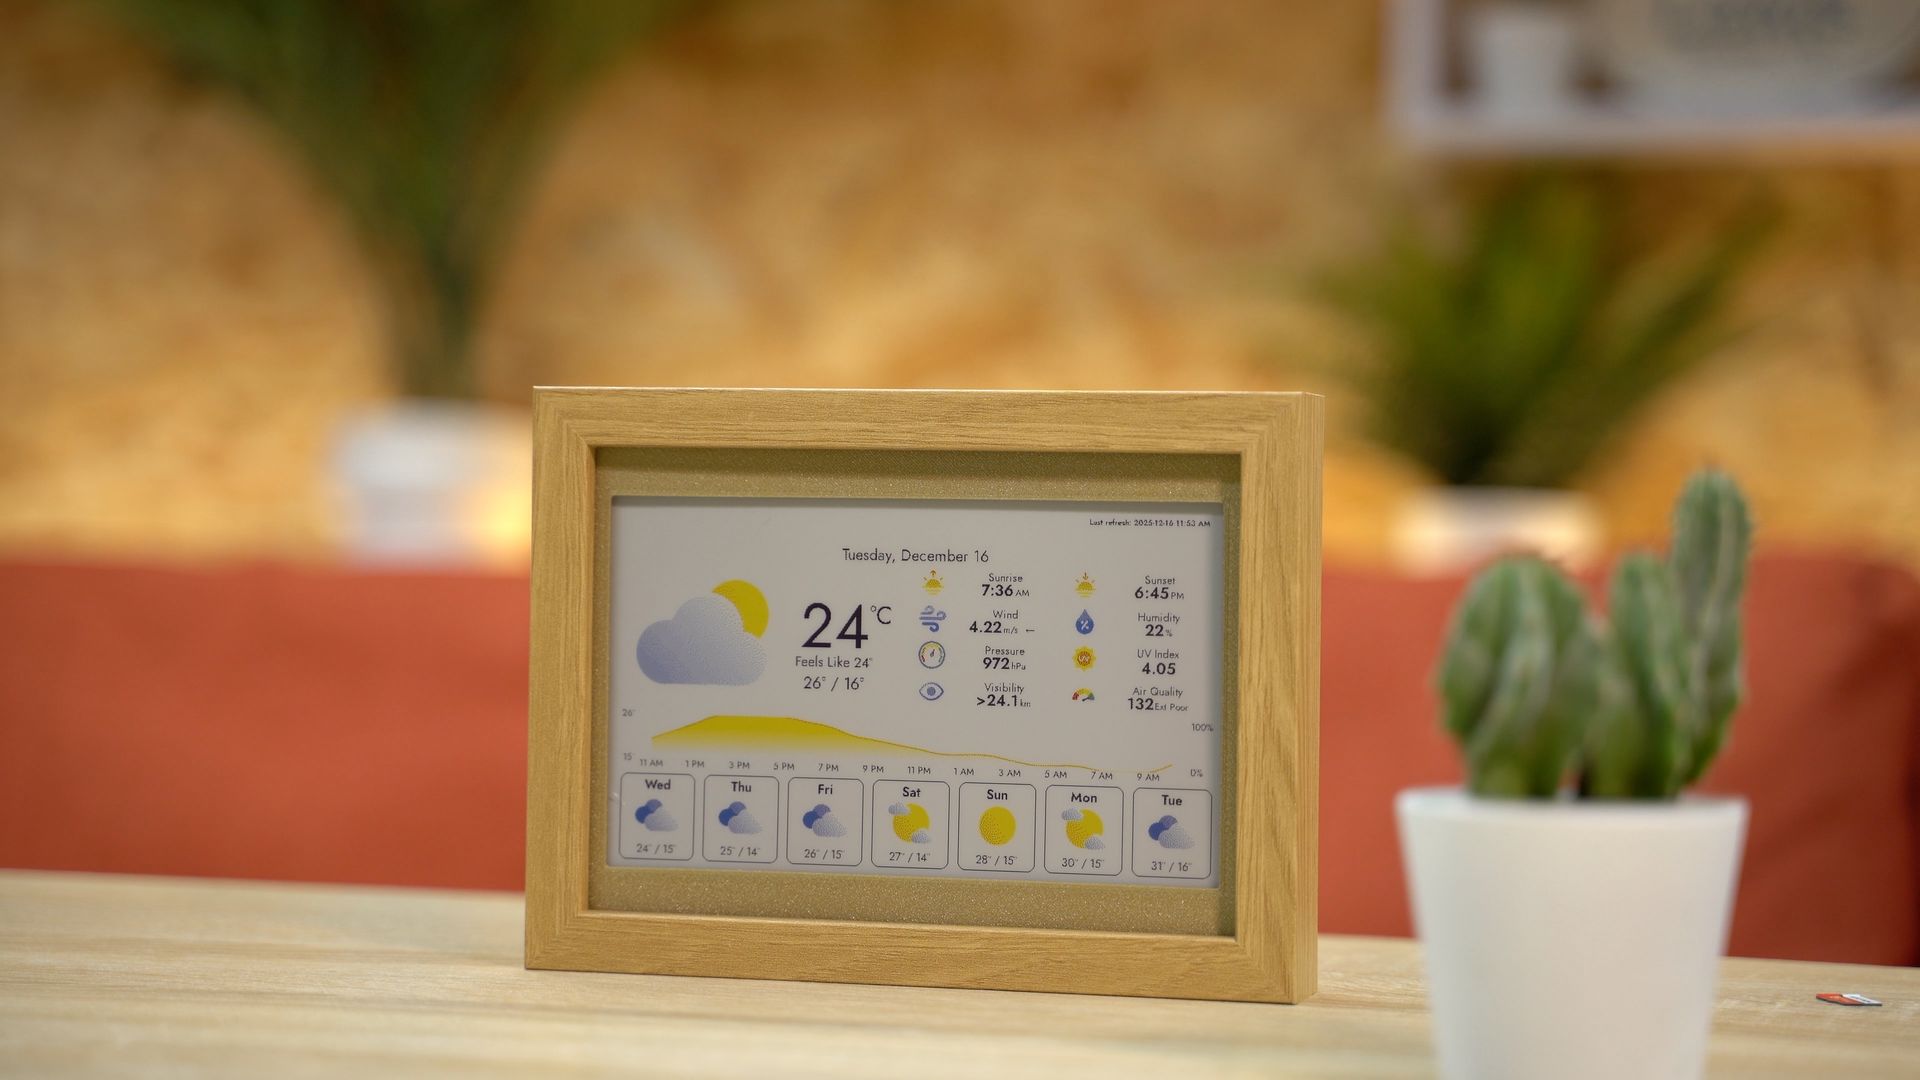
They are customisable to show different data at different times of the day. So you can see your calendar when you wake up, followed by the weather when you’re choosing your outfit for the day ahead, catch up on the news when you get home and then enjoy the charm and nostalgic photos of your family and friends in the evenings.
There is an ever-growing catalogue of plugins such as GitHub stats, NASA imagery, weather reports and more… thanks to the amazing open source InkyPi software running on the Raspberry Pi Zero 2 W. https://github.com/fatihak/InkyPi
Developers YouTube account documenting the process of developing InkyPi:
https://youtu.be/UOKB9y05eOc?si=Ge9P5QmmB0Aoc42_
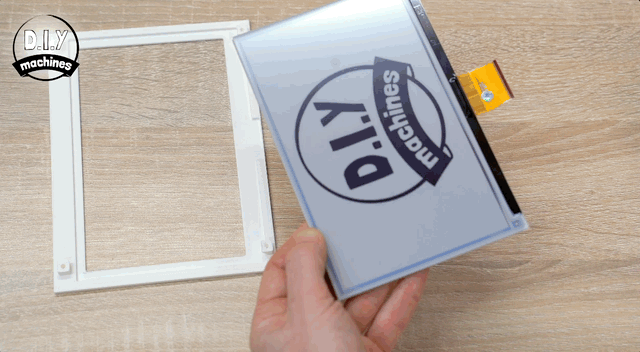
I love the colour e-paper display on this project as unlike a traditional screen it does not emit any of it’s own light and instead only reflects natural light just like a kindle screen - but in colour. This is far less distracting and elegantly hides the technology inside behind what looks a printed image in a wooden Ikea frame.
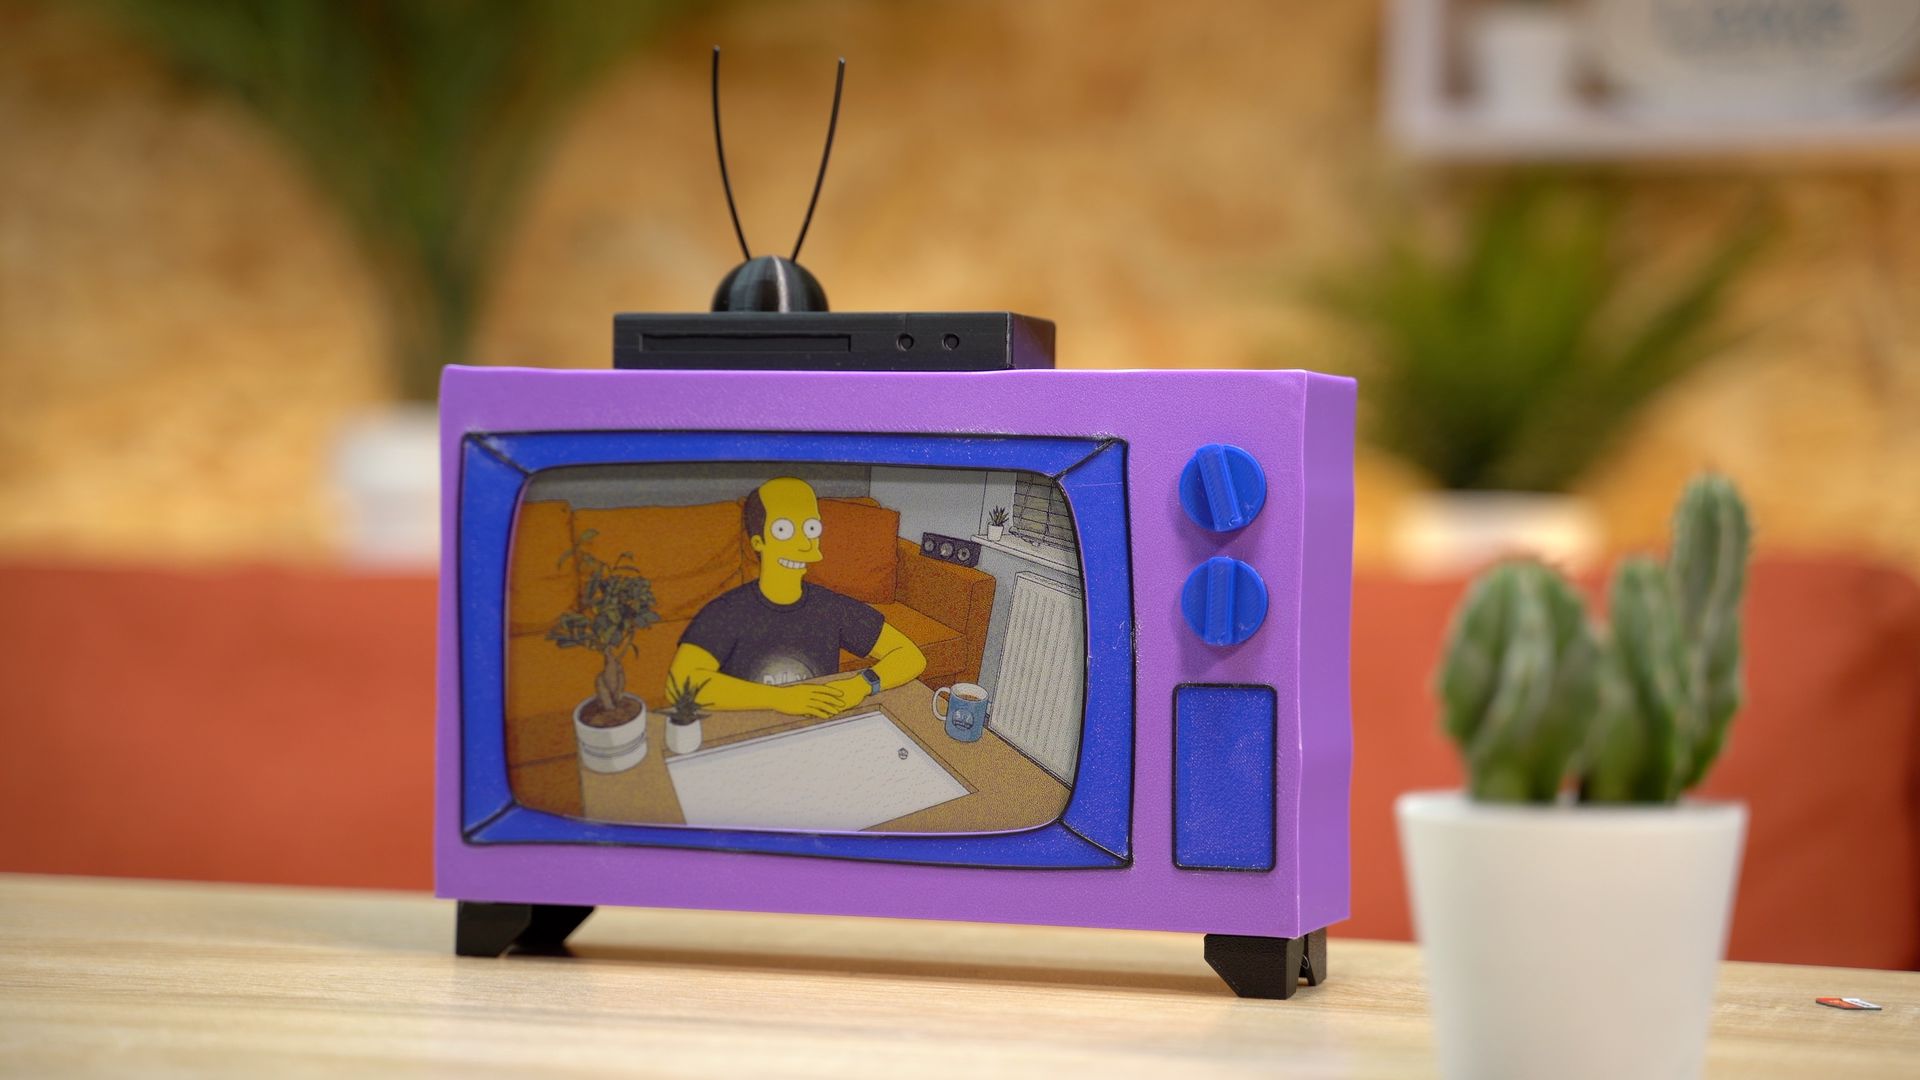
You can also 3D print everything if you don’t want to use a wooden frame, I’ve put up a few ready-to-print designs for you to choose from and you’ll find the Fusion360 file available to download and create your own frame designs with as well.
I hope to add a few more designs online shortly and encourage other makers to share what they create as well.
List of items used in this project and where to find them / BOM:
To build one of your own you will only need a few items for the relatively simple, but effective, project:
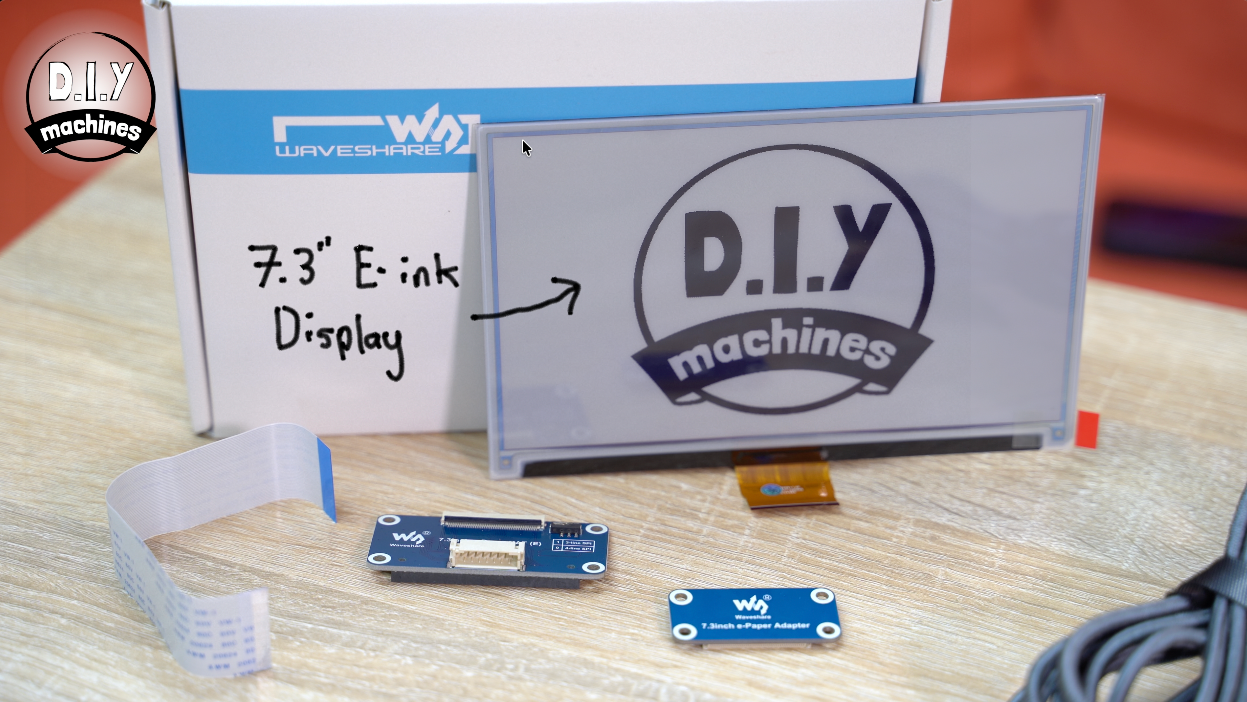
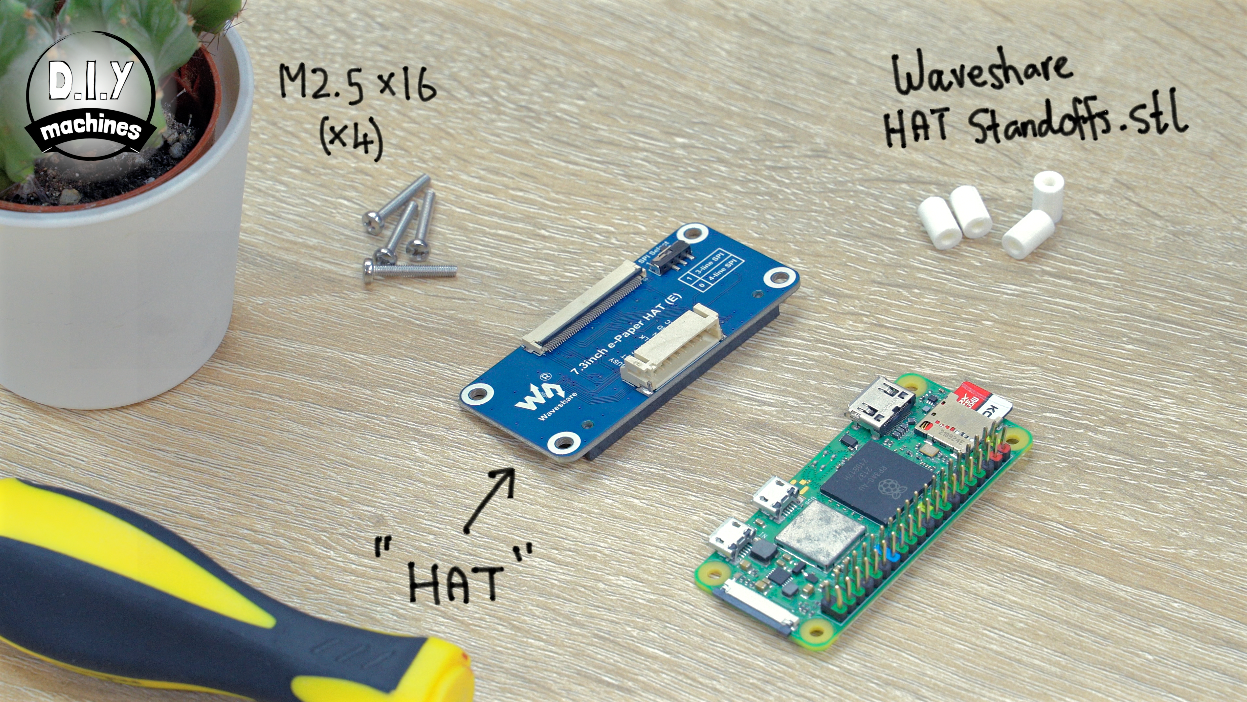
- WaveShare 7.3" E-ink display and HAT: https://geni.us/Waveshare7-3Colour
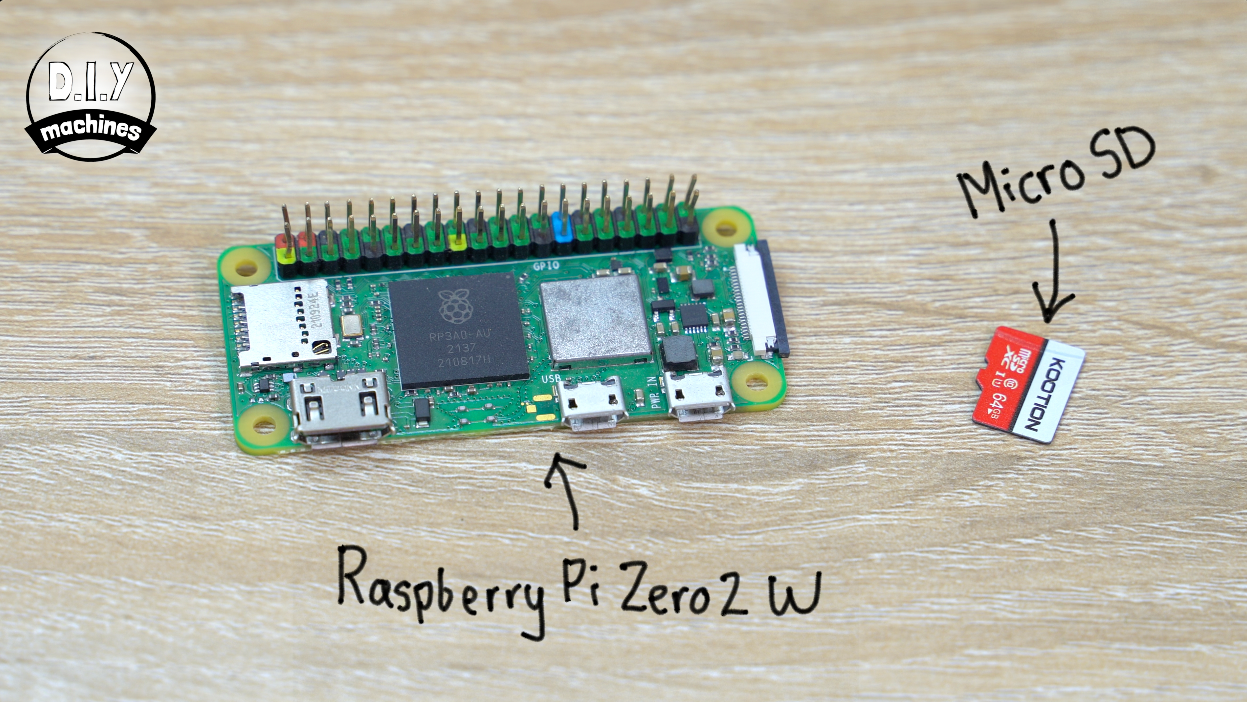
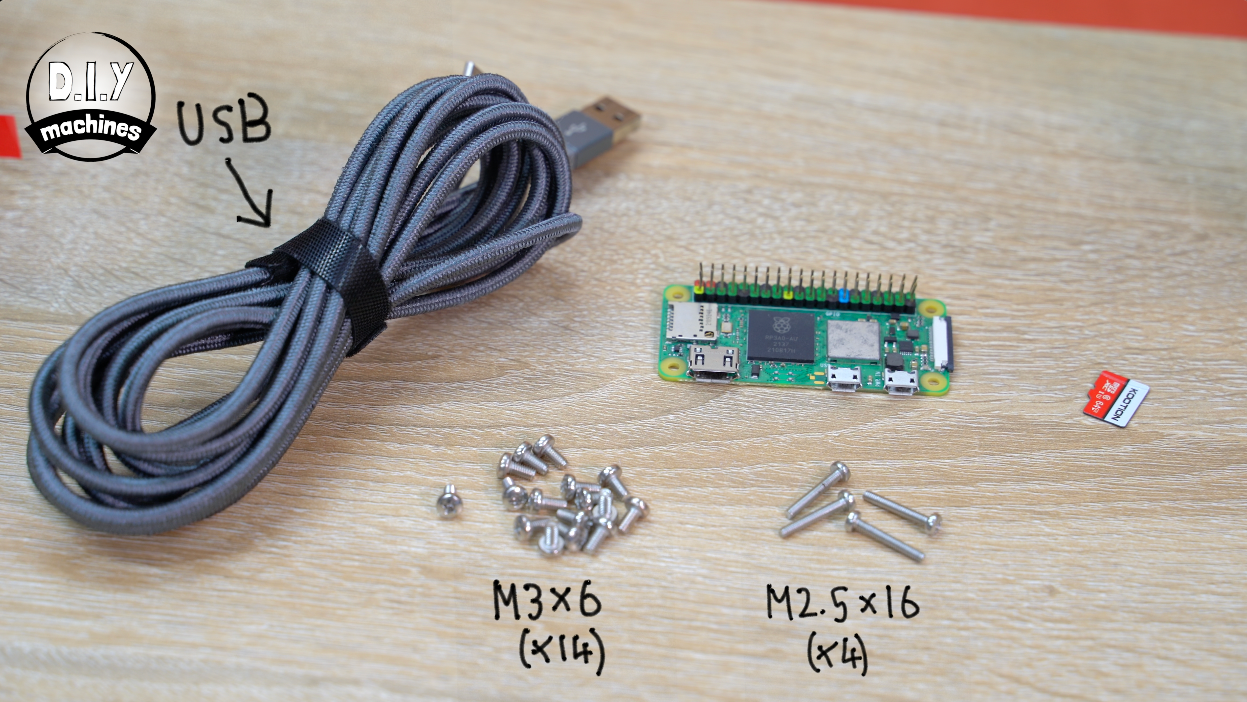
- Raspberry Pi Zero 2 W: https://geni.us/RaspberryPiZero-2W
- USB Cable: https://geni.us/MicroUSBCable
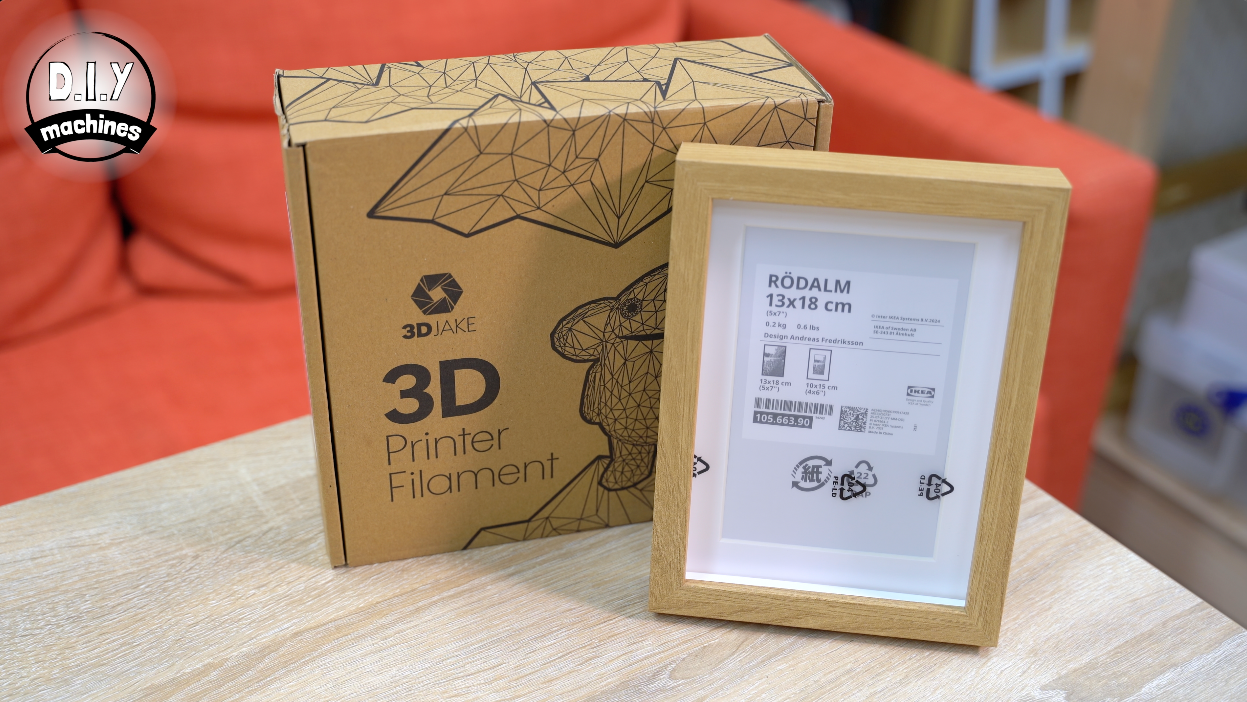
- 3D Printer Filament: https://www.3djake.uk
- M3x6 bolts (x16) and M2.5x16mm (x4): https://geni.us/NutsAndBolts
If you’re putting yours into an Ikea frame it’s part 105.663.90 - Rodalm 13x18cm
And you’ll want some filament for 3D printing. All mine was done in PLA from 3D Jake.
Downloads:
Please 'like' the model on Printables. It really helps me out. Thank you.
3D models for printing: https://www.printables.com/model/1518955-build-a-colour-e-ink-dashboard-weather-calendar-ph
International shipping Etsy shop: www.diymachines.etsy.com
How to Build your InkyPi Display
Step 1: Choosing the Front
You have a few choices for the front of the frame - the part you see surrounding the display when the project is finished. Whichever one you choose below, the rest of the instructions are the same for all of them.
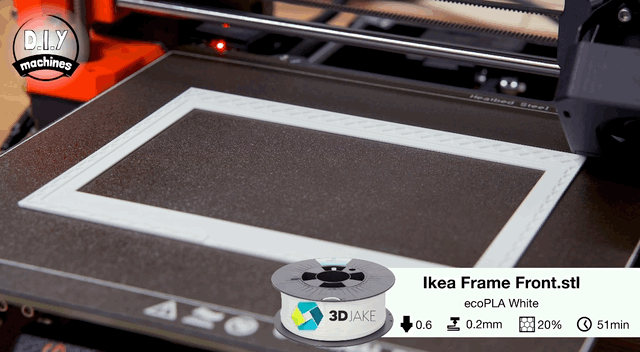
- Ikea Wooden Frame - Rodalm - Choose this is you will mount your project inside of the 13x18cm Ikea photo frame. You will need to print the file named "Ikea Frame Front.stl". This will act as the interface between the frame and the rest of the projects step. This print hold the e-paper display in the centre of the frame.
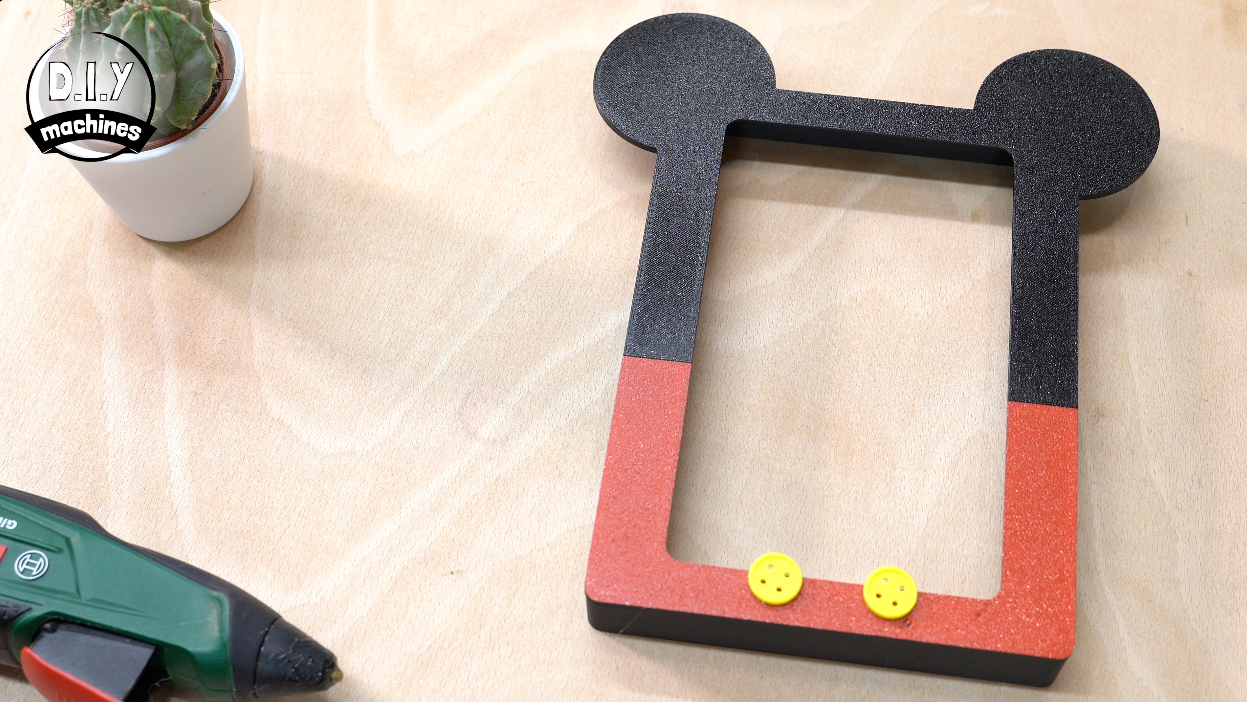
- Mouse Frame - For this you will need to print the files "InkyPi Frame - Mouse" and "InkyPi Frame - Mouse Buttons" which are simply glued onto the front as optional decorative items.
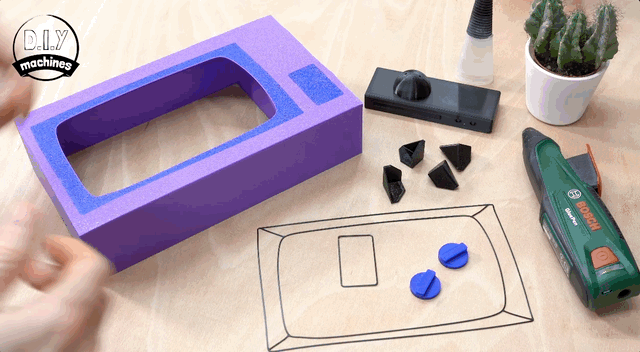
- Cartoon TV Frame - For this you need to print "InkyPi Frame - Cartoon TV" followed by InkyPi Frame - Cartoon TV - TopBox" which is glued onto the top, then a pair of "InkyPi Frame - Cartoon TV - Control Knob" which are similar glued to the front along with the "InkyPi Frame - Cartoon TV - Screen Outlines" and finally the feet on the underside are "InkyPi Frame - Cartoon TV - Feet"
If you're interested in making your own then you'll find a template for Fusion 360 which I have included on the Printables page for download. https://www.printables.com/model/1518955-build-a-colour-e-ink-dashboard-weather-calendar-ph
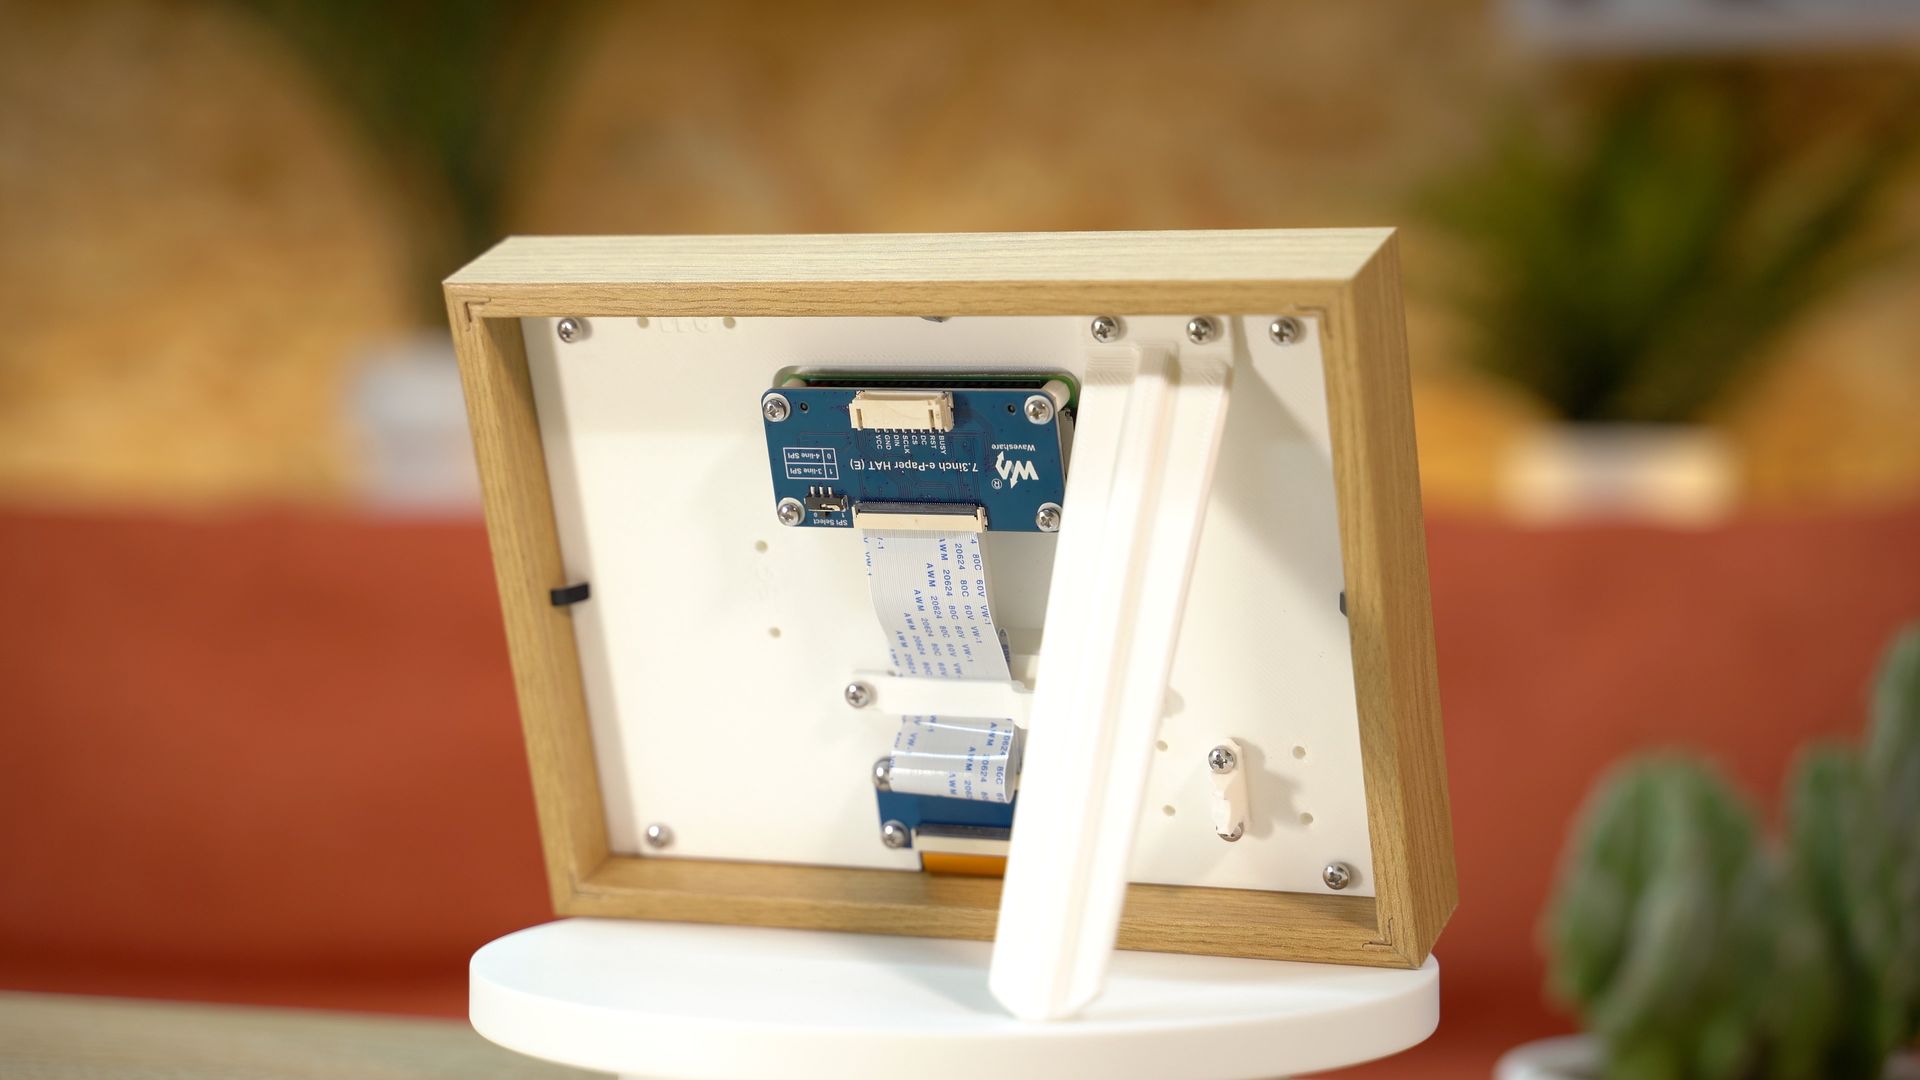
Step 2: Adding The Back
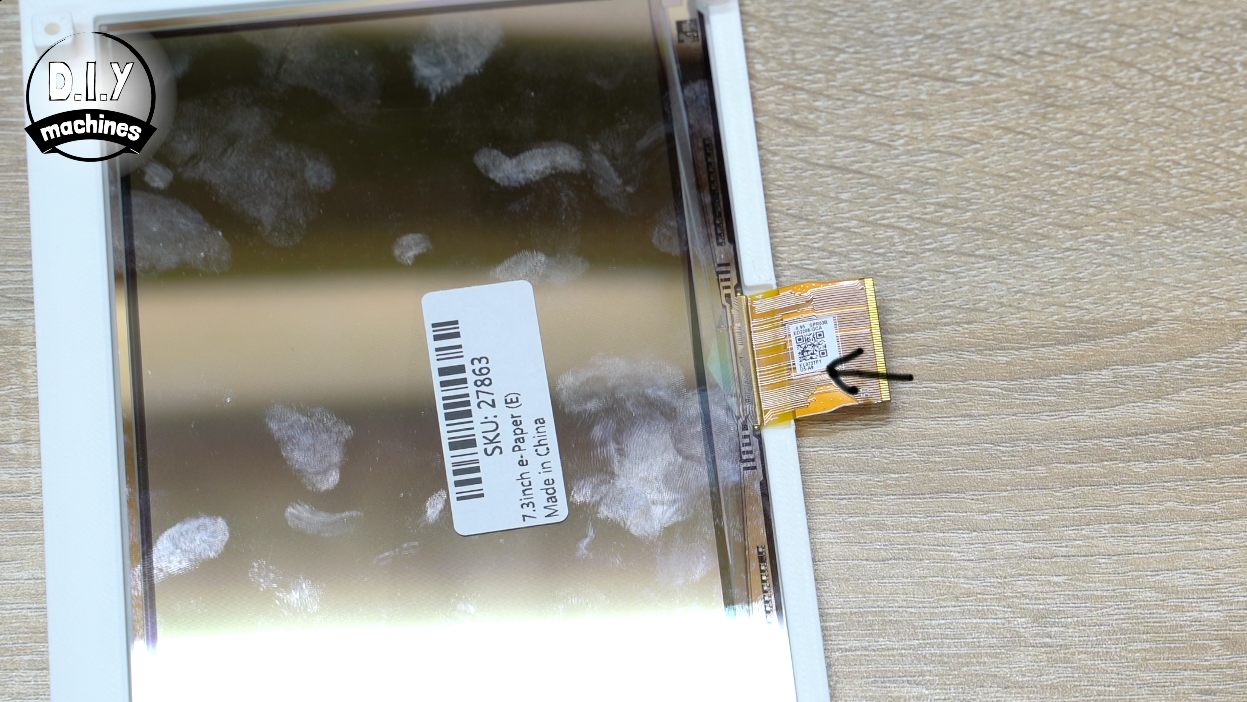

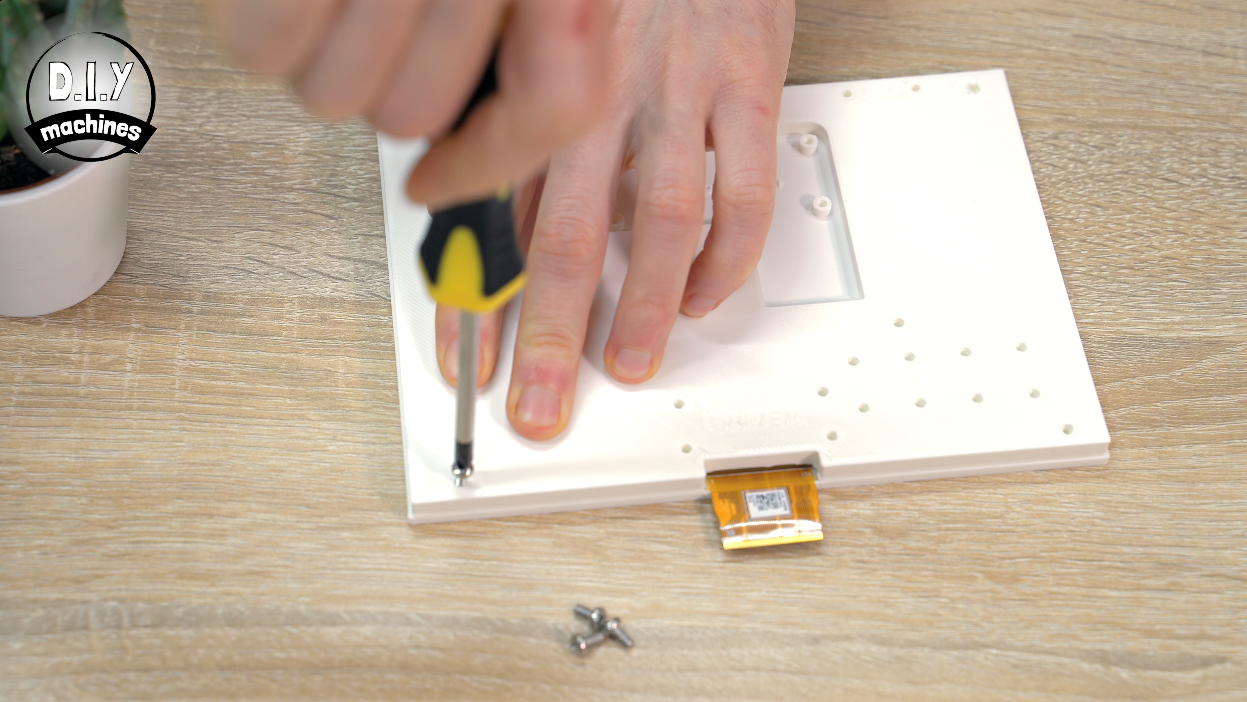
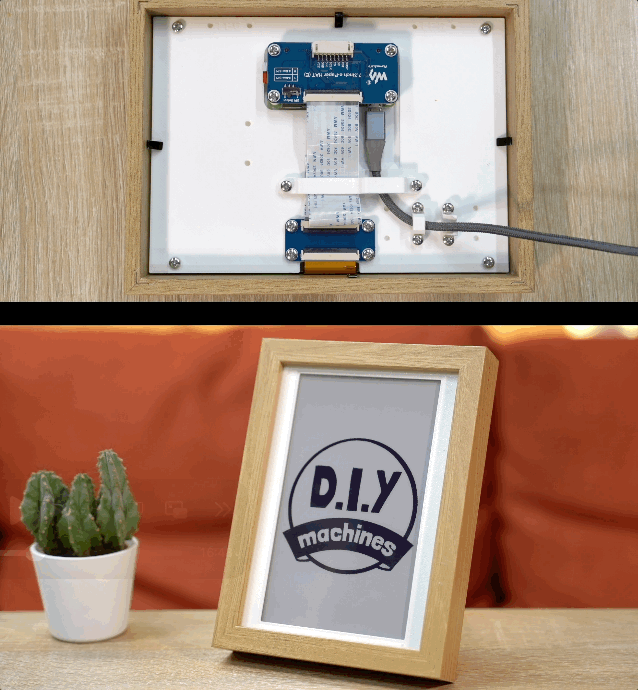
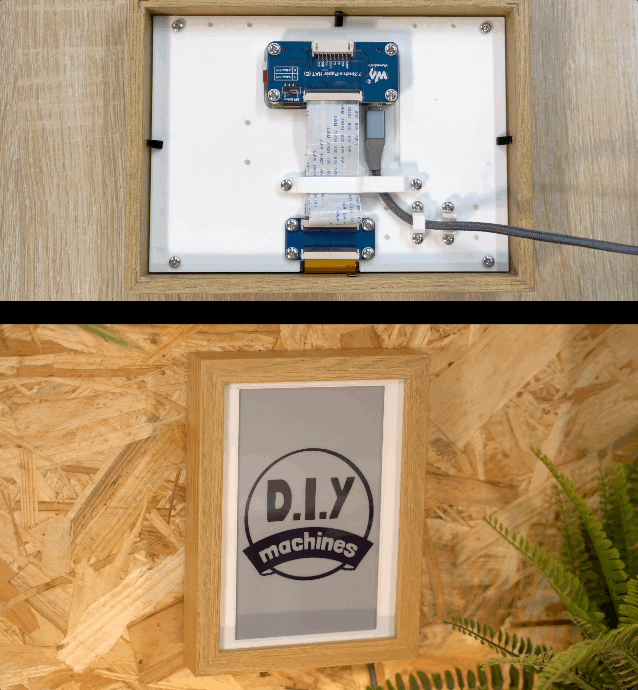
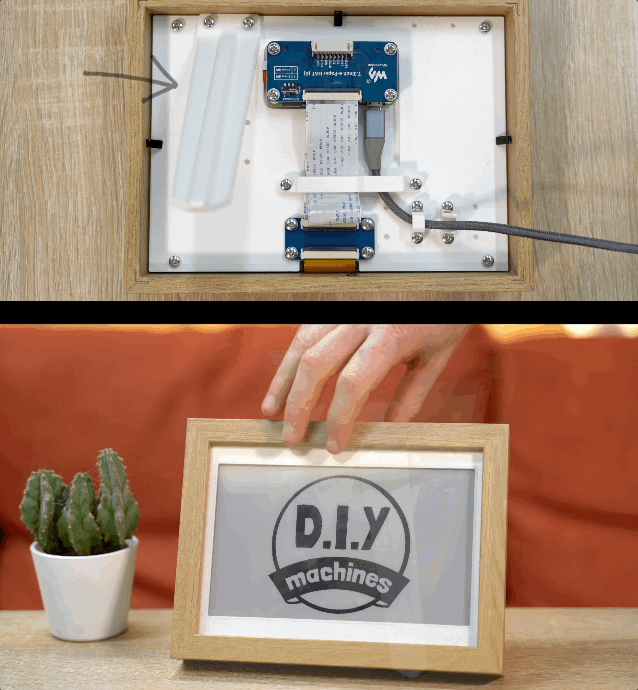
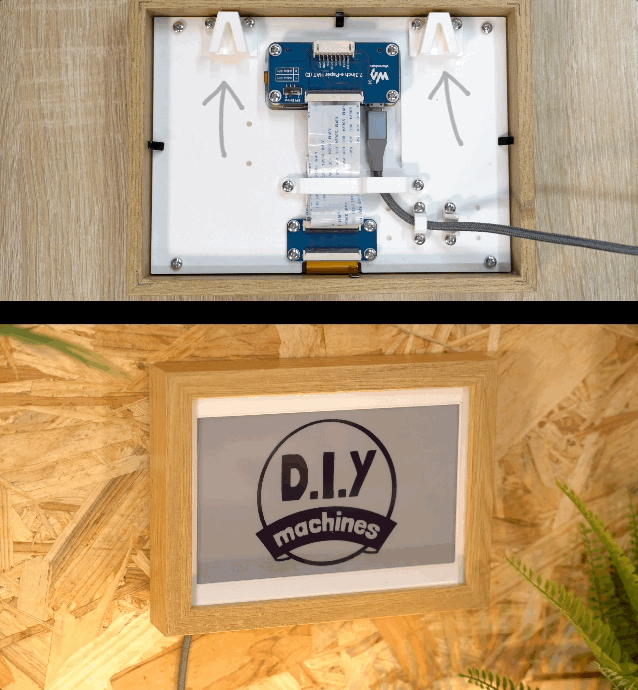
Whichever frame design you choose, we can continue by taking our e-paper screen and removing the protective film from the front. This is then placed face down into the frame ensuring the ribbon cable passes over the cutout at the base (as shown by the arrow in the image above).
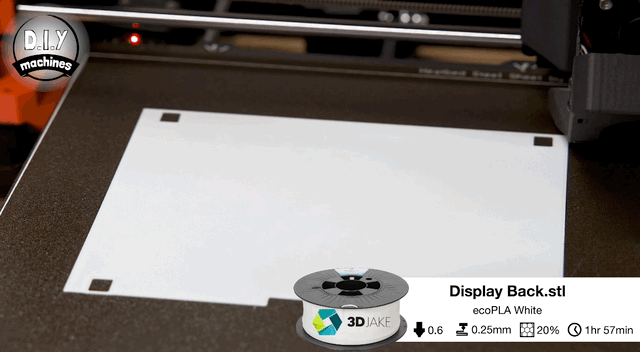
We can then 3D print and install the rear cover using four of our M3x6mm bolts in the four outermost corners of the print.
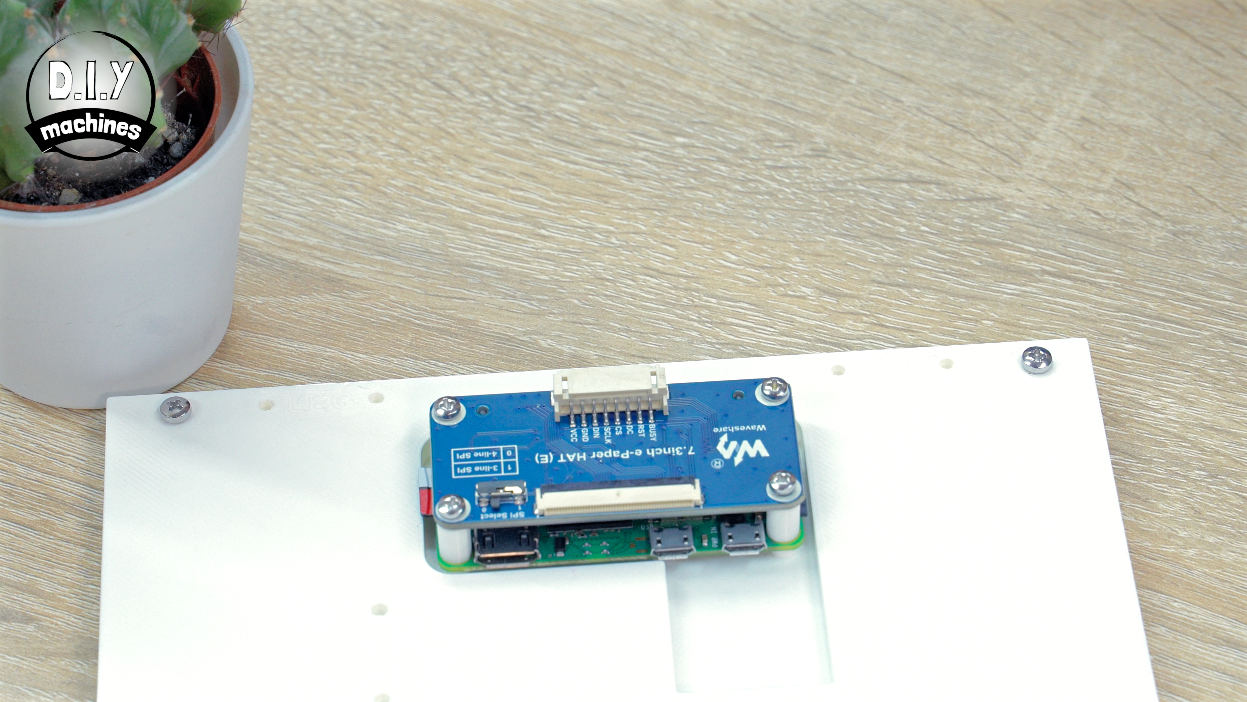
Step 3: Attach the Ribbon Connector
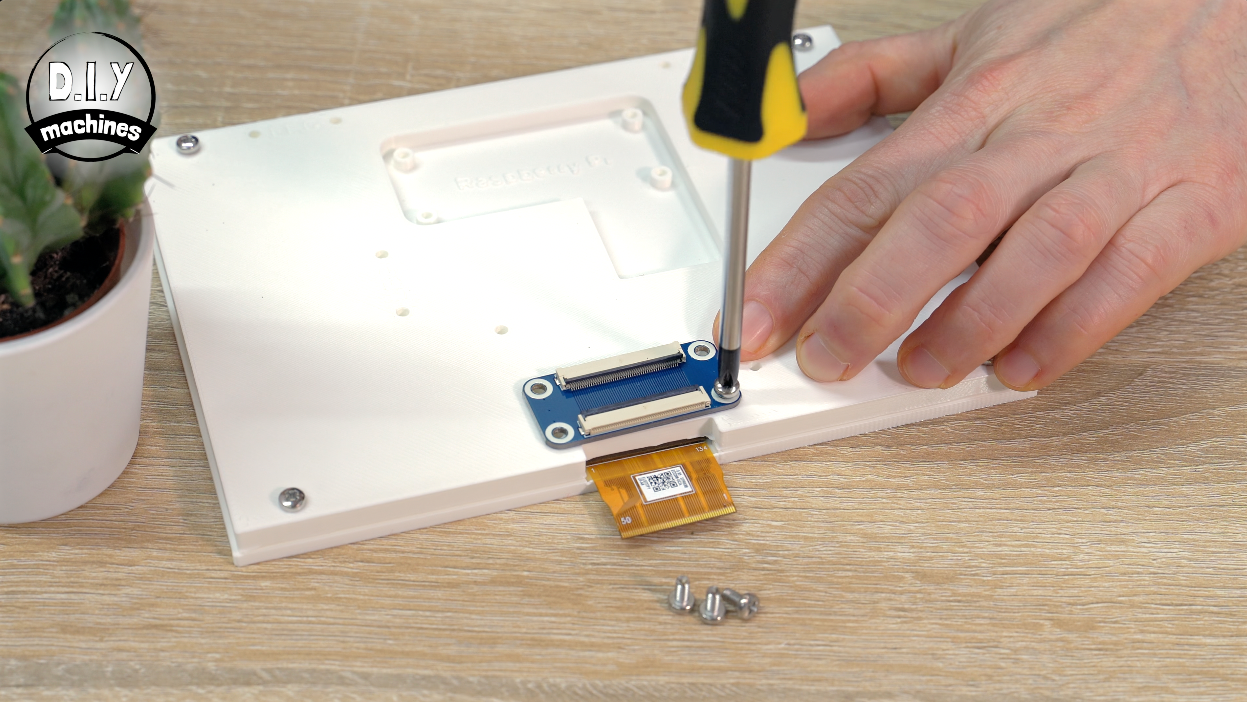

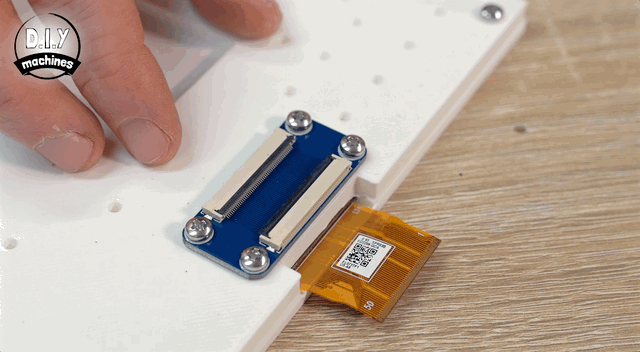
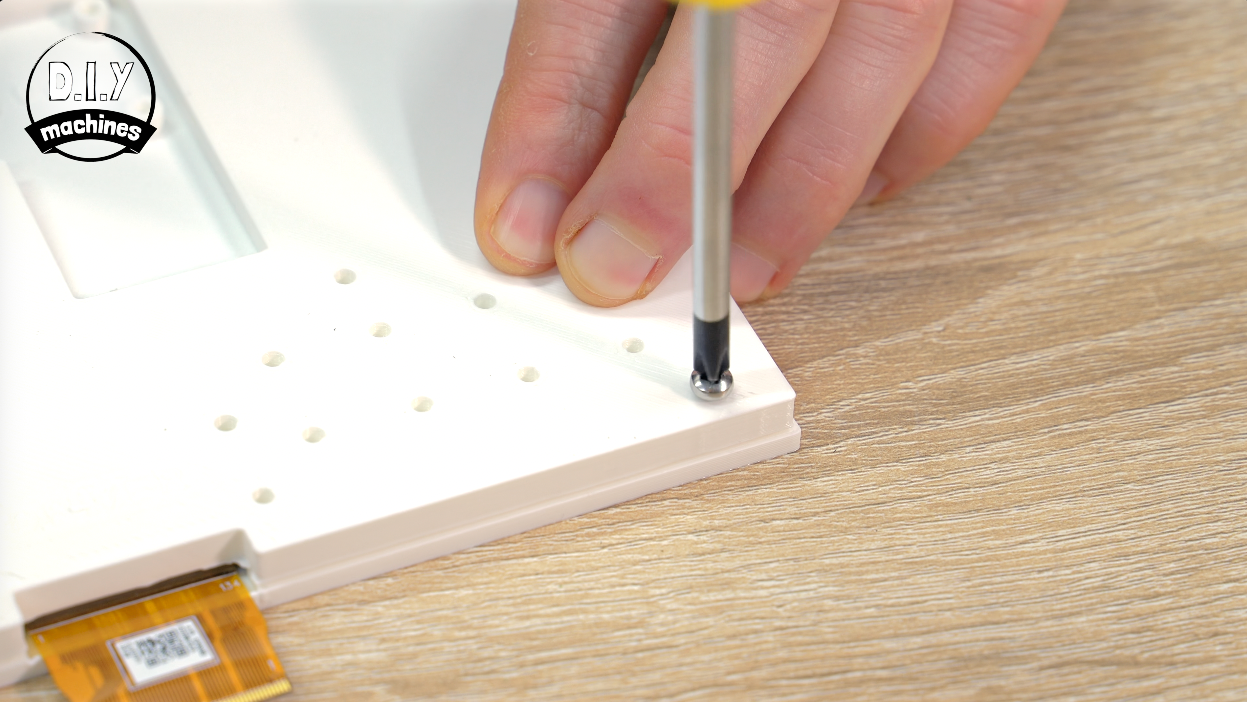
The ribbon cable board is then fitted into place directly on top of the 3D print with another four M3x8 bolts.
We can then open the connector by lifting the black bar at the back upwards and then inserting the ribbon from the screen. Once seated inside simply push the black bar downwards to lock it into place.
Step 4: Install Raspberry Pi OS
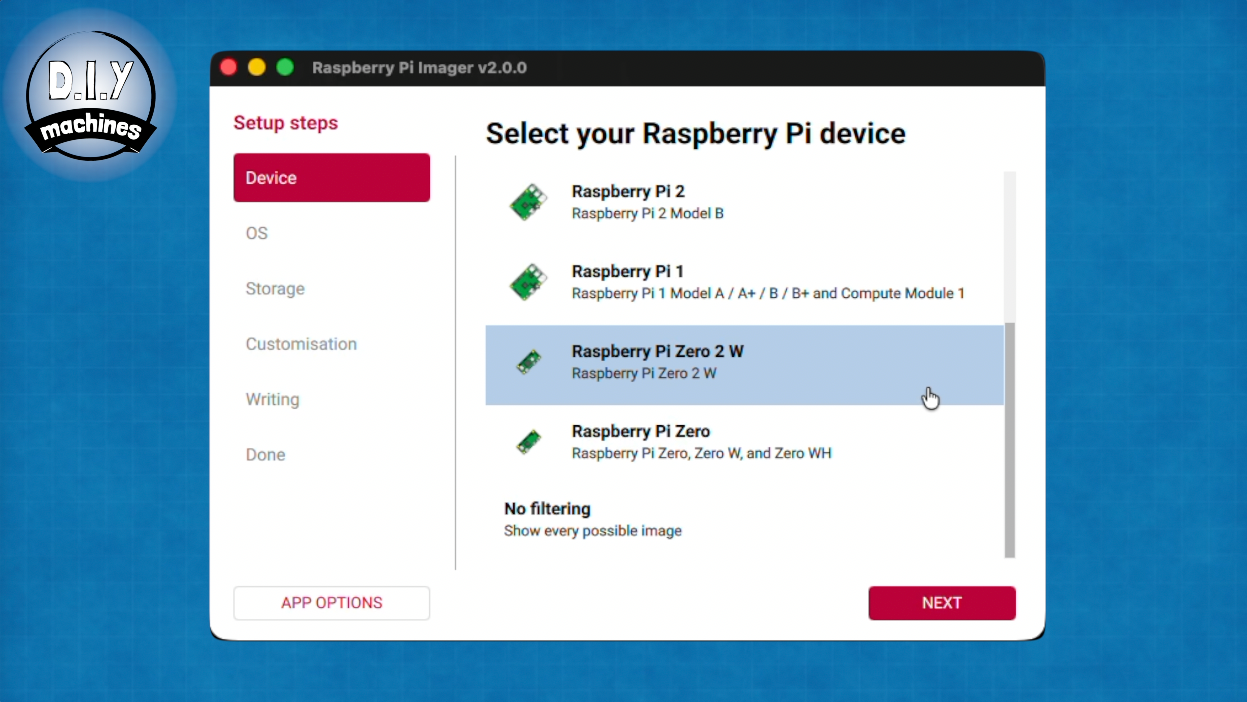
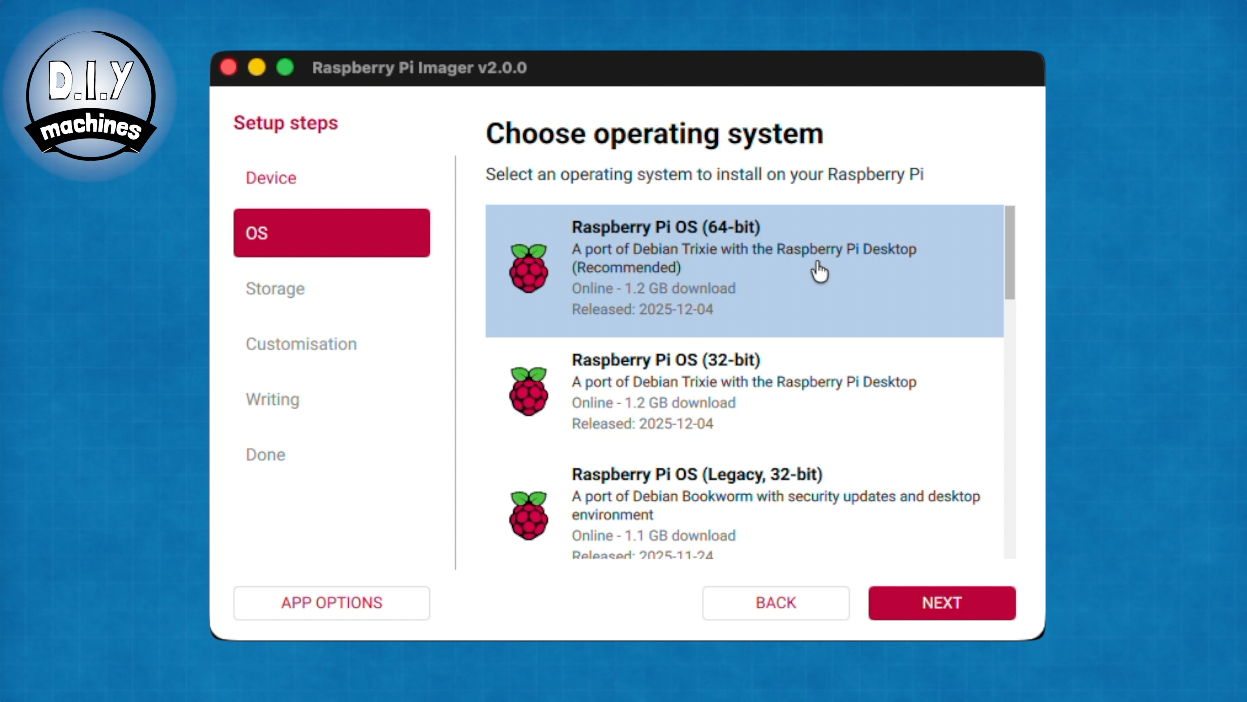


Let’s turn our attention to the Raspberry Pi next. We’ll start by installing the Raspberry PI OS onto the memory card.
I’m using the excellent free ‘Raspberry Pi Imager’ which you can find here: https://www.raspberrypi.com/software/ .
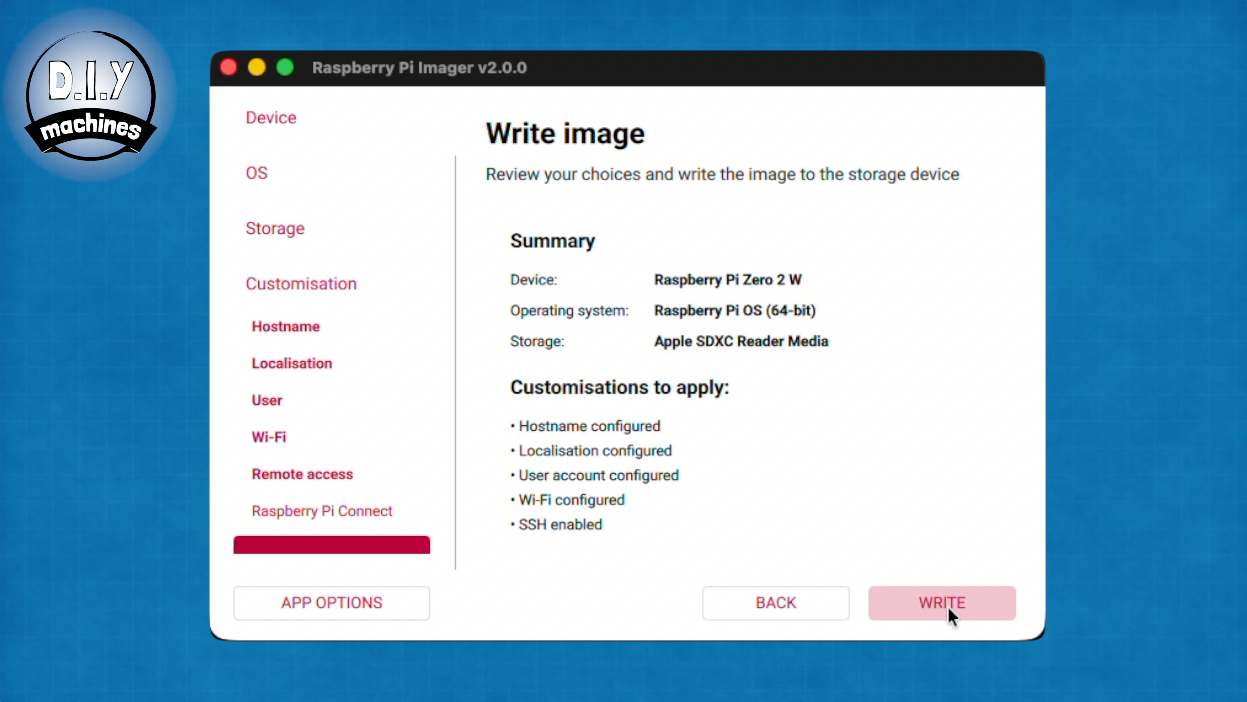
We’re using the Raspberry Pi Zero 2 W so select that after opening up the Raspberry Pi Imaging software, then we want to use the Raspberry Pi OS 64-bit - which is currently on version ‘Trixie’.
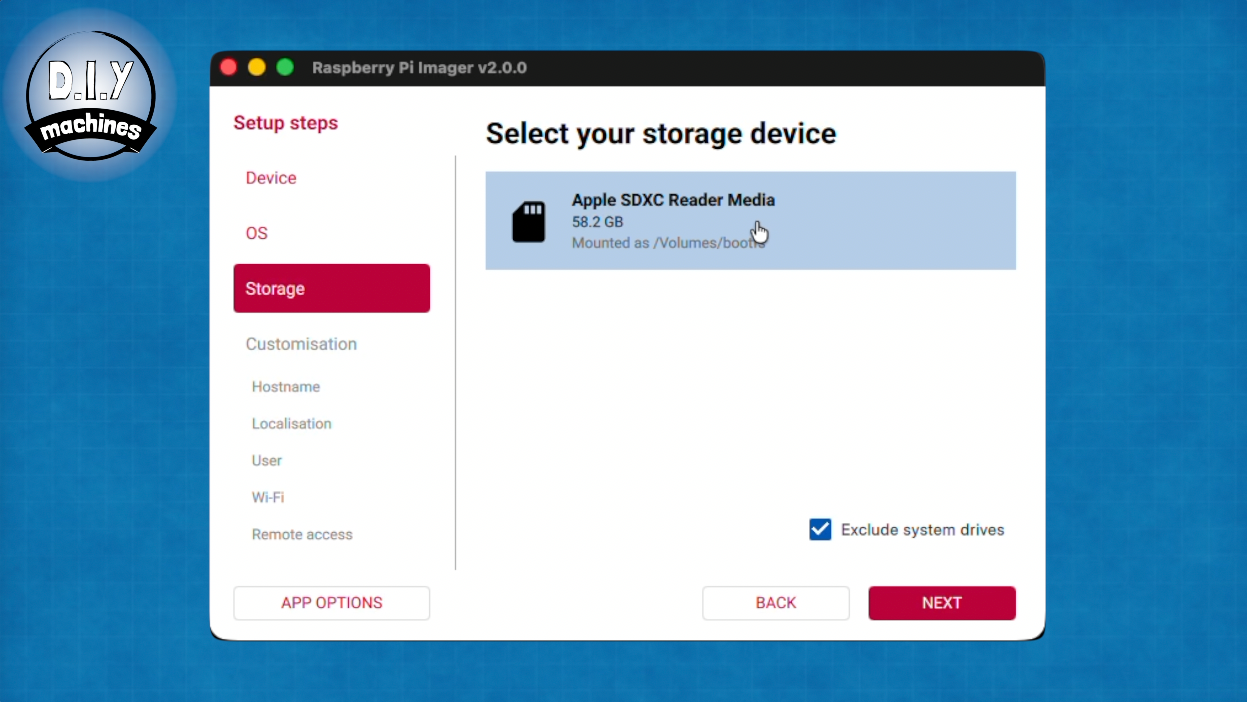
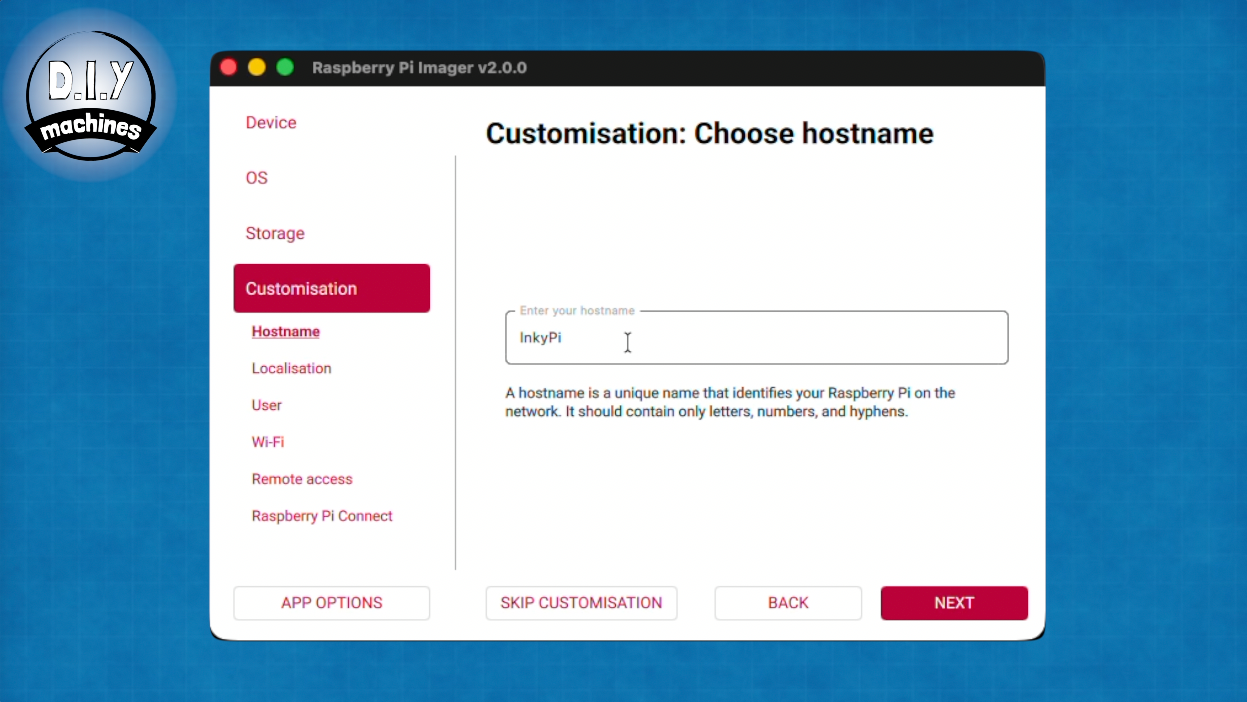
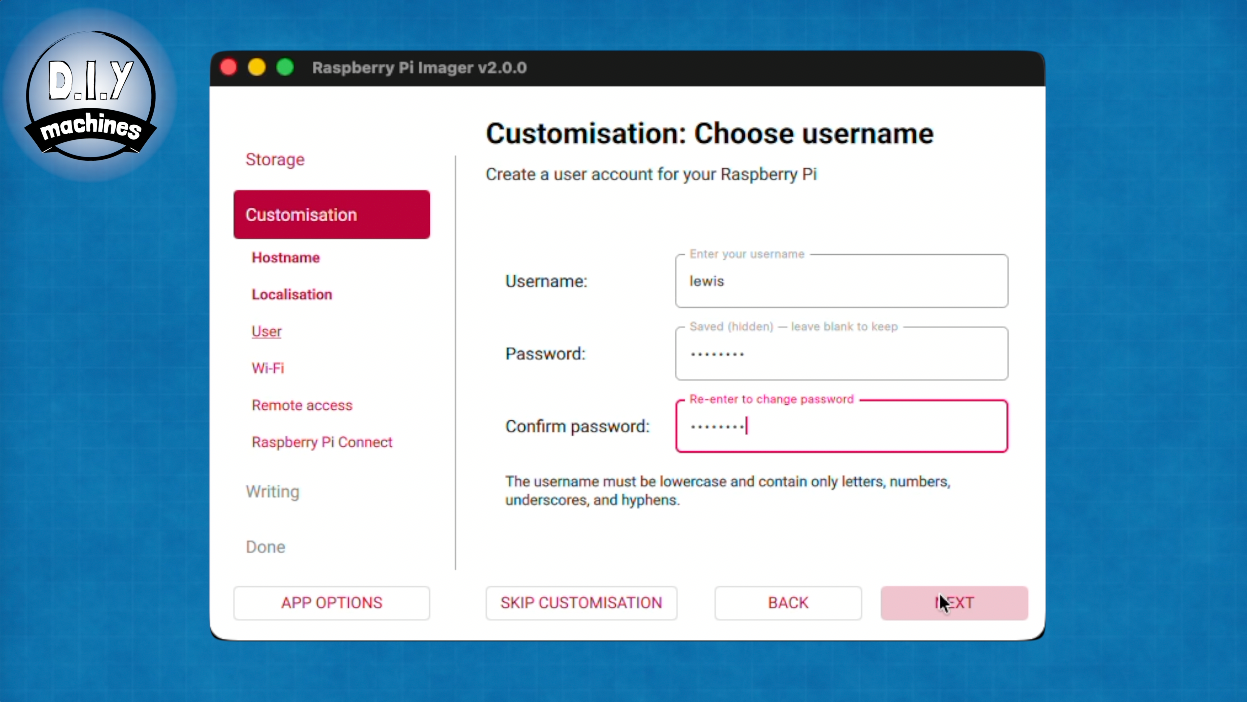
Insert your micro SD card into your computer and select it on the next screen before continuing to customise your install……
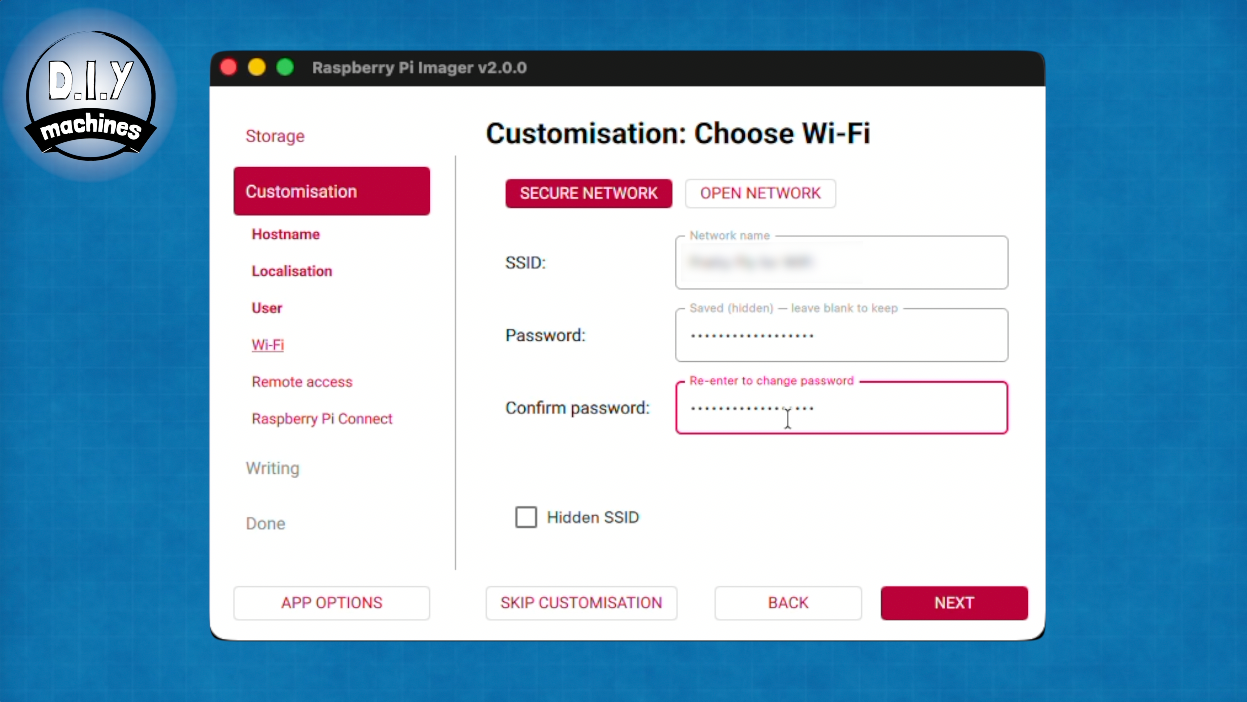
- Choose a hostname for your Pi which will be shown on the network later.
- Configure your geographical settings.
- Set a username and password for accessing your Pi. Remember these.
- Enter Wifi setting for the network it will be connecting to.
- Ensure SSH is enabled with password authentication. We will be using this to connect to the Pi later and install the software from GitHub.
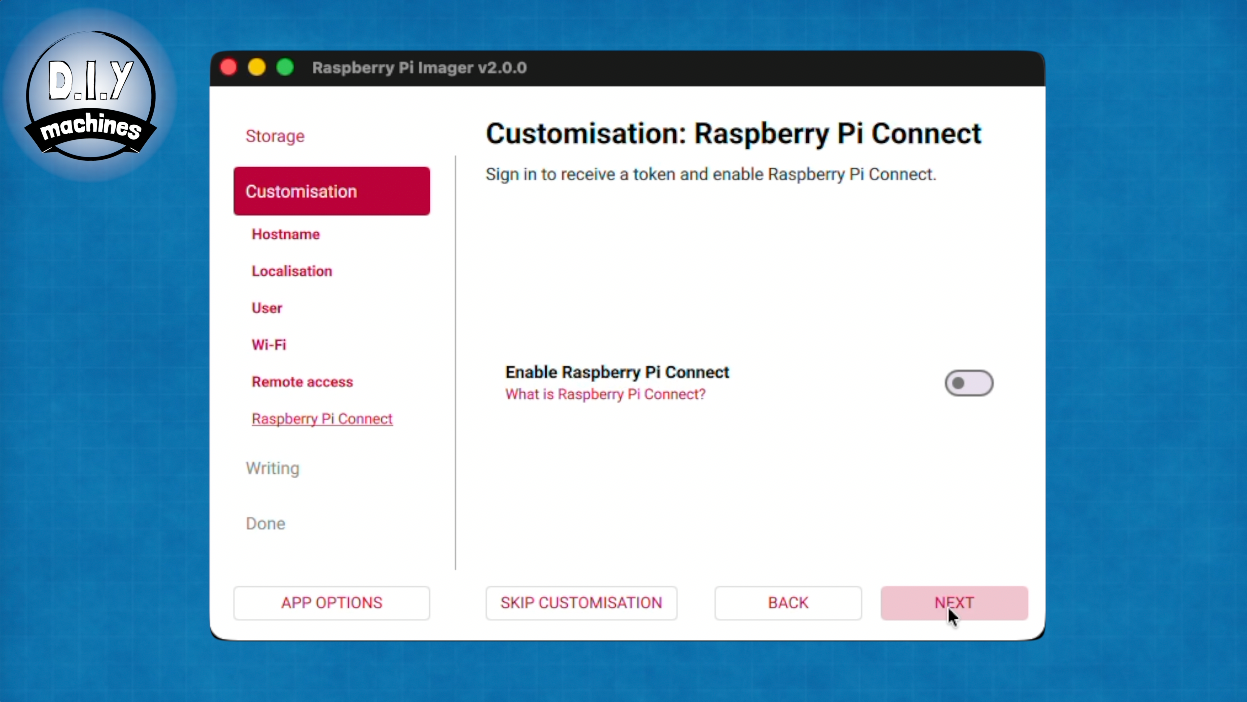
- No need to enable Raspberry Pi Connect.
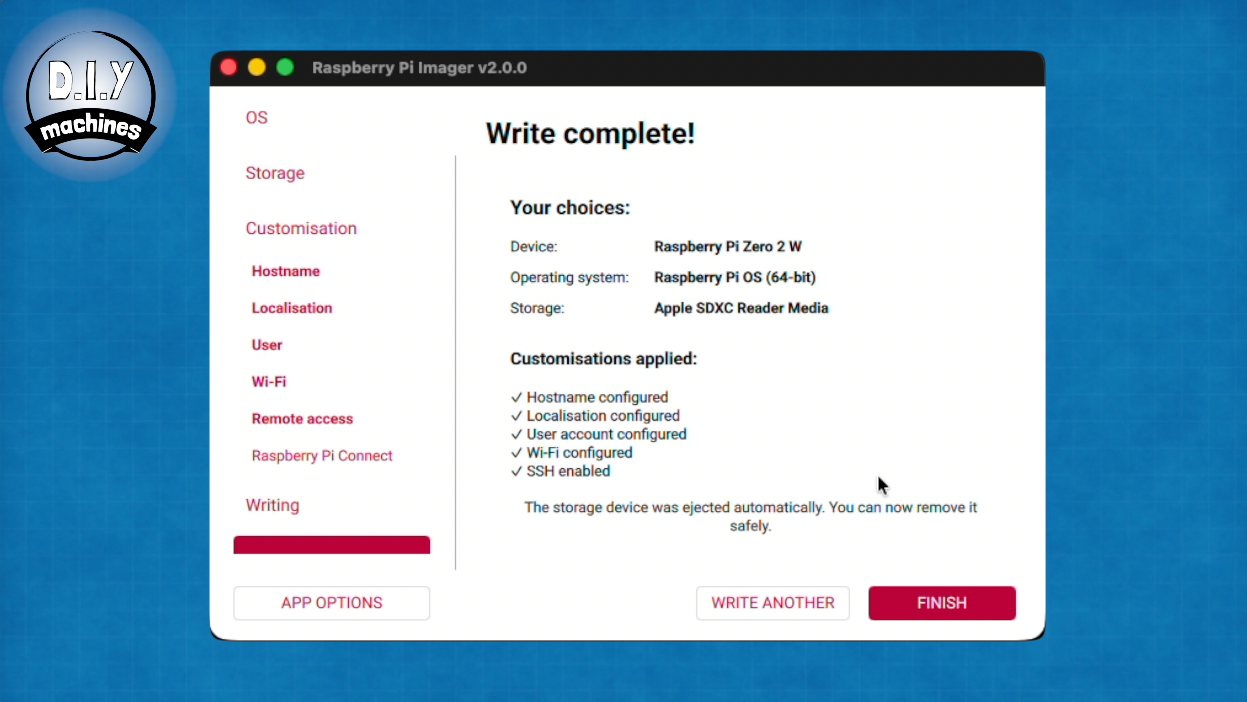
You can the proceed to write this to your SD card. It's good practice to also wait for it to verify this process afterwards.
Once this has been written and verified to the card you can remove it from your computer and insert it into the Pi.
Step 5: Attach Display 'HAT' to Raspberry Pi
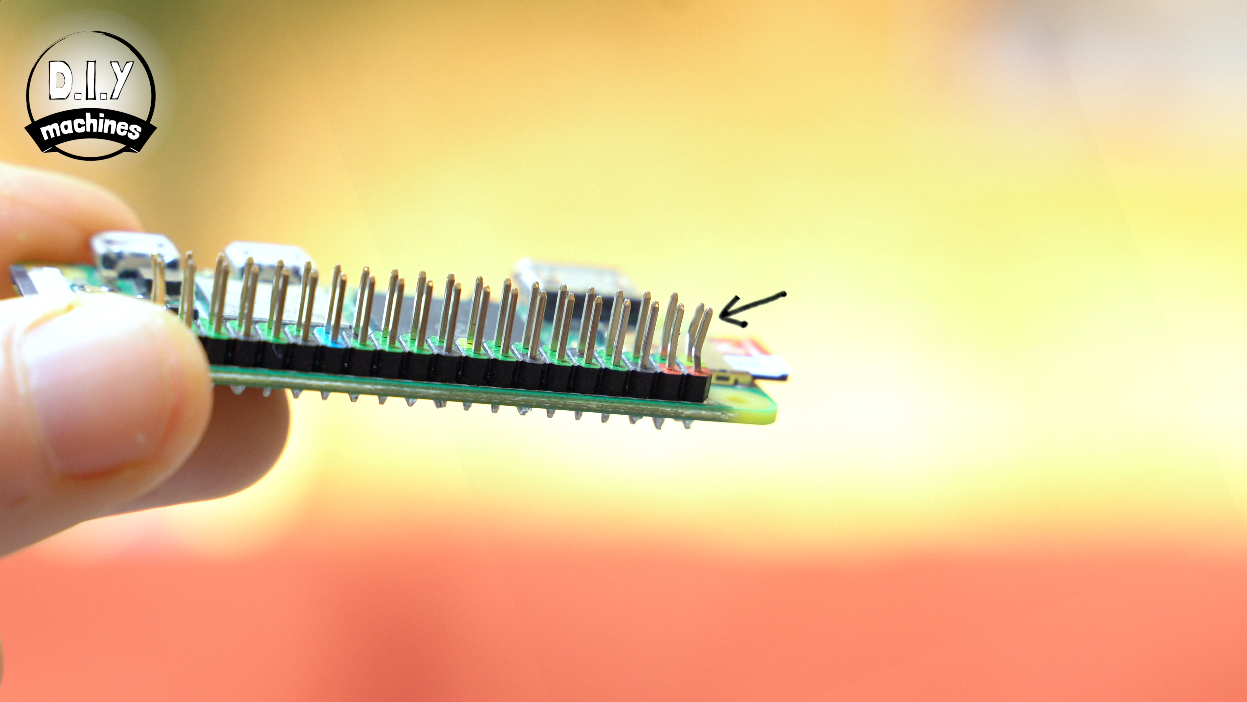
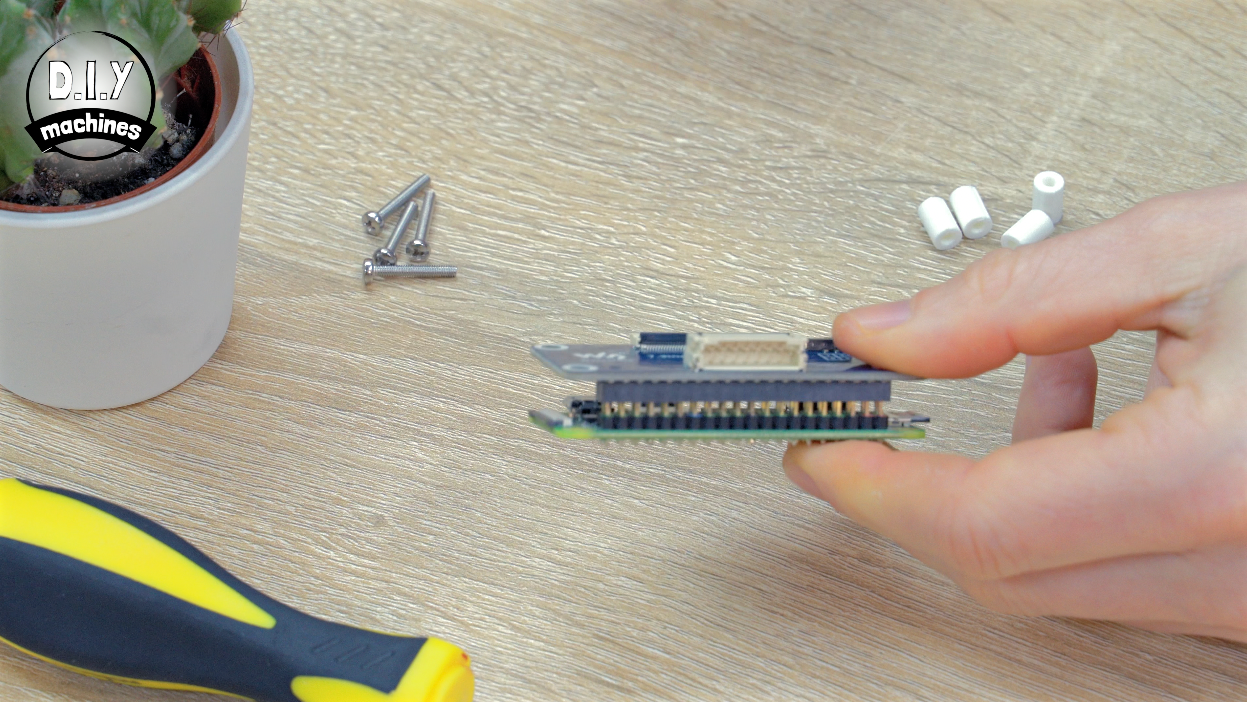
Next we can fit the Display HAT. This is carefully connected to the Pi by pressing it’s connector against the pins on the raspberry Pi. You might notice I already bent mine when prototyping this project. :/
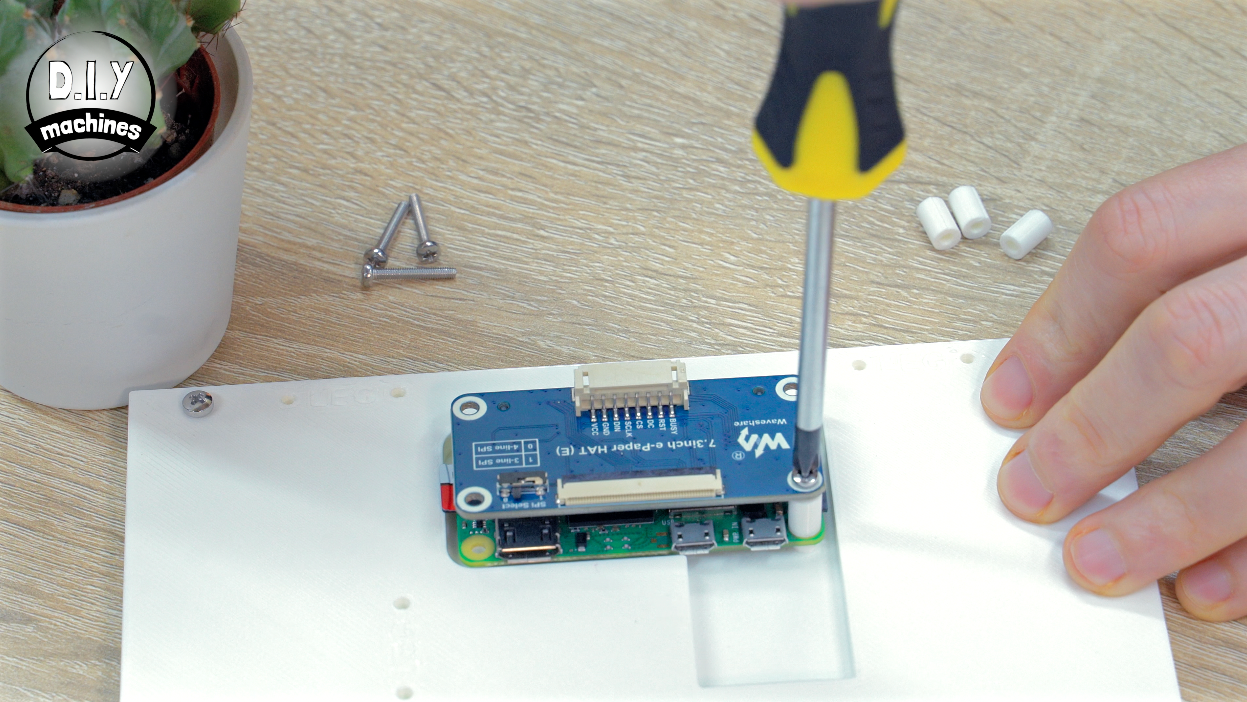
Once pressed together, we can add the four 3D printed stand offs to sit between the two boards as you secure it to the frame using your M2.5 bolts.
“HAT” stands for Hardware Attached on Top — it’s a Raspberry Pi term for a board that plugs straight onto the Pi’s 40-pin GPIO header.
Step 6: Finishing the Wiring
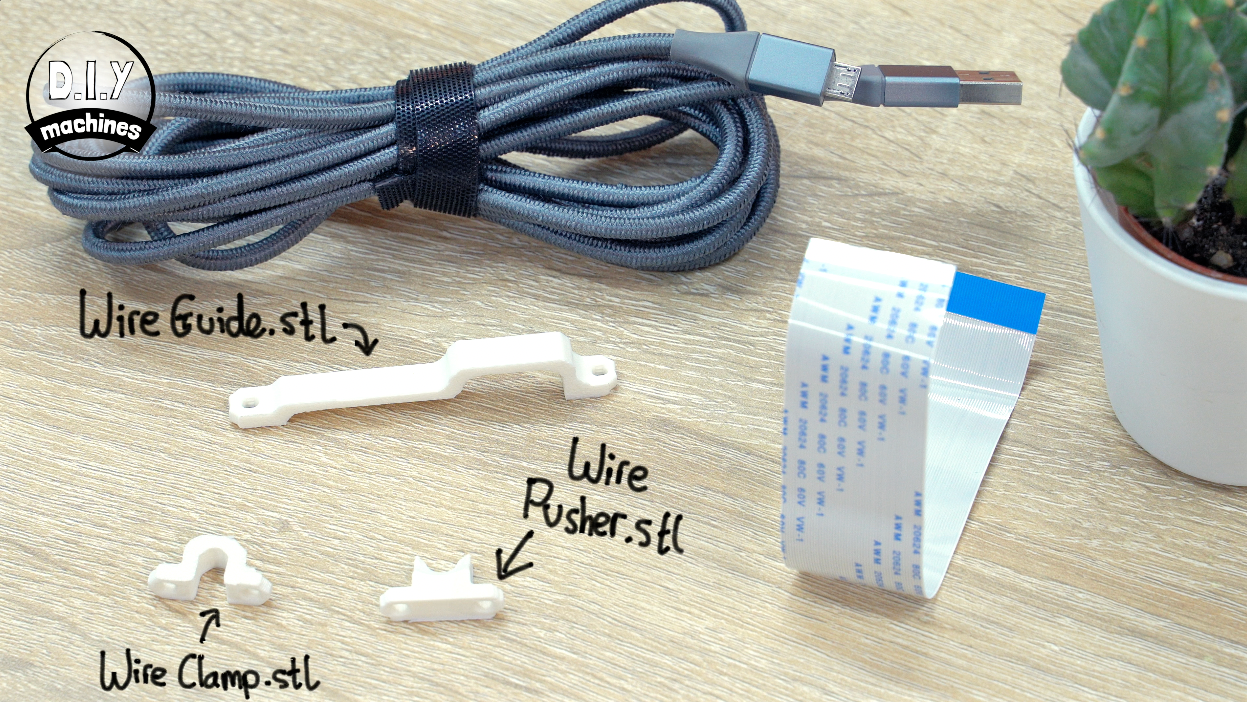

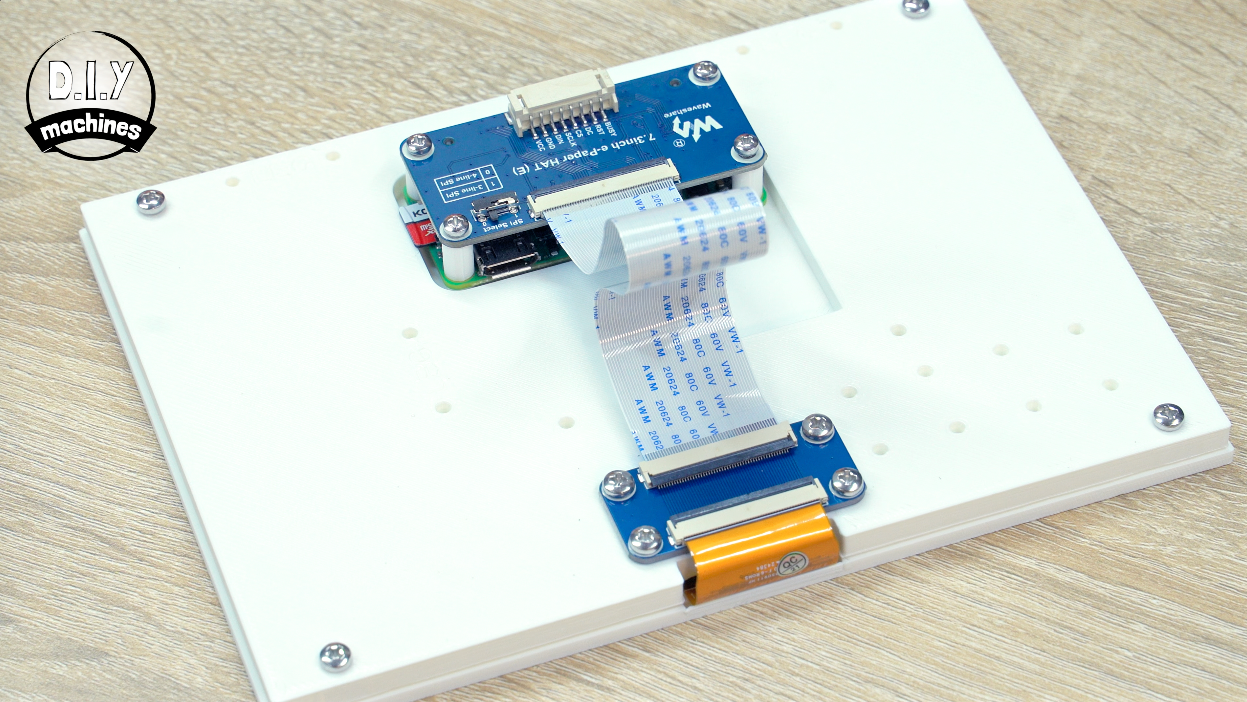
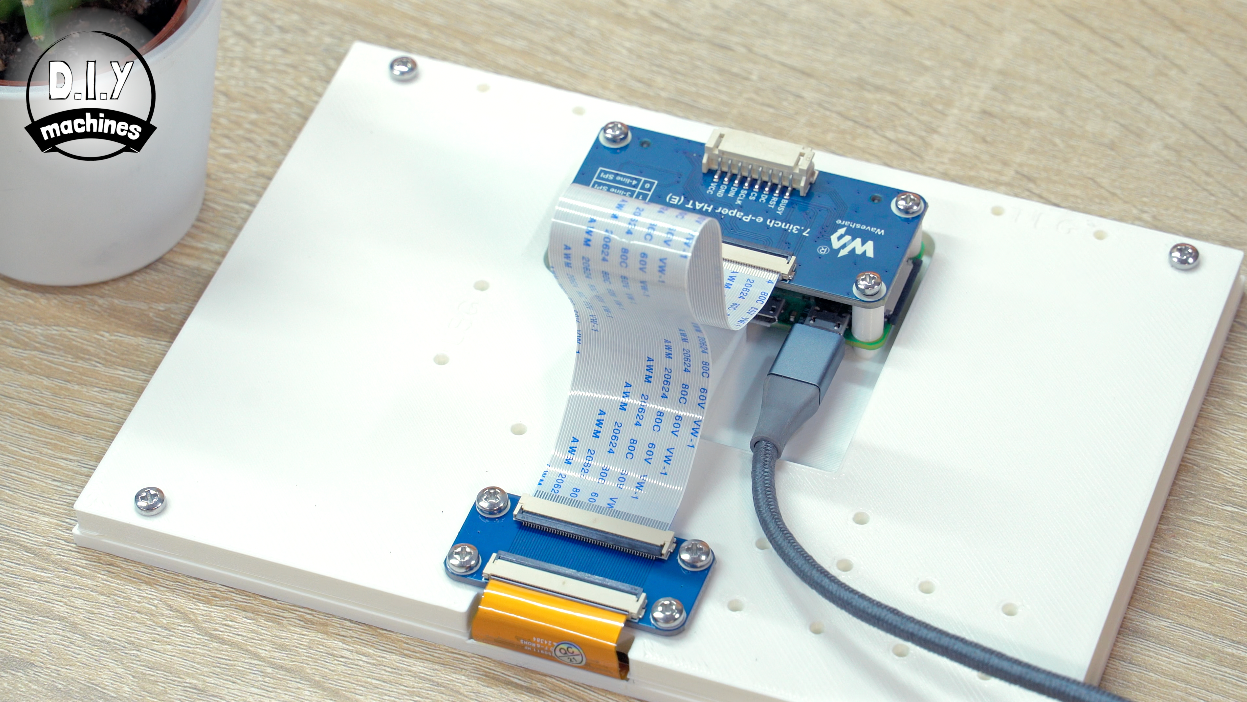

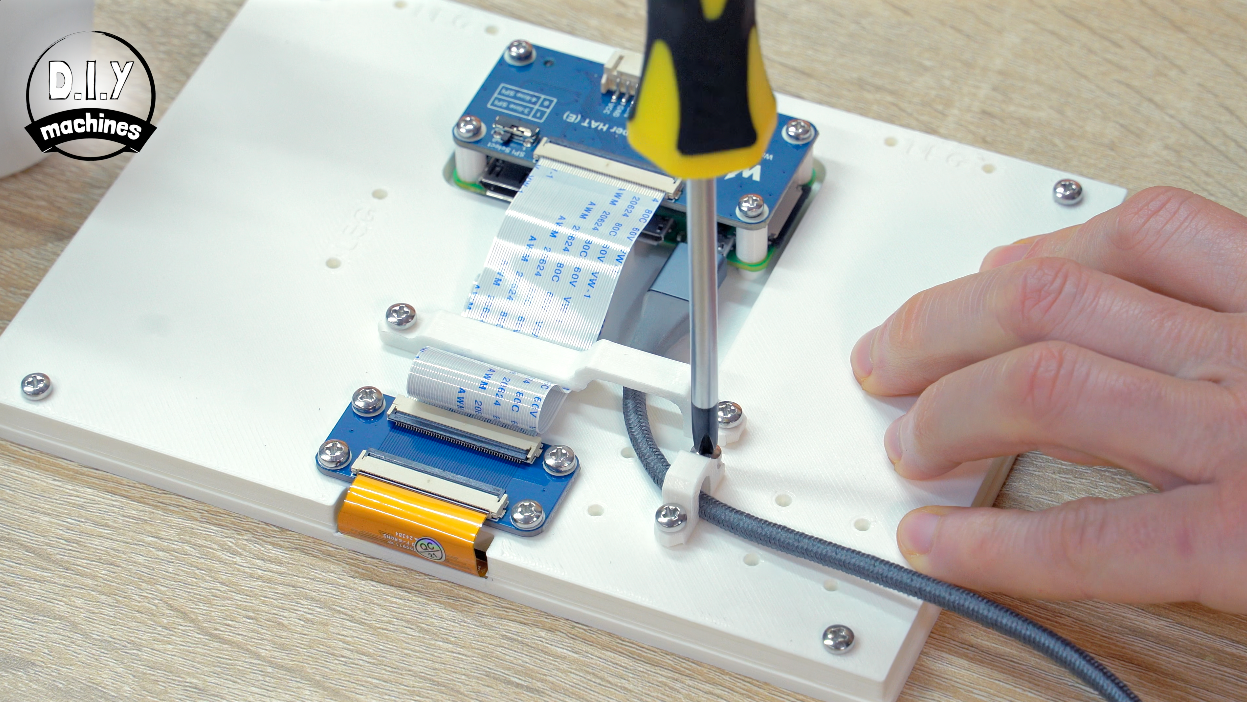
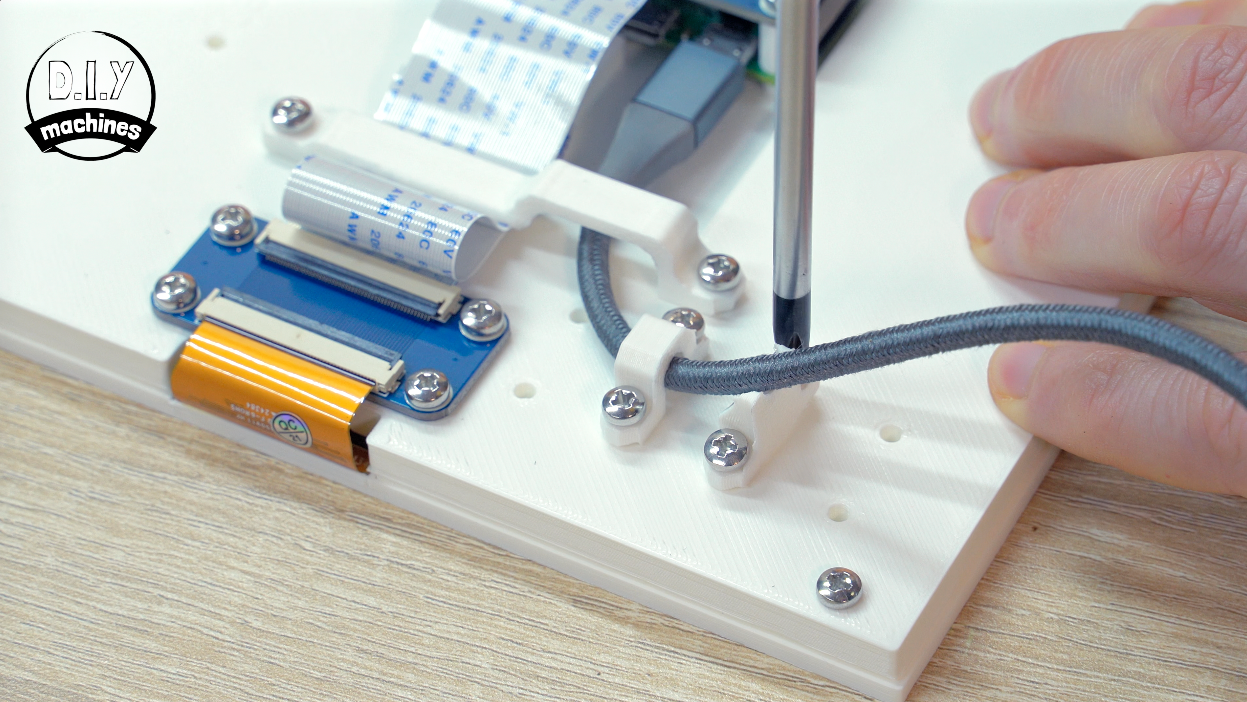
The ribbon cable then goes between the connectors on the two WaveShare boards (one directly attached to the 3D printed frame and the other on the top of the Raspberry Pi). The side with the shiny pin contacts should be facing upwards.
The USB cable can also be connected to the outer USB port on the Pi now. This is the one used for powering the Pi.
Both of these are held in place with 3D printed cable clamp. Then there are two more print used to secure the USB cable and optionally direct it away from the floor if the frame will be freestanding. If you are wall mounting I would not add this additional wire guide.
Step 7: Inserting Into Ikea Frame
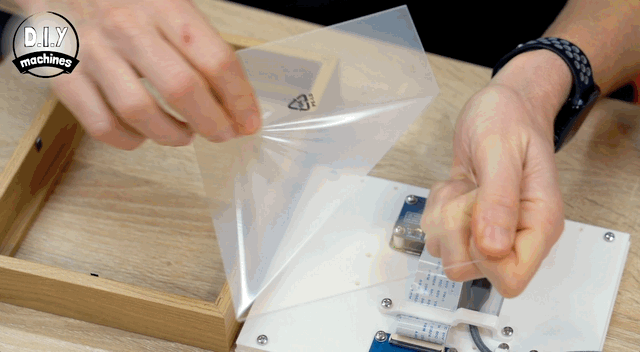
OK, there is just this one more step if you are using the Ikea frame. We need to remove all the additional parts from inside the Ikea Frame and then insert our display.
The acrylic/glass sheet is optional. I'm not a big fan of glossy things so ended up removing the sheet of acrylic later - but in the animation above you can see me including it for additional protection for the screen itself.
If you are using one of the 3D printed frame then you will have already have installed the screen inside so you can skip this step without worry. 🙂
Step 8: Connecting to our Project
Ensure that the Micro SD card is still inside your Pi from earlier and connect the USB cable to a power supply.
This will cause either to boot up and begin preparing itself for use. The first boot after installing the OS takes a little longer then it will in subsequent boots as it has some housekeeping tasks to do (like expanding the files system, creating cryptographic keys and more). All of this happens automatically so take this as an opportunity to make a cup of tea.
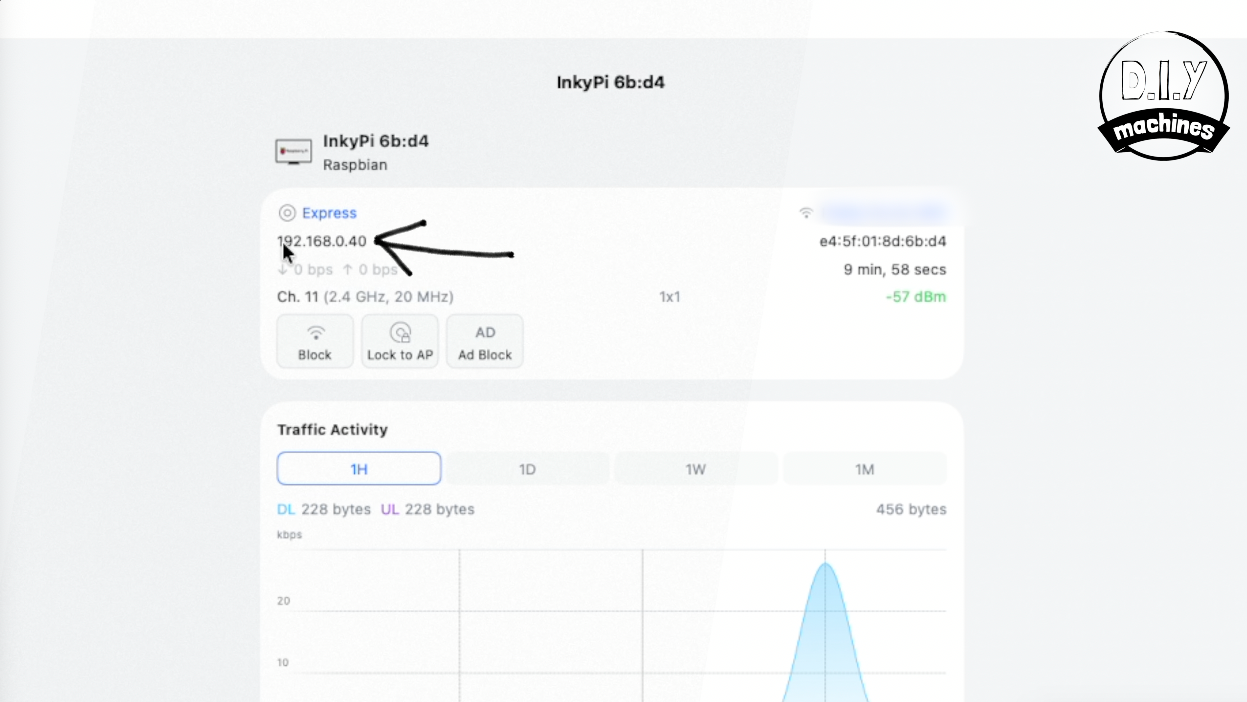
When it's ready we will connect to it via SSH (Secure Shell - A way of creating an encrypted connection between two computers). To do this we need to find its IP Address on our network.
(You could also consider connecting a monitor and keyboard to the device for the following steps but I find this remote connection far more convenient.)
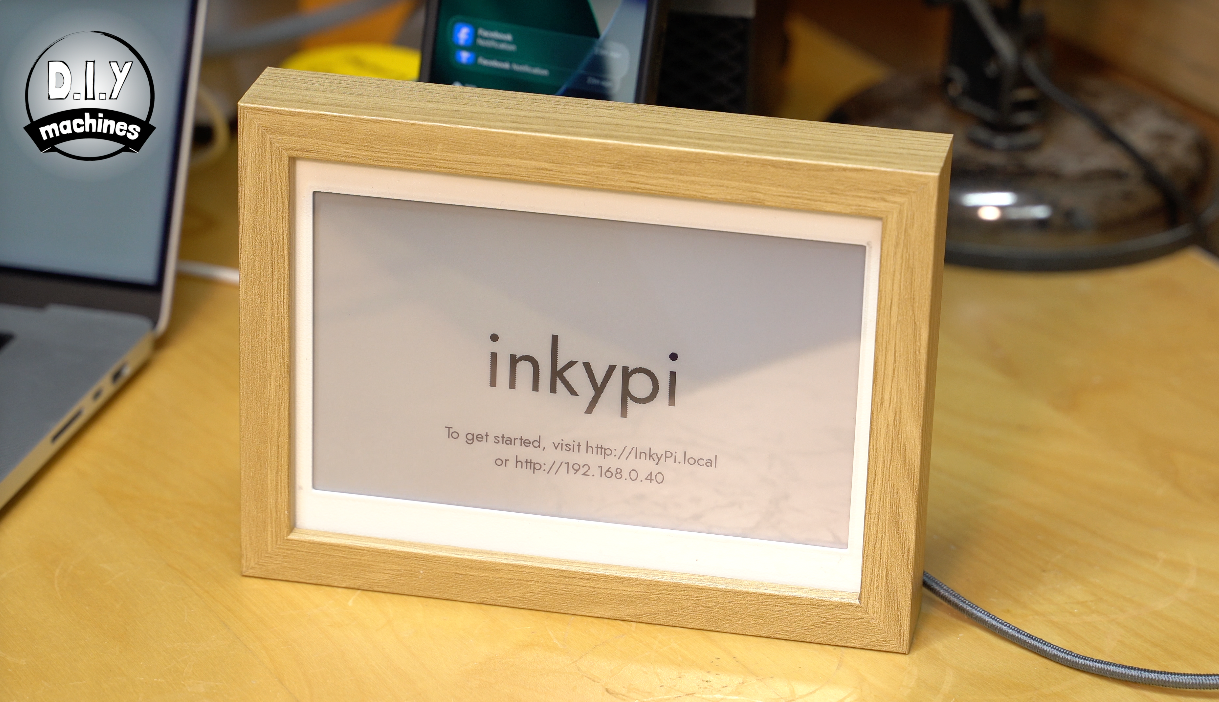
The easiest way to do this is to connect to your router and have a look for your device in there. I gave mine the hostname of 'InkyPi' and I can see in my Unify network software that the device called InkyPi has been assigned the IP Address of 192.168.0.40.
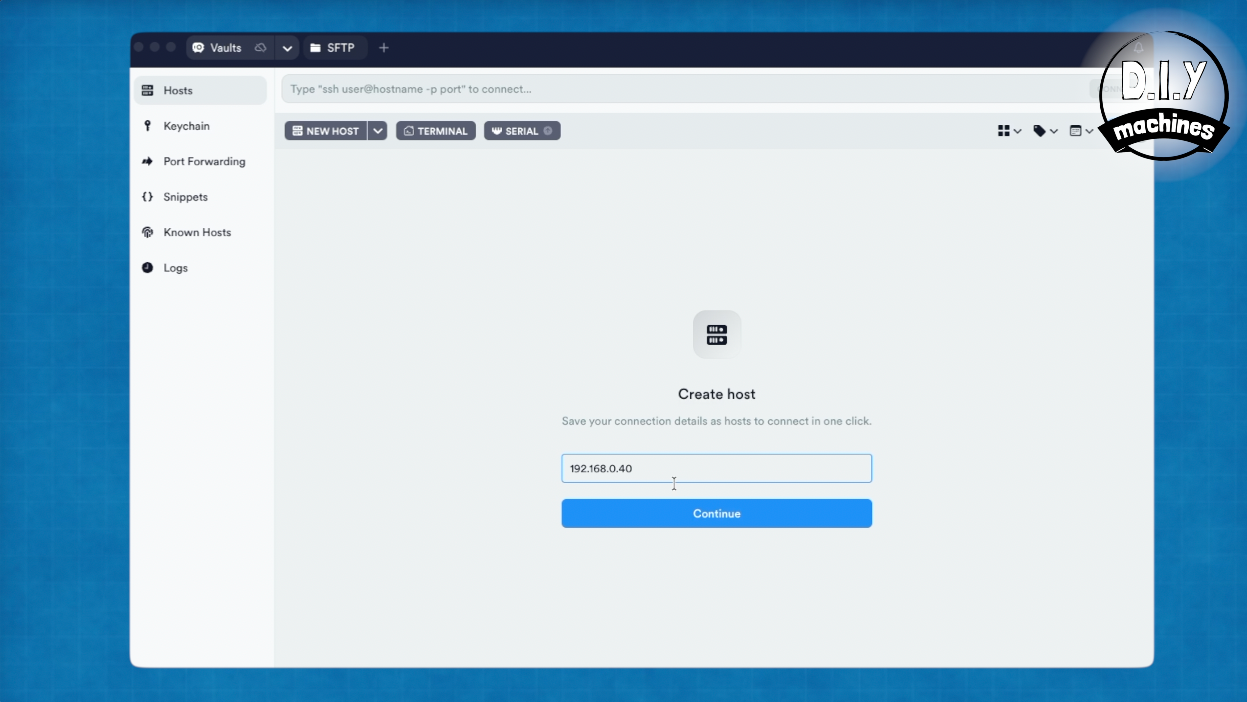
I'm using some free software called Termius to connect to my Pi via SSH. You can download it here: https://termius.com
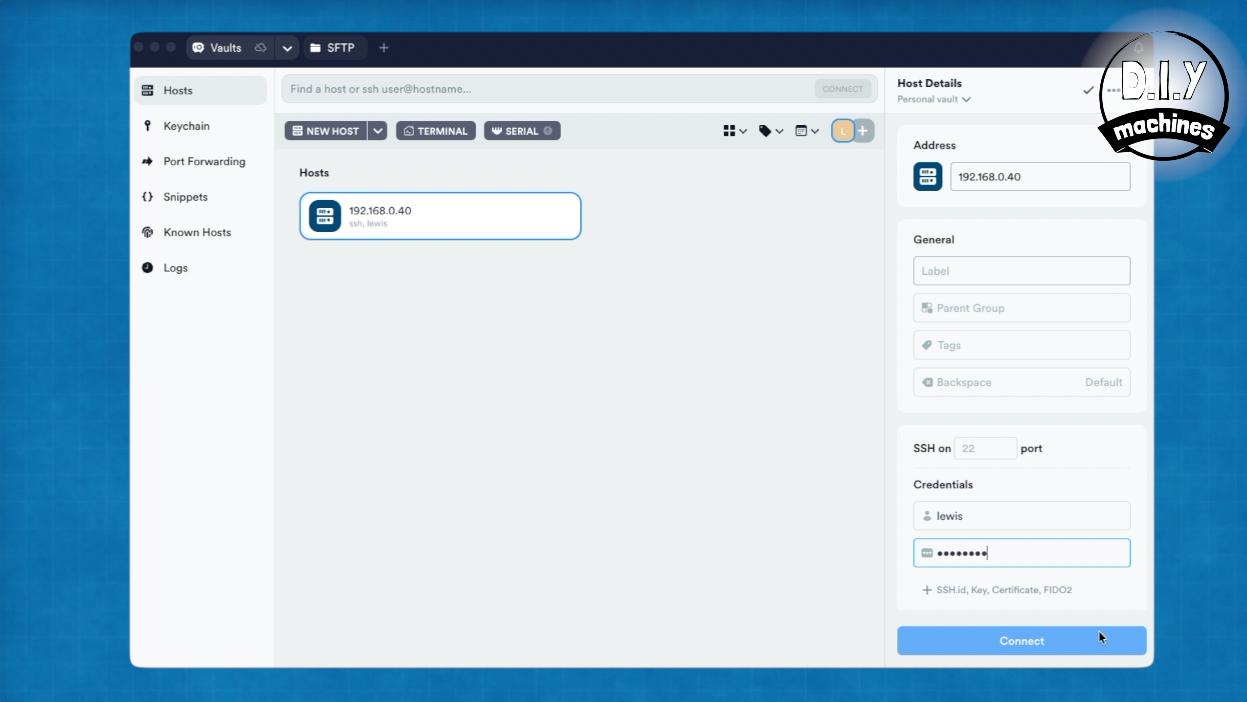
Type the IP address of your Raspberry Pi into the window of Termius and press continue. In the Host Details pane which then shows on the right you can enter your username and password you chose earlier when configuring the Raspberry Pi installation.
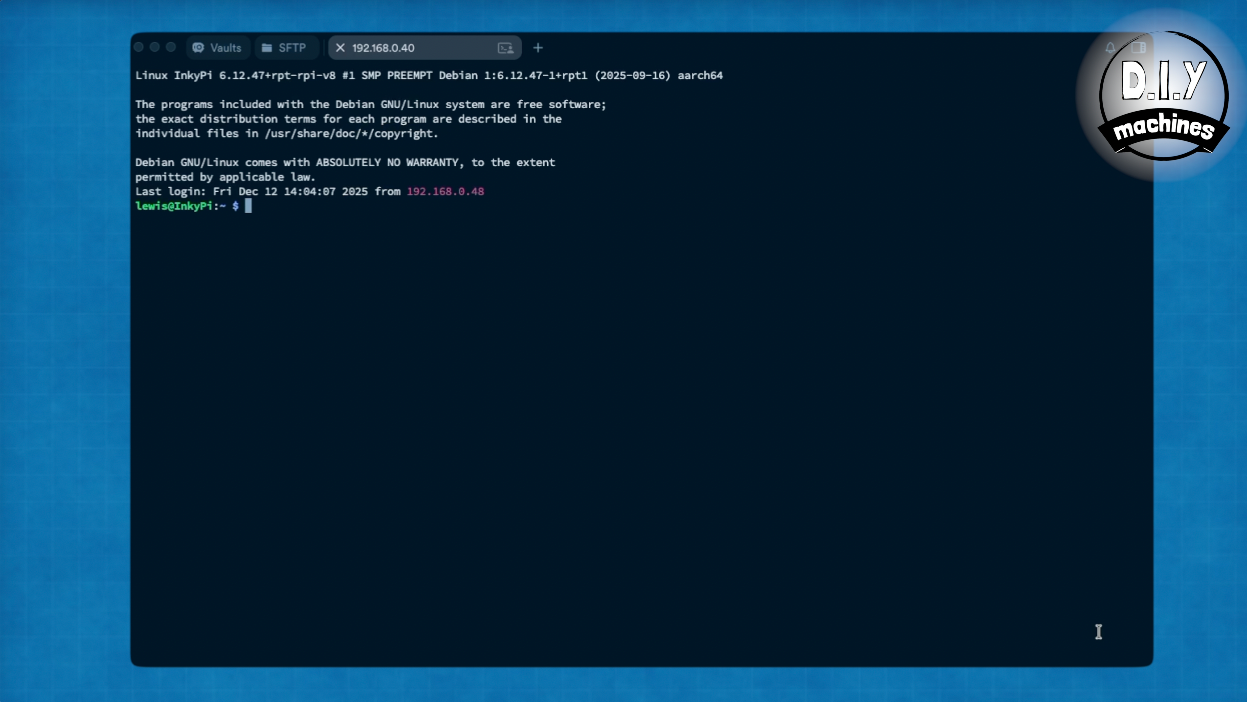
Press connect and then you’ll be connected.
Step 9: Installing InkyPi
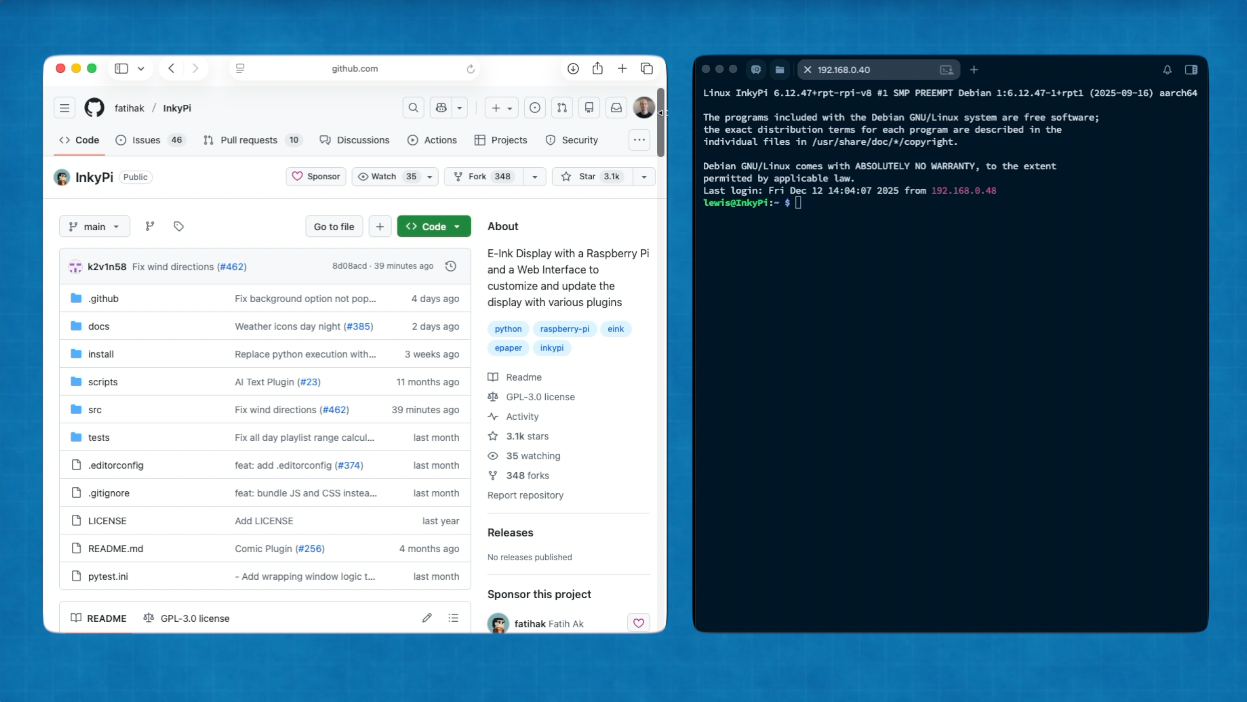
This project runs the amazing InkyPi project started by 'fatihak'. You can find the repository for the software here: https://github.com/fatihak/InkyPi
There are well written instruction on that page on how to install the software, so I will only go over it briefly here, but if int he future the projects GitHub page suggests a different process for installing then please follow that.
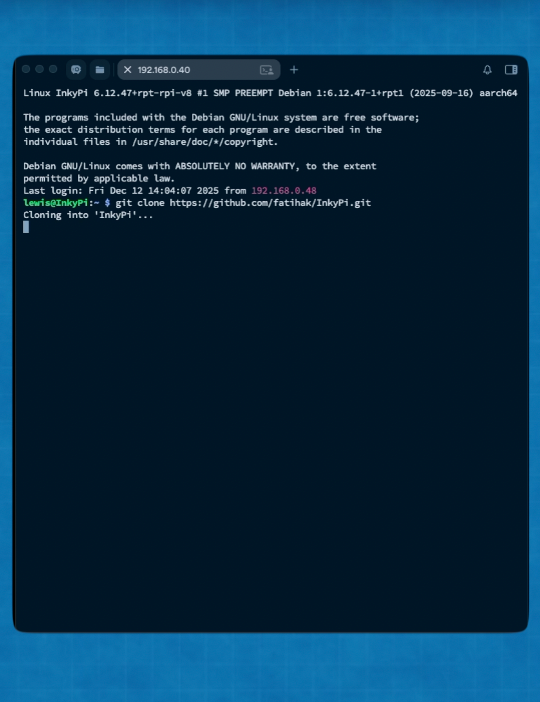
You will first need to copy and paste this command and send it in Termius:
git clone https://github.com/fatihak/InkyPi.git
This will clone the InkyPi repository to our Pi.
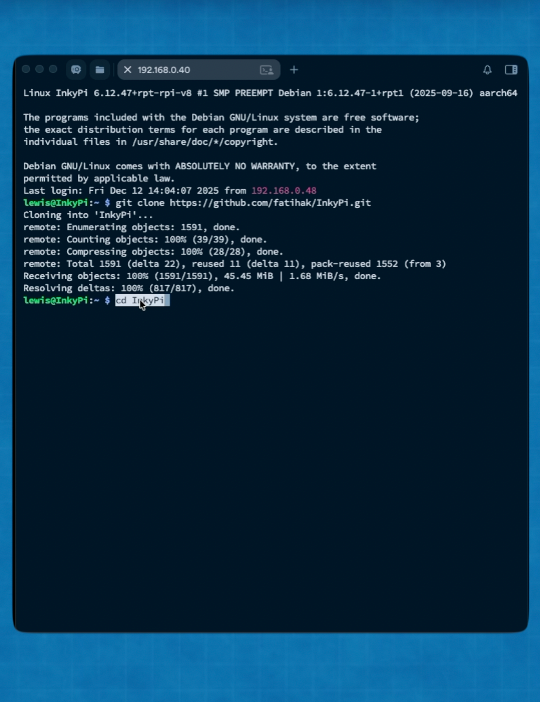
We then open the folder it created with this command:
cd InkyPi
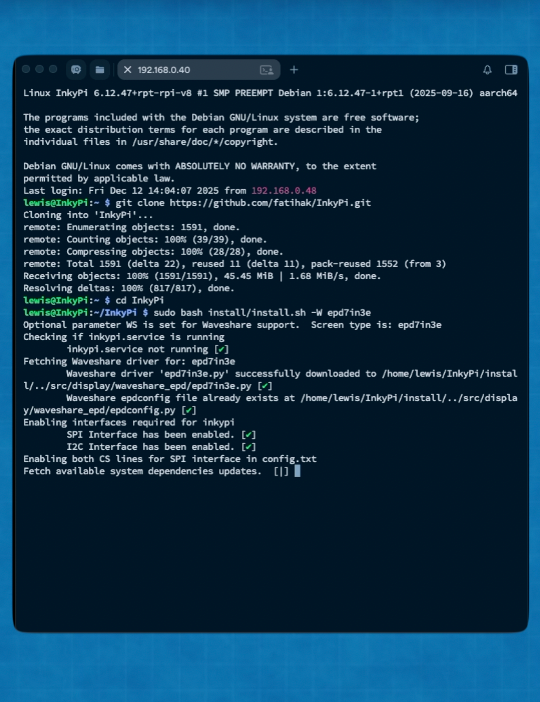
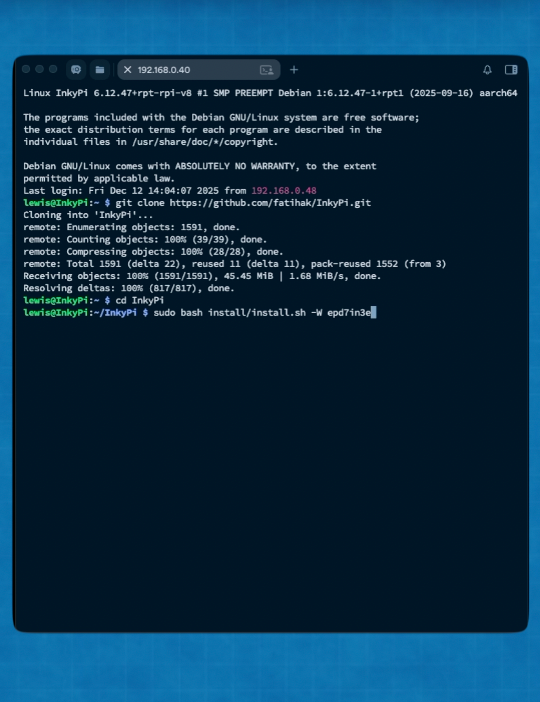
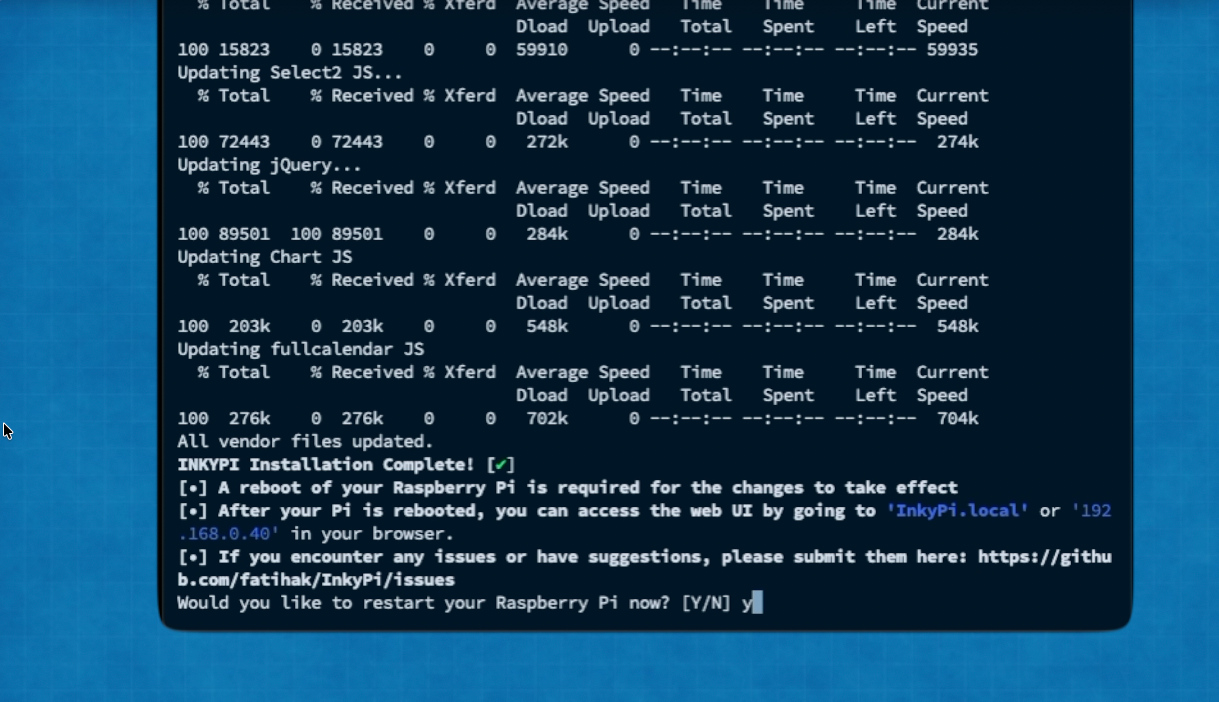
And once in this folder we install the software for our Waveshare screen with the following:
sudo bash install/install.sh -W epd7in3e
This will take some time, perhaps between 5 to 10 minutes but once it has completed the screen on your display should refresh and show you a URL and IP address you can type into a web browser on your local network to connect to InkyPi and begin customising it.
Step 10: Exploring the Plugins
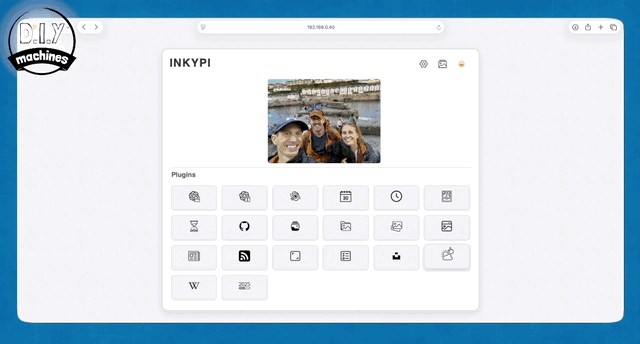
Here is a brief overview of some of the features to get you going with your new dashboard.
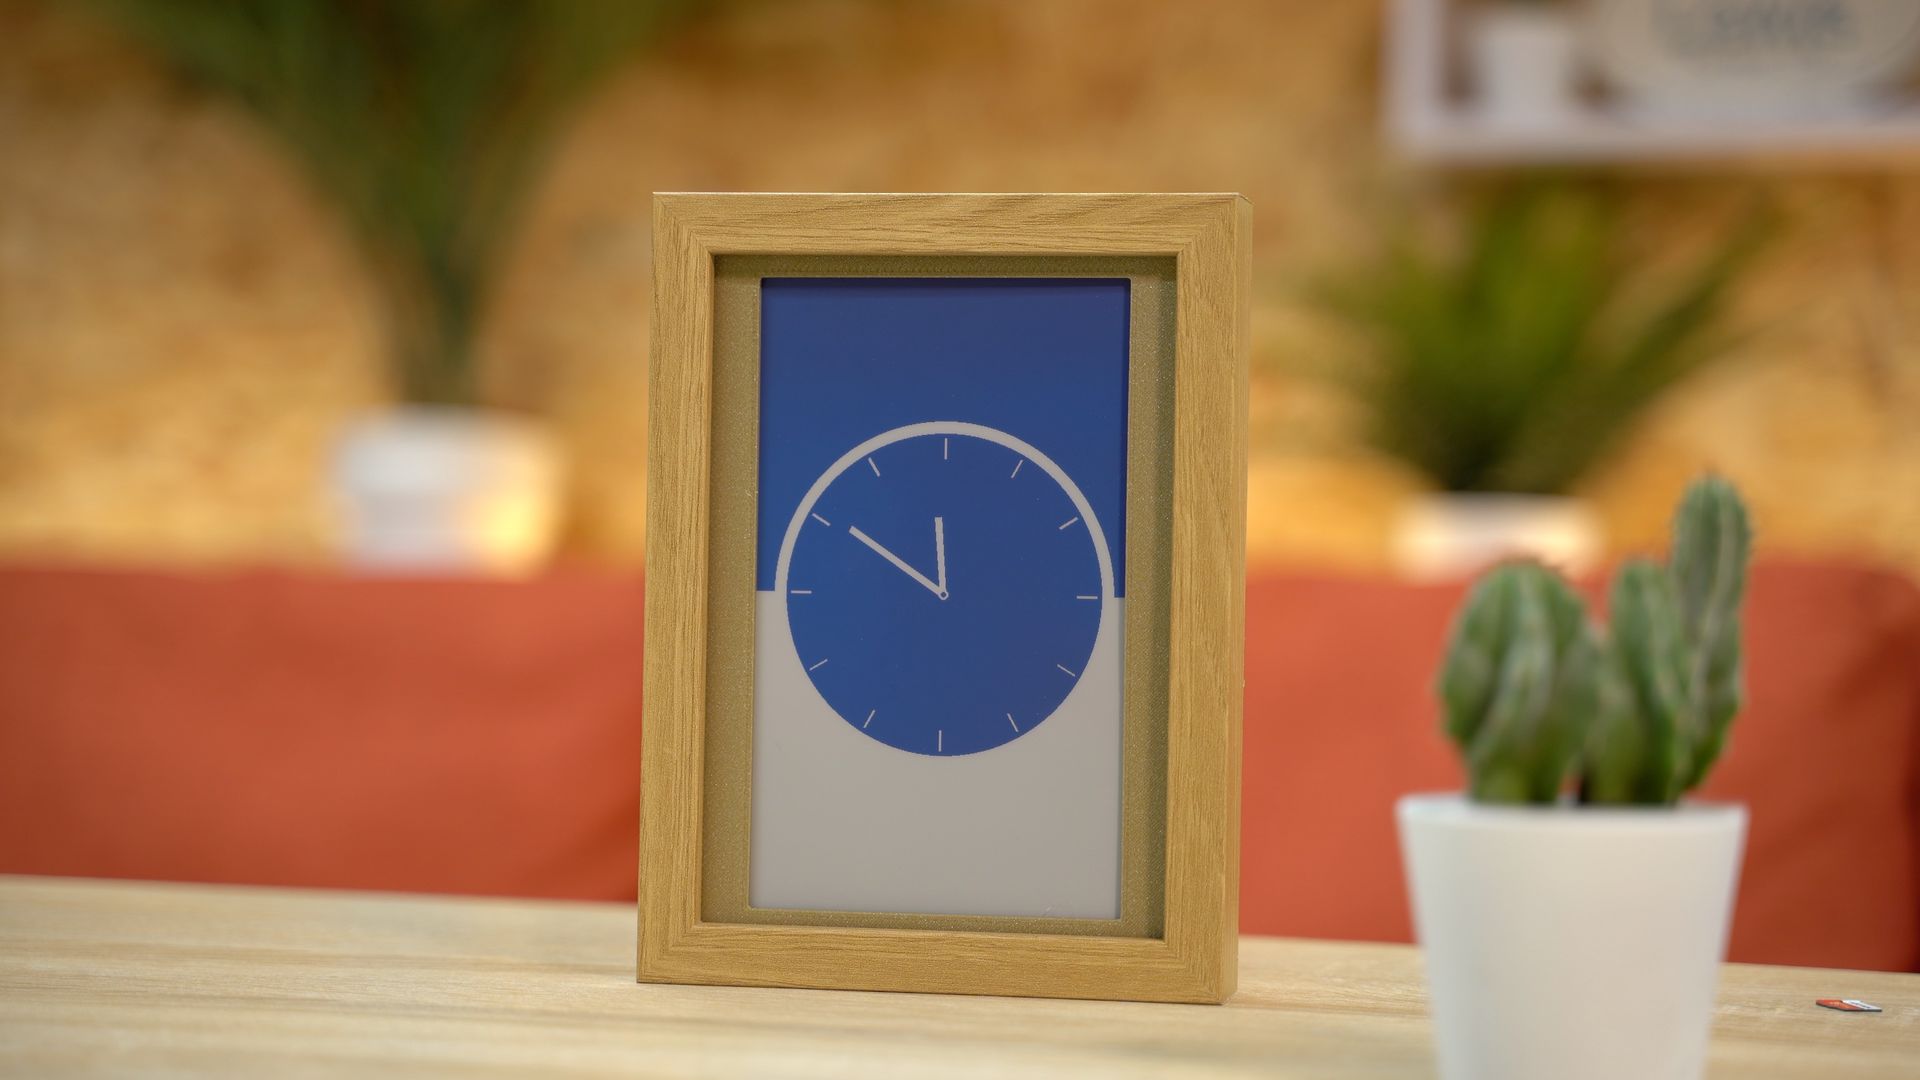
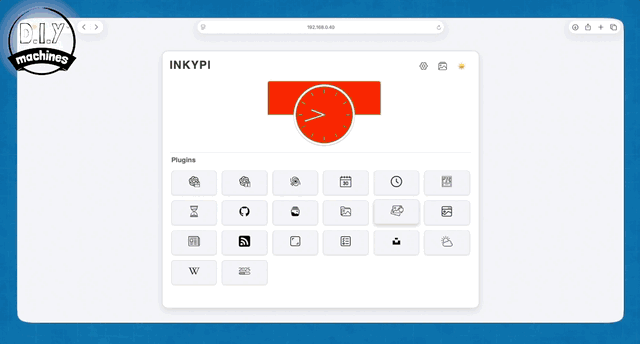
The thumbnail at the top centre shows the last image sent to your display. We can send a clock face by choosing the clock plugin, setting the style and colour we want and pressing ‘Update Now’.
To see which plug in is what - just hover over it and a tool tip will pop up and let you know.
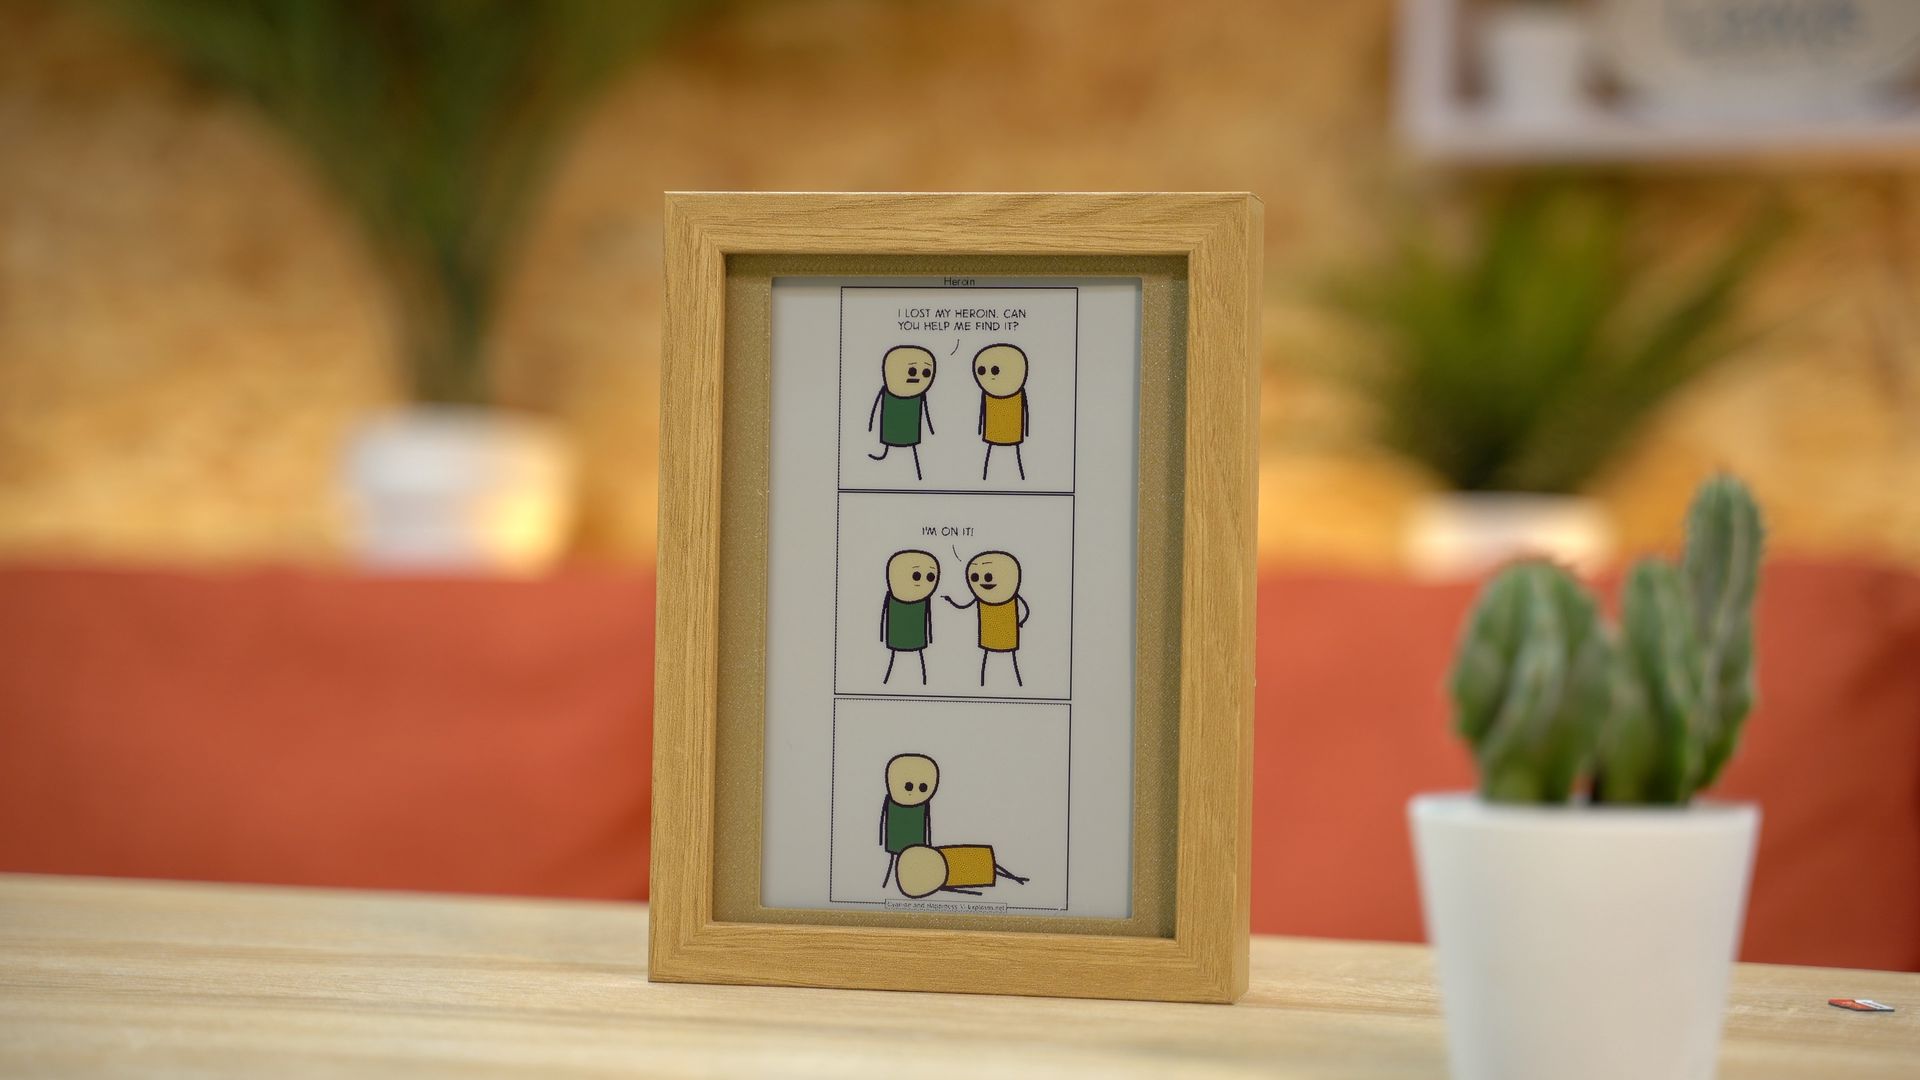
The image upload plugin will let you upload a photo and have that rendered onto the display - fun fact - this uses something called the Floyd-Steinberg dithering algorithm from 1976 - that’s an algo invented 50 years ago.
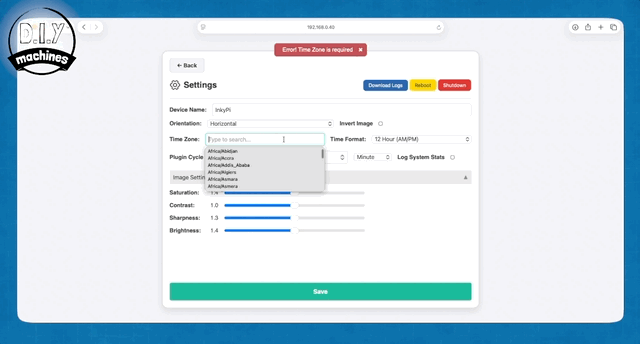
If you found your clock time displayed was wrong, you’ll want to head to the settings (cog icon top right of the Home Screen) and update the Time Zone and how often the display should update the information. I also like to boost the saturation, sharpness and brightness of the display for a better image quality.
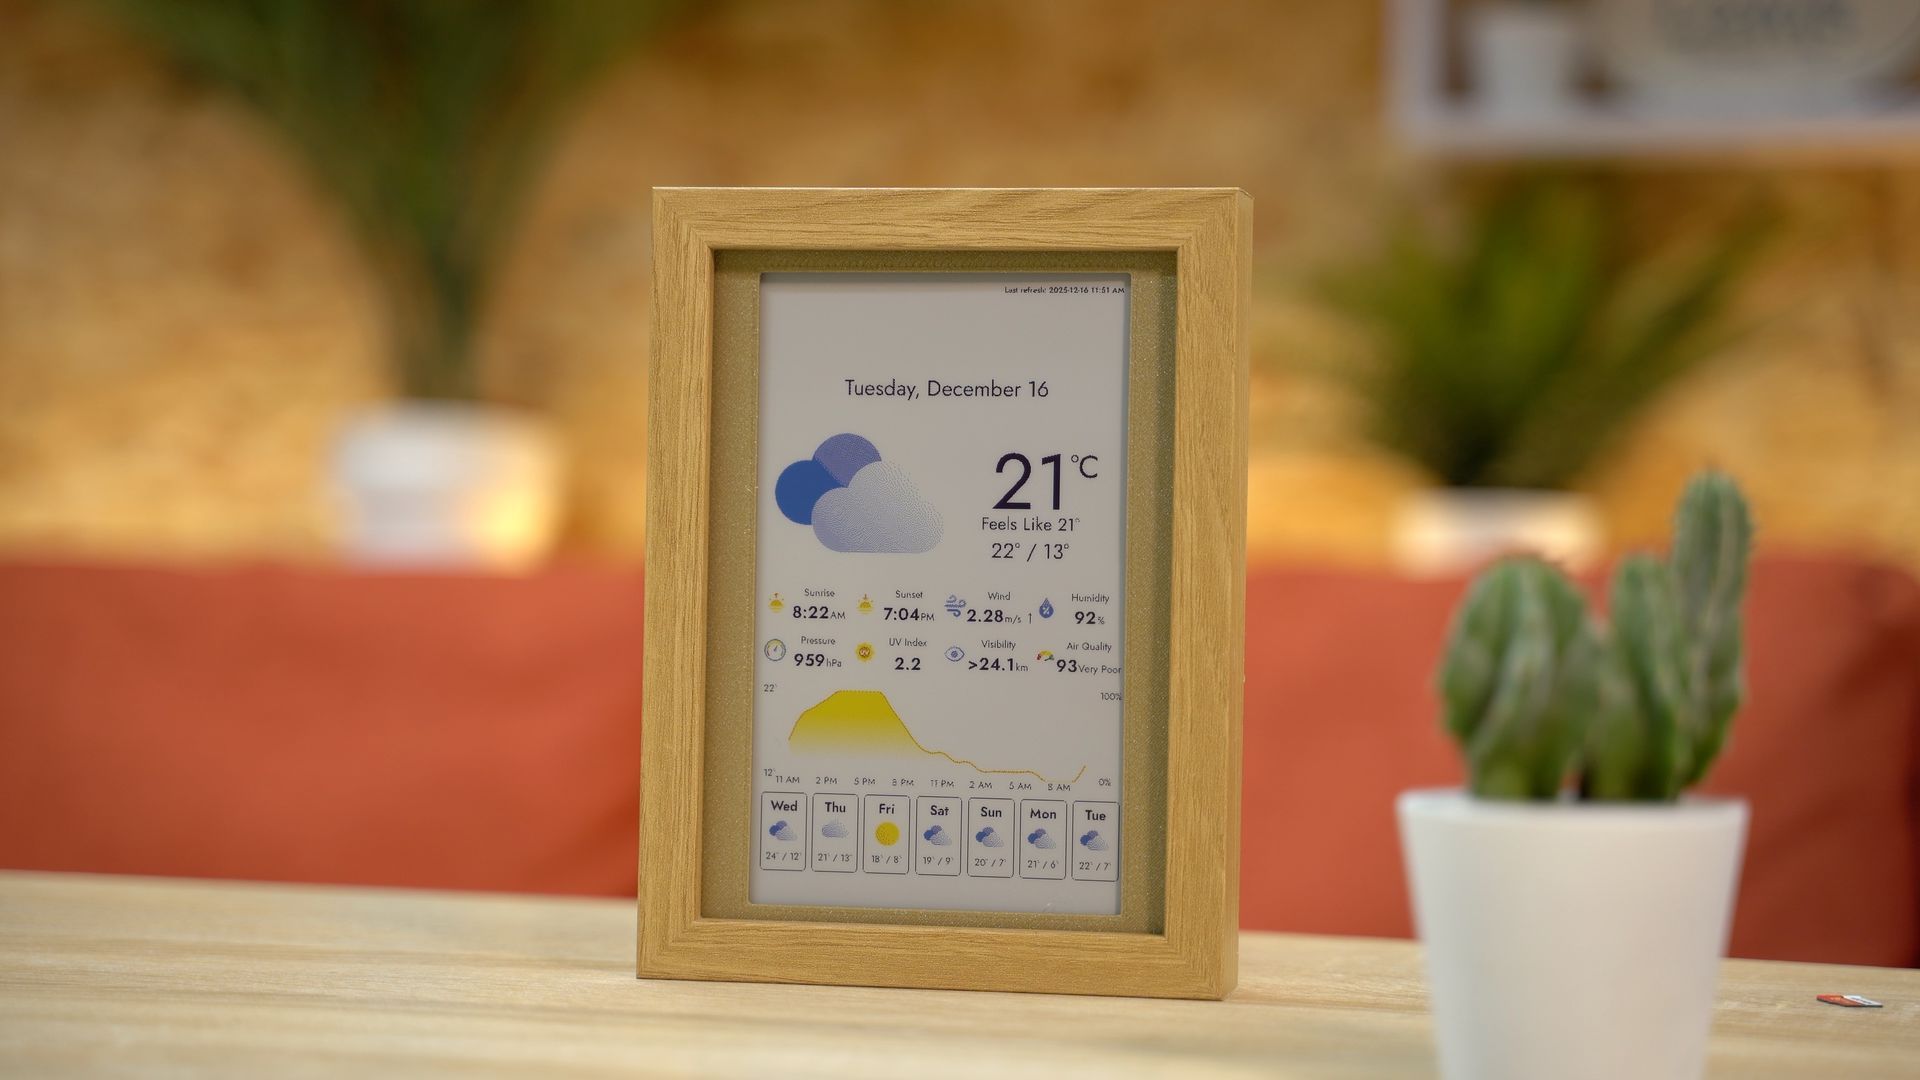
Let’s look at one more popular plug-in - the Weather. Here you’ll need to select a location for the forecast, and change the units of measurement to suite your preferences.
That’s just a few of the plug-ins currently available, and there are being more developed and added as time goes on.
Step 11: Ways to Display Your New E-ink Dashboard
You have three different options for displaying your frame, you can have it stand directly on the frame, attach a rear leg to be able to recline it in portrait or landscape, and finally hang it on the wall.
If you’re attaching the leg, simply print it and then bolt it on with two m3x8 bolts to any or the positions marked out on the rear.
To wall hang, print the hanging bracket and attach it to either the single mounting point for portrait, or attach one to each of these two points for landscape. For convenience when adding hardware such as a nail to a wall; the space between the two hanging points when in landscape is 105mm.
Community:
Discord server for this project: https://discord.gg/UE79EkPwAr (A great place for questions and advice).
There is a comments section at the end of this page where you can also engage with other makers. However I do find the Discord community more active. :)