
Wifi 3D Printed Steam Train with Live View Camera
How to build a Smart 3D Printed Steam Train with live view POV camera (ESP32-CAM), steam effect and working lantern.
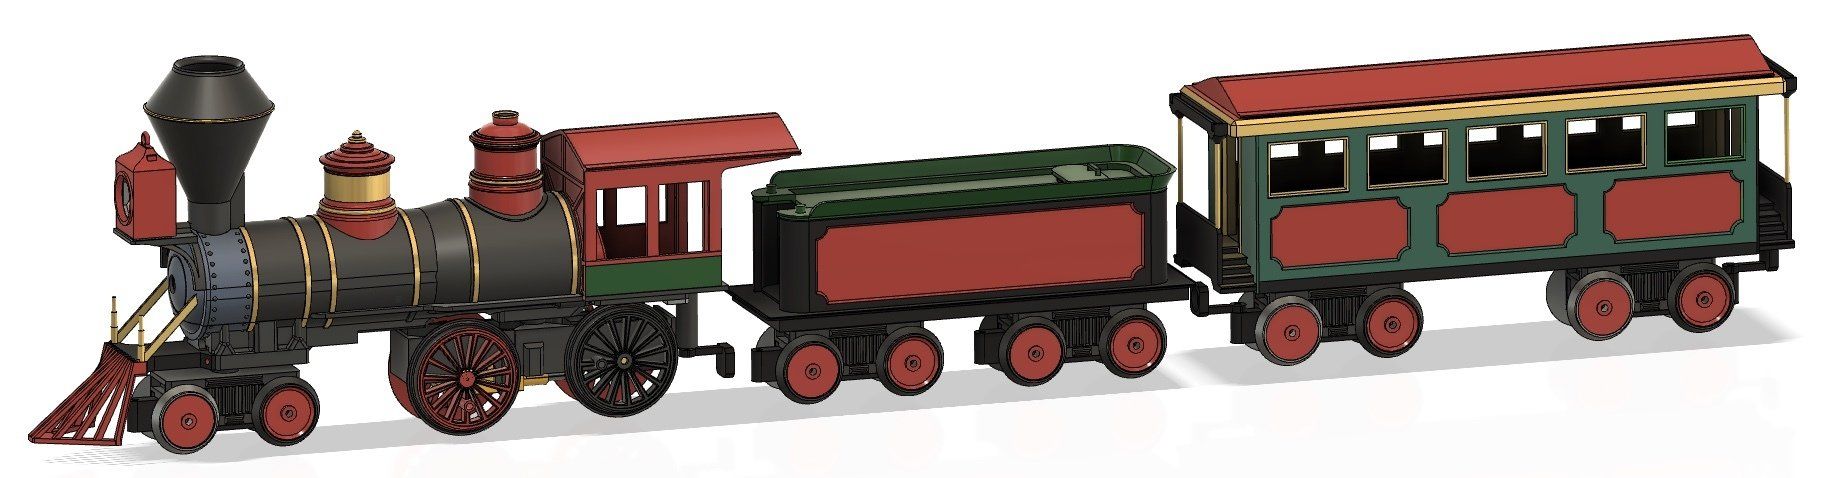
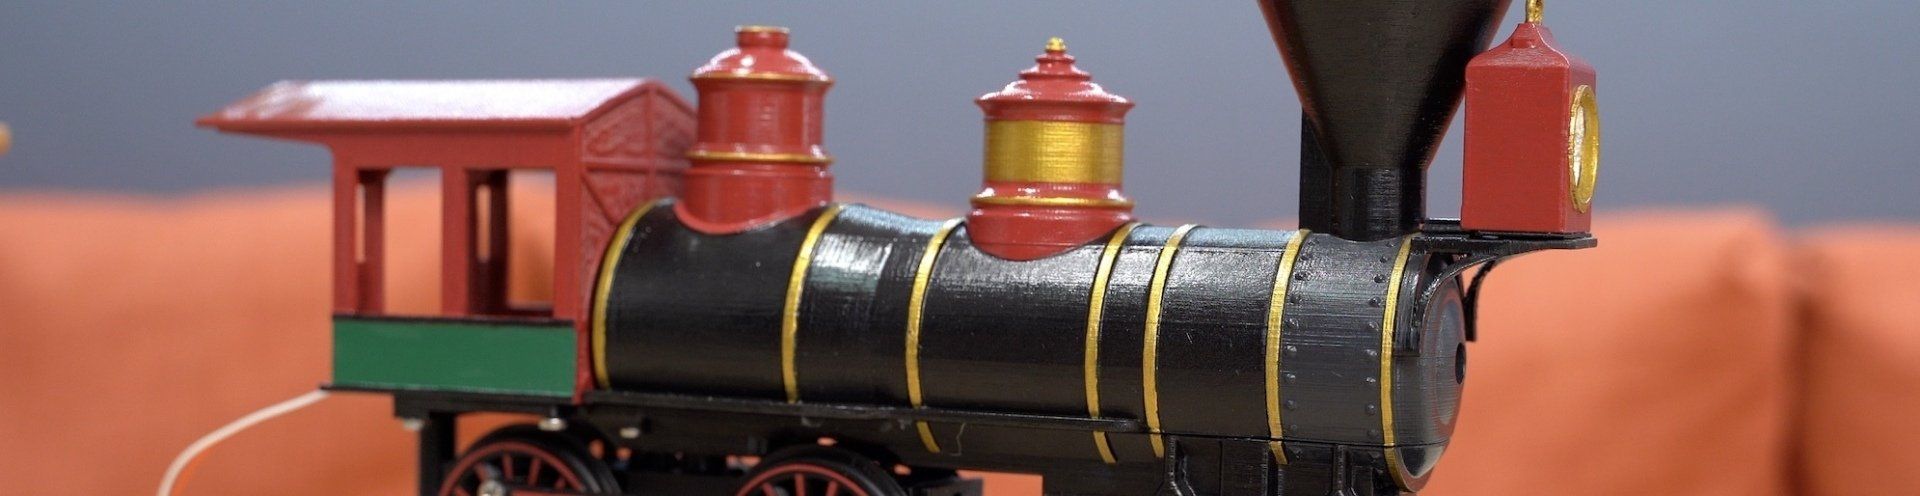
Hello I’m Lewis and this is how to make your very own 3d printable steam train complete with a cool water based smoke effect, inbuilt miniature camera which streams a live view as it drives around your garden, living room or model railway and a working front lantern. It looks soooo cool at night
The tracks are also 3D printed and are suitable for outdoor or indoor use. My train was printed in PLA for ease and the track in PETG as I installed mine outdoors permantley. The track has been outside for around 28 months and still works perfectly fine.
All of this is controlled from your existing smart telephone by connecting directly to the trains own inbuilt web server and wifi network powered by an ESP32-CAM.
Everything has been designed to an ‘O’ gauge model railway standard so you can mix and match it with other O gauge models and track.
I wanted a garden railway for some time but the trains were expensive, especially those with smoke effects, this one was much cheaper to make, plus I got to paint it how I want it and learned a few things along the way whilst making it.
On this page you'll find everything you need to know to be able to build your own. You’ll need a 3D printer and a few basic electronic components. Everything I used is linked to below, and further down have included some helpful tips and an FAQ. Enjoy.


List of items used in this project and where to find them / BOM:
(As an Amazon Associate I earn from qualifying purchases.)
- ESP32-Cam (inc. programming board) https://geni.us/ESP32-CAM
- Common Geared Motor (x1): https://geni.us/TT-Motor
- 3-way wago connectors (though the design can accommodate a 3 or 5 way if that’s what you already have): (x2) https://geni.us/Wago221
- Motor driver: HG7881/ L9110S (x1) https://geni.us/HG7881-Driver
- 5mm LED (x1): https://geni.us/LEDs
- 220 ohm resistor (x1): https://geni.us/Ufa2s
- 2 magnets for each carriage (10x3mm):
- 3mm brass rod : https://geni.us/3mm-Brass-Rod (30cm worth is enough)
- Compact USB battery pack: https://geni.us/USB-Battery-Small
- Rubber Gaskets for drive wheels 39mm ID x mm 3mm C/S (x4): https://geni.us/Gasket-39mmID-3mmCS
- Bearings (3x6x2.5): https://geni.us/Bearing-3x6x2-5
- Atomizer and Driver for the Steam effect (x1): https://geni.us/Atomiser
- 3D printing filament - I used 3D Jakes PLA for the train and PETG for the tracks as mine will be outdoors all year round. https://geni.us/3DJake
- Electrical wire - I’ll also be trimming down some Female jumper wires to make easy use of their connectors:
- Wire: https://geni.us/22AWGWire
- Jumpers: https://geni.us/JumperWires
- Some bolts: https://geni.us/NutsAndBolts
- M2 x 8 ( x2 )
- M2.5 x 8 ( x2 )
- M3 x 8 ( x22 )
- M4 x 20 ( x4 )
- Paint for decorating: https://geni.us/Vallejo-Steam
- Grey primer: https://geni.us/Grey-primer
- Gloss finishing coat:
https://geni.us/Gloss-Protection-Spray
Downloads:
Please 'like' the model on Printables. It really helps me out. Thank you.
3D models for printing: https://www.printables.com/model/268716
I am also working on some additional prints to go with the steam train such as the Passenger Carriage shown below. These will be available on Etsy in the next few days for just a few pounds/dollars which all goes to help fund the next project.
Etsy shop: https://www.etsy.com/uk/shop/DIYMachines
Code:
The code for the project can be downloaded from Github: https://github.com/DIY-Machines/Smart-Model-Steam-Train
The full written guide for programming the ESP is further down this page.
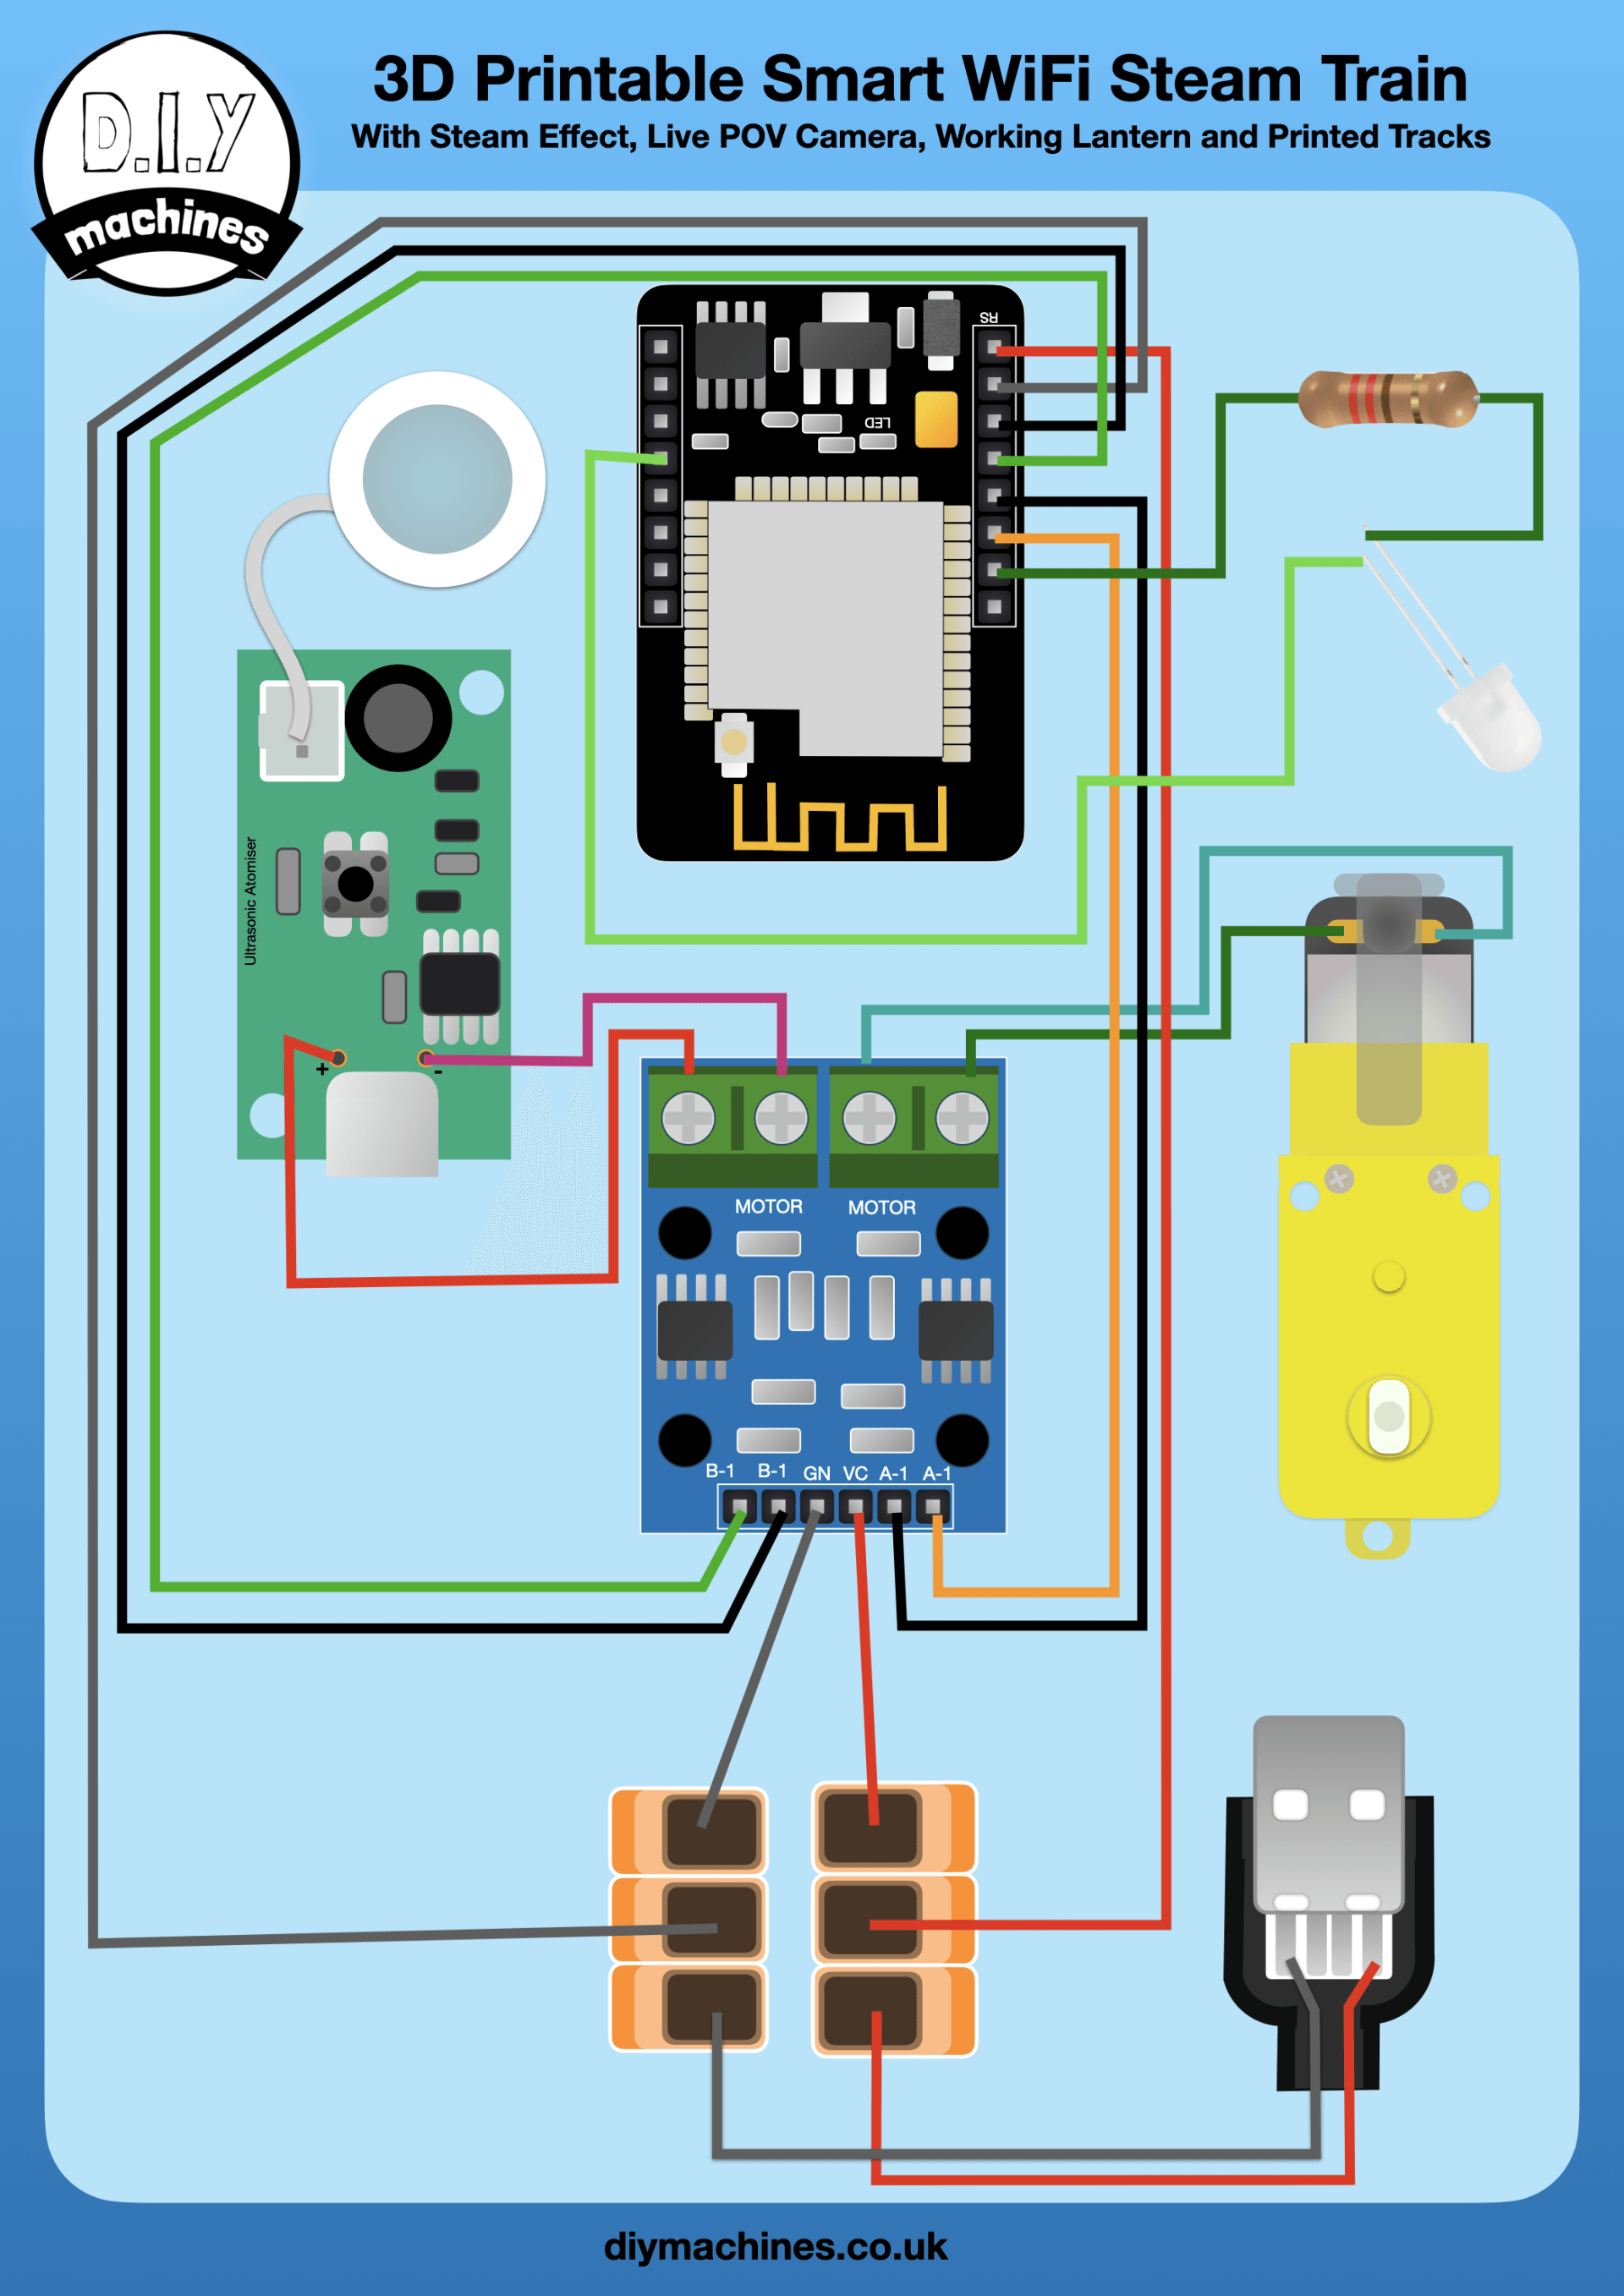
Wiring Diagram:
This is a diagram showing you the same wiring as demonstrated in the projects video.
Painting the model
You'll need a just a few things to decorate the train as I did. If you're lucky enough to have an airbrush, great, but I didn't (as much as I wanted to treat myself to one) so I used spray cans and paints along with a small basic kids paint brush.
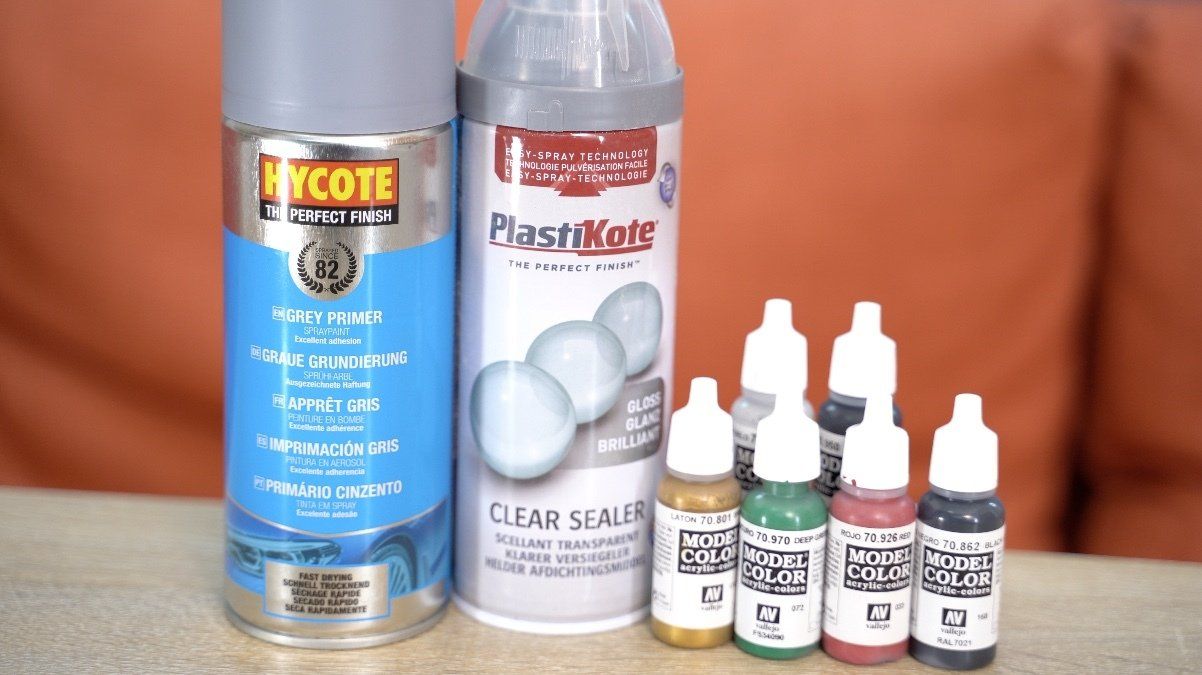
- Paint for decorating: https://geni.us/Vallejo-Steam
- Grey primer: https://geni.us/Grey-primer
- Gloss finishing coat: https://geni.us/Gloss-Protection-Spray
I decorated the each printed part of the train before assembly. This allowed for better coverage of sprays and paint.
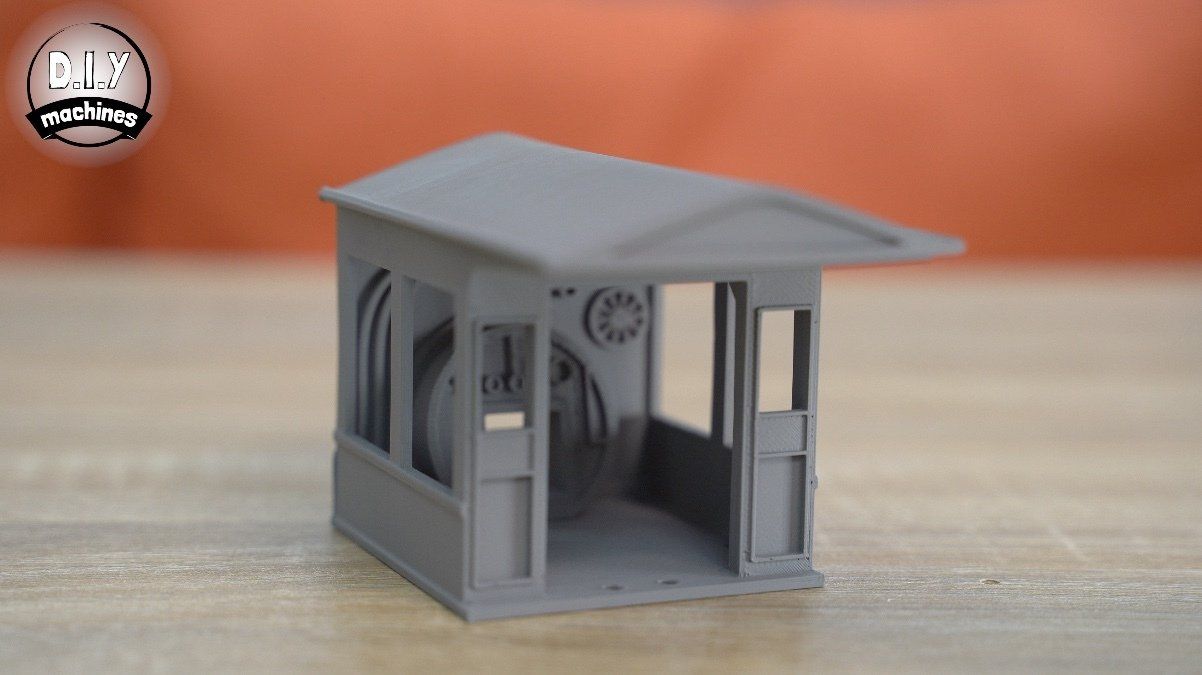
Undercoat
To help disguise the original colour of the filament used for the printed parts I started with a base coat of 'Hycote Grey Primer'. Not only does this cover the parts original colour, but also provides better adhesion for the following layer of paints and slightly reduces the appearance of layer line artefacts from the printing process.
Follow the instructions on the can. Mine required shaking for a few minutes and then painting several thin layers with a side too side motion. To help me get at all the surfaces I used some blue tac to temporary fix the printed part to then of a glass bottle.
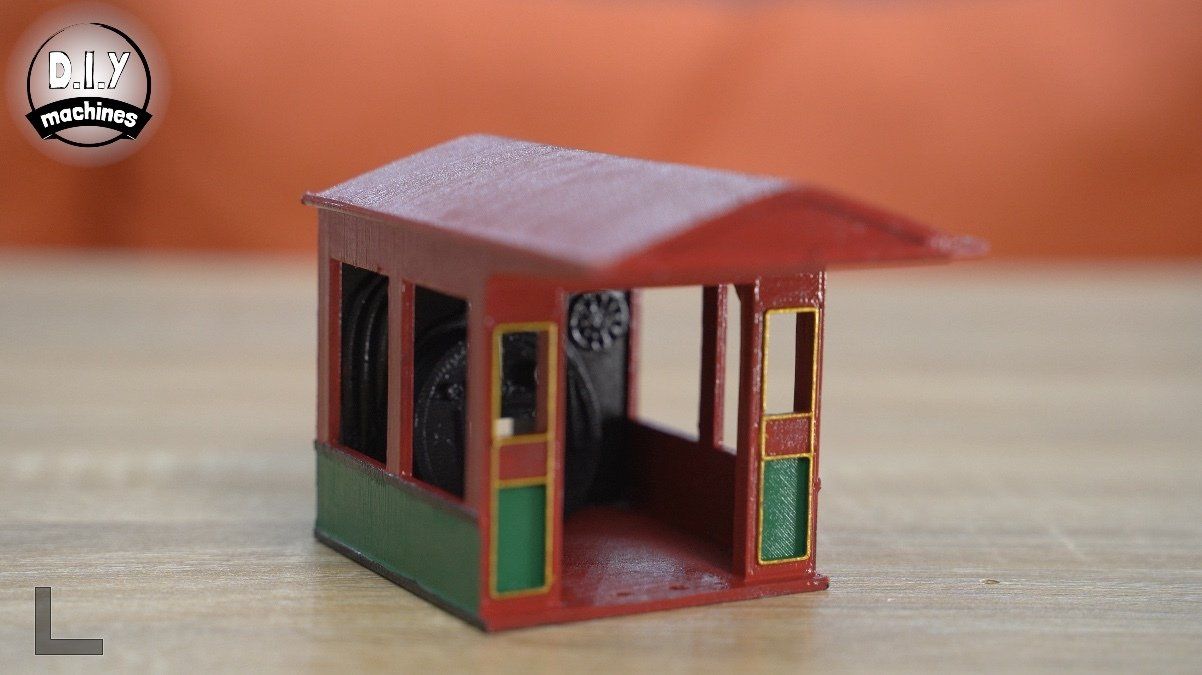
Decorative coat
I used a common cheap children's painting brush and some Vallejo acrylic model paints to add the colours. I found these to have excellent coverage quality and further helped to reduce the visibility of layer lines. I applied at least two coats of this allowing around 10 minutes to dry at room temperature between applications.
They also stock a range of 'liquid metal' paints which create a very smart and ey catching metallic metal effect. I opted for gold on one of my models and bronze on the second. Both really gave a fantastic feel of a highly cared for and polished steam engine.
Protective coat
To help protect the paint job from abrasion and dampness I finished the model with a few coats of clear gloss sealer. This is also gave everything a lovely sheen. If you wanted something less reflective then you can get selling sprays in matt and satin finishes as well.
Programming the ESP-32
There are several (easy to follow) steps required to be able to upload code to your ESP32-CAM board. Some of them you may be able to skip if you have already completed them before, for example, installing the Arduino IDE. The steps you need to follow are:
- Install Arduino IDE
- Install the ESP32 Board
- Connect your board to your PC
- Upload the projects code
Installing Arduino IDE
If you do not already have the Arduino IDE installed (software to help programs microcontrollers) you can freely download it from Arduino at: https://www.arduino.cc/en/software
I'm using their newer 2.0 version of their software in the screenshots below but the instructions are close to identical for both the new Arduino IDE 2.0 and the Original Arduino IDE. Just follow their simple installation instructions on their website..
Installing the ESP32 Board
The Board Manager within the Arduino IDE allows us to install additional Cores. A Core allows the software to add compatibility for additional microcontroller such as the ESP32-CAM we are using for our model steam train.
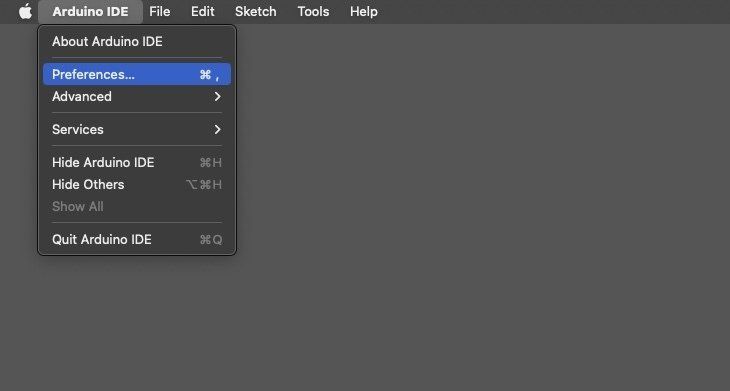
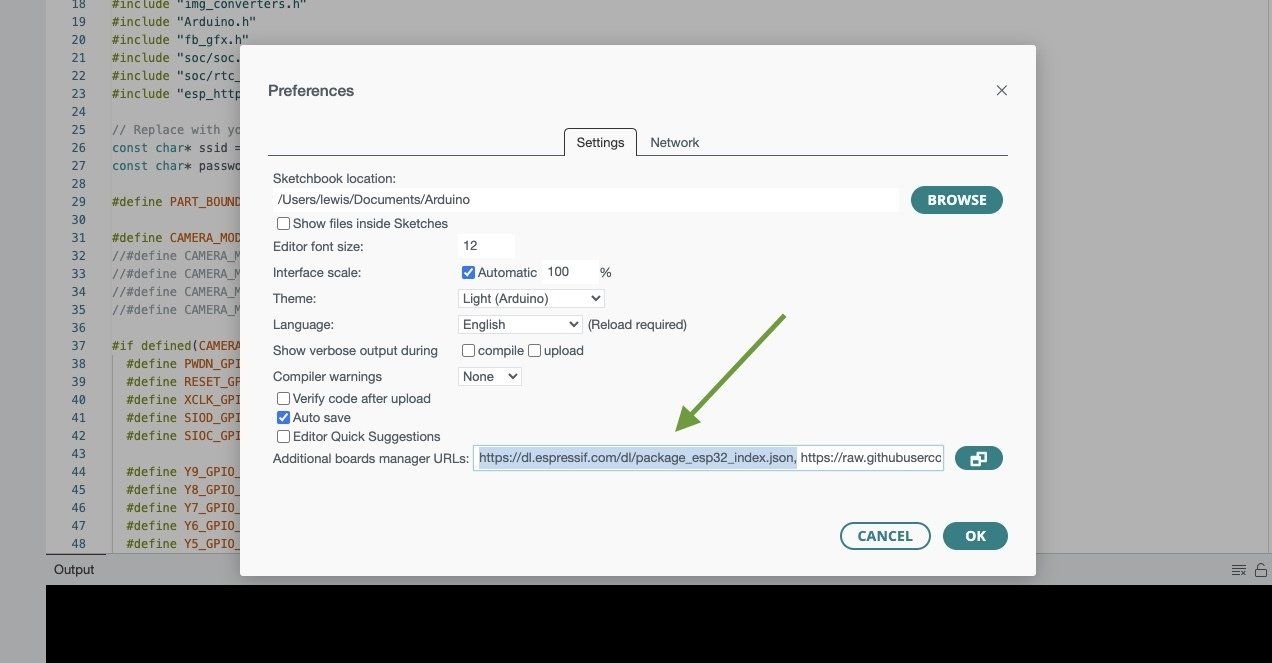
Before we can add the board core we require we need to let the Arduino IDE know where it can look to find the files we need. To do this go to 'File' > 'Preference (or on a Mac 'Arduino IDE' > 'Preferences')'. In the window that opens add the following into the 'Additional Board Managers URLs' field:
https://raw.githubusercontent.com/espressif/arduino-esp32/gh-pages/package_esp32_index.json
If you already find another URL in the box, just separate the two from one another with a comma. You can then press OK to save the changes.
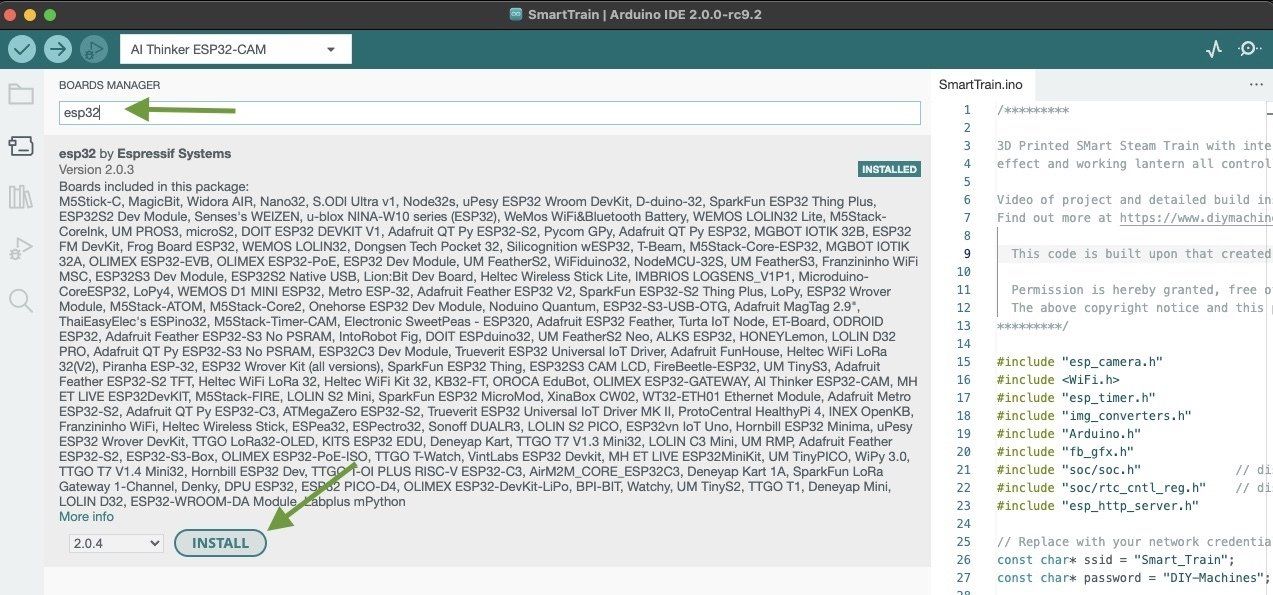
To add the required cores, in the Arduino IDE, click on 'Tools' menu along the top followed by 'Board' and then 'Boards Manager'.
In the window which opens for the Boards Manager you will find a search box along the top. Search here for 'ESP32' and then install the software for 'ESP32 by Espressif Systems' (if it was not already installed).
Connect your board to your PC
To connect your ESP32-CAM to your PC you will use a USB connection. We use an 'FTDI' board (Future Technology Devices International ) to convert our USB signals to a signal our ESP32 microcontroller will understand. Your ESP32-CAM board should be able to 'piggy back' onto of the FTDI board like so:
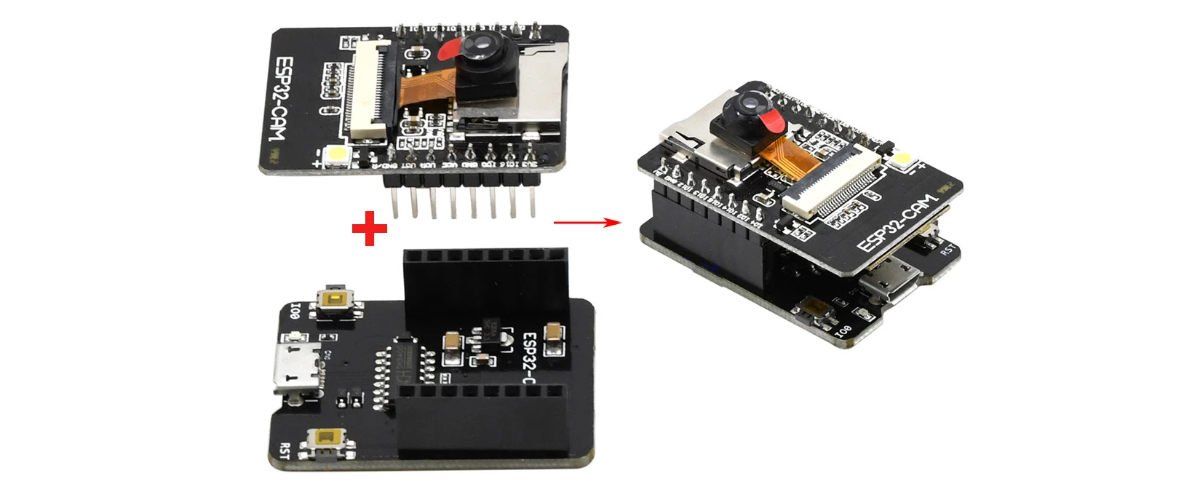
This is then connected to your computer using a USB cable.
Upload the projects code
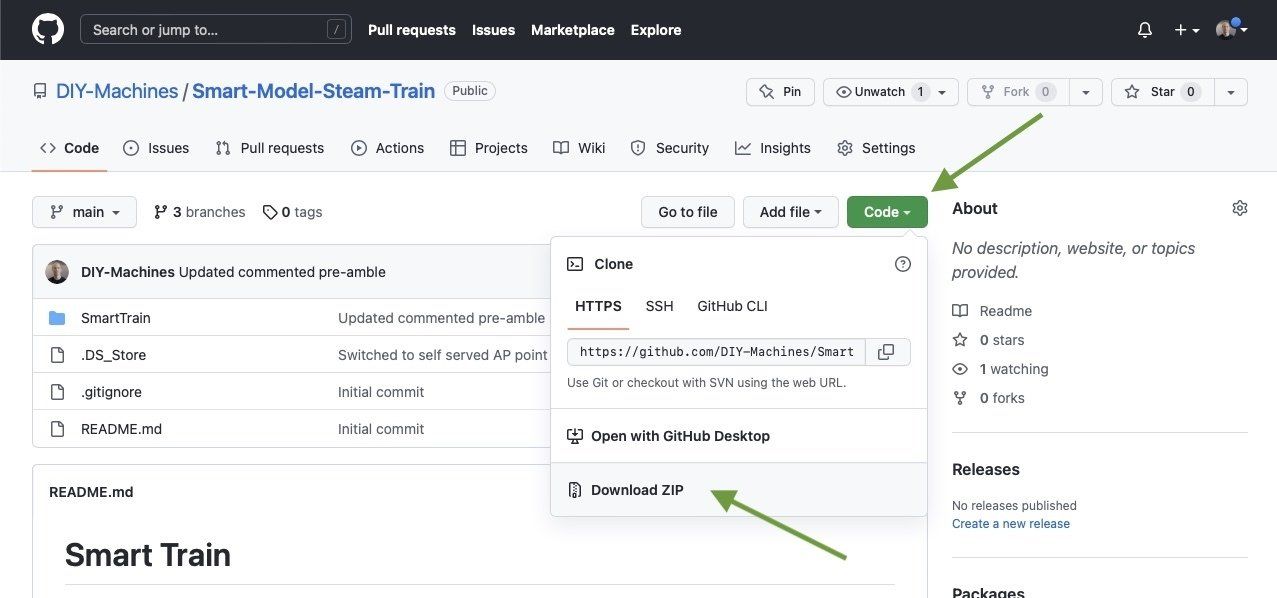
Now you can simply download the projects code from it's page on Github: https://github.com/DIY-Machines/Smart-Model-Steam-Train
Once your on the Github page, click 'Code' and then 'Download ZIP'.
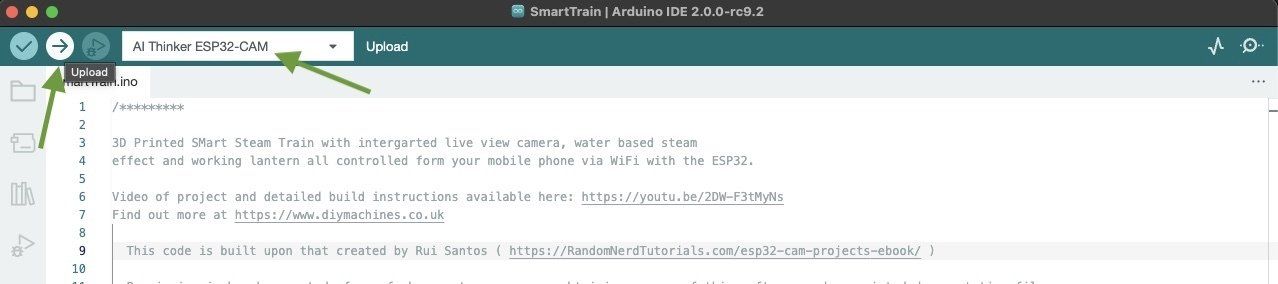
Open the ZIP folder which you just downloaded and then open the SmartTrain.ino file in the Arduino IDE you prepared earlier. With your board connected to your PC with a USB cable via the FTDI programmer we can select the board type of 'AI Thinker ESP32-CAM' from the drop down near the top. Then press the upload button.
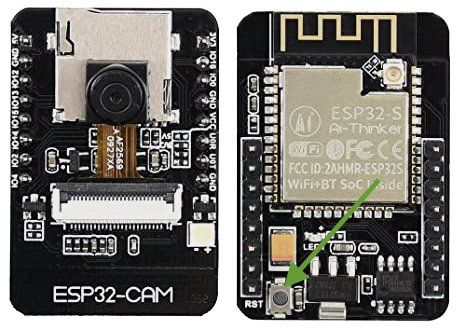
The last thing we need to do is hold down the 'RST' button (shown on the left) on the programmer board until you see the text 'Connecting.......' with a trail of '........' growing in the console window on the IDE.
At this point you should release the button and the code will upload.
If it fails just repeat the same instructions for this step and retry the upload.
Community:
Discord sever for project: https://discord.gg/rtYGrSfJeP
There is a comments section just below where you can also engage with other makers. However I do find the Discord community more active. :)
Comments


