
Elegoo Neptune 3 Pro Review
Elegoo Neptune 3 Pro
A continuous evolution of the Neptune line of FDM 3D printers, this improves in several ways on an already solid predecessor.
Pros:
- Direct extrusion
- Large, clear and responsive controls
- New integrated LED lighting
- Power Outage Recovery
Cons:
- Very tall machine - won't fit under most cabinets
- Front mounted USB port
Where to buy:
- Amazon: Elegoo Neptune 3 Pro
- 3D Jake: Elegoo Neptune 3 Pro
What is it?
The Elegoo Neptune 3 Pro is the latest (at time of writing) and greatest FDM printer from Elegoo. Naturally it would feature refinements and improvements across the board, and unsurprisingly the 'Pro' designation highlights additional features to improve reliability, quality and usability. For example its newfound ability to work with a wider range of filaments such as flexible materials thanks to its move to direct extrusion as opposed to the previous non-pro models use of a Bowden tube extrusion system.

FDM (Fused Deposition Modelling) printers have been found in domestic homes far longer than other 3D printing technologies such as resin based MSLA (Masked StereoLithogrAphy). As such their price continues to become more affordable and the technology is proven, refined and easy to work with. I cut my teeth on 3D printing with an FDM printer and mostly use them to this day.
The Technical Overview
| Printing Technology | FDM | |
|---|---|---|
| Print Volume | 225 x 225 x 280mm | |
| Layer height | 0.1 to 0.4mm | |
| Max. nozzle temperature | 260℃ | |
| Max. bed temperature | 100℃ | |
| Printable Filaments | PLA, ABS, PETG, TPU, TPE and infused (i.e wood, marble etc.) | |
| Extrusion Type | Direct Extrusion System |
For a more detailed technical table please see the end of this review.
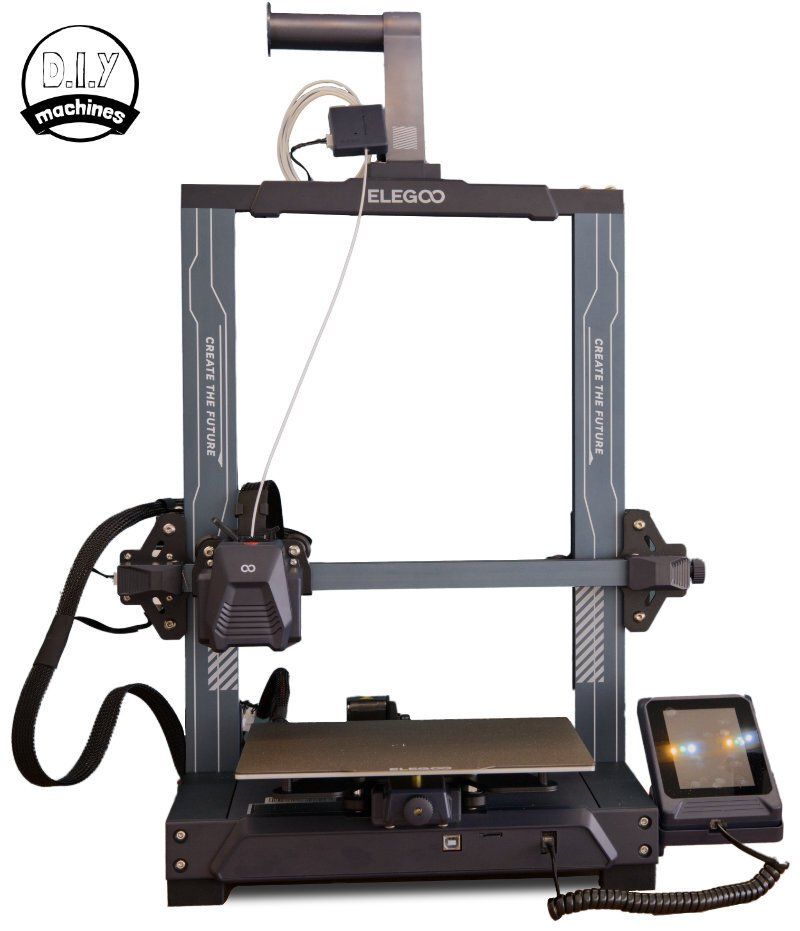
The printers 225 x 255 x280mm is marginally wider and deeper than the standard Neptune 3 (5mm increase in both directions). This is a fairly decent volume and you'll be able to print most predesigned models you might download of the internet.
The print bed is removable and magnetic. This makes detaching a print super easy and quick, just wait for it to cool then bend the plate slightly - your print will pop right off. The surface on the plate has a slightly textured finish which helps hide the printed lines on the first layer whilst encouraging adhesion when you need it.
The power supply has been integrated inside of the base which makes for a slicker visual appeal and one less item to assemble. However, this seems to have resulted in the need for a fan in the base which continuously moves air through the machine even when the nozzle and bed are not preheated resulting in a continues base level of 'noise' whenever the printer is switched on.
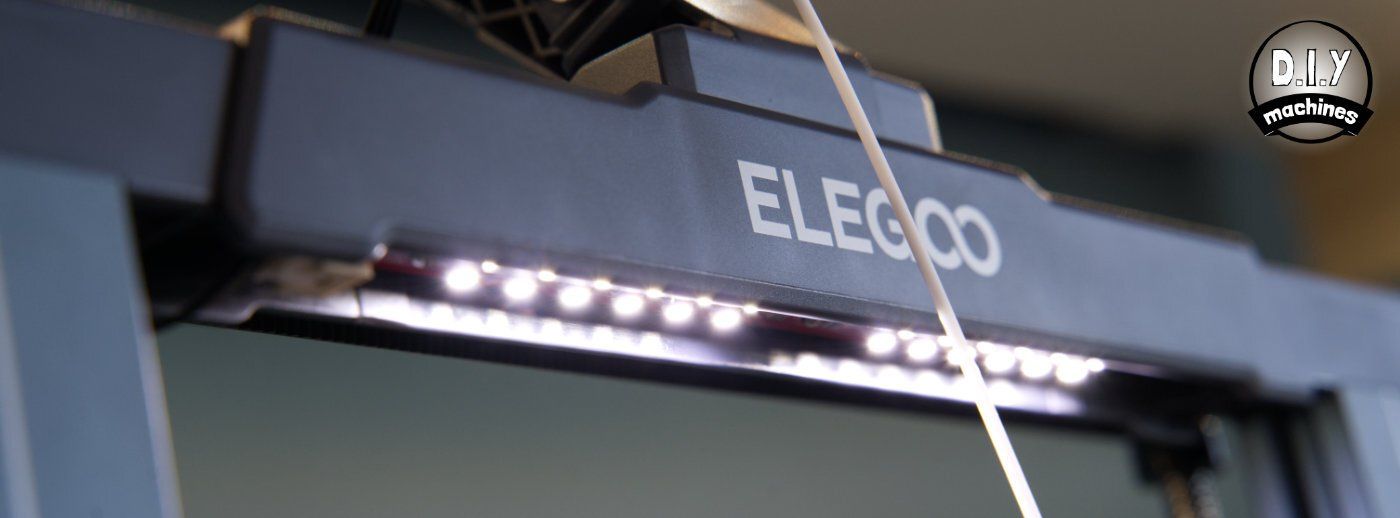
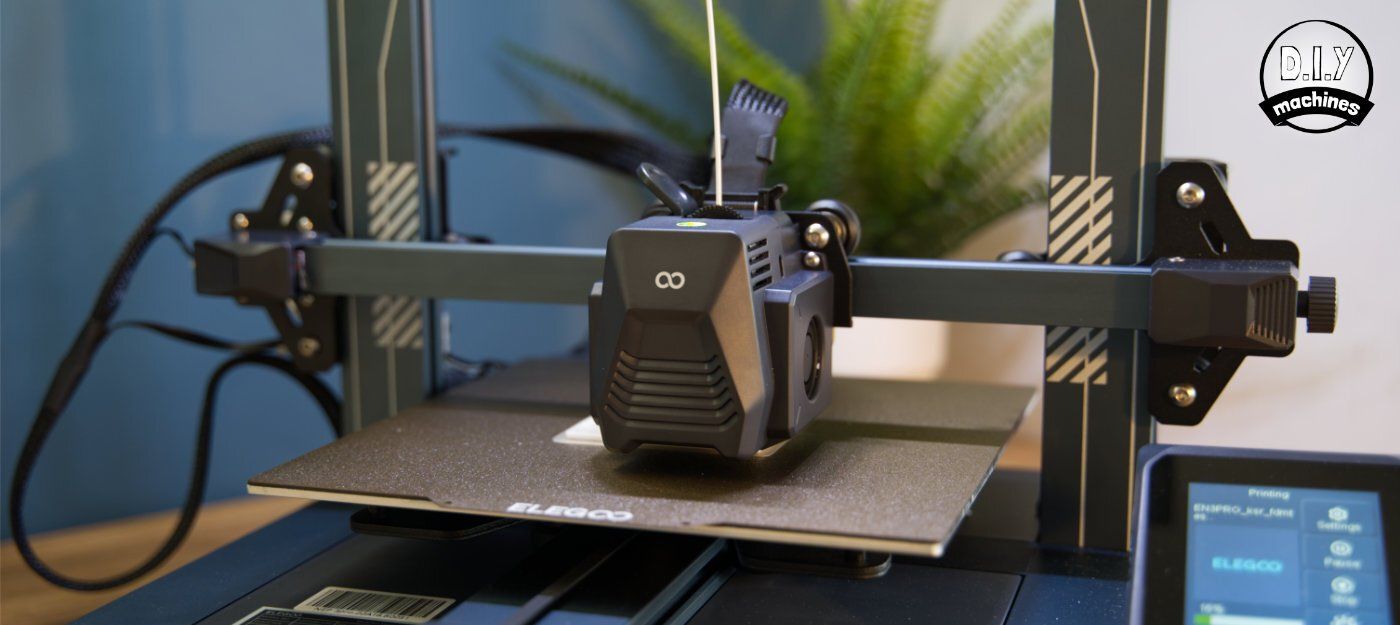
New to this model are the integrated LED lights. These are found nestled inside the top gantry. I thought they would be gimmicky - when in fact I'm finding them very useful for illuminating the machine whilst preparing and actually printing the models.
Power switch and kettle lead connections are mounted on the left hand side towards the rear of the machine. The USB and memory card slot is mounted on the front of the machine. I personally think the is a great spot for the memory card slot but I prefer the USB port on the side and failing that the rear. This is because I think it is less prone to damage when the machine is connected to a computer for direct printing. I often set-up a Raspberry Pi running OctoPrint to manage my printers and this prints via USB.
The most visible difference is the use of a direct extruder system on the pro model. Like everything , this comes with pros and cons:
Pros:
- Increased ability to print with flexible filaments.
- Better print quality through constant extrusion control.
- Faster retraction.
- Simpler extrusion path.
Cons:
- Slower print speeds because of heavier print head.
- Reduced print volume depending on design of extruder.
- More elaborate print head design required.
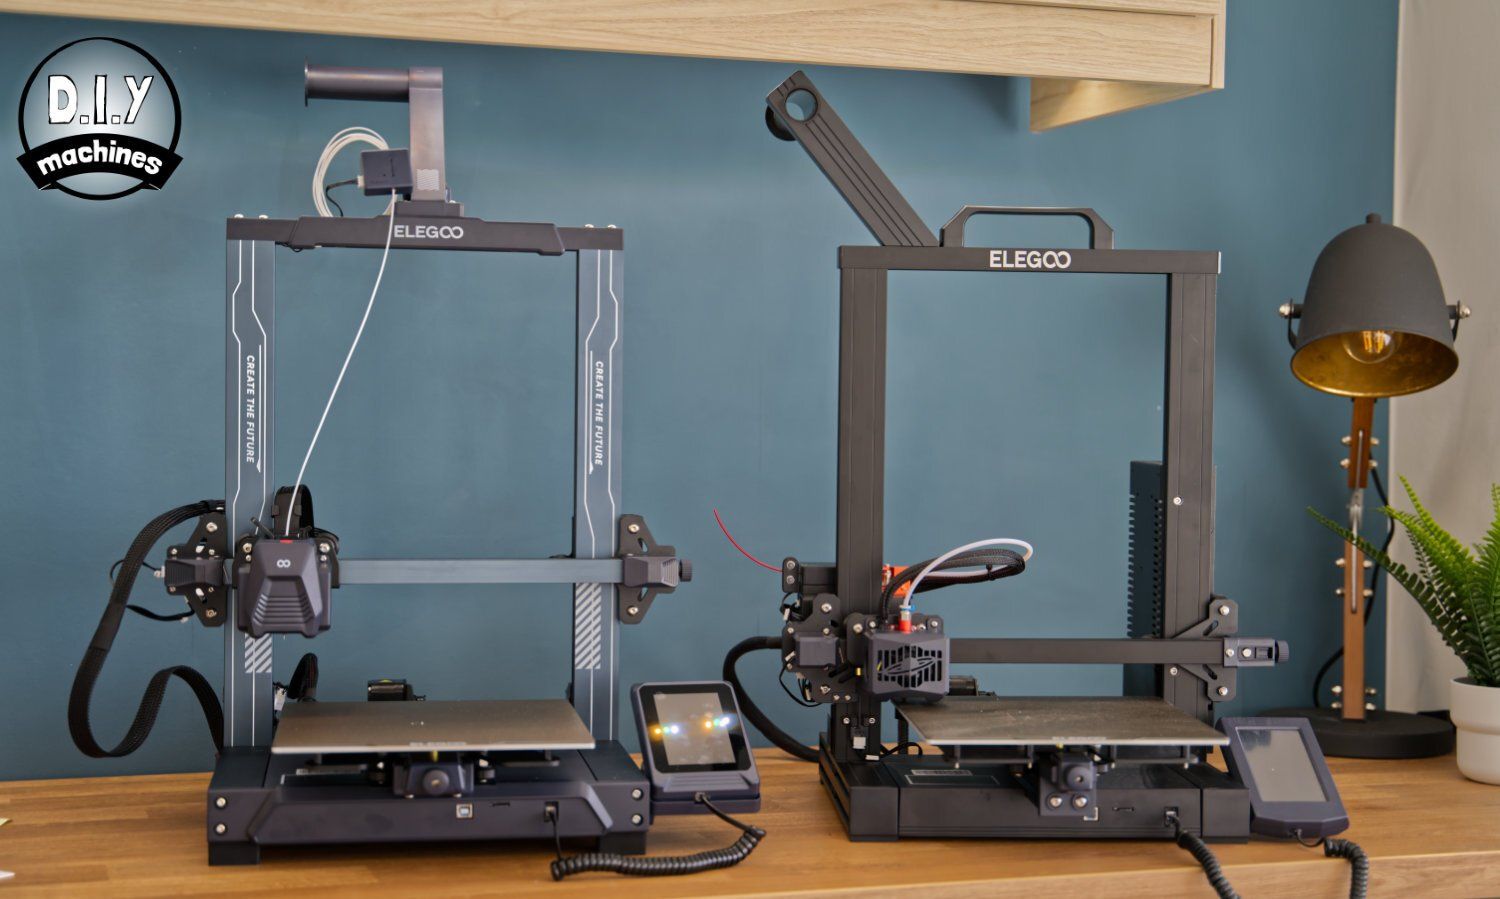
You can see two extrusion setups demonstrated in the comparison photos showing the Bowden setup of the Neptune 3 and Direct Drive used in the newer Neptune 3 Pro.
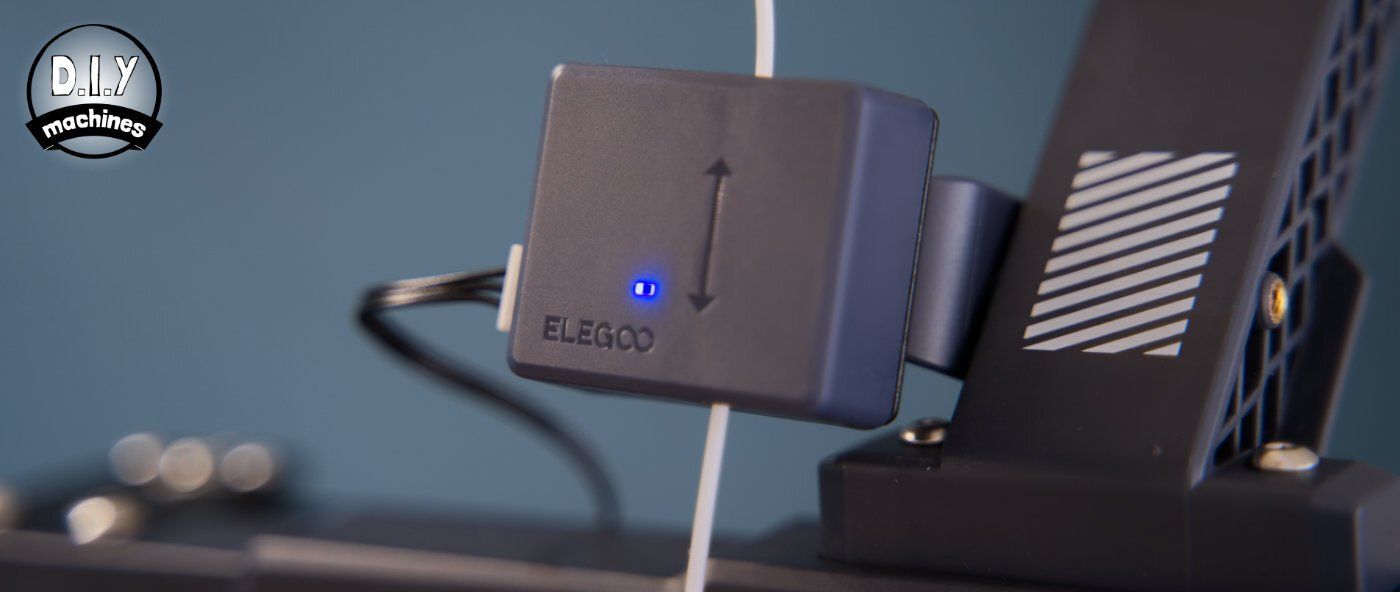
Unlike most Direct Drive setups though. Elegoo have kept the filament sensor attached to the frame of the machine instead of the print head.

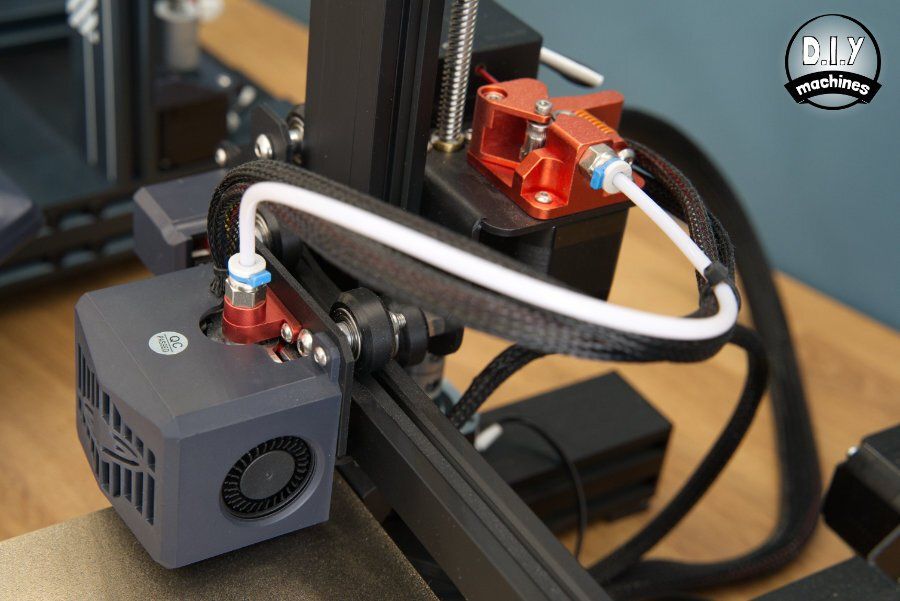
Elegoo have managed to minimise the effect of the 'cons' listed above. For example complexity, size, and weight of the print head was reduced by moving the filament sensor to the top of the machine nearer the spool. (This also provides earlier warning when you're running out of filament).
A simple slight increase in physical height of the machine negates any decrease in available print height. (Roughly 52cm in height vs the 50cm height of the non-pro version).
Though the printer has come from the factory with its belts pre-tensioned there are easily accessible knobs that allow you to adjust the tension if needed. (I did not need to tweak any of the factory set tensions). Similarly there are four control knobs on the underside of the print bed for levelling adjustment when the variance in the surface height is too extreme for the auto levelling feature. These are tucked a little further in but I imagine it is highly unlikely these will need adjusting unless you experience a significant collision.
The power outage recovery feature is very welcome. It is incredibly annoying if you are printing something expected to take many many hours only to find that during the night a power cut meant your project was brought to an abrupt and unexpected halt. The power recovery feature will detect this and offer to re-heat the bed and nozzle before resuming where it was before the power failed. The main drawback of this feature is that it only work when at least 10mm of the print has already been completed - I assume this helps ensure the print it continues with is unlikely to have warped whilst cooling.
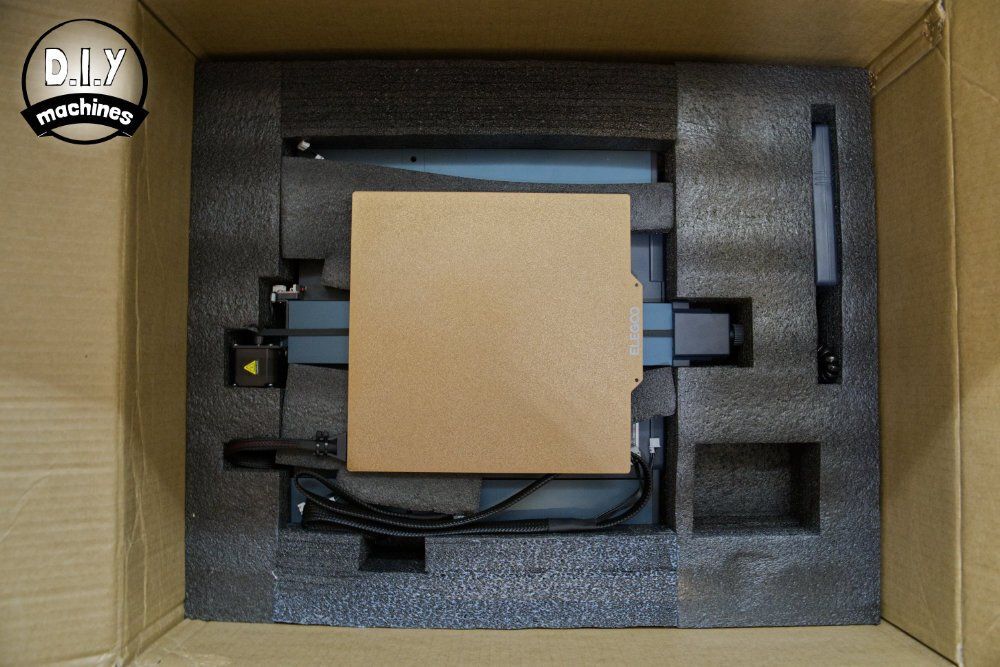
Shipping and Packing
I have had plenty of packages from Elegoo over the years and despite some arriving with their outer boxes pierced during shipping I'm yet to experience any damage to the products inside. This is a testament to their generously padded and well thought out containers. This one is no different. The parts inside are spread over two levels and everything is easily removed.
In comparison one of the pieces of the Original Neptune 3 printer was enclosed over two levels of foam making for a trickier than expected extraction of that part. No such hurdles this time.

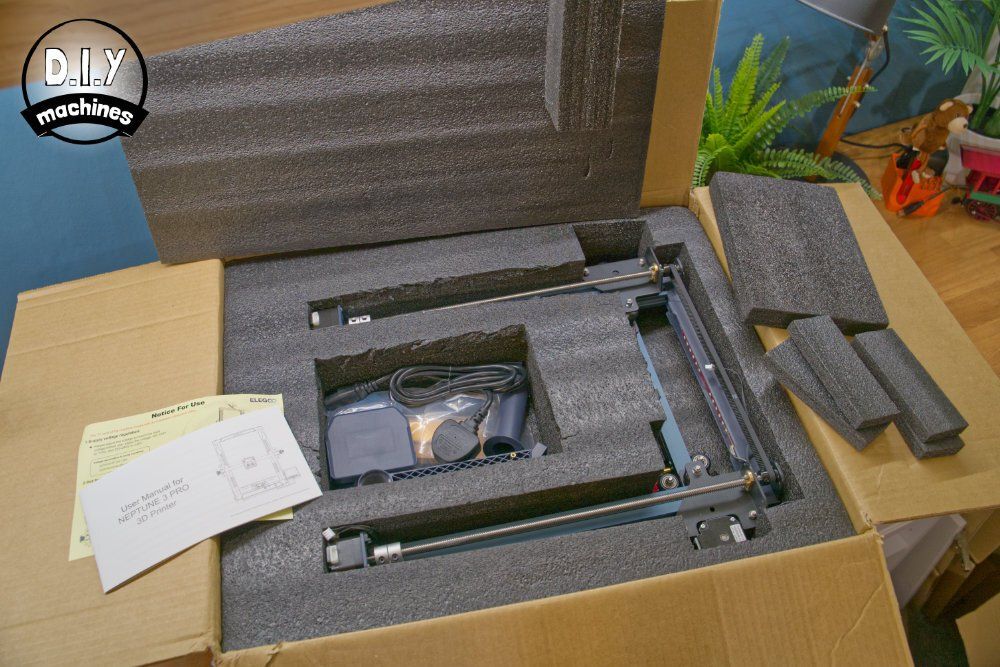
This is the box unpacked. Although some assembly is required, the contents offer up a pleasing peek at how quick assembly is going to be. (Spoiler Alert: it is extremely simple 🙂 ).
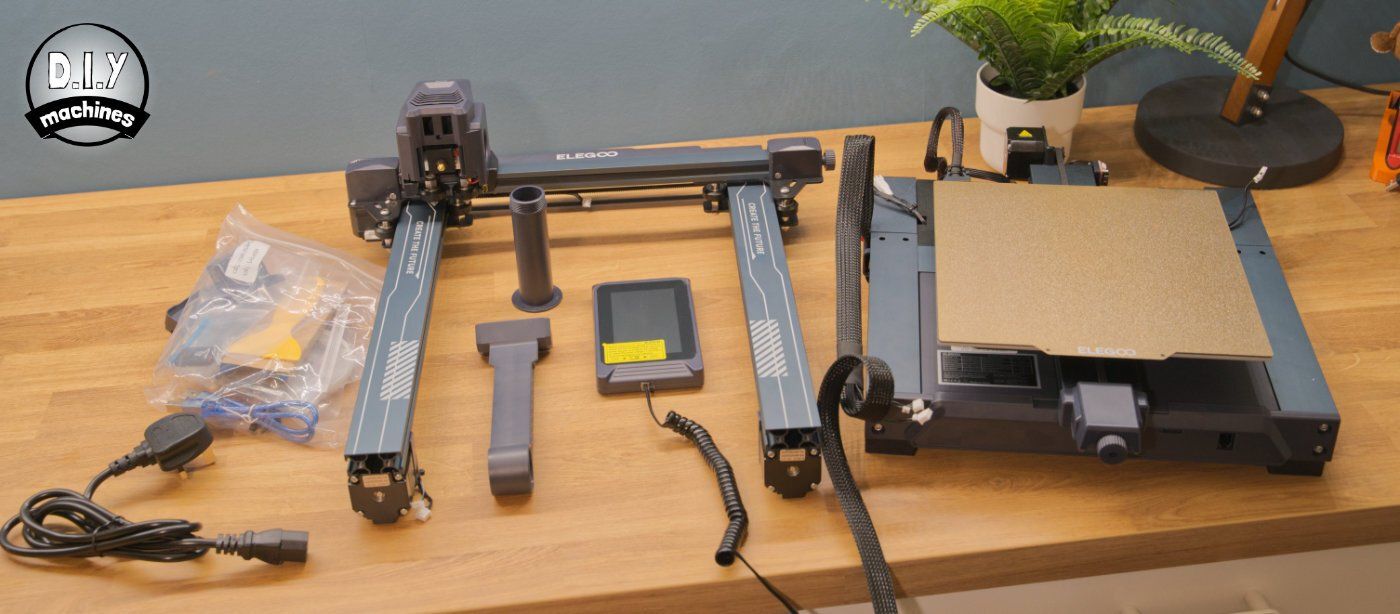
What else is included?
There are plenty of accessories included. More than enough to kit you out if this is your first FDM 3D printer, plenty of spare parts and all the tools you would need to repair and maintain your new machine.
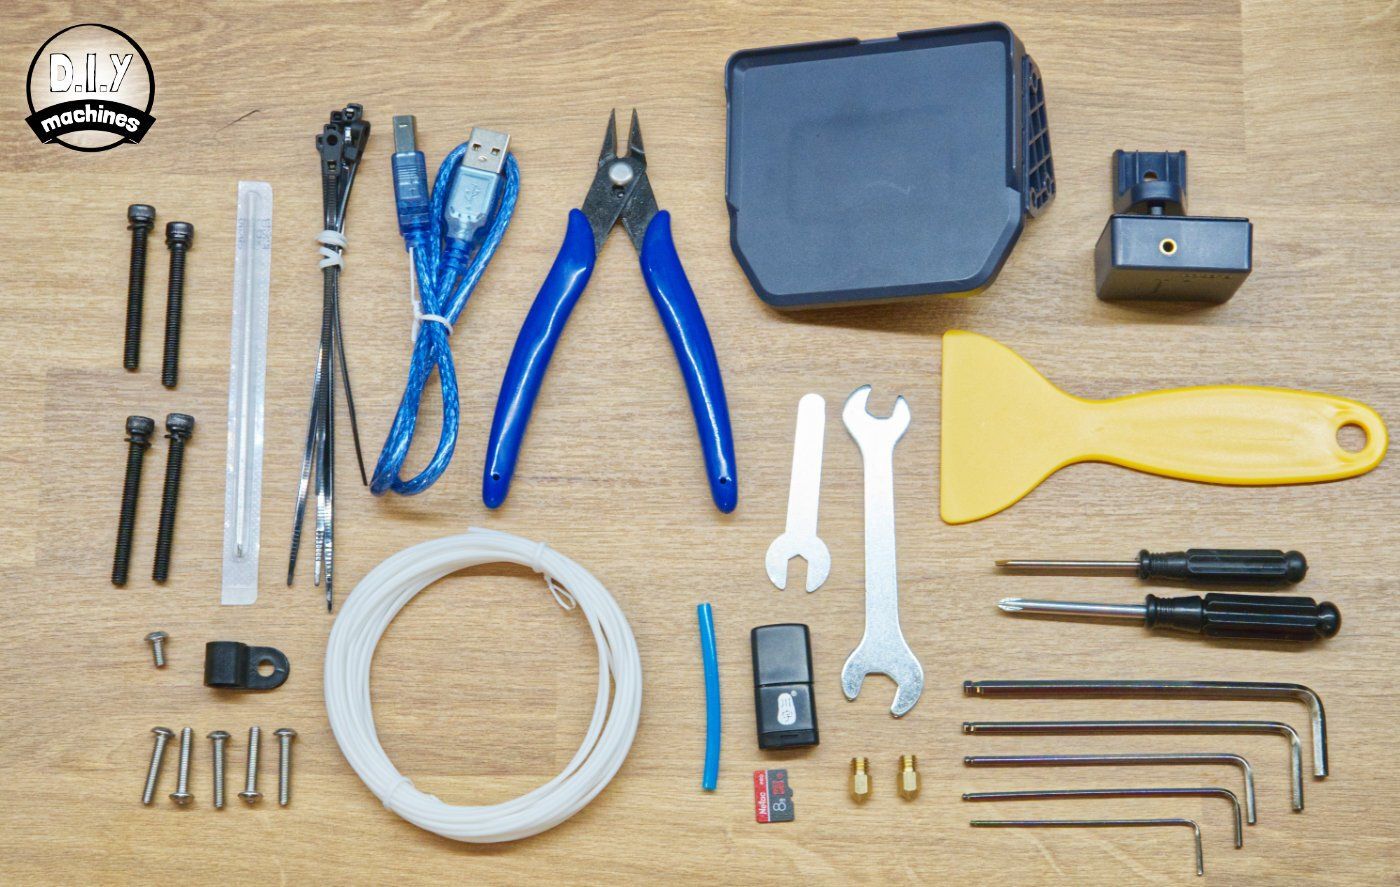
- Print removal spatular
- Spanners for changing nozzle
- Two spare brass nozzles
- Acupuncture Needle (to clear blockages)
- Screwdrivers (Philips and flat head)
- Selection of Allen Keys
- Micro SD / TF Card
- USB Memory Card Reader
- PTFE Tube (Spare)
- Snips
- USB Cable
- Sample of PLA Filament
- Cable Ties
- Bolts for assembly
Assembly
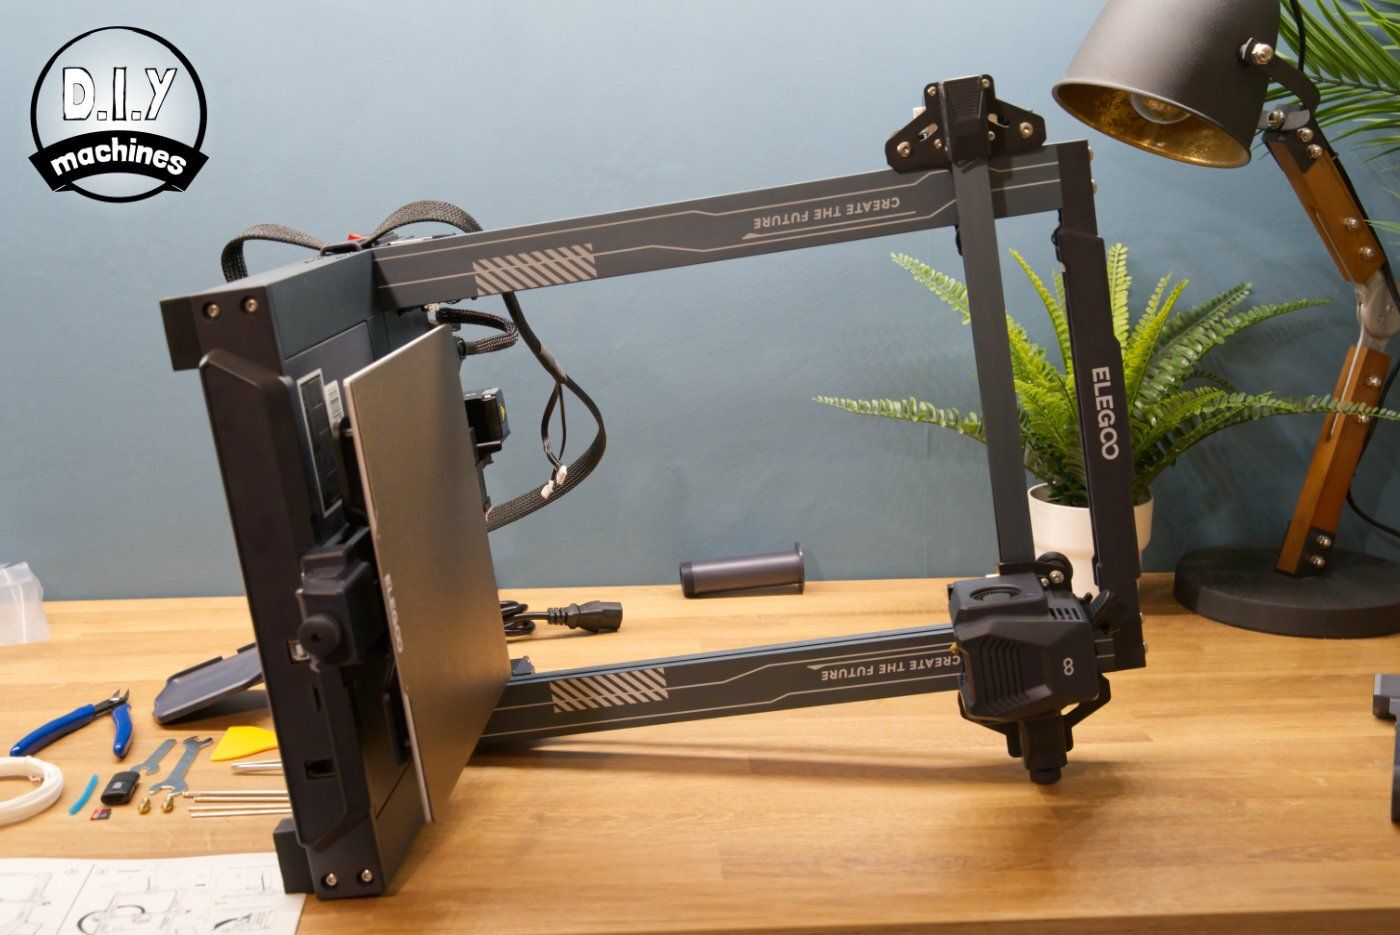
This is a very simple process. The 3D printer is supplied in two halves. These are bolted together using four bolts from the underside.
The accessories need attaching next which includes the magnetic screen mount, extruder cable clip, spool holder and filament sensor.


Electronics
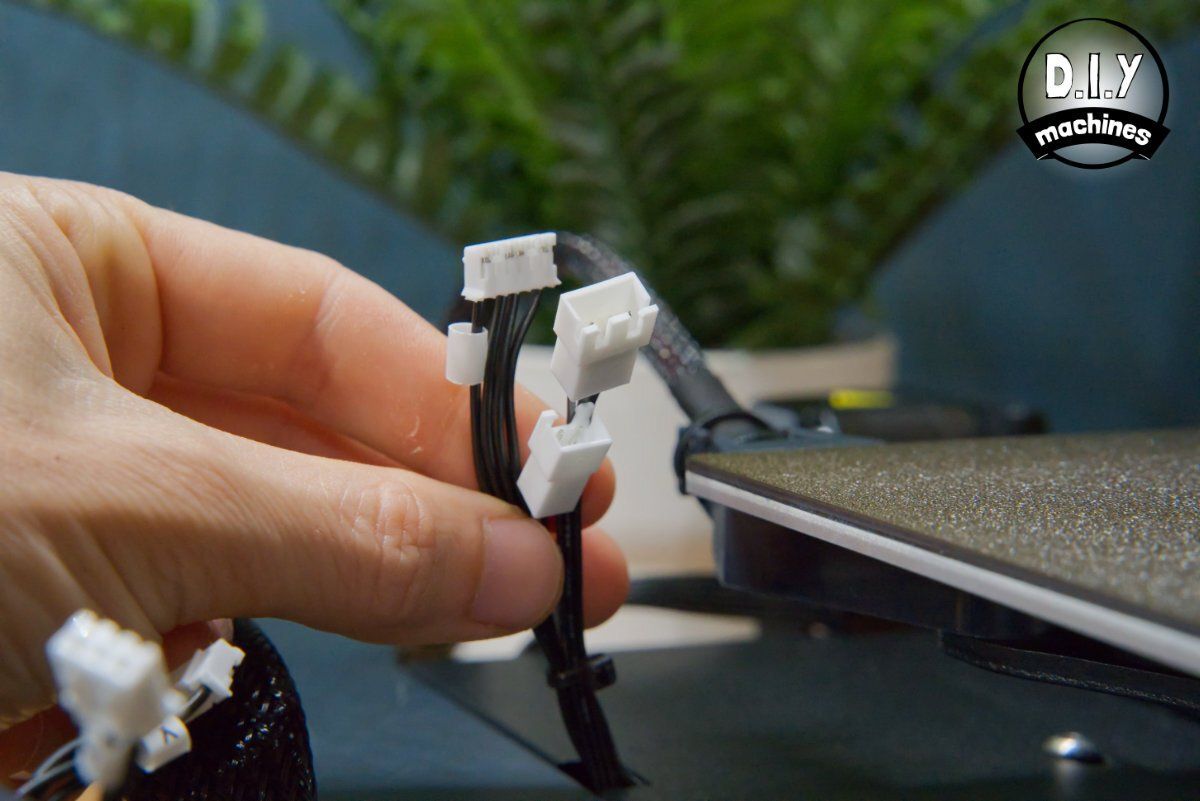
All the wiring for the various motors and sensors have already been thoughtfully routed around the machine and present themselves ready for connection alongside the correct component.
To help ensure the correct cable goes to the correct part each one is labelled and differently sized connectors are used. I didn't need to consult the instructions save for ensuring I had not overlooked any.
Instruction manual
The instructions are concise and mostly in a pictorial form. I had no problem consulting them except I felt a little more instruction would be beneficial for the steps taken to run the auto bed levelling program. (More on that later). Take a look at the manual yourself if you would like - I have linked to it for your personal perusal.
Elegoo have also included a handy video guide of the assembly procedure which you will find included on the memory stick include with your new printer. Thanks Elegoo. 😊
First Print

Levelling the Bed
The printer automatically measures the height of the print surface across a grid of 36 unique points and uses this information to calculate a mathematical model it refers to whilst printing to compensate for any warping of the print bed.
Once this automatic routine has completed you need only to set the layer height of the first layer. This simply requires you to continuously slide a piece of common paper back and fourth under the nozzle whilst lowering it with the touchscreen until you feel some slight resistance.
This process was incredibly easy and proved accurate as no further tweaks were required when making the proceeding test prints.
My one gripe comes down to the instructions provided for this step in the booklet. Elegoo shows an image of the levelling menu on the touchscreen and draws your attention to the buttons which matter. It could be improved if they also clarified in what order calibration should be performed - i.e. level the print bed before setting the first layer height. Perhaps this does not matter but in either case the vagueness here in the instructions was the only let down of the assembly and first print preparations literature.
Loading the Filament
The process of loading the filament has been improved on the Neptune 3 Pro. I was not terribly keen on the process of feeding the filament though the filament detector, robbed gears, Bowden tube, and finally extruder for the earlier model. On this Pro integration its a case of passing the filament effortlessly though the detector at the top of the gantry, pressing the comfortable lever on the top of the print head before inserting the filament a few cm's and then releasing.
All that is left to do is to heat the nozzle using the touchscreen (Elegoo provides a handy set of presets for common materials) and pressing load.
Printing the included Sample Model
It seemed only fair that the first print completed should be the included sample model file on the memory card printed with the included sample of PLA filament.
After selecting it on the touchscreen the fans whirred into life as the print bed and nozzle heated unto the required temperatures. During printing the display offered up various metrics such a print time remaining, an image of the finished print (provided by the slicing software) and controls to allow adjustment to be made during the print process if required.
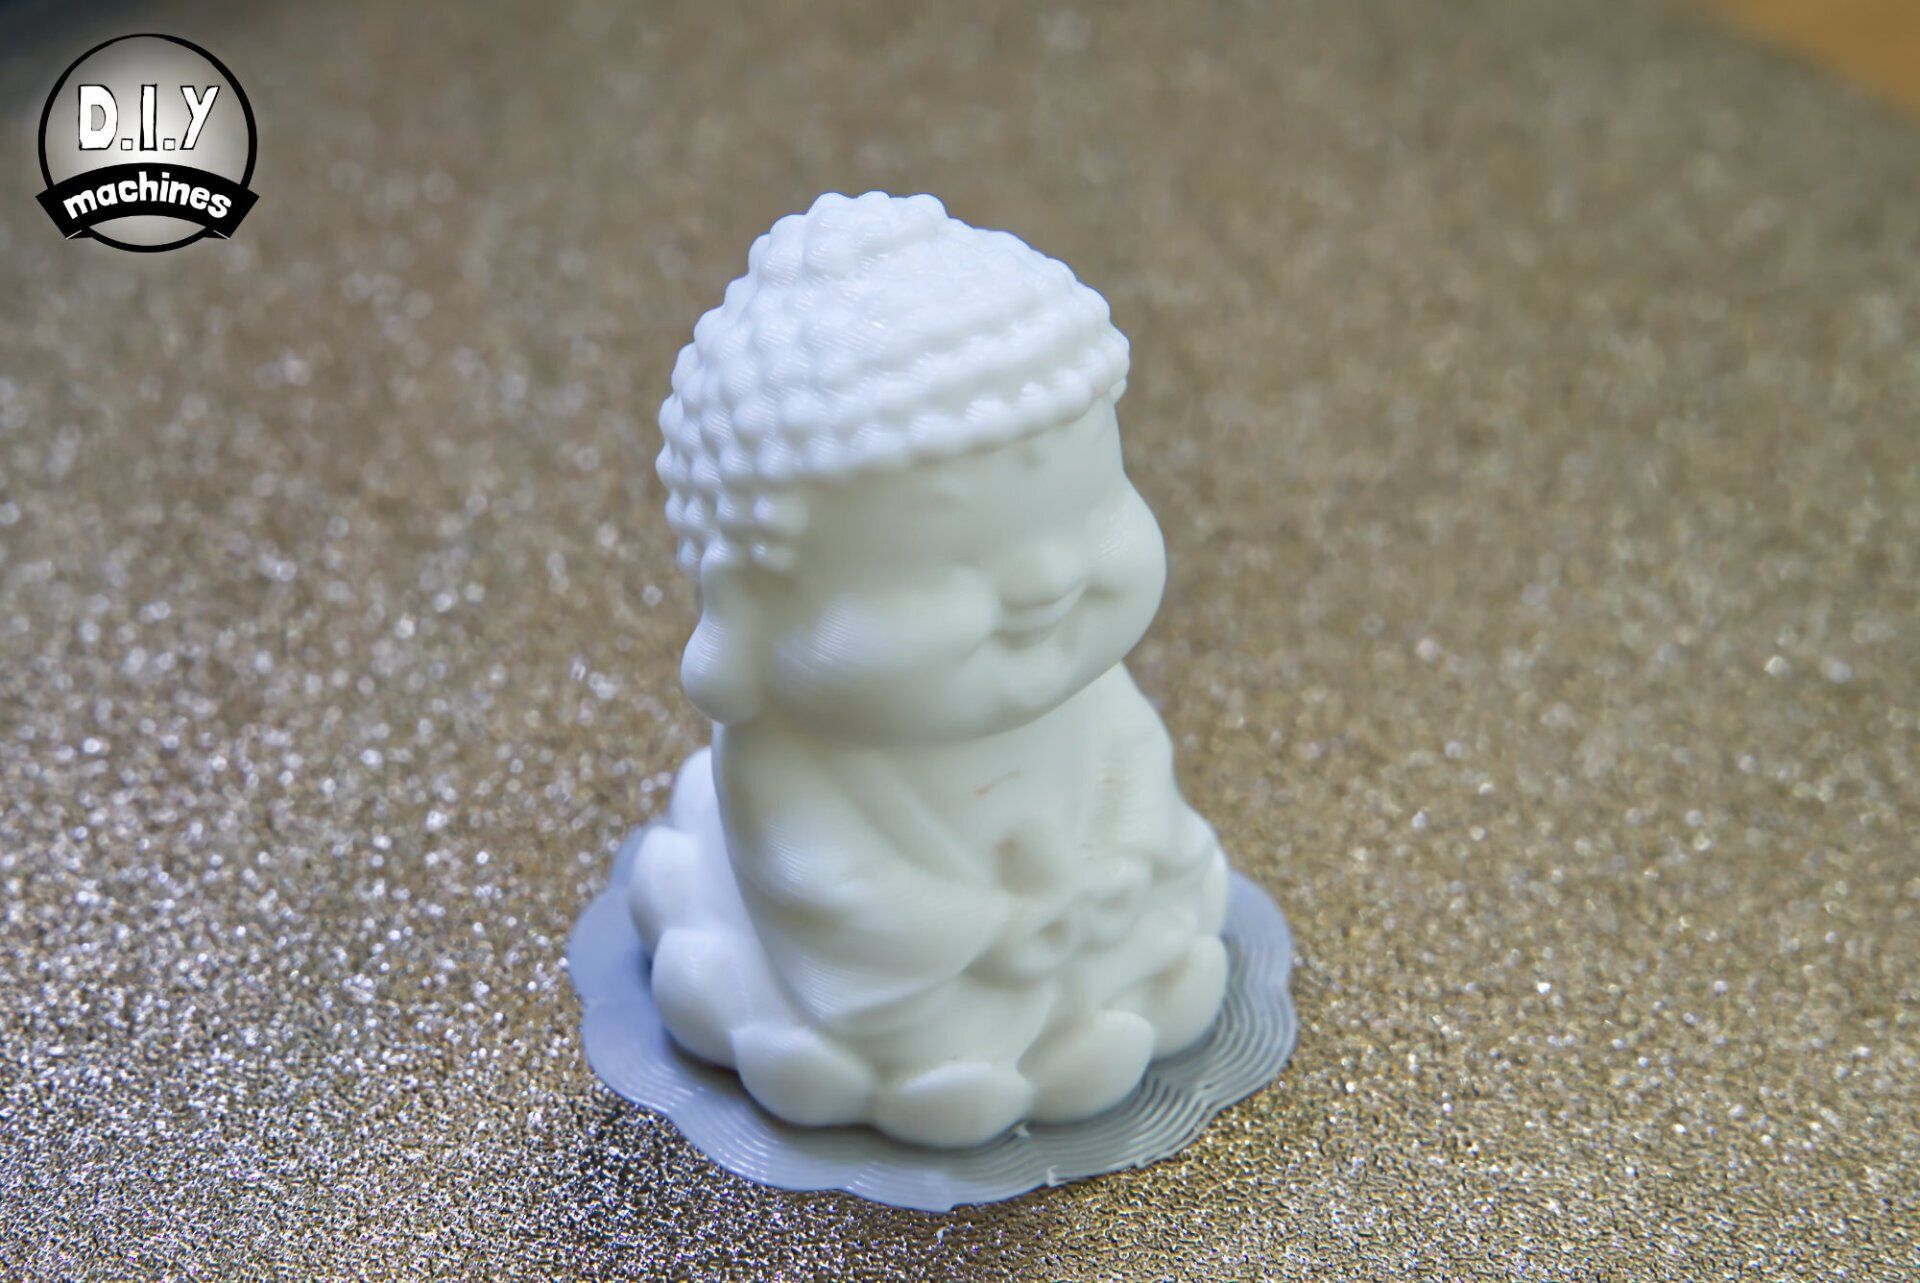
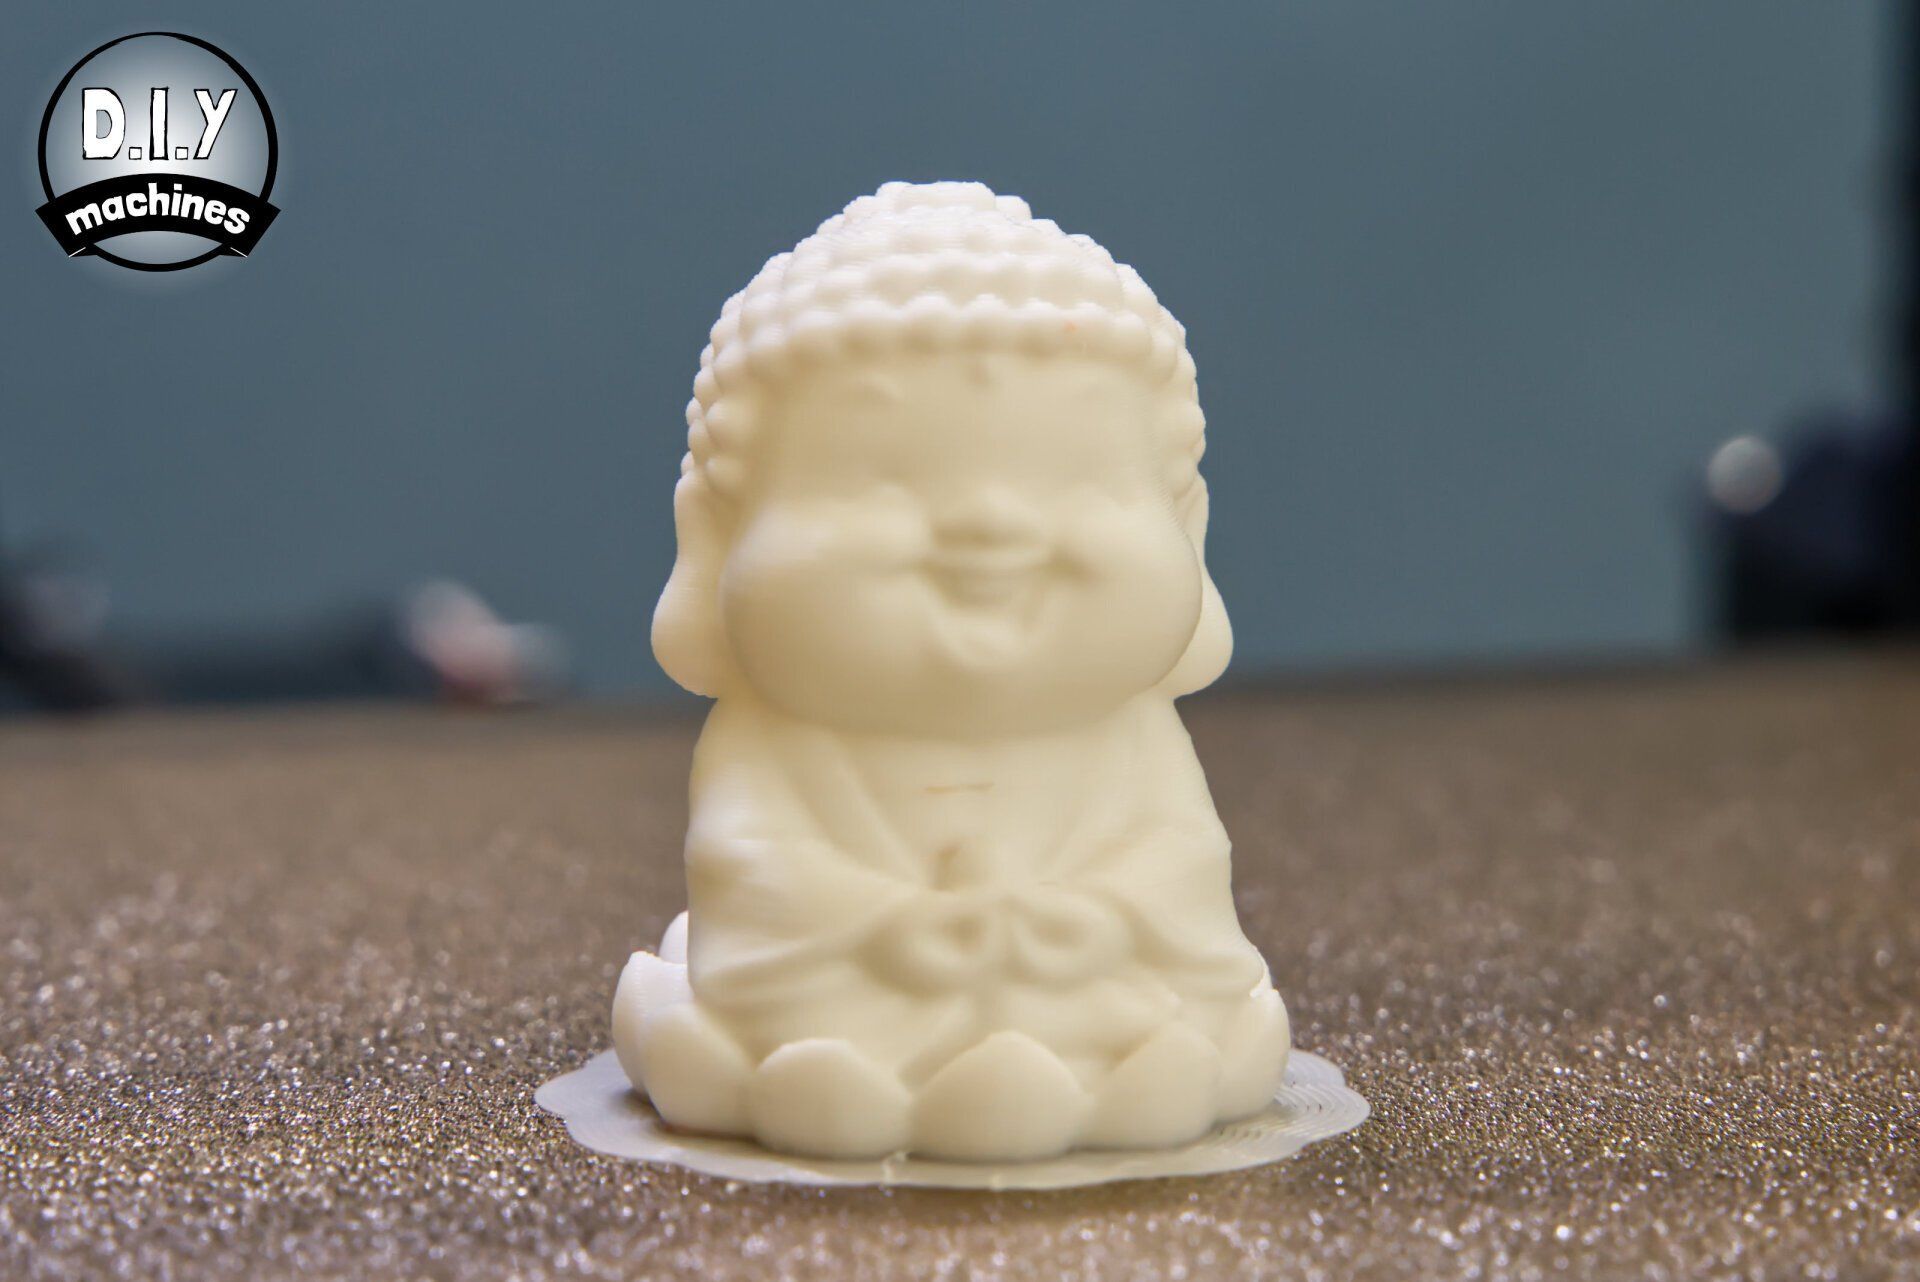

Click on either of the photos of the sample print to view a larger size and judge the quality for yourself. I am very impressed. It was printed at a 0.15mm layer height. No lifting or warping of the base occurred and extrusion appears to be consistent. Their is a fleck of red partially though the print but this is the filament used in the factory when testing which was not fully purged when changing the filament colour to the one I was using.
Torture Test
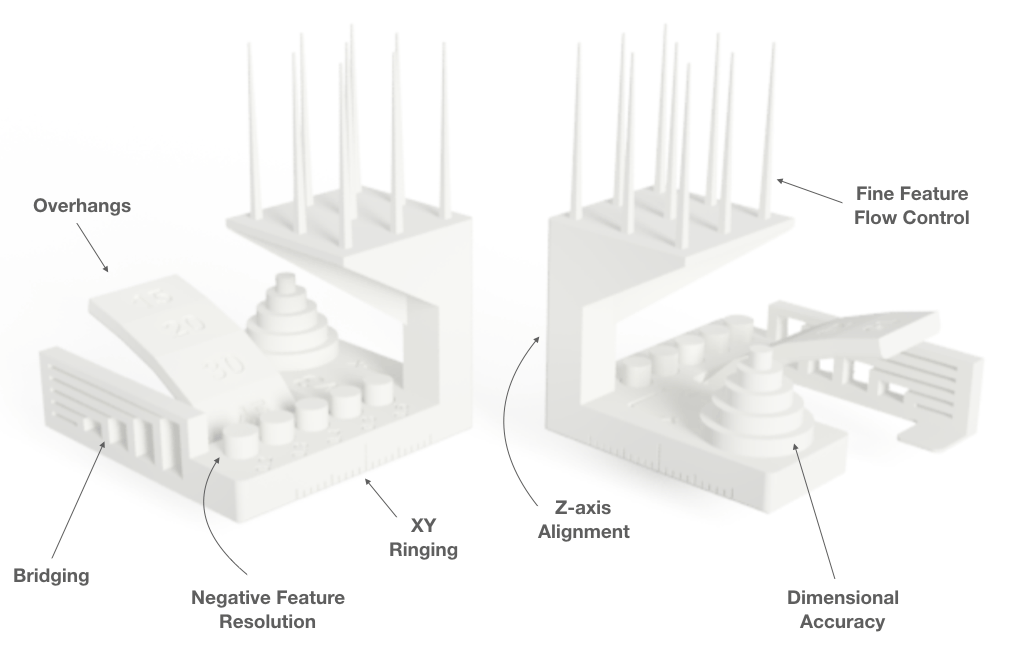
To only print Elegoo's preselected model would make for a terrible review (naturally they will have chosen something within the capabilities of the machine) so I have chosen to print a torture test.
I will print the same one created by AutoDesk and Kickstarter I use on all FDM printers which I review. This allows us to push the limits of the machine such as overhang, bridging and retraction abilities. It also allows for a fair and convenient comparison.
Don't forget to click on any image to open a higher resolution copy to inspect for yourself.


Well I have to say I am mightily impressed by the results. Stringing was kept to a minimum. All five of the cylinders printed to test negative objects tolerances were removable. The 0.2mm one took a little persuasion with a wiggle but it did come out. The bridges look marvellous and the overhangs as clean as you could hope at the angles tested. Well done Elegoo, it may have taken 5hrs 14mins to print but it printed it very well indeed.
Software
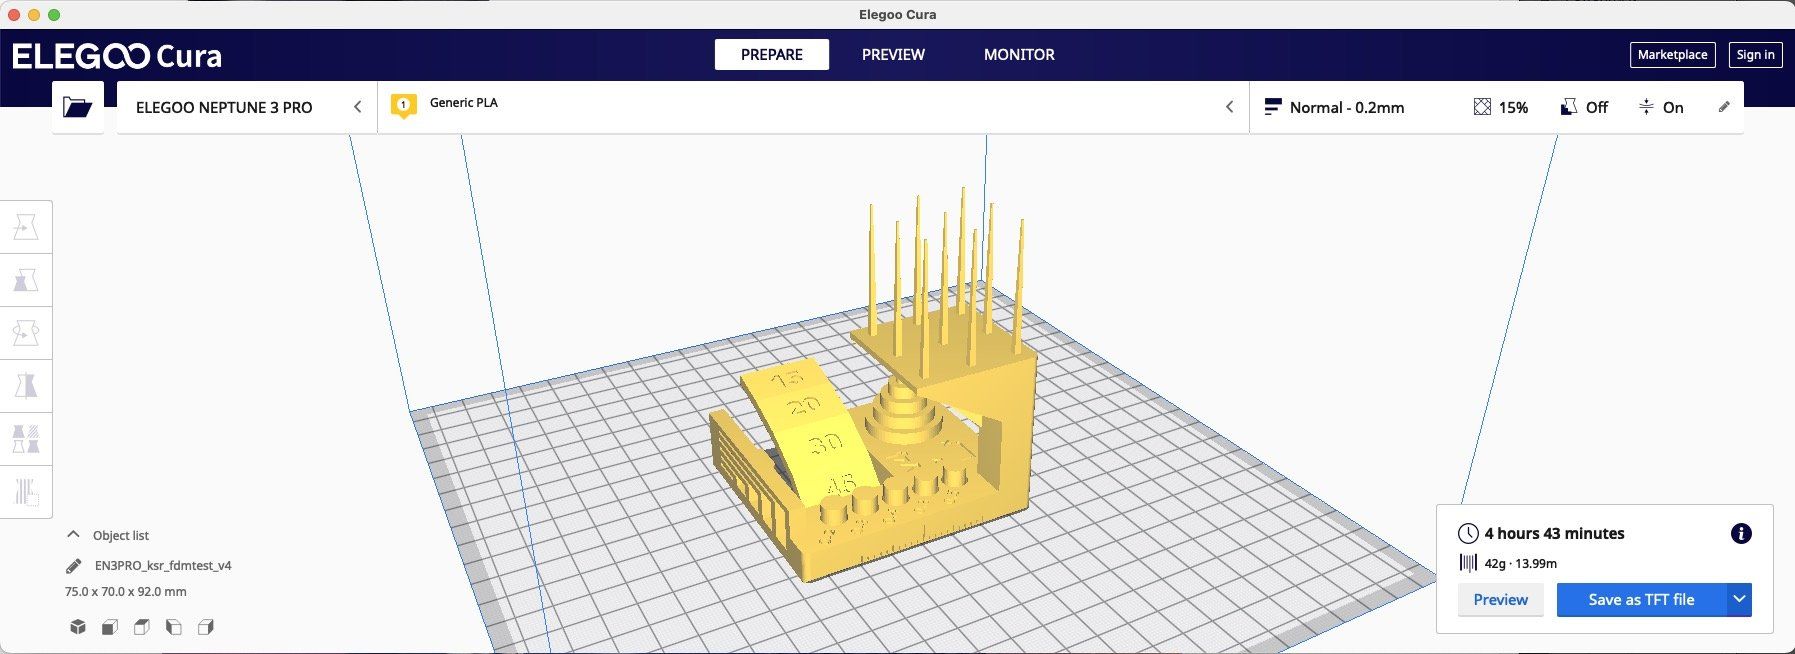
Elegoo have customised a copy of Cura to be used as a Slicer for preparing your prints to be printed. If you're not familiar with Slicing Software then it's the middle stage which takes your computerised 3D models and 'Slices' it into individual layers, usually 0.15mm or 0.2mm in height. Each one of these layers is then prepared as a series of paths for the printer to follow before it raises its print head for the next layer.
The software can have as much an impact on print quality as the hardware itself. They go hand in hand. For example it's the Slicers responsibility to calculate support structures if required and deal with the acceleration and deceleration of the print head in order to balance the need for a desirable print speed without introducing print artefacts into the finished model.
The version of customised Cura included on the memory card of my test machine was 4.8. Cura is currently on version 5.2.1 and as such it prompted me to update. I obliged only to realise that the latest version of Cura did not contain the printer profiles for many of Elegoos latest printers including the Neptune 3 Pro. Perhaps they will include it in the future, but for now it means we cannot take advantage of the advancements in Slicing Software past version 4.8.
Final Thoughts
I'm impressed with the Elegoo Neptune 3 Pro. If I had to give a single sentence high level summary it would be that it creates great quality prints at a steady, but not fast, pace.
The addition of LEDs turned out to be more welcome than I had expected, illuminating the machine and print to allow for a clearer view of what's happening. The Direct Drive Extrusion system is similar to that on my Prusa i3 Mk3s and it's caused me very few problems there and I don't expect it to cause problems on the Neptune.
From an aesthetic stand point the machine looks very sleek, thanks to the omission of a Bowden tube and additional stepper motor mounted to the frame, as well as the power supply being built into the base. As much as this means one less thing to assemble it does have drawbacks - the fan. There is a fan in the base designed to cool the components within - this fan however runs continuously, even when the printer sits idle with no heating of the nozzle or bed. It can be overcome simply by switching the printer off when not printing - but sometimes between prints it can be a little tiring. This is only a small problem.
I had to print two of the torture test models as whilst printing the first one we had an extremely rare power cut. I thought 'No Problem, it's the perfect test for the Power Recovery feature'. Well, that didn't work out - when the power came back just seconds later the printer restarted apparently clueless to the fact that just moments ago it was part way through a print. I've emailed Elegoo for clarification on what went wrong here and will update this review when I found out more.
Common tasks such as changing the filament, clearing the print bed, and starting a new print are all very easy thanks to numerous features mentioned earlier in the review. The ability to change nozzles is welcome and the large touchscreen interface makes for easy control of the machine.
Where to buy:
Where to buy:
- Amazon: Elegoo Neptune 3 Pro
- Elegoo direct: Link to follow when available


