
Elegoo Neptune 3 Review
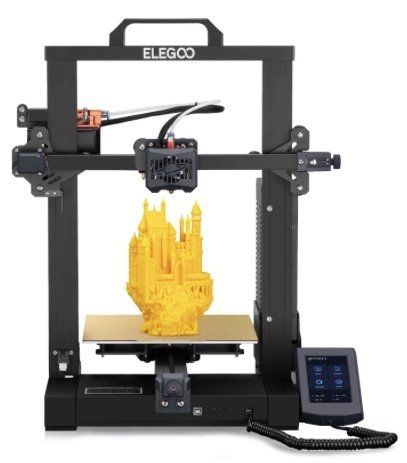
Elegoo Neptune 3 FDM 3D Printer
Another impressively budget friendly FDM printer from Elegoo with upgrades and new features all punching way above its price point.
Pros:
- Very budget friendly price
- Automatic bed levelling via Resistance Strain Gauge
- Filament sensor for clogs and run outs
- Near silent stepper motor drivers
- Less then 10 minutes to set-up
Cons:
- No estimated print time remaining shown on display
- Print head fan is still the noisiest (but effective) component
Where to buy:
What is it?
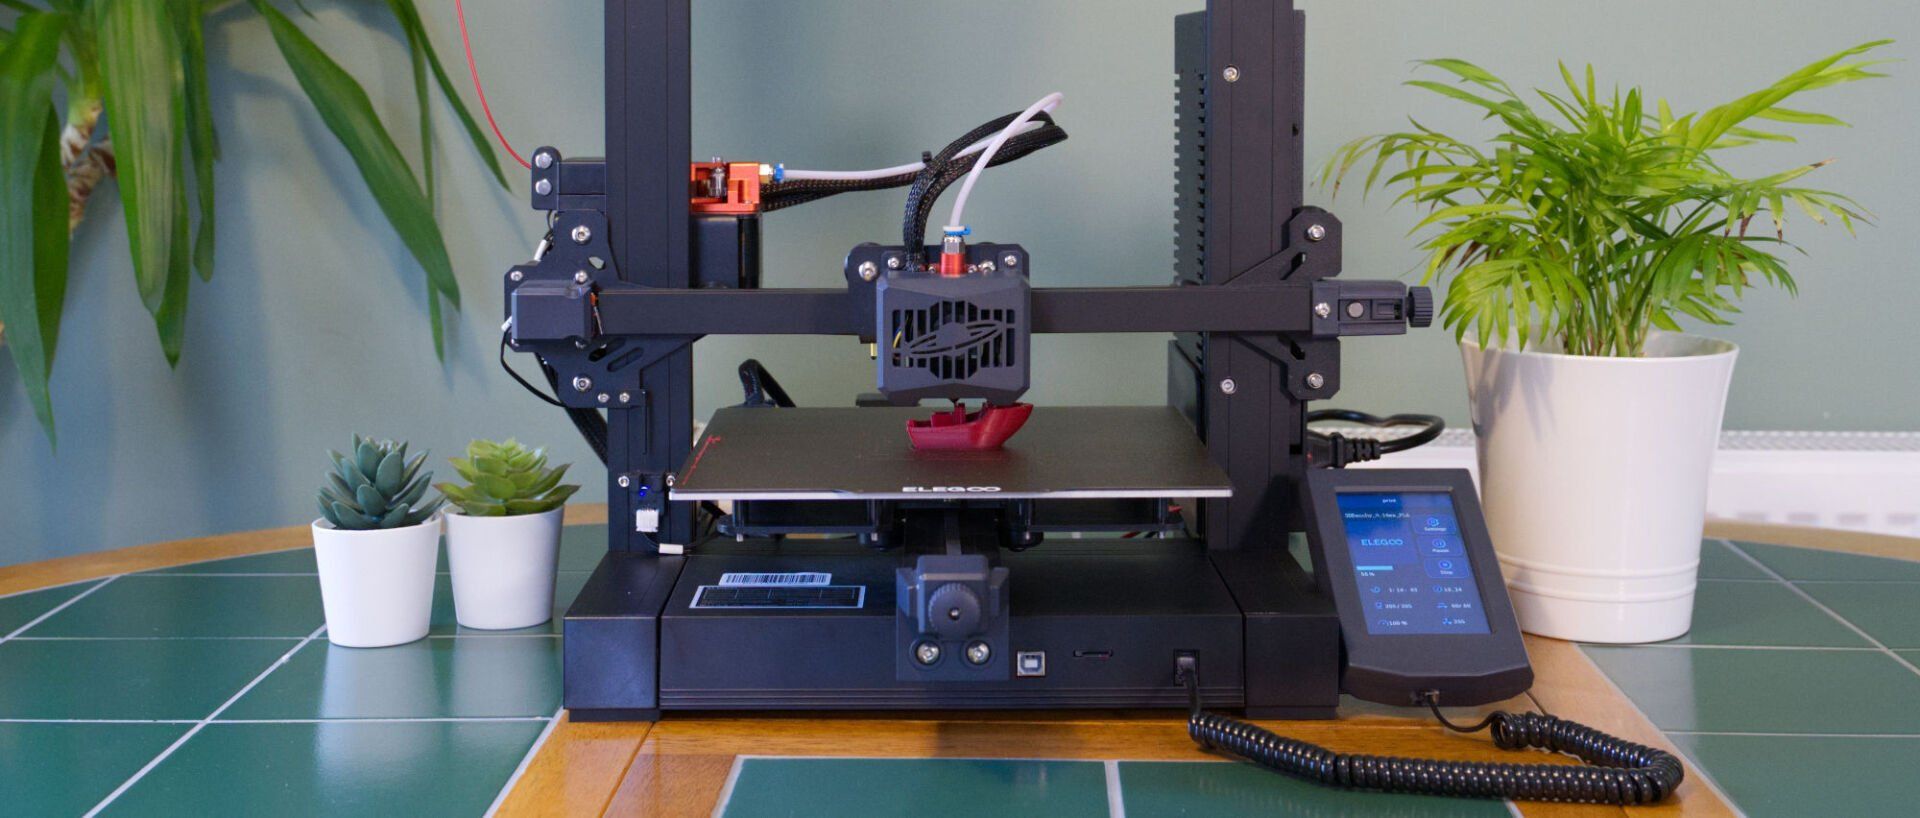
The new Elegoo Neptune 3 is a Fused Deposition Modeling (FDM) 3D printer. FDM printers create the 3D parts by depositing one layer of hot plastic at a time on top of the previous which is fused together by the temperature of the plastic. Usually I would compare this printer against its rivals such as Creality - but as I have previously owned its predecessor (the aptly named Neptune 2), I believe it would be best to compare them and find out if it is time you upgraded from your Neptune 2 or made your first jump into FDM printing with Elegoo.
Technical Overview
| Printing Technology | FDM |
|---|---|
| Print volume | 220 x 220 x 280mm |
| Layer height | 0.1 to 0.4mm |
| Max. nozzle temperature | 280° C |
| Max. bed temperature | 100° C |
| Printable filaments | PLA, ABS, PETG, and infused (i.e wood, marble etc.) |
| Safety / Convenience features | Resume printing after a power interruption and filament run-out sensor |
For a more detailed technical table please see the end of this review.
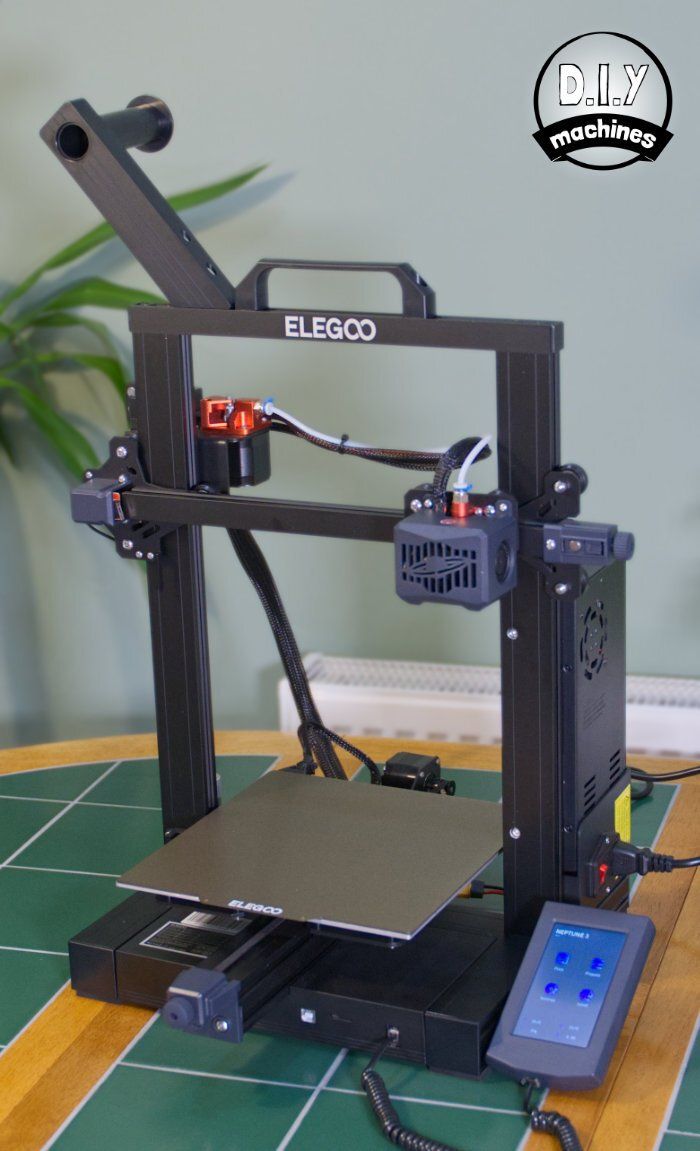
The build volume is 220 x 220 x 280mm - an increase of 30mm in height over the Neptune 2. This is also a fairly standard build volume so you should be able to print most models you find online without difficulty.
The machines
Bowden style extruder (as opposed to direct drive) will make the printing of flexible materials more difficult, and any filament breakages which occur inside the Bowden tube are trickier to remove. However the dual geared metal extruder drive does keep an excellent grip on the filament.
The included removable print bed is magnetic now and has a Prusa like
PEI textured finish. There is also Elegoo's RSG auto levelling system which I'll go into more detail about later.
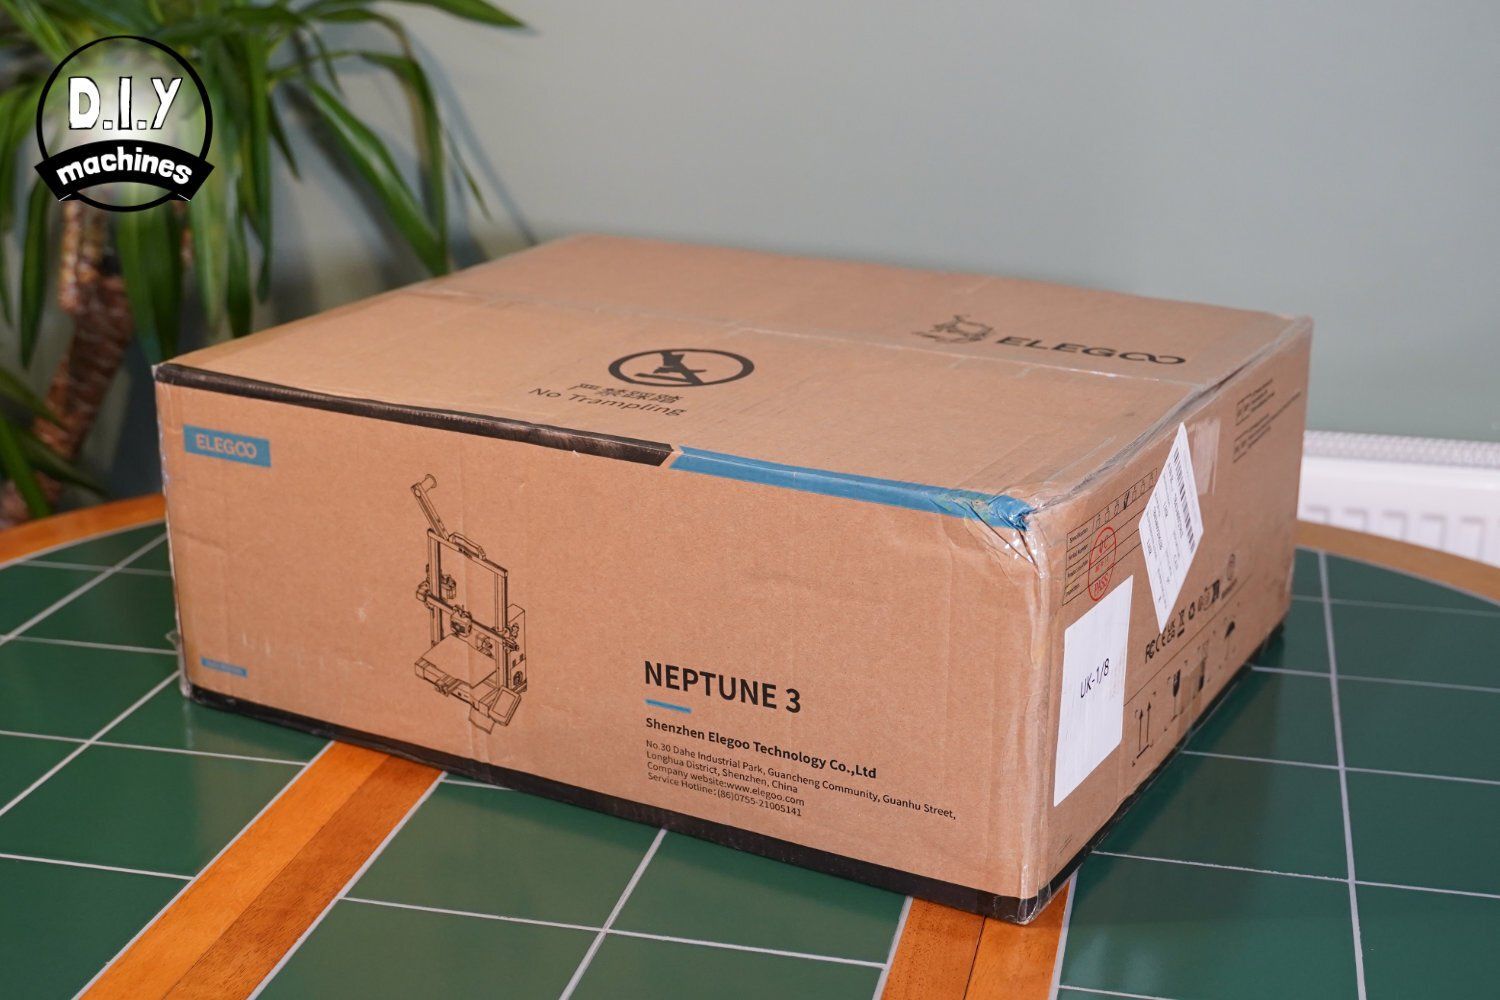
Shipping and Packing
As I've come to expect from Elegoo, everything was very well packaged. When the parcel arrived it had clearly taken an impact to one of the corners. Once opened I could see the generous amounts of foam padding had thankfully done its job and protected the contents from the couriers bump without issue.
(Click below to see larger images)


The components which make up the printer are nested across several layers, each surrounded by plenty of foam/polystyrene. The penultimate layer of foam which surrounds the vertical Z-axis is split so that it can be 'peeled' away from the Z-axis which then allows you to remove the base assembly and Z-axis simultaneously. You need to do this as the printer ships with 95% of the electrical wiring already connected for you. Very helpful of Elegoo.
What else is included?
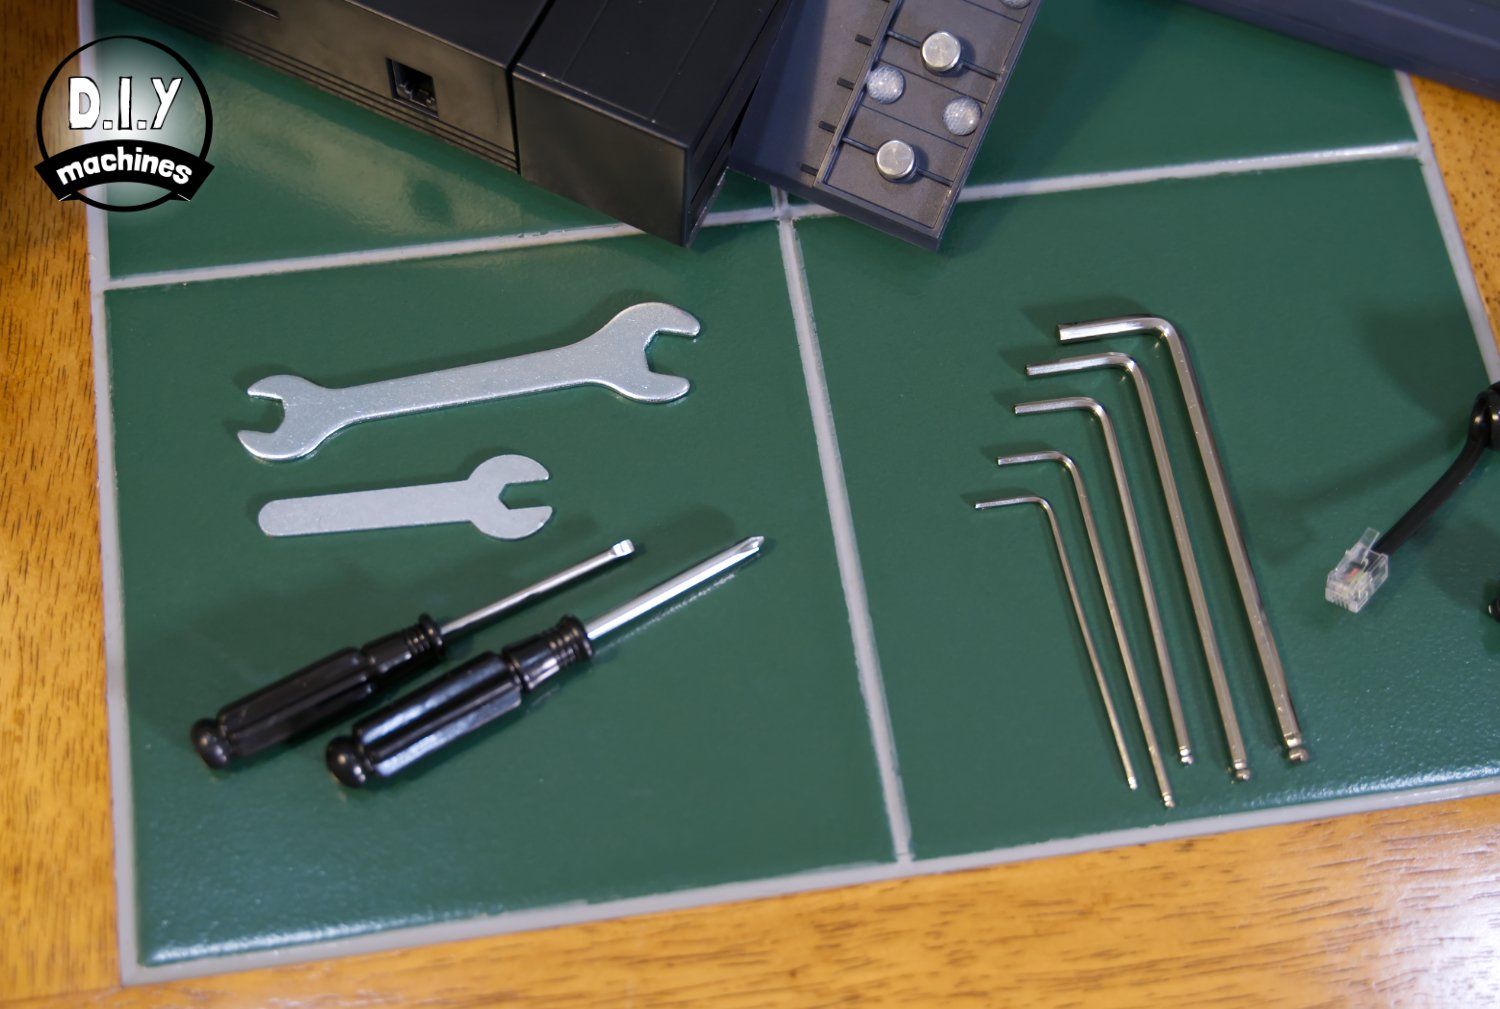
Besides the 3D printer itself Elegoo also include a generous selection of tools and accessories in the box, everything a beginner would need to start in their adventure in 3D printing:
- 5m of PLA filament
- 8GB Micro SD card
- USB Micro SD card reader
- Spare 0.4mm nozzle (x2)
- Spare PTFE tubes
- USB cable
- Screwdrivers
- Flush cutters
- Spare cable zip ties
- Acupuncture needle
- Set of Allen keys
- Two spanners
- Stainless steel scraper (for removing prints)
- Carry handle


This is an increase in the amount of accessories the earlier Neptune 2 included. Though I would buy yourself an additional roll of 1.75mm filament as you'll very quickly get through the 5m sample included.
Most of the tools were not needed whilst assembling the printer, they have been provided to help with simple maintenance tasks as you clock up the the hours, days, and weeks of printing time with this 3D Printer.
Assembly
The Elegoo Neptune 3 ships in even less parts than the Neptune 2. Unlike the earlier version there is no need to tension belts or assemble gantries (the belts are pretensioned in the factory but instructions are provided on how to check and tweak them if required - mine were fine as they arrived).
The vast majority of the electrical connections have also already been made and only eight bolts are required for assembly.
Very briefly this requires:
- Attaching the vertical axis to the base (four bolts - easiest done with printer on its left).
- Attaching the power supply to the frame (two bolts).
- Attach the handle (last two bolts).
- Attach the filament holder (already has two bolts pre-installed).
- Connect the power supply, Z-axis stepper and Z-axis sensor (all involve joining simple connectors together with a push fit).
Everything felt solid once assembled. No wobbles or squeaks. It's an assembly process my Grandma could have followed without my need to intervene.
Instruction manual
The instructions themselves are brief but adequate, relying on very little language similar to an Ikea instruction booklet. The odd miss-translation is to be expected but does not cause any confusion. You can also download a copy of the instructions to see for yourself:
Video Assembly Guide
If you pop the Micro SD card into your computer you'll find that (For the first time which I have noticed) Elegoo have included a very helpful video covering the assembly of the printer. The really are going the extra mile to ensure you succeed with your new machine.
You will also find some model for 3D printing (both pre-sliced GCODE and STLs), a digital copy of the written instructions and Elegoo's implementation of the slicing software Cura.
First prints and impressions
Once assembled there are a few steps left before it starts magically building your first 3D print layer-by-layer:
No more bed levelling!
The Neptune 2 required manual turning of some under-slung slightly comical giant geared knobs to level the print bed which you then manually verified at 5 points across the print bed. It worked, but was a little tedious.
The Neptune 3 on the other hand has made enormous improvements to this. Gone are the four manually turned adjusters in favour for Elegoo's new Resistance Strain Gauge (RSG) levelling system.

The new RSG system utilises a pressure sensor on the print head itself to probe 16 points across the printing surface and automatically calculate and apply corrections whilst printing. Once the system has calculated any unevenness of the print surface you only need to slide a sheet of paper under the nozzle and set the appropriate gap to be left whilst printing the first layer.
So far for me, Elegoo's RSG auto-levelling has worked well every time. It is to my knowledge the first time this system has been available on a printer at this price point.
Loading the filament and printing
This has not changed massively since the Neptune 2 with the exception of the system now utilising a twin geared feeding mechanism. The loading of the filament went without a hitch once I realised you could squeeze open the path between the extruder gears so that you could manually insert the filament through the filament sensor (which lights blue the moment it detects the presence of filament) and feed it all the way through the bowden tube until it is stopped by the cold printing nozzle. Before this I was using the controls on the screen to feed it through electronically which was slower.New Paragraph

Just as I do with every printer I test, I started the first print which I found on the included Micro SD card. Elegoo have included a very handy USB Micro SD card reader in the box - which was very useful for me as my Apple laptop does not (to my continued frustration) include an inbuilt SD card reader. Thank you again Elegoo.
As I started to interact more with the detachable touchscreen controller I became quickly impressed with not only its sensitivity to my touch but also the speed at which it processed my requests. It was very responsive, a pleasant departure from the what now feels rather rudimentary and slow control system of my Prusa i3 Mk3s.
This touchscreen is now 4.3 inches in size and detachable, this is an upgrade on the earlier models 3.5 inch screen fixed to the base.
It does feel somewhat inspired by Snapmaker's implementation of a touchscreen - but I'm not complaining, it works well her just us it does on the Snapmaker.
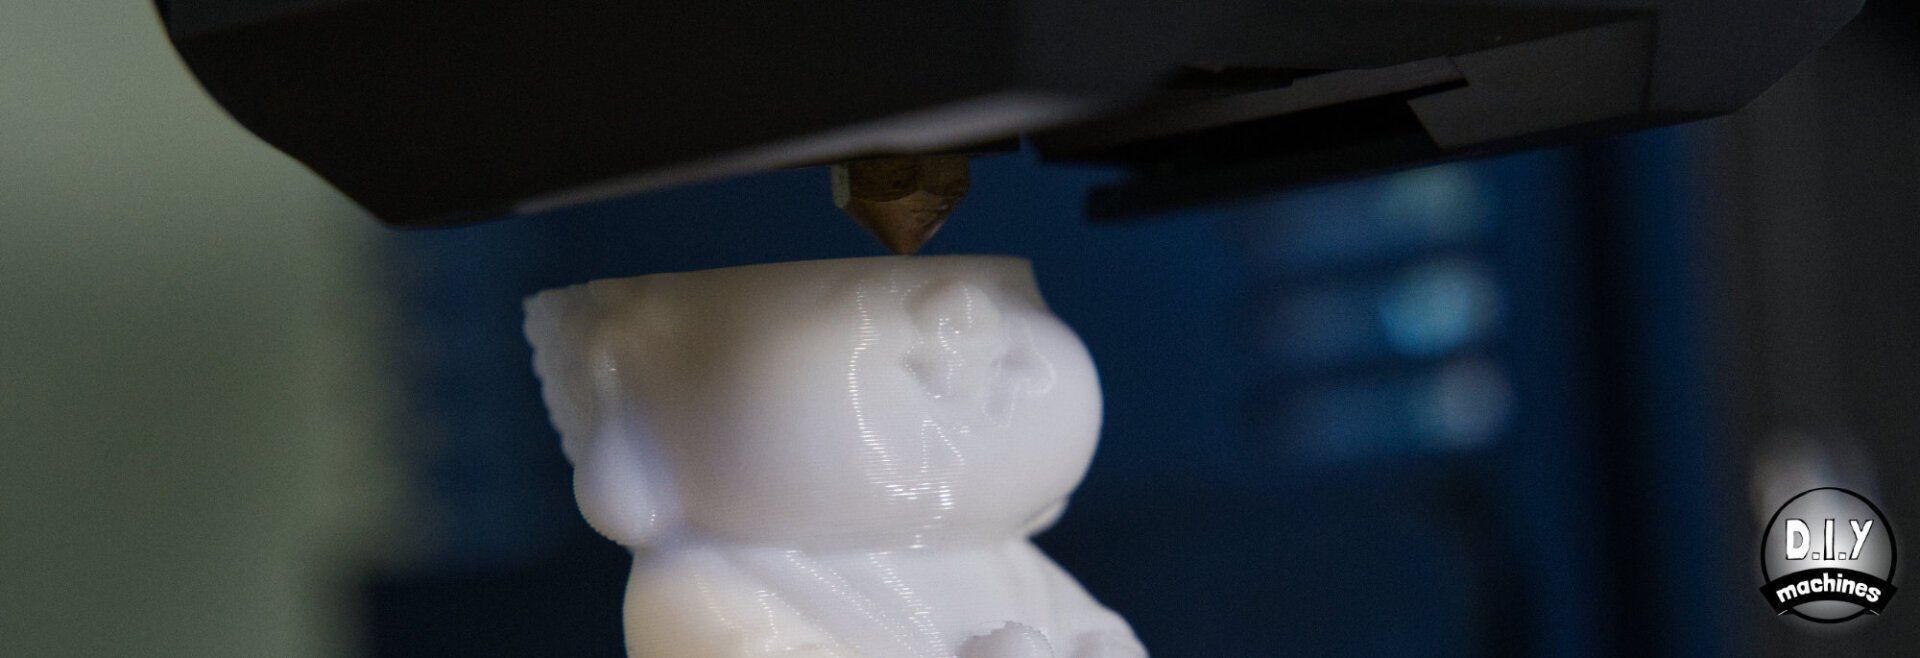
As mentioned this is the included model found on the micro SD card using the supplied sample of white PLA filament. I have taken some high resolution images which can be enlarged for your interrogation by clicking the photos below.

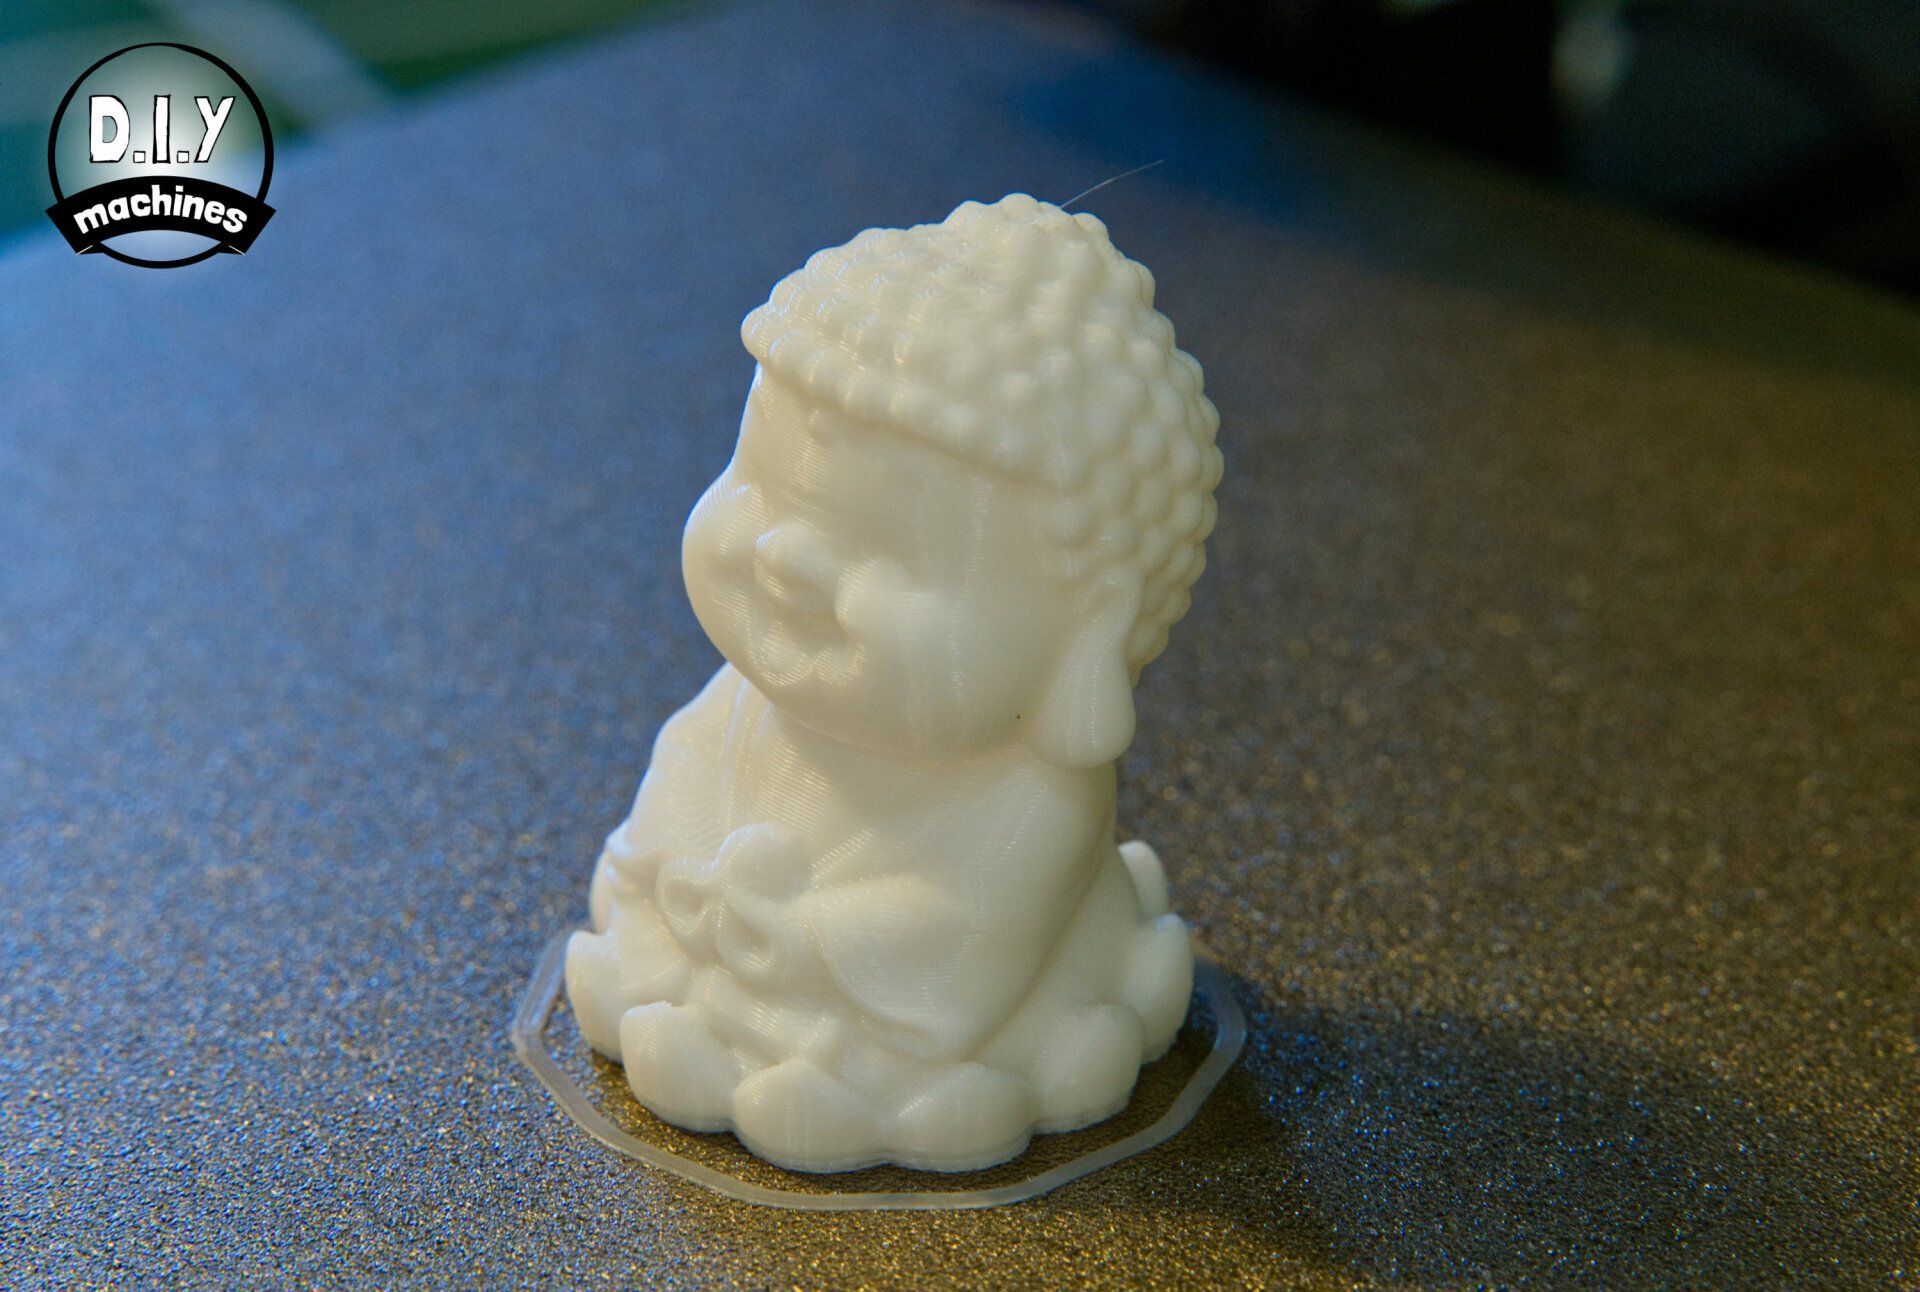
The total print time was about 1hr and 13mins. The first layer went down beautifully and there were no problems with adhesion. Once the print bed had cooled the model detached itself automatically. I could have probably removed it from the platform with a deep breath and a straw if I had wanted to. 😁
Considering the price - I am extremely impressed with the print quality and ease of use. The textured PEI magnetic print sheet worked well, and if the model had remained stubbornly stuck to the sheet after cooling I could have just popped the sheet of and flexed it a couple of times to remove the print. The magnetic fixing system is also a welcome upgrade over the slightly clunkier bulldog clips of its former model. I always worried that the clips would get caught on something as the printer moved the platform back and fourth.
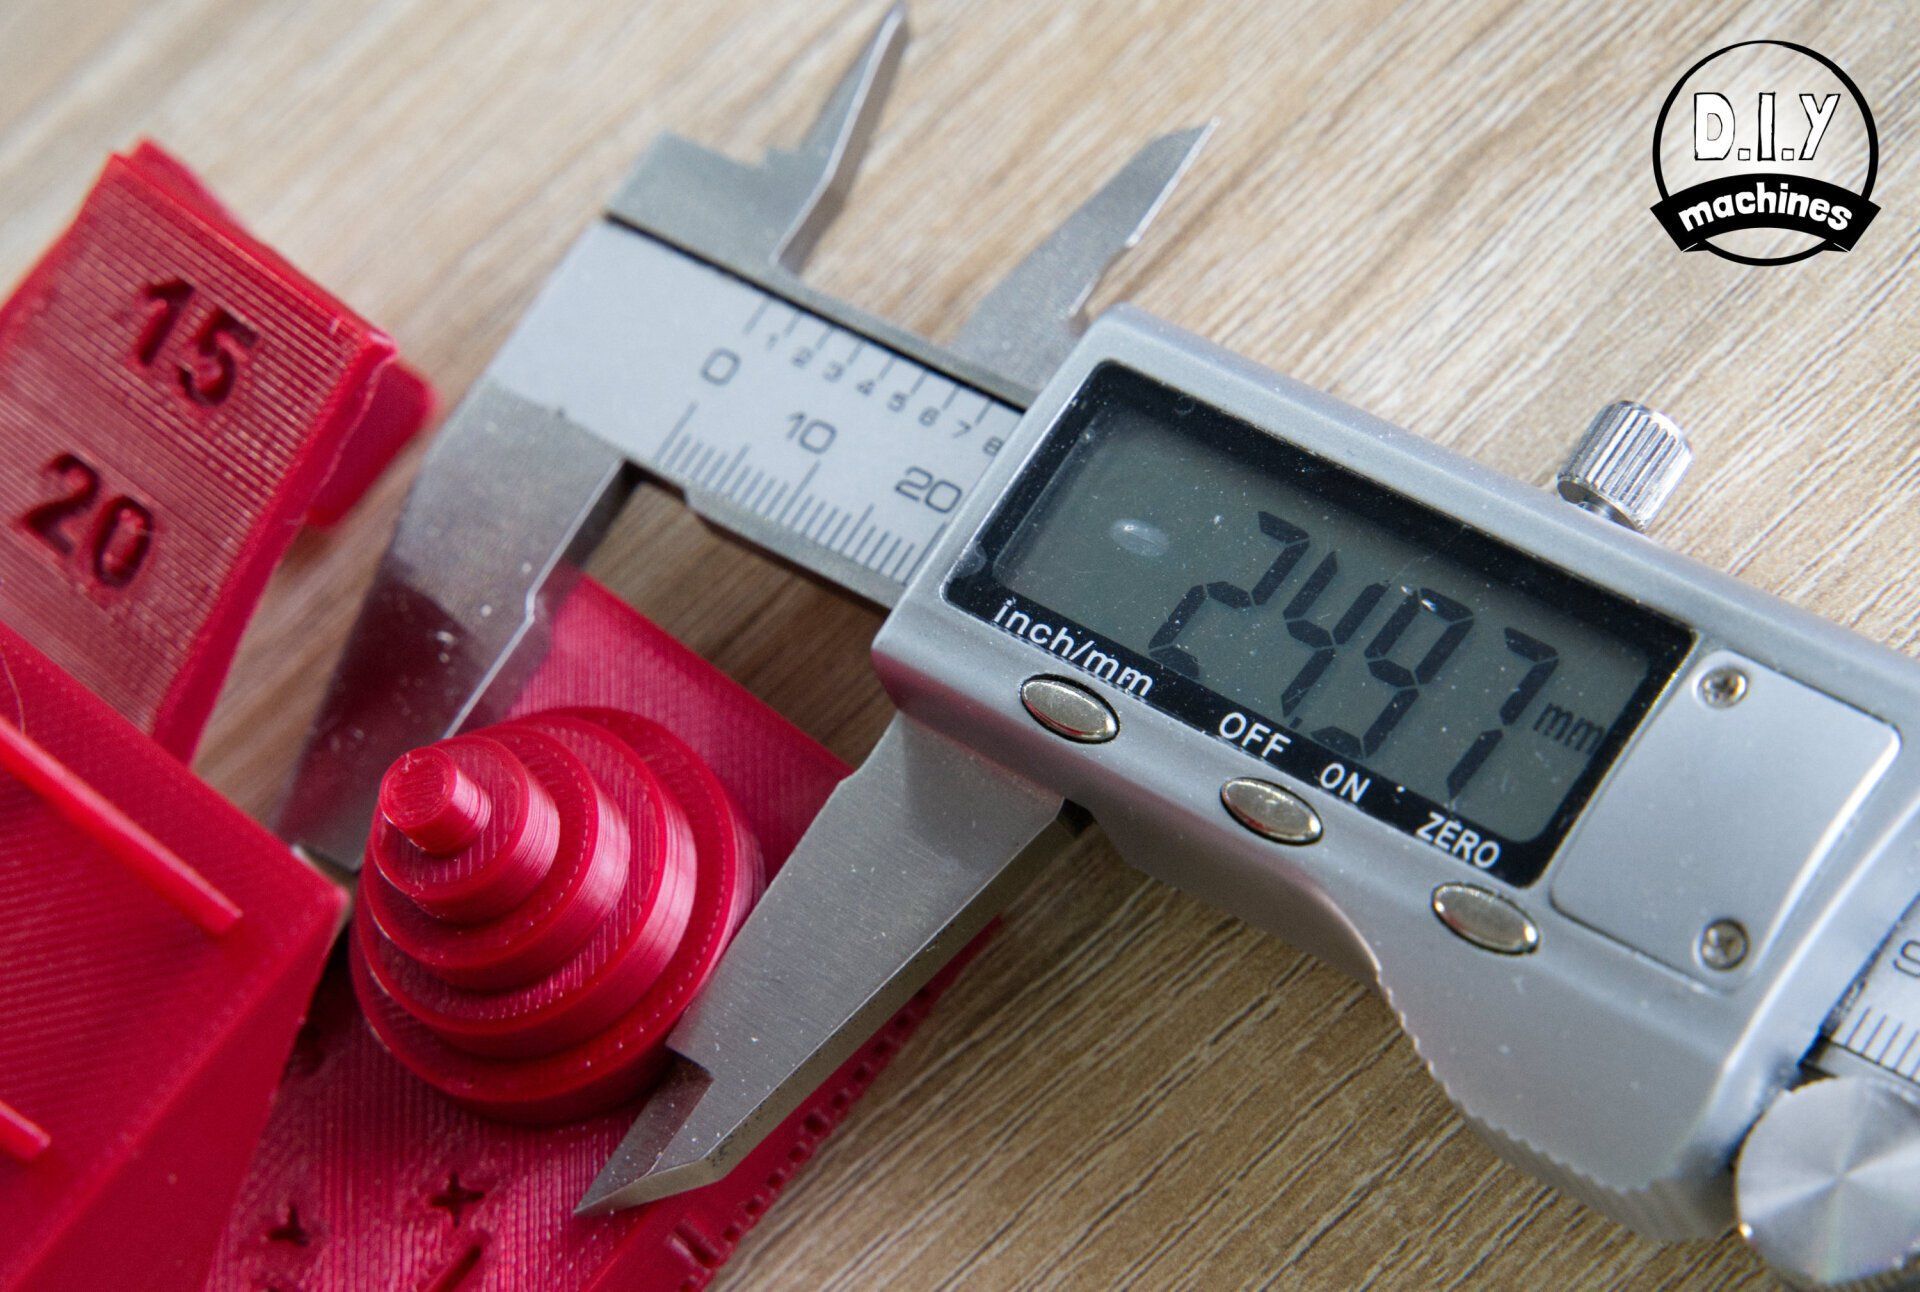
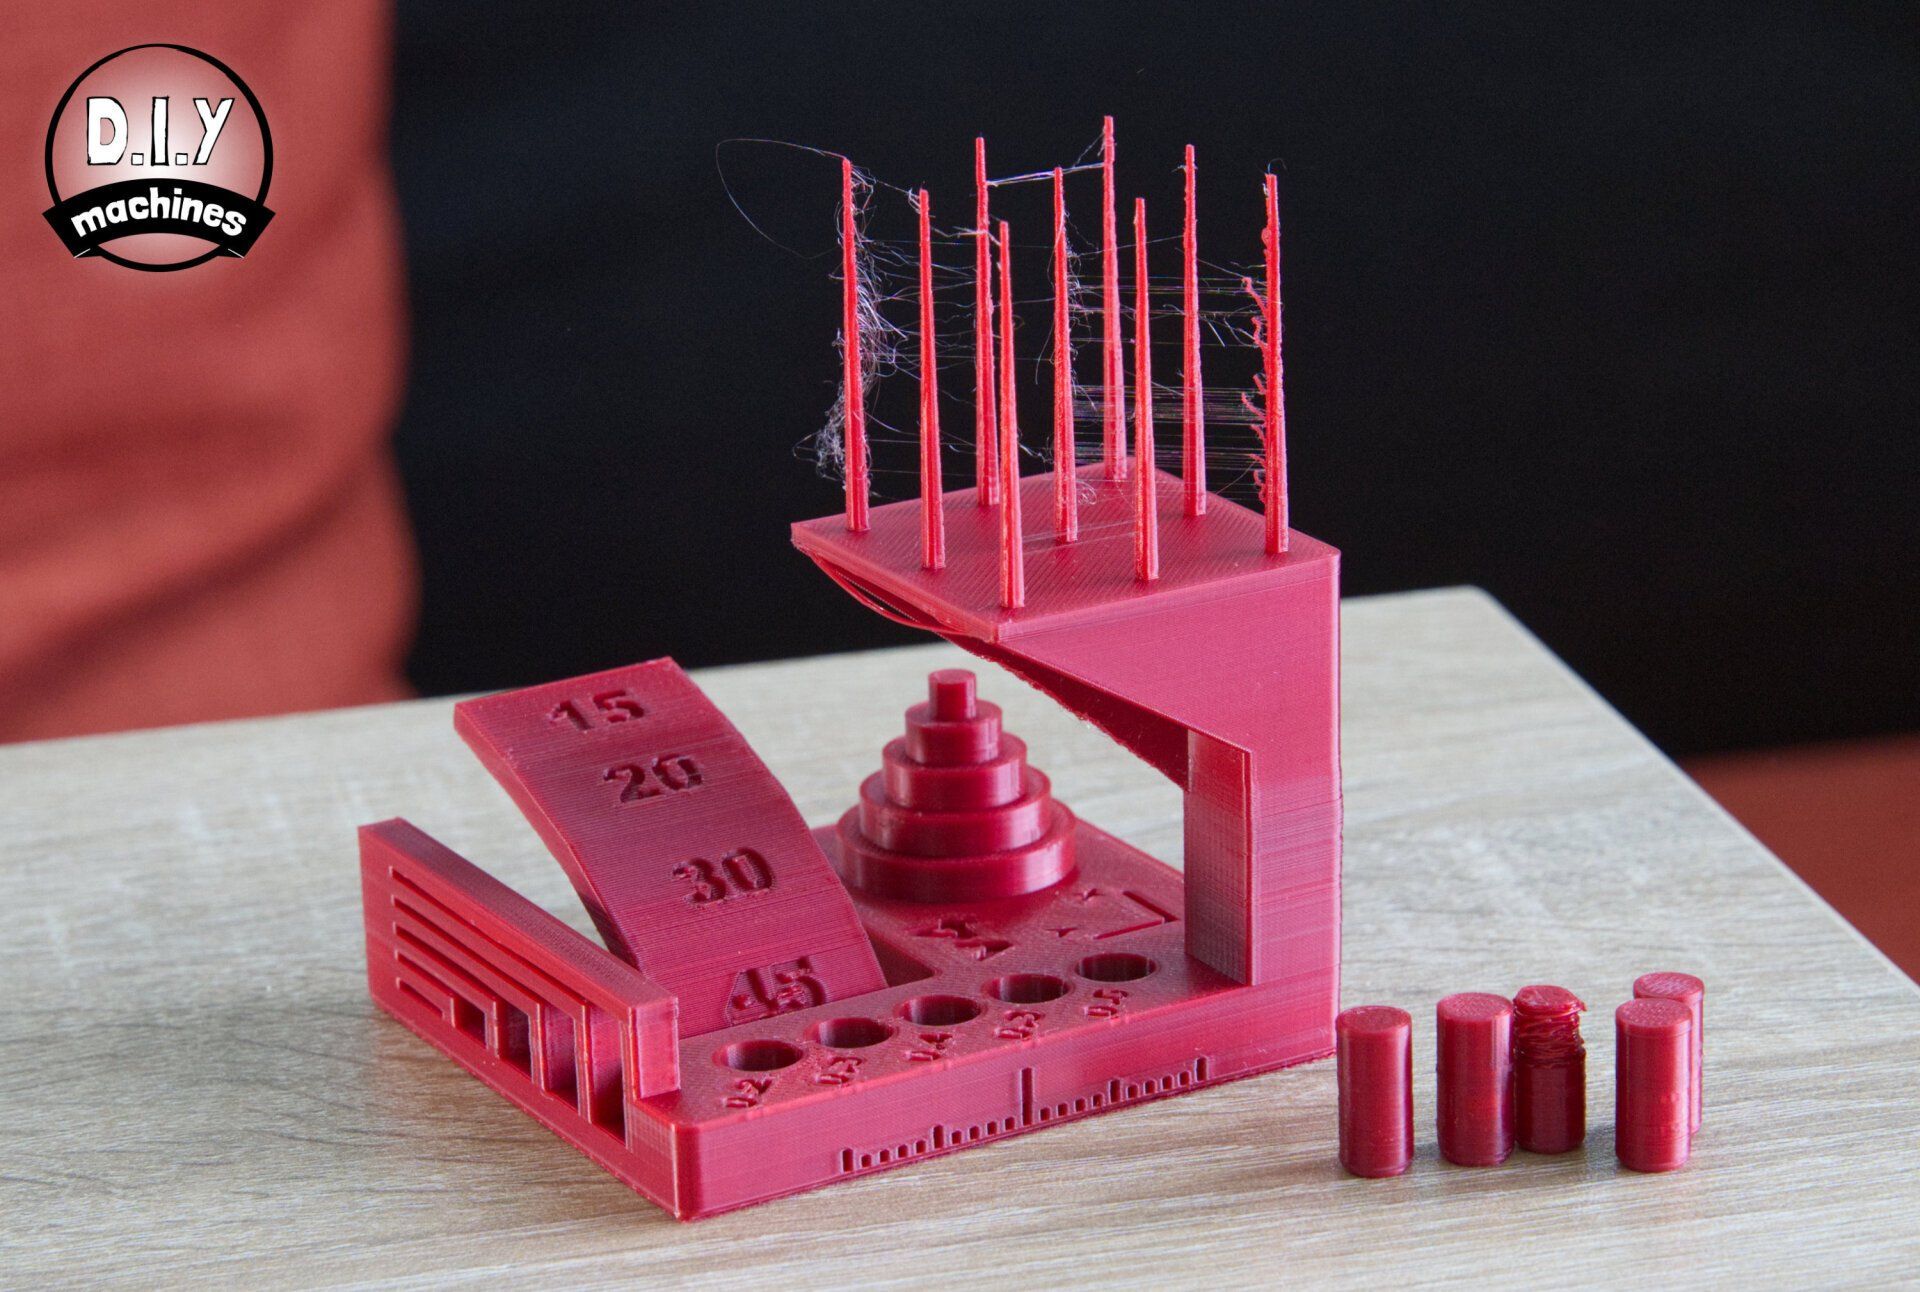
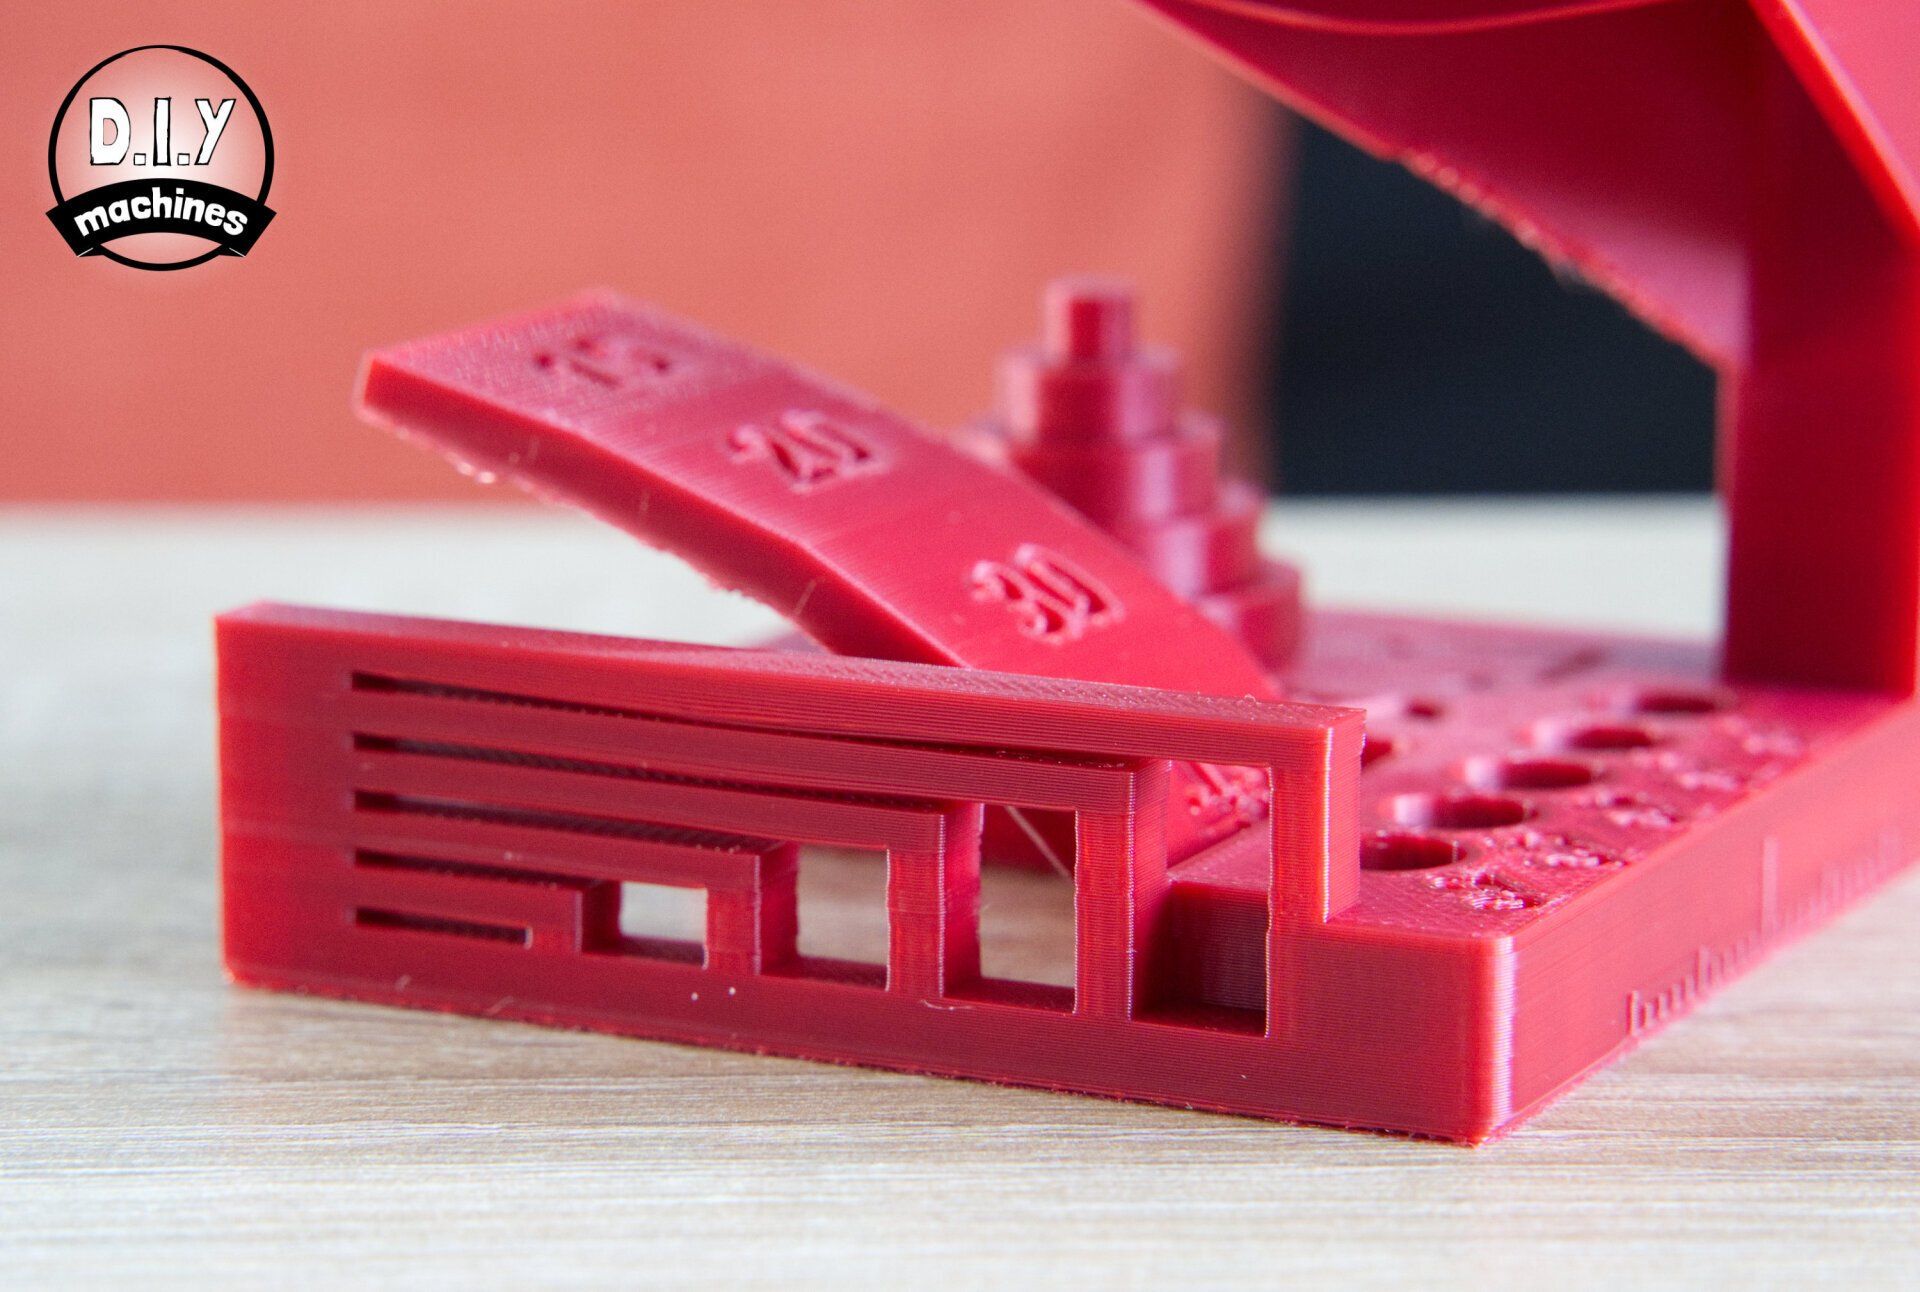
Here are some further high resolution photos of some of the classic 'torture tests' which to be honest show little issues with the printer in its factory stock configuration. Nothing has been dialled in or refined yet. Both these torture tests were slice with Prusaslicer (my preferred slicing software).


Noise Levels
As 3D printers continue to fall in price and complexity they are finding their way into more homes. At the moment, in my opinion, this makes the noise levels one of the biggest battles for manufacturers at the moment as not everyone has space to keep their printer and it's whirring and whinning away from their day-to-day lives.
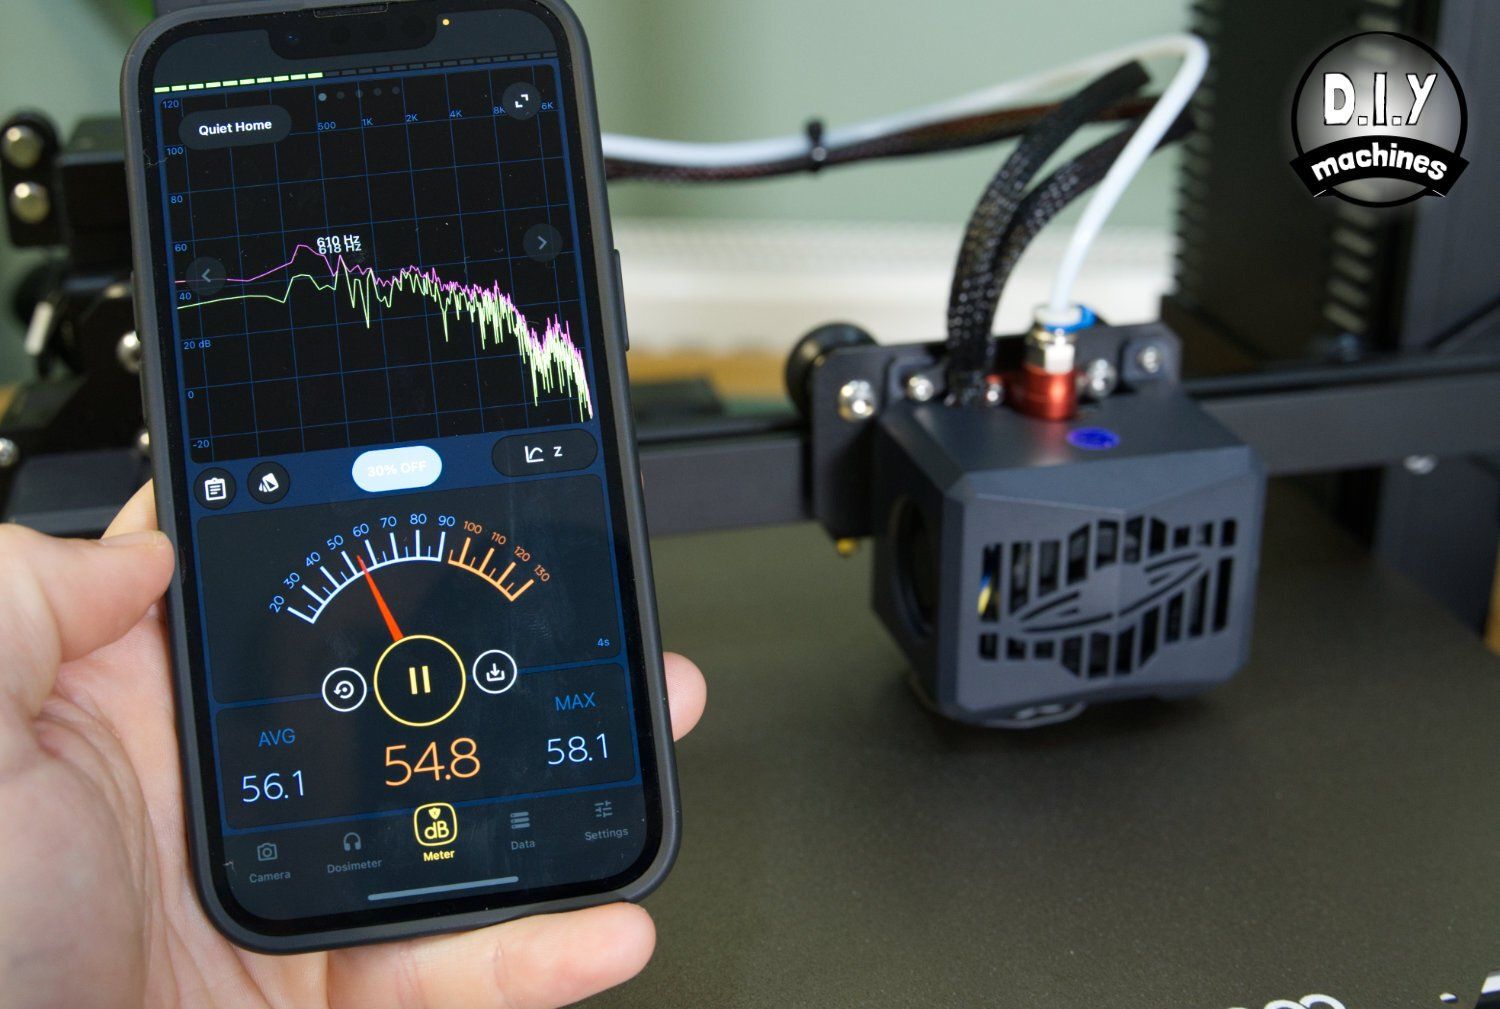
Elegoo proudly claim a noise level below 50dBA. I'm not certain at what distance they measured that from the machine but in my rudimentary iPhone app based test I registered an average of 56.1dBA (30cm away from the machine). Most of this is coming from the dual cooling fans on the print head. I could not hear a whisper from the stepper motors.
This is the noise level of a 'Quiet Home' according to the app and I would agree. This would not be any nuisance if left running in an adjacent room. With the door shut you might not even know if it was still running.
Software - Cura
Elegoo include a customised copy of Cura on the Micro SD card. It is based on the older Cura 4 - version 5 has been released. I found the Windows version but had to download the Mac version for free from Elegoo website: https://www.elegoo.com/pages/3d-printing-user-support
On the SD card is a detailed introduction to using Cura and some advice on what retraction, infill, perimeters, supports etc. are including how to use them in Cura and some advice on knowing when you might want to adjust them from their default values pre-set by Elegoo.
There are plenty of instructional videos on the internet for using Cura, it is a popular slicing software package also used by the likes of Ultimaker so I will not be going into details about Cura here.
If you're not a fan of Cura, you are also free to use other slicing software such as the open source PrusaSlicer. I can also recommend following this guide for importing some Elegoo FDM profiles for your machine into PrusaSlicer: https://github.com/andrewsuzuki/prusaslicer-elegoo-profiles
Technical Details:
| Printing Technology | FDM |
|---|---|
| Print volume | 220 x 220 x 280mm |
| Layer height | 0.1 to 0.4mm |
| Max. nozzle temperature | 280° C |
| Max. bed temperature | 100° C |
| Printable filaments | PLA, ABS, PETG, and infused (i.e wood, marble etc.) |
| Safety / Convenience features | Resume printing after a power interruption and filament run-out sensor |
| Time to assemble | 10 minutes |
| Connectivity | USB, Micro SD |
| User interface | |
| Manufacturers site | https://www.elegoo.com/collections/neptune-series-fdm-printers/products/elegoo-neptune-2-fdm-3d-printer-with-silient-motherboard |
| Included software | Elegoo Cura |
| Number nozzles | 1 |
| Nozzle diameter | 0.4mm(can be replaced with 0.3mm and 0.2mm nozzles) |
| Filament diameter | 1.75mm |
| Print speed | ≤180mm/s, normal speed at 30-60mm/s |
| Controller board | SMT32F |
| Languages | English, French, German, Russian, Italian, Spanish, Japanese, Chinese |
| Frame construction | CNC machined aluminium extrusion |
| Stepper Drivers | XYZ = TMC2225 Extruder - TMC2209 |
| Bed levelling technolgoy | Resistance Strain Gauge Auto Levelling |
Have any questions or comments?


